In this guide, we will show you how to run ADB and Fastboot Commands on Android without using root. Furthermore, we would not be using a PC anywhere during the course of this guide. So how will we proceed in this guide? Well, as surprising as it may sound, but the entire tutorial is just based on one single line of command. We will be sharing this command here, you just have to copy-paste it inside an app and that’s it.
At the end of this guide, we will also be explaining each and every bit of that command so that you have perfect knowledge regarding the functionality of this command. So without further ado, let’s get on with the guide to run ADB and Fastboot Commands on Android without root. On the other hand, if you have a rooted device, then check out this interesting guide as well: Use ADB and Fastboot Commands directly on rooted Android Without PC.
- How to Pass Magisk SafetyNet on Rooted Android 11
- Root Android 11 via Magisk Patched boot.img (without TWRP)
- Fix Android stuck in Recovery Mode: No Command screen
- Fix Magisk patched boot.img issue while Rooting Android 11
Table of Contents
Why Run ADB Fastboot Commands directly on Android?
The usage of Android and Fastboot Commands are among the most powerful tools for the Android user. It doesn’t matter whether you are a general user or the tech enthusiasts, these commands will come in handy for all. The general usage of these commands includes the ability to boot to stock recovery, installing or uninstall apps via commands, Apply Update via Sideload among others. Then the tech geeks could use these commands to unlock the device’s bootloader and boot or flash TWRP to their device.
Likewise, they could also flash stock firmware via Fastboot Commands, unbrick their device using the Fastboot Commands, etc. However, executing these commands on a PC calls for a lot of effort. To begin with, you will have to download and install Android SDK Platform Tools on your PC. Then you should launch the CMD or PowerShell window inside the platform-tools folder. After that, it also requires you to enable Developer options and then USB Debugging on your Android devices. Apart from that, issues such as the below ones are also likely to occur in some instances.
- How to fix ADB Device not found [List of Devices Attached is blank]
- Detailed Steps to Fix adb is not recognized Error
- How to Fix Unauthorized Device with ADB Commands [3 methods]
All in all, some new or first-time users might really find it difficult to deal with all these. Hence the perfect way forward is to run ADB and Fastboot Commands directly on your Android device without root. And in this guide, we will help you with just that. The biggest perk of using the below method is the minimal effort involved. You only have to copy-paste one single command and the task stands complete. So without further ado, let’s start off with the guide.
Run ADB Fastboot Commands directly on Android via Bugjaeger
In this method, we will show you the steps to get this job done via the Bugjaeger app. For the sake of reference, we will be unlocking the device’s bootloader, you are free to carry out any tweak of your choice.
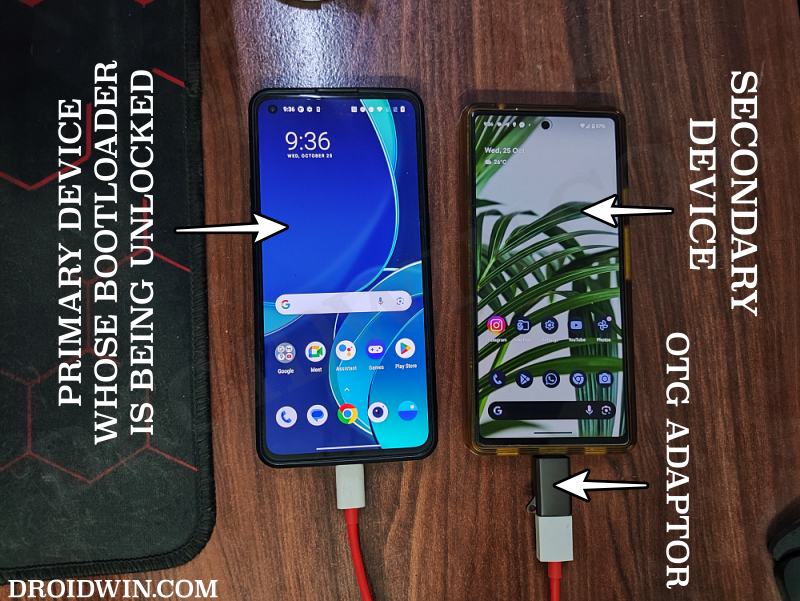
- First off, connect the USB OTG adaptor to your second device.
- Likewise, plug in the USB Type A end to the OTG.
- On the other hand, plug the Type C end into your primary device.
- Now download and install the Bugjaeger app on your second device.
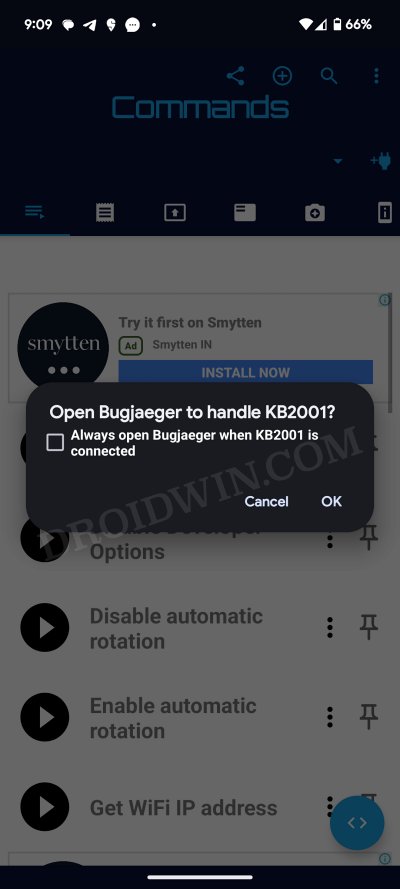
- Then launch the app and you’ll get a prompt “Open Bugjaeger to handle <device name>”. Tap OK.
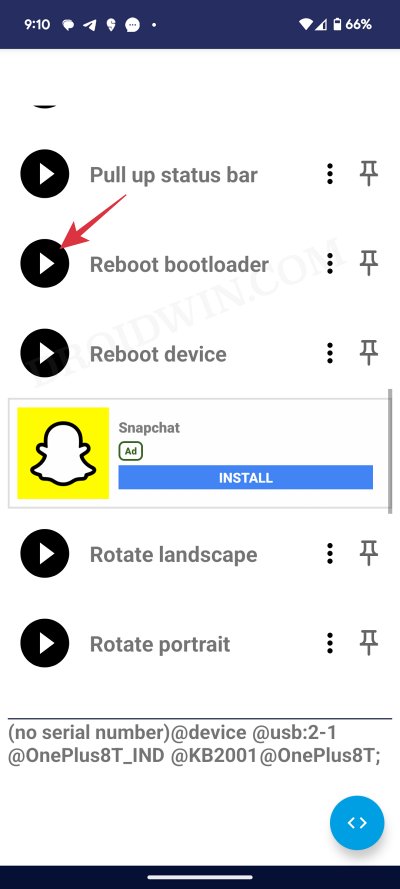
- Now from the Commands page of the app, tap on List Devices. Your primary device should be listed at the bottom.

- If that doesn’t happen, then unplug and replug the USB cable/OTG. You might have to do this a few times until you get the prompt/device name.
- Once that happens, tap on the Reboot Bootloader icon. Your primary device will now boot to Fastboot Mode.
- Then tap on the shell icon at the bottom right of the app. This will open the Command window. Type in the below command:
fastboot devices
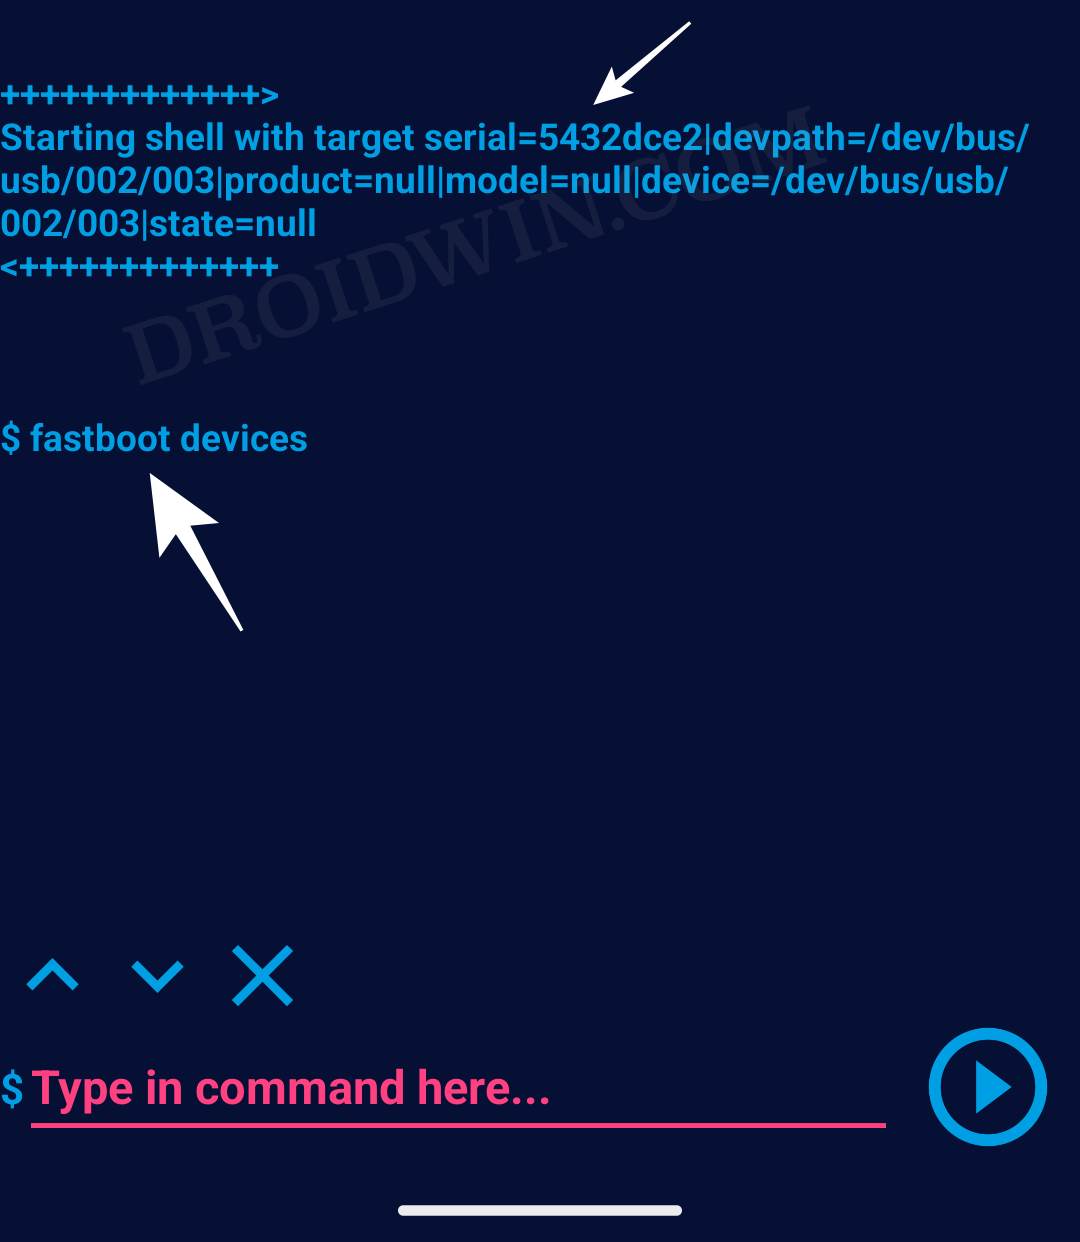
- Make sure that you are getting a serial ID. If that is not the case, then carry out the USB/OTG tweak until you get the ID.
- Finally, type in the below command to unlock the bootloader
fastboot flashing unlock
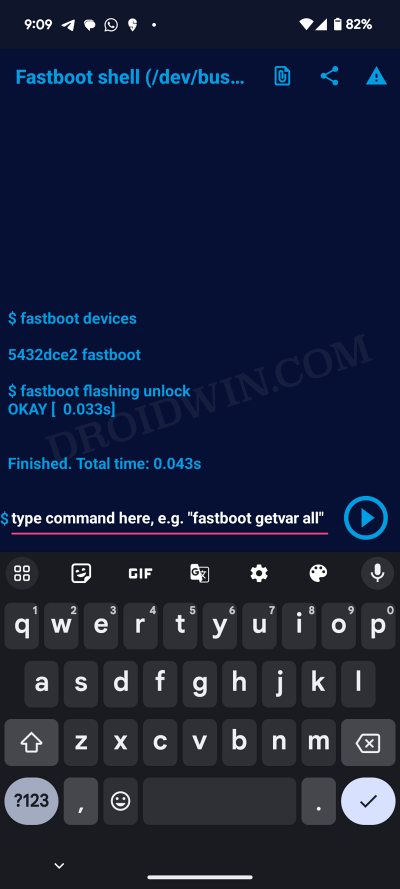
- Your device will undergo a reboot and subsequently boot to the OS.
Run ADB Fastboot Commands directly on Android via ADB Shell app
- Head over to Settings > About Phone > Tap on Build Number 7 times.
- Then download and install the ADB Shell app on your device.
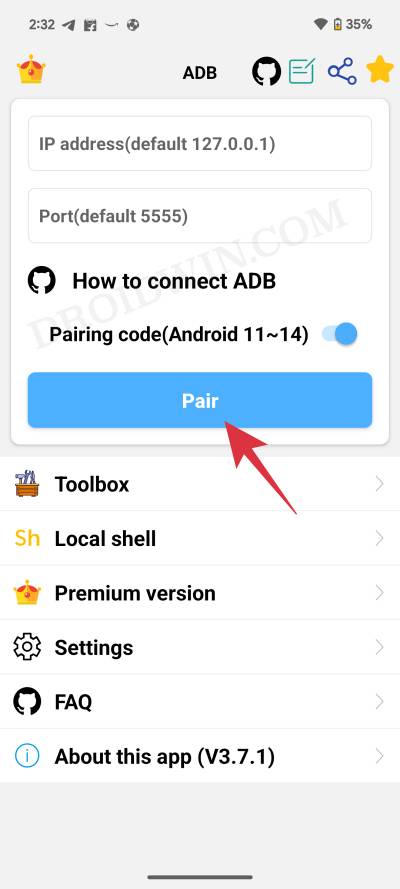
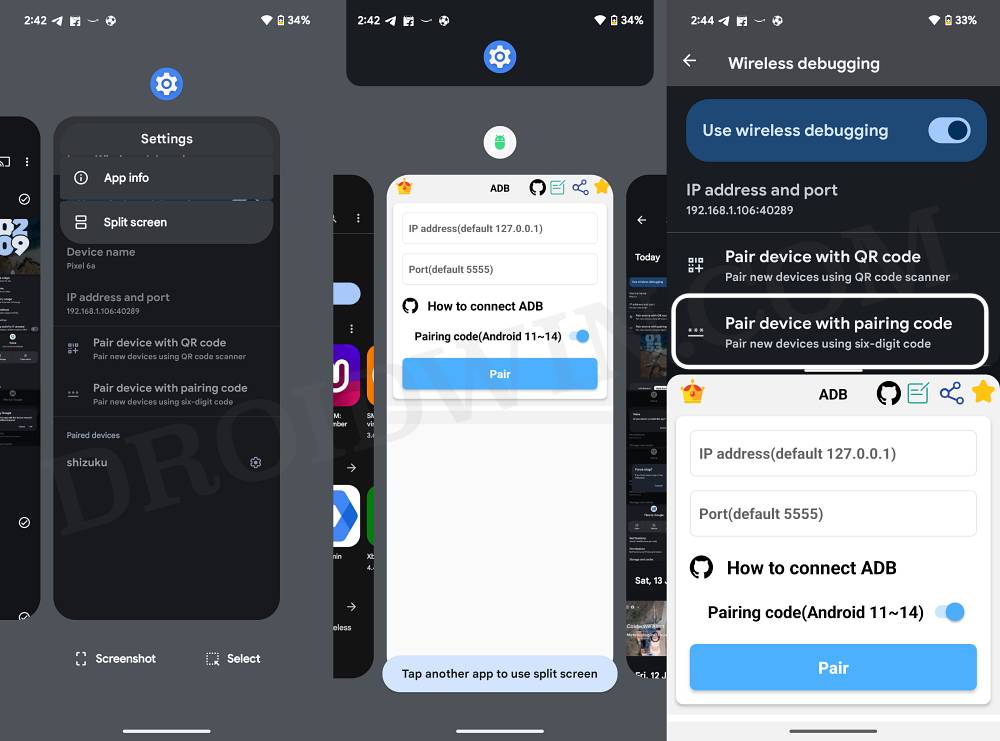
- Now launch it and enable the toggle next to Pairing Code.

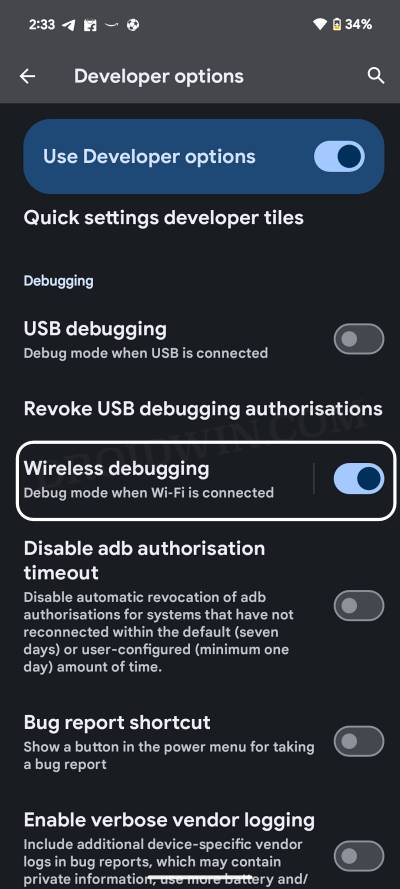
- Then go to Settings > System > Developer Options > Enable Wireless Debugging.
- Now we will have to carry out the rest of the steps in the split screen mode. This is because the information that we are about to get tends to get refreshed every time it is minimized, which in turn will end up bullying this fix. So to prevent that from happening, we will have both the wireless debugging and the app opened at the same time.
- S0 perform an upward swipe gesture such that Wireless Debugging is now inside the recent apps screen.
- Then tap on its icon and select Split Screen. Now choose ADB shell as the second app.
- Now ‘tap’ on Wireless Debugging. Then tap on Pair Device with Pairing Code.
- You’ll now get the WiFi Pairing Code, IP Address, and Port Number.
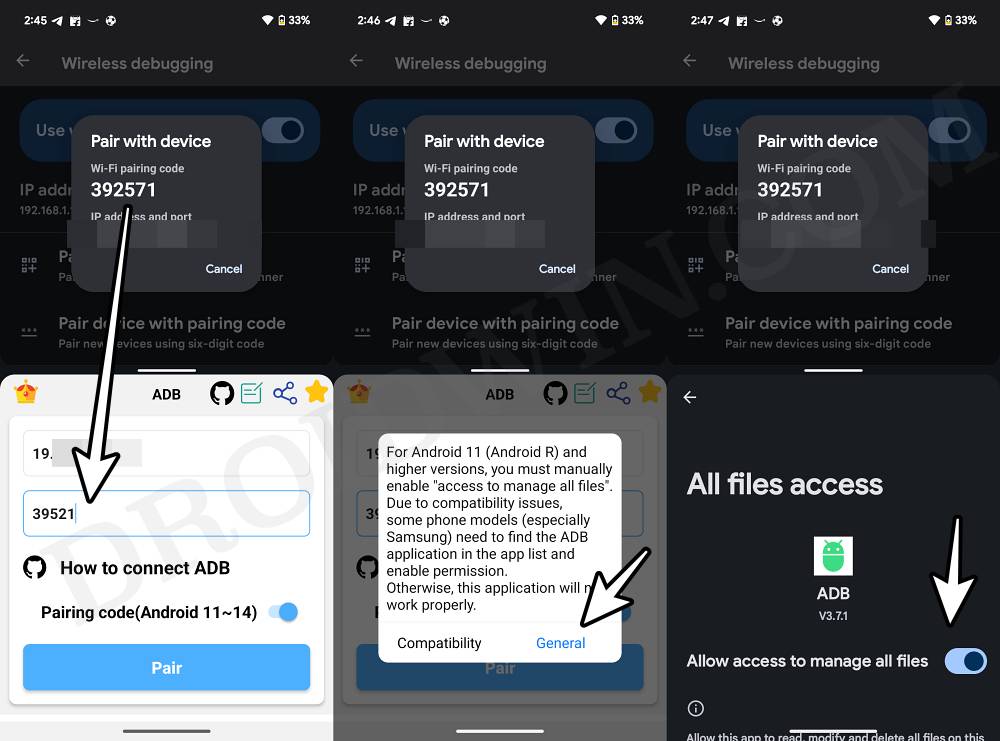
- Now type in the IP Address and Port Number in the ADB Shell app and hit Pair.
- You’ll get a prompt, tap General, and enable the toggle next to Allow access to files.
- Then come back to the app and again tap on Pair. You’ll now be taken to the shell.
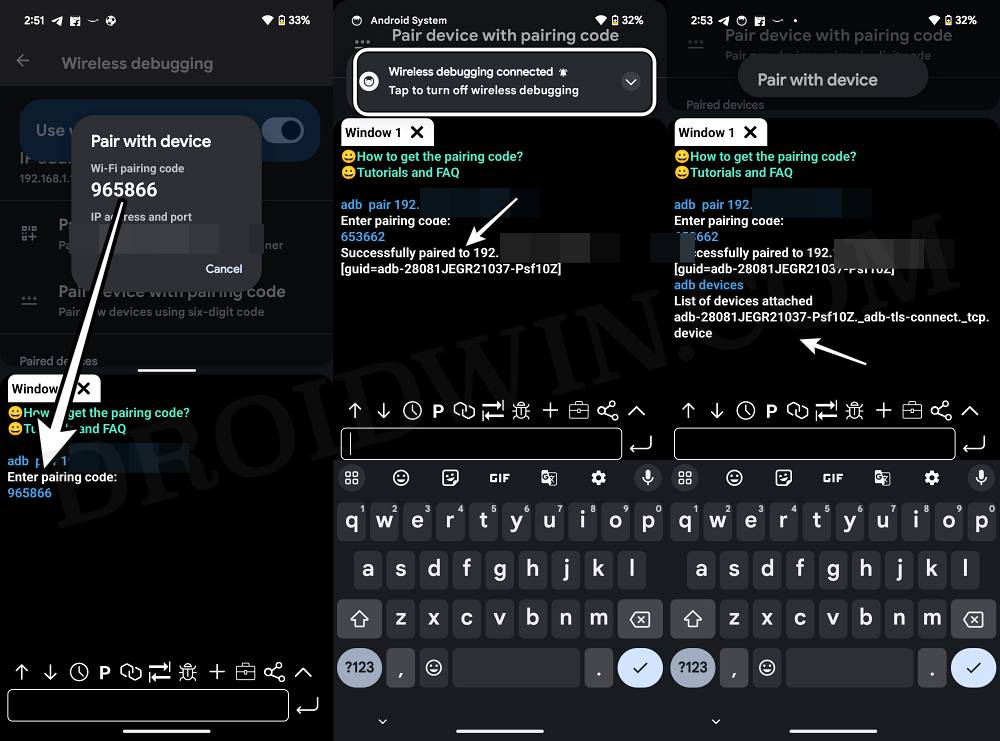
- Type in the Pairing code and hit Enter. You should get the “successfully paired” prompt.
- Finally, type in adb devices and make sure that you are getting an ID.
Run ADB Fastboot Commands on Android via Termux
We have listed out the detailed instructions in separate sections for ease of understanding. Proceed in the exact same sequence as mentioned and the task will be over within minutes. [Don’t Miss: Wireless Debugging Feature of Android 11: How to Use].
STEP 1: Create a Host Device
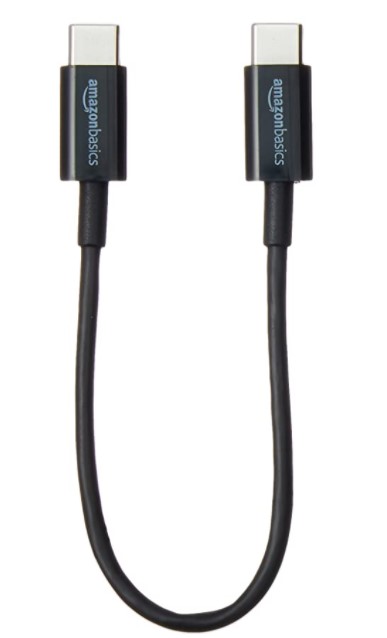
First up, you will need to have another Android device (non-rooted/rooted doesn’t matter) to carry out this process. This second device will actually act as a host device (similar to what a PC does when we execute these commands). Apart from that, you will also need a USB Type C to Type C cable to connect both these devices (if both the devices have Type C ports).
On the other hand, if one of the devices has a Micro USB and the other is USB Type-C, then you will need a Micro USB OTG cable and a USB A to USB C cable for the connection.
STEP 2: Enable USB Debugging on Both the Devices
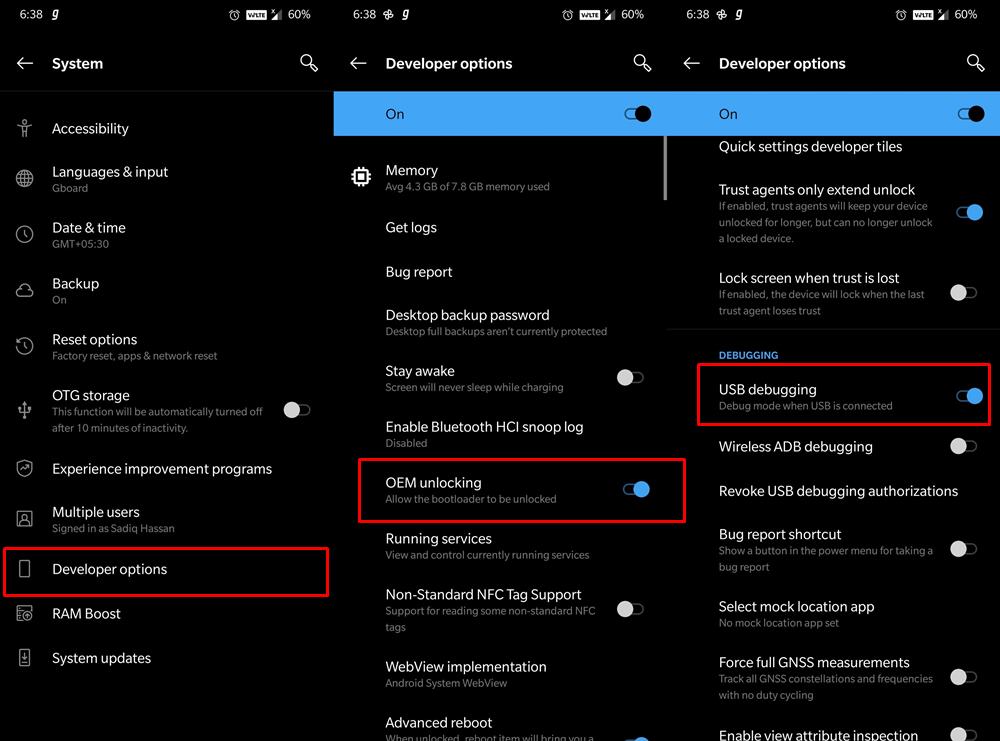
Next up, enable USB Debugging on both these devices. This is needed so that the host device is able to recognize your primary device in the ADB mode. So head over to Settings > About Phone > Tap on Build Number 7 times (Xiaomi users tap on MIUI number 7 times)> Go back to Settings > System > Advanced > Developer Options > Enable USB Debugging. [Don’t Miss: How to Enable USB Debugging on a Broken Android Device’s Screen]
- [GUIDE] Flash ROMs/Magisk/TWRP/Kernels on A/B Partition Devices
- Everything About Magisk- Manager, Modules and More
- Best Magisk Modules of 2020 [PART-1]
- [3 METHODS] Unroot any Android Device-Uninstall Magisk
STEP 3: Connect Primary Device to Host Device
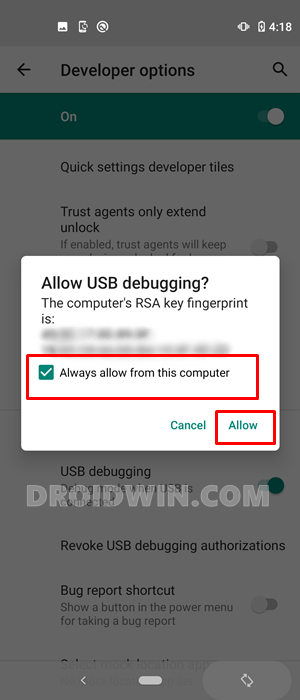
Once debugging is enabled on both the devices, connect them via USB Type C to Type C cable or Micro USB OTG as discussed above. As soon as the connection gets established, you will get an Allow USB Debugging on both these devices. Tap on Allow (and even checkmark the Always allows from this computer if you don’t want to be greeted with this prompt every time).
You may now proceed with the steps to run ADB and Fastboot Commands directly on your Android device without root. Do keep in mind that the below instructions (in STEP 4) are to be carried out on the host device. So everywhere you see the ‘device’ word in the below instructions, it means the ‘host device’ (unless stated otherwise). Then once the ADB and Fastboot binaries are installed on this host device, you may connect your primary device to this host and execute the desired commands.
STEP 4: Run ADB and Fastboot Commands directly on Android
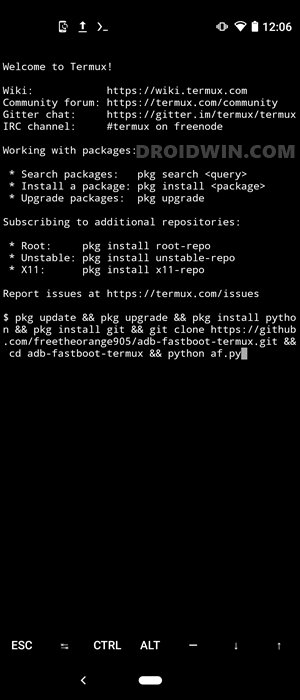
- First and foremost, download and install the Termux app on your device.
- Now launch the app, copy-paste the below command, and hit Enter:
pkg update && pkg upgrade && pkg install python && pkg install git && git clone https://github.com/freetheorange905/adb-fastboot-termux.git && cd adb-fastboot-termux && python af.py
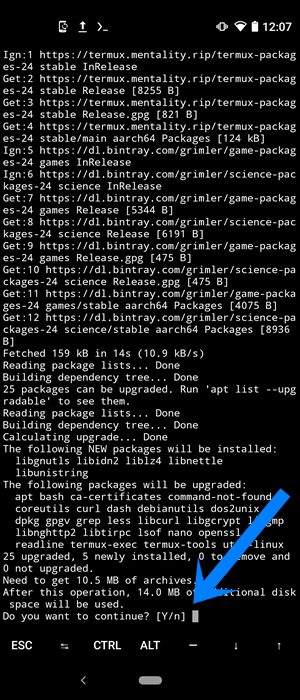
- The necessary dependencies and configuration will now be automatically downloaded and installed on your device. After every few seconds, you might get a prompt asking whether you wish to install each of these dependencies or not (see below image). You will have to type in Y and hit Enter each time. In my testing, I had to type in Y a total of around five times.
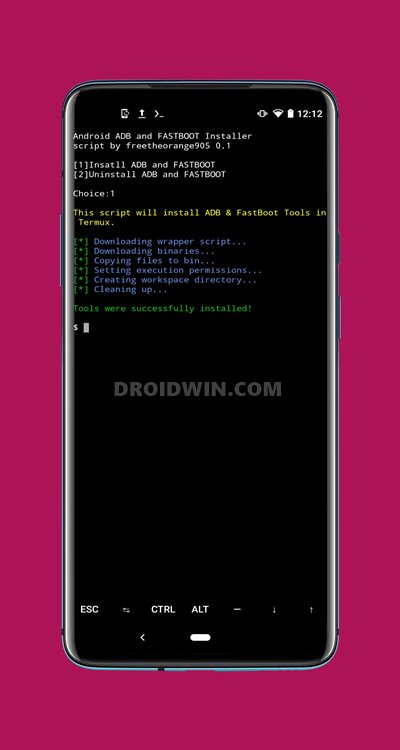
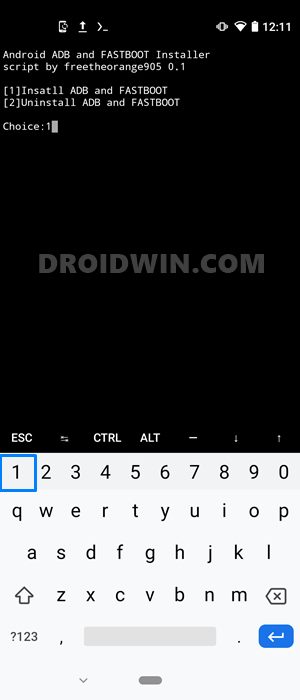
- In the end, you will be greeted with the message to Install ADB and Fastboot or Uninstall ADB and Fastboot. Type 1 and hit Enter.
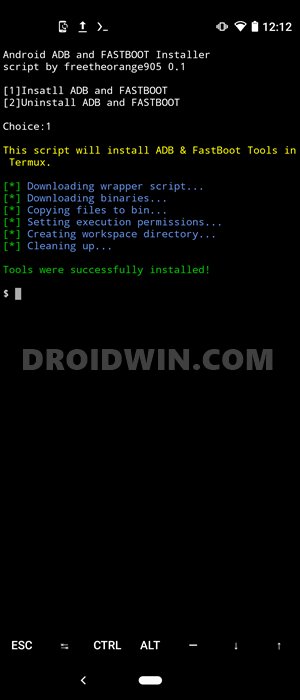
- The installation will now begin and should take a couple of minutes. Once done, you will be greeted with Tools were successfully installed message.
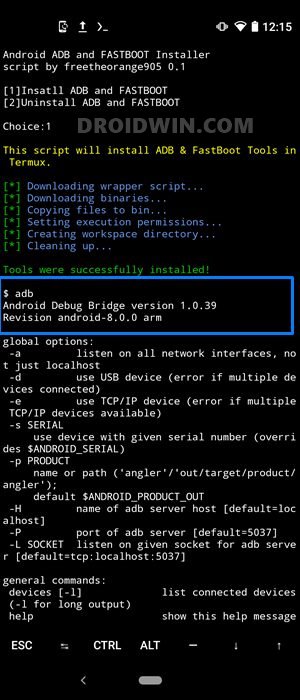
- To check for the successful installation of ADB and Fastboot binaries, type in adb and hit Enter. You should get a long list of all the supported commands, indicating that all the required files are now installed.
- Now connect your primary device to this host device. You may now execute the desired ADB and Fastboot Commands on your host Android device without root and the result will be seen on the primary device. For example, you may type in adb reboot bootloader on your host device and your primary device will be booted to Fastboot/Bootloader mode. Interesting, isn’t it?
With this, we conclude the guide on how to run ADB and Fastboot Commands on an Android device without root. Furthermore, we haven’t made use of the PC anywhere during this process. With that said, if you have any queries concerning the aforementioned steps, do let us know in the comments. We will get back to you with a solution at the earliest.
- How to Fix FAILED (remote: unknown command) Error
- How to Extract payload.bin and get the stock boot image file
- Fix: pip is not recognized as an internal or external command
- Detailed Steps to Fix adb is not recognized Error
What is the Meaning of the Above Command?
So let’s break down the above commands and understand what each one of them means. First and foremost, we have combined numerous commands into one single command using the && character. Just to recall, the command was:
pkg update && pkg upgrade && pkg install python && pkg install git && git clone https://github.com/freetheorange905/adb-fastboot-termux.git && cd adb-fastboot-termux && python af.py
As you could see, after each && a new command begins. Here is what each of them does:
- pkg update: Update the package
- pkg upgrade: Upgrade the Termux package
- pkg install python: Used to install Python on your Android device.
- pkg install git: Installing the GIT package from GitHub
- git clone https://github.com/freetheorange905/adb-fastboot-termux.git: It is used to install ADB and Fastboot Git using Termux
- cd adb-fastboot-termux: Changing the Termux directory to the location where ADB and Fastboot Git is installed on your device.
- python af.py: Installing the Python library
Well, if you would ever like to take a longer route, you could also execute each of these commands individually in the Termux window. For example, type in pkg update and hit Enter, then execute pkg upgrade and so on until python af.py. This will also give you the same results. Just to make things easier, I have added all the commands into one single command using &&.
Run ADB Fastboot Commands directly on Android via Root
So with this, we conclude the guide on how to run ADB and Fastboot Commands on Android without using root. If you have any queries, do let us know in the comments section below. We will get back to you with a solution at the earliest.


Ray
I also tried this method. But it doesn’t seem to work without root
Dmytro
This method doesn’t work without ROOT