In this guide, we will show you the steps to unroot your Android device and uninstall Magisk. While stepping into custom development, gaining administrative privileges is usually the preferred choice for the tech enthusiast. While it does open the floodgates to a plethora of customizations, it also has its fair share of caveats as well. The primary among them is the tripping of SafetyNet. Once that happens, you wouldn’t be able to use any banking apps.
Apart from that, the WideVine L1 Certification will be lowered to L3 thereby resulting in your inability to watch DRM content in Full HD. Likewise, the process of installing OTA updates would also become a rather complicated task. So while rooting does give us the option to welcome abode numerous mods, but after a while or so, having a clean stock non-rooted environment free from all issues becomes the need of the hour. So with that in mind, let’s get started.
Table of Contents
How to Unroot any Android Device: Uninstall Magisk

Before starting, please take a backup of all the data on your device, just to be on the safer side. Droidwin and its members wouldn’t be held responsible in case of a thermonuclear war, your alarm doesn’t wake you up, or if anything happens to your device and data by performing the below steps.
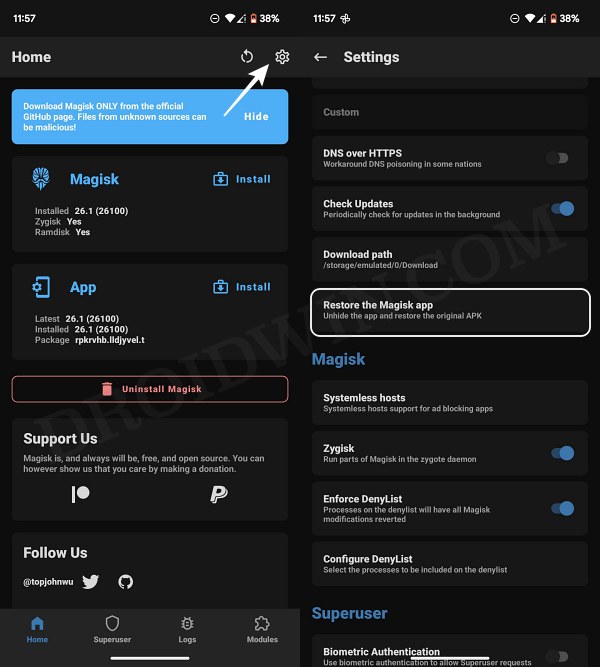
STEP 1: Unhide Magisk App
If you have hidden the Magisk app and renamed it to something else [mainly to pass the SafetyNet test], then it’s time you unhide it right away. Follow along.
- Launch Magisk, tap on the settings icon, and select Restore the Magisk App.
- Tap OK in the confirmation prompt that appears and wait for it to be restored.

STEP 2: Remove LSPosed Modules
Next up, disable and remove all the LSPosed/Xposed modules installed on your device [if present]. Here’s how it could be done:
- Launch the LSPosed app, go to Modules, select the module, and disable the toggle next to it.
- Then go back a step, long-press the module, and select Uninstall. Do so for all the modules.
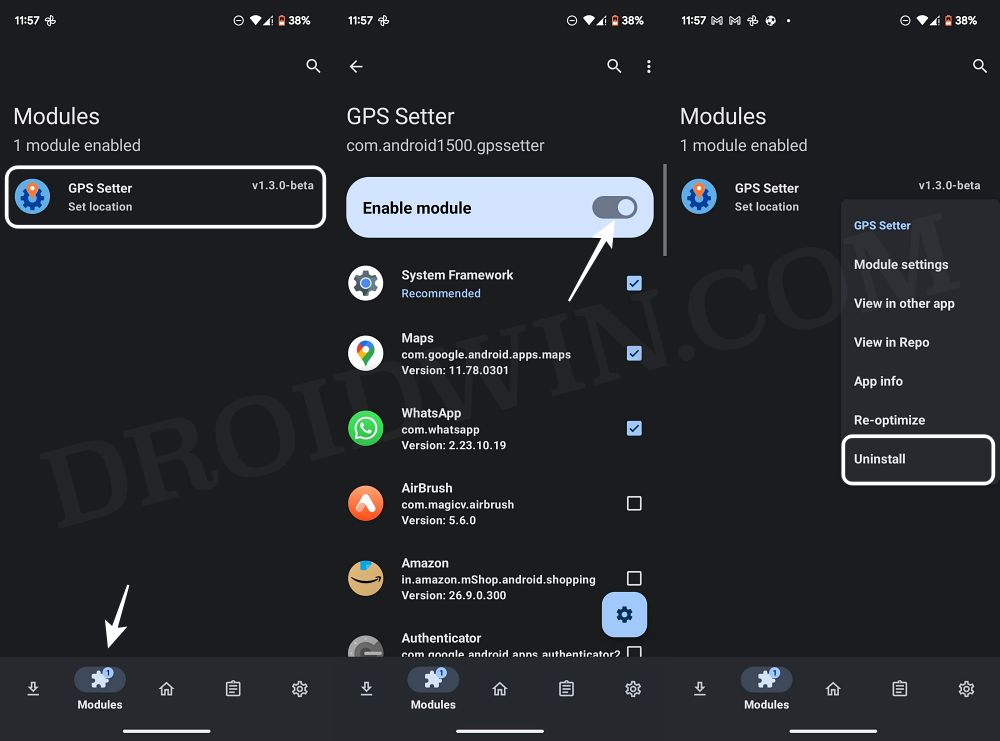
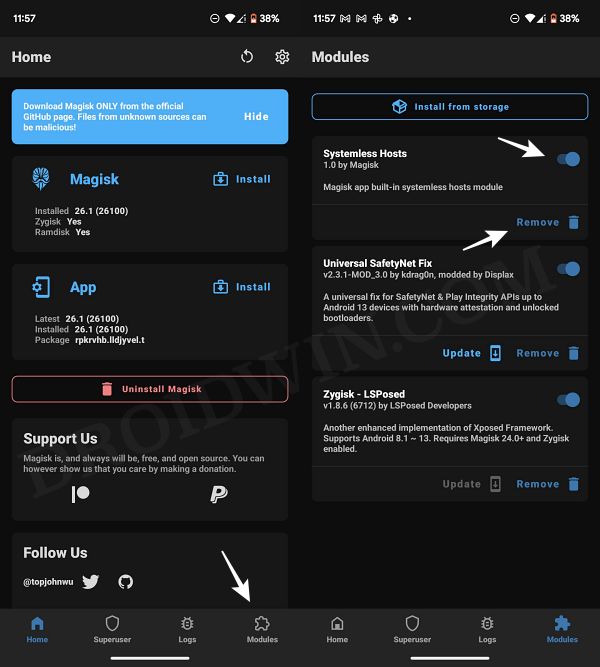
STEP 3: Uninstall all Magisk Modules
Likewise, you should also disable and uninstall all the Magisk Modules from your device as well. Here’s how it could be done:
- Launch Magisk, go to Modules, disable the module, and then tap Remove.
- Do so for all the installed modules. Once done, restart your device.
- Once the device boots up, make sure all LSPosed and Magisk modules are removed.
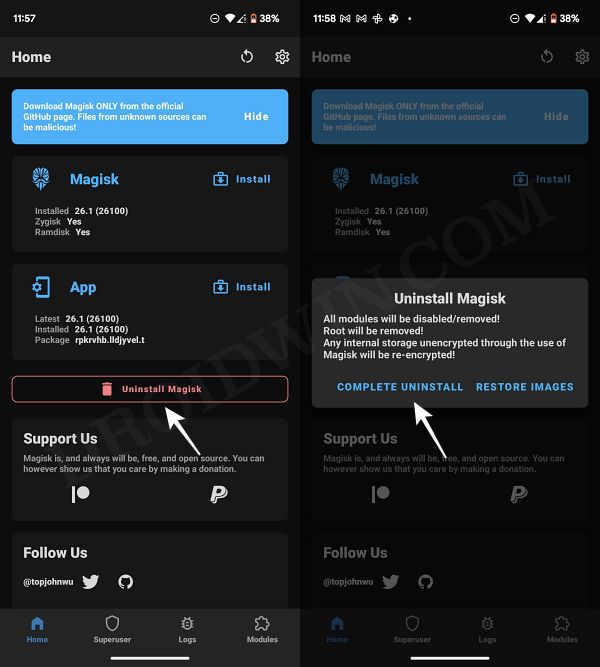
STEP 4: Uninstall Magisk
Now comes the most important part of uninstalling the magisk app and removing the root from your device. Follow along:
- Launch Magisk and tap on Uninstall Magisk > Complete Uninstall.
- Wait for the process to complete. Once done, your device will restart.
- It will now boot to the non-rooted stock ecosystem with no mods installed.
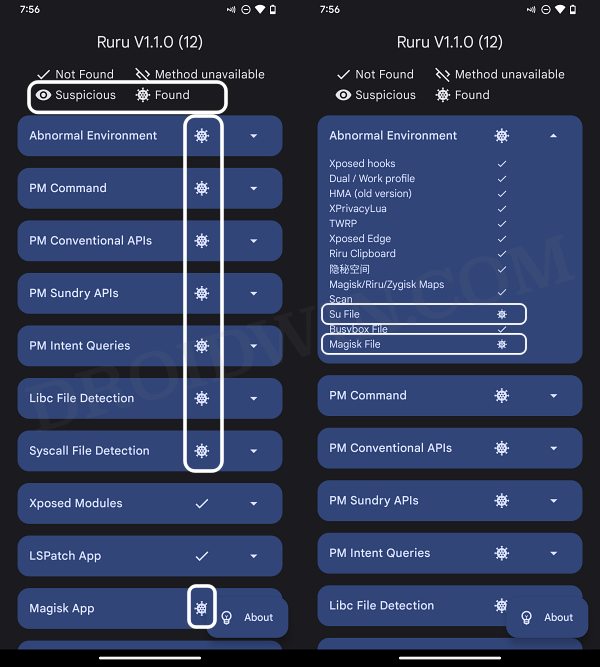
STEP 5: Verify the Presence of Rooted Apps
Before rounding off the guide, let’s double-check that no rooted apps or system services are left behind. For that, do refer to our detailed guide on How to check if your device has any Root apps installed [Video].
STEP 6: Flash Stock ROM [Optional]
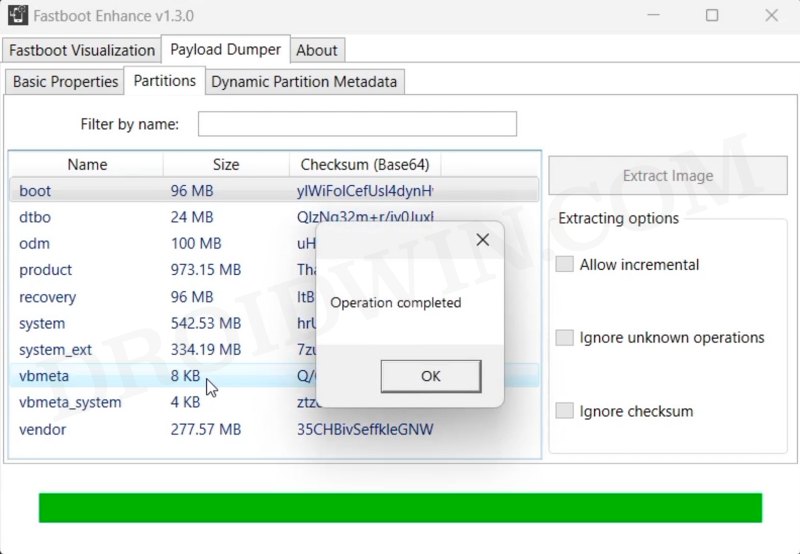
If you are currently on a custom ROM, then now could be the perfect time to flash the stock firmware. The process to do so varies, depending on the device you own [and it will also wipe off all the data from your device, so take a backup beforehand. Xiaomi/Redmi/Poco/Mi users could use the Mi Flash Tool, OnePlus users could try out the MSM Download Tool or Fastboot Enhance Tool whereas Pixel users could opt for Android Flash Tool.
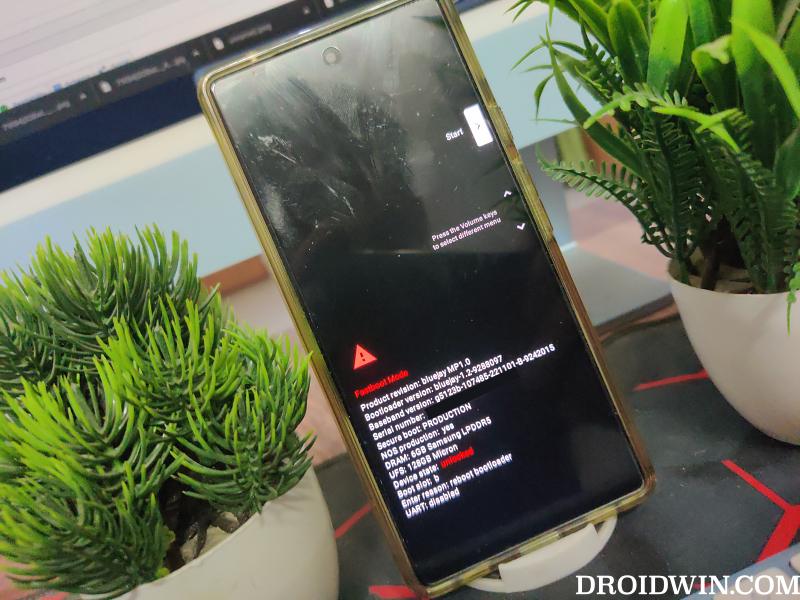
STEP 7: Relock Bootloader [Optional]
If you have removed all the rooted modules and are currently using the stock firmware, then you have the option to relock the bootloader as well [again, this will wipe off all the data, so take a backup beforehand]. To do so, you could refer to our guide on How to Relock the Bootloader on any Android Device.
That’s it. These were the steps to unroot your Android device and uninstall/remove Magisk. If you have any queries concerning the aforementioned steps, do let us know in the comments. We will get back to you with a solution at the earliest.


