In this guide, we will show you a couple of methods to retain/reflash TWRP while/after installing a custom ROM. Nowadays, every custom ROM comes with its own set of recoveries. For instance, LineageOS has a LineageOS Recovery, crDroid comes with its own crDroid Recovery, and so on. Most or rather all these AOSP recoveries have the same set of functionalities and just differ in their design and theme elements.
With that said, there still exists a massive difference between the AOSP and the likes of TWRP and PitchBlack. While the latter beholds a slew of intriguing and useful features, including the ability to easily flash ZIP files, take a backup of all the partition data aka Nandroid Backup, carry out advanced functionality like in-built Terminal, File Manager, flashing to Ramdisk, and the ability to change slots, unfortunately, the former lacks near about all these features.
The few useful features that an AOSP Recovery beholds are ADB Sideloading a ZIP file and doing a format data. Since it is so far behind TWRP, many users prefer to use the latter in place of the built-in recovery that comes with the ROM. If you are on the same page, then this guide will make you aware of a couple of nifty methods to get this job done. Follow along.
Table of Contents
How to Retain/Reflash TWRP while/after Installing a Custom ROM

There exist two different methods through which you could get this job done: using the built-in feature provided by TWRP itself or manually flashing TWRP after the ROM flashing is complete. We have listed both these methods below, you may try out the one that is in sync with your requirements.
Moreover, even though the process will not wipe off any data from your device, still take a complete device backup, just to be on the safer side. Droidwin and its members wouldn’t be held responsible in case of a thermonuclear war, your alarm doesn’t wake you up, or if anything happens to your device and data by performing the below steps.
Via Retain TWRP Feature
The TWRP Recovery comes with a built-in feature that will allow you to retain TWRP even after flashing the custom ROM. In other words, it will prevent the default activity of the custom ROM of replacing TWRP with its own AOSP Recovery. The only thing to keep in mind is the fact that you could only carry out this method before flashing the ROM. If you have already flashed the ROM, then you should refer to the next method.
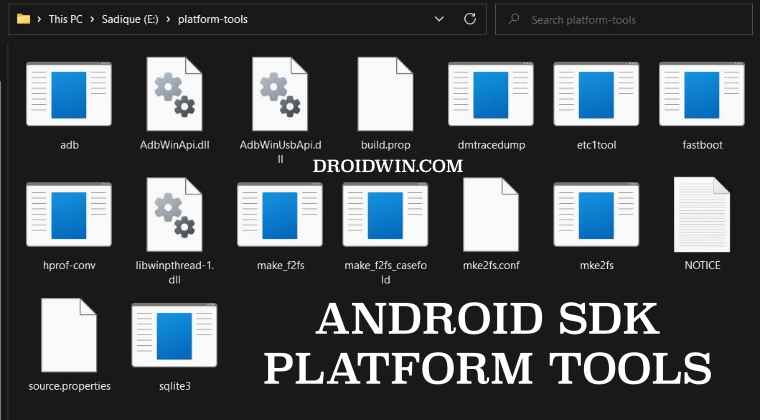
- Firstly, download and extract Android SDK Platform Tools on your PC.
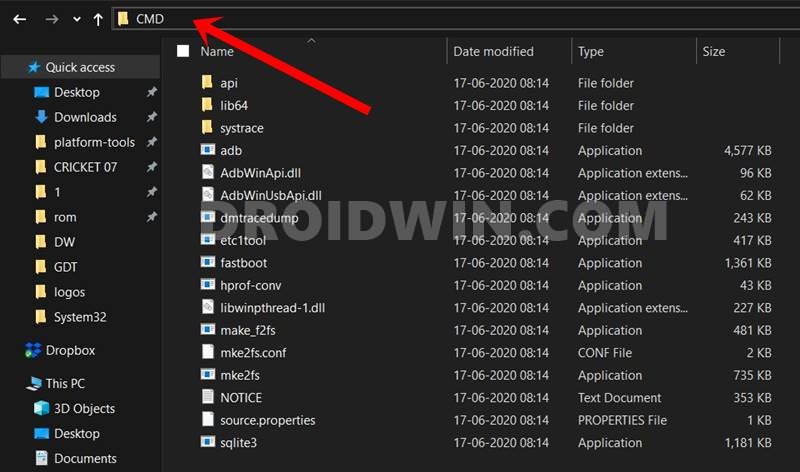
- Then type in CMD in the platform-tool folder address bar and hit Enter.

- This will launch Command Prompt and will act as our working directory.
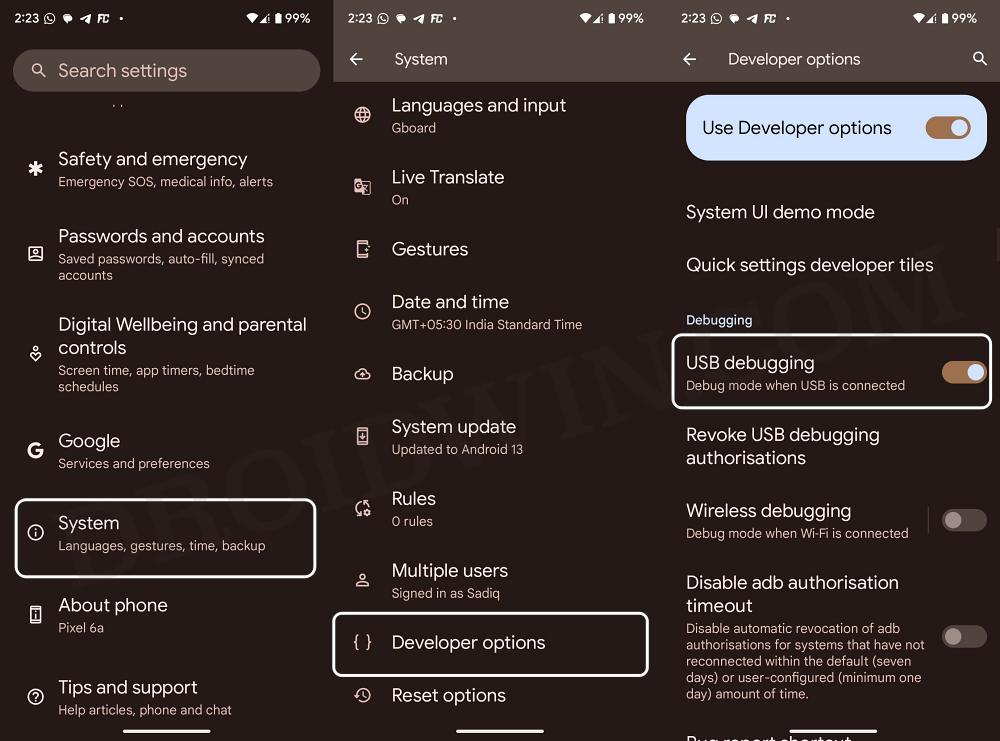
- Once done, now go to Settings > System > Tap on Build Number 7 times.
- Then go to System > Developer Options and enable the USB Debugging.
- After that, connect your device to your PC via a USB cable.
- Now download TWRP for your device and transfer it inside platform tools.
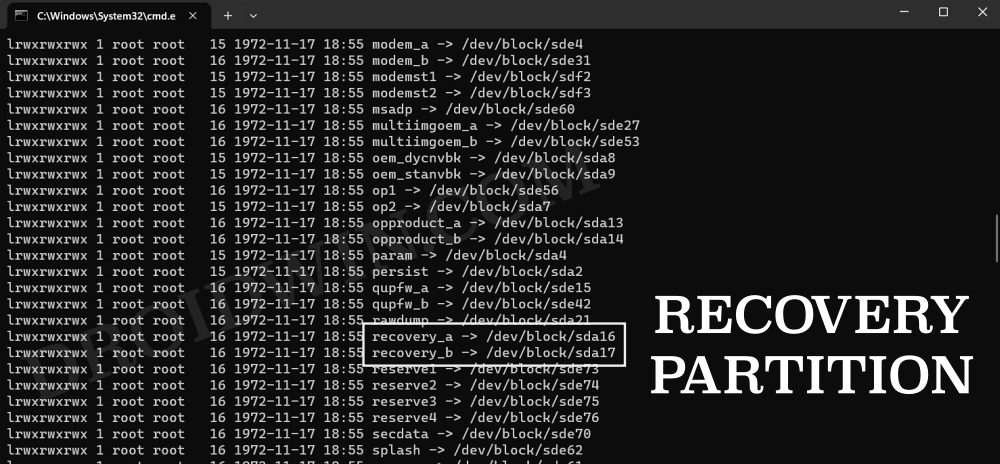
- Check if your device has a recovery partition or not via the below commands:
adb shell
cd /dev/block/platform
ls -la /dev/block/bootdevice/by-name
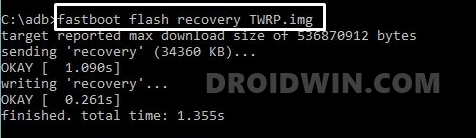
- If it does, then use the below command to directly flash the TWRP Recovery:
fastboot flash recovery twrp.img
- You may then boot your device to the TWRP Recovery via the below command:
fastboot reboot recovery
- However, if it doesn’t have the recovery partition, then boot your device to TWRP:
fastboot boot twrp.img
- Now permanently flash it by flashing the twrp.zip, or installing the IMG to Ramdisk.
- Once done, carry out all the steps required before flashing a custom ROM.
- This could include flashing firmware, doing a format data/reset, etc.
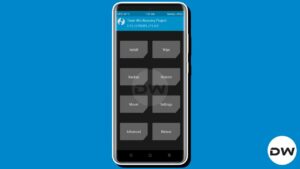
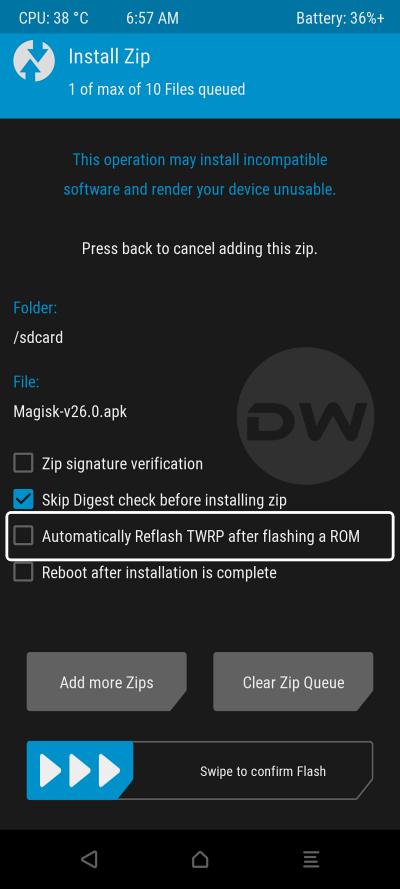
- Once done, go to Install, and check Automatically Reflash TWRP after flashing a ROM.
- You may now go to Install, select the ROM ZIP file, and flash it.
- Once done, do a format data and you may then reboot to the OS via Reboot > System.
- Your device will now reboot to the newly flashed ROM along with the TWRP Recovery.
Via Manual Flashing
In this method, we are assuming that you have already flashed the Custom ROM and as of now, you have its associated custom recovery installed [for example, LineageOS ROM and LineageOS Recovery]. In that case, here’s how you could replace the AOSP Recovery with TWRP, or in other words, reflash TWRP after flashing the Custom ROM.
- Firstly, download and extract Android SDK Platform Tools on your PC.
- Then type in CMD in the platform-tool folder address bar and hit Enter.
- This will launch Command Prompt and will act as our working directory.
- Once done, now go to Settings > System > Tap on Build Number 7 times.
- Then go to System > Developer Options and enable the USB Debugging.
- After that, connect your device to your PC via a USB cable.
- Now download TWRP for your device and transfer it inside platform tools.
- For flashing it, you may refer to our detailed guide or check the below steps.
- Check if your device has a recovery partition or not via the below commands:
adb shell
cd /dev/block/platform
ls -la /dev/block/bootdevice/by-name
- If it does, then use the below command to directly flash the TWRP Recovery:
fastboot flash recovery twrp.img
- You may then boot your device to the TWRP Recovery via the below command:
fastboot reboot recovery
- However, if it doesn’t have the recovery partition, then boot your device to TWRP:
fastboot boot twrp.img
- Now permanently flash it by flashing the twrp.zip, or installing the IMG to Ramdisk.
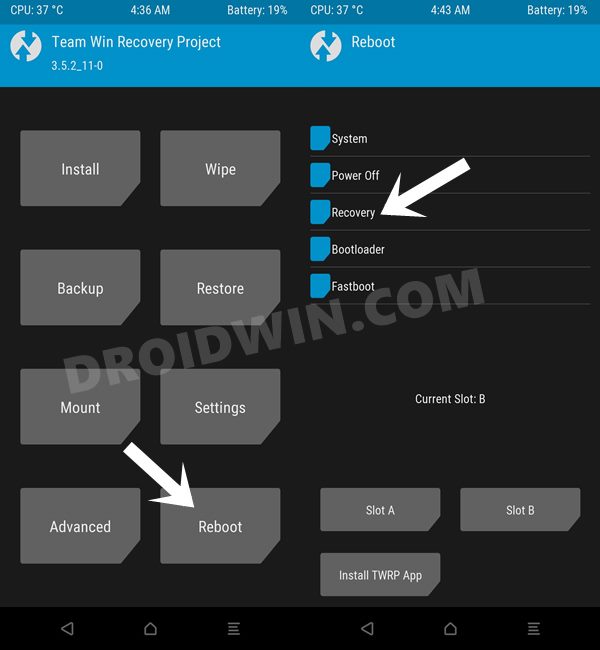
- Finally, from recovery, select Reboot > Recovery. Your device will reboot to TWRP.

That’s it. These were a couple of methods to retain/reflash TWRP while/after installing a custom ROM. If you have any queries, then do let us know in the comments. We will get back to you. with a dilution at the earliest.