In this guide, we will show you the steps to unroot your Samsung device via Magisk and Odin. In the technical domain, no device is as complicated as Samsung. This OEM has deviated quite a lot from the traditional process, whether its rooting, unlocking the bootloader, or simply booting to its ‘flash’ mode. For instance, instead of the usual Fastboot Mode, here you get a Download Mode.
Likewise, you cannot unlock the bootloader via fastboot flashing unlock. Moreover, even rooting via the conventional method of patching the stock boot/init_boot and then flashing via Fastboot is not possible. Instead, you’ll have to take the help of the patched AP and flash it via Samsung’s own Odin Tool.
Apart from that, you might already be aware of the fact that rooting comes with quite a few downsides as well, most noticeably the SafetyNet and Play Integrity being triggered and failed. In this regard, when you relock the bootloader, you’ll once again pass all these tests and use all the security features as before. However, that isn’t the case with Samsung as once you have unlocked the bootloader/obtained root, there’s no going back.
The drawbacks that are there in the rooted environment, such as the Knox being tripped and your inability to use secure payment apps like Samsung Pay will even be there when you relock the bootloader and go back to stock! With that said, if you have still made up your mind to unroot your Samsung device, then let’s get started with the instructions.
Table of Contents
How to Unroot any Samsung Device
The process will wipe off all the data from your device, so please take a complete device backup beforehand. Droidwin and its members wouldn’t be held responsible in case of a thermonuclear war, your alarm doesn’t wake you up, or if anything happens to your device and data by performing the below steps.
NOTE: You cannot simply flash the stock AP file via Odin to unroot the device. Instead, you’ll have to flash the entire firmware [using the CSC and not the Home_CSC as we require a complete data wipe], after using the Magisk’s Complete Uninstall feature. Moreover, the latest Samsung devices like S23 and S24 cannot be rooted by simply patching and flashing the AP file.
Instead, you’ll have to extract the AP file > use its init_boot > extract the BL file > use its vbmeta file > combine both init_boot and vbmeta into the TAR file > flash it in the AP slot of Odin. But when it comes to unrooting, the steps will be the same when compared with other Samsung devices, as we will anyhow be flashing the entire firmware via Odin [which would include flashing the stock AP file as well].
STEP 1: Remove All Modules
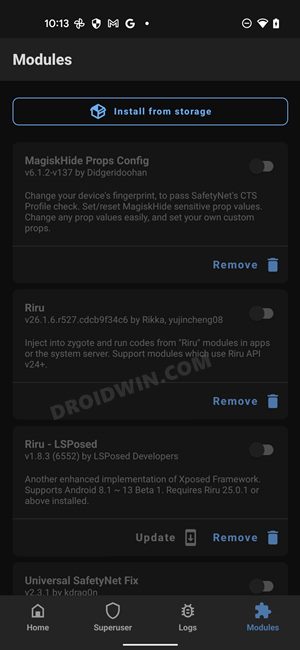
First and foremost, you’ll have to disable all the modules on your device, whether it’s Magisk, LSPosed, Viper4Android, etc. Here’s how it could be done:
- Launch Magisk and go to the Modules section.
- Then disable the toggle next to all the modules.

- After that, tap on Uninstall next to each module.
- Restart the device for the changes to take place.
STEP 2: Download Stock Firmware
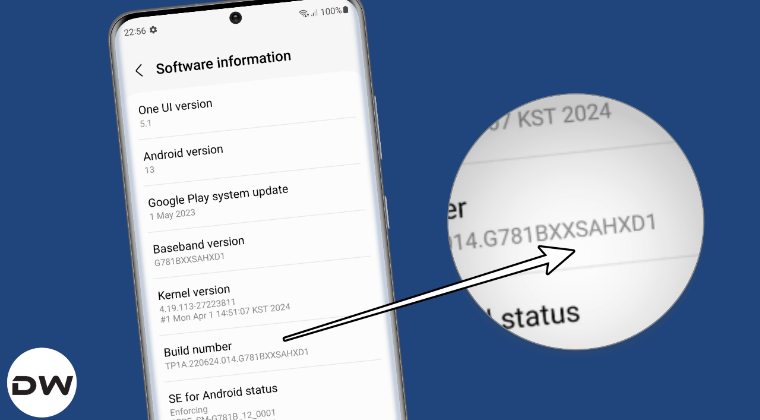
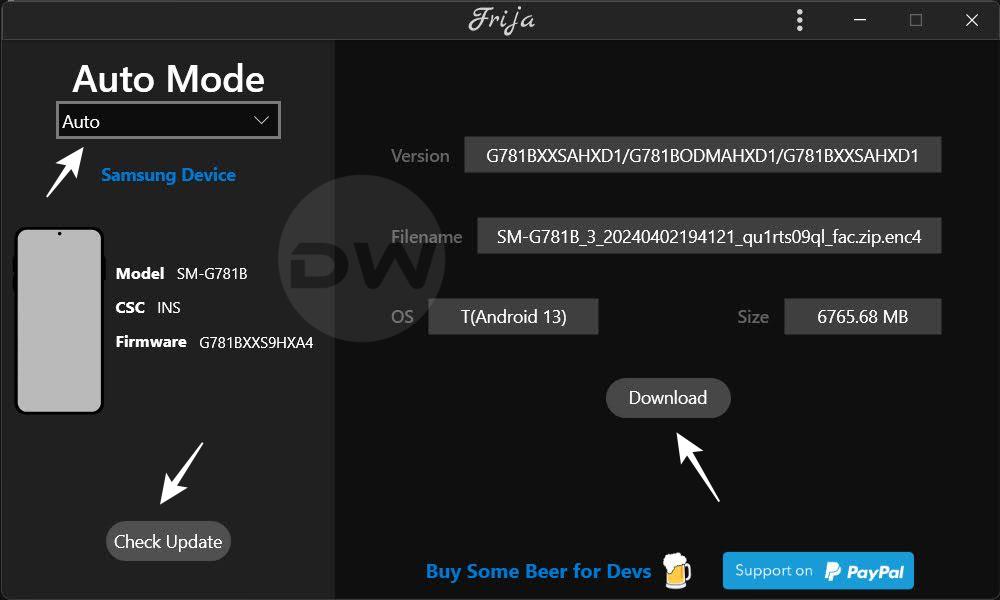
Your next course of action is to download the stock firmware for your device. Make sure to download the same firmware that is currently installed on your device or the latest version, do not download an older build. In this rgeard, you could take the help of SamFW website or the Frija Tool to get this job done: Download Samsung Stock Firmware/ROM via Frija Tool & SamFW.
STEP 3: Extract Firmware
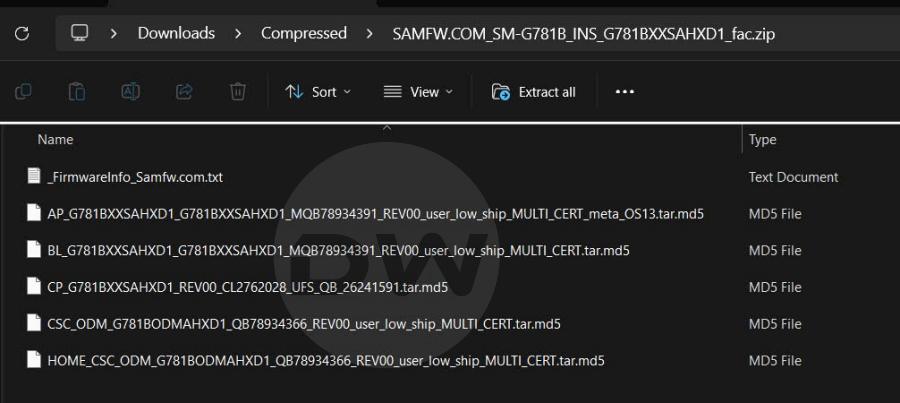
You’ll now have to extract the downloaded firmware via the built-in Windows extractor or a third-party tool like 7ZIP. Once extracted, you’ll get AP,BL, CP, CSC, and Home_CSC.
STEP 4: Download Odin
Next up. download and extract the Odin Tool on your PC. It will be used to flash the firmware on your device.

STEP 5: Boot to Download Mode
You will now have to boot your Samsung device to the Download Mode so that Odin can interact with it and you may in turn flash the resultant firmare files. So do check out our guide on How to Boot any Samsung Device to Download Mode. The shorter instructions follows below:
- To begin with, power off your device [unplug it from your PC as well if it is currently plugged in].
- Then press and hold Vol Up + Vol Down together and connect your device to the PC via a USB cable.

- As soon as you see the Warning message on your device, release the pressed keys.
- Now press the Volume Up key once and your device will be booted to Download Mode.
STEP 6: Flash Firmware via Odin
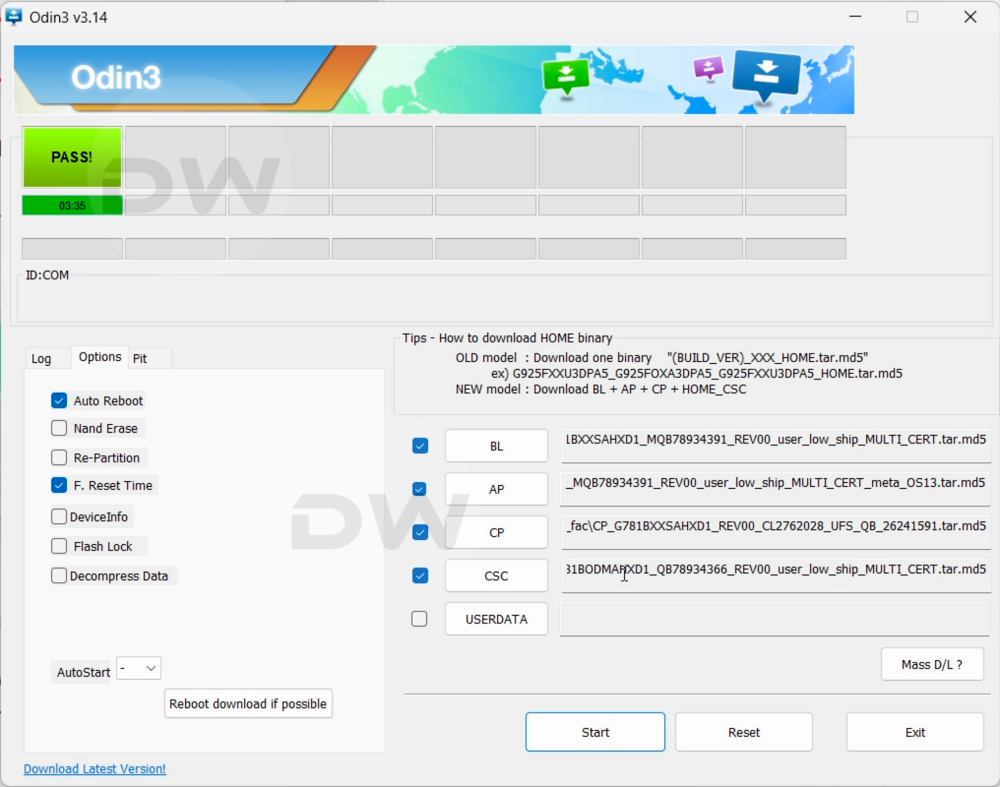
- Launch Odin via its EXE file and load the following files to the tool:
- First off, click ‘BL‘ and load the BL firmware file.
- Then click ‘AP‘ and load the magisk_patched.tar file.
- After this, click ‘CP‘ and load the CP firmware file.
- Finally, click ‘CSC‘ and load the CSC firmware file.

- Once all the files have been loaded, go to the Options tab and check Auto Reboot.
- Finally, click Start to begin the process. Once done, you should get the PASS!‘ message.
That’s it. These were the steps to unroot your Samsung device via Magisk and Odin. If you have any queries concerning the aforementioned steps, do let us know in the comments. We will get back to you with a solution at the earliest.
