In this guide, we will be listing all the useful and most frequently used ADB and Fastboot Commands. When it comes to the custom development, then ADB and Fastboot Commands are literally the first steps in this long journey. Not just by the tech enthusiast but these commands are also being used by general users as well.
In this regard, if we talk about the basic everyday tasks where these commands are being used, then this could include the likes of opening the ADB shell environment [for carrying out tasks like uninstalling bloatware], rebooting the device to stock recovery for resetting the device or flashing firmware via ADB sideload.
Then if we turn our attention toward the technical aspects, then you could use these commands for booting the device to Fastboot/FastbootD Mode, unlocking the bootloader, flashing custom recovery like TWRP, flashing Magisk patched boot.img for rooting, and a slew of other tasks. So owing to their such a higher position in the pecking order, this guide will make you aware of some of the most important ADB and Fastboot Commands. Follow along.
Table of Contents
The Prerequisites to Executing ADB and Fastboot Commands
Before you could execute any of the ADB and Fastboot Commands, you will first have to checkmark a few prerequisites listed below.
STEP 1: Download Android SDK Platform Tools
First and foremost, you will have to download the Android SDK Platform Tools on your PC. This is the official ADB and Fastboot binary provided by Google and is the only recommended one. So download it and then extract it to any convenient location on your PC. Doing so will give you the platform-tools folder, which will be used throughout this guide.
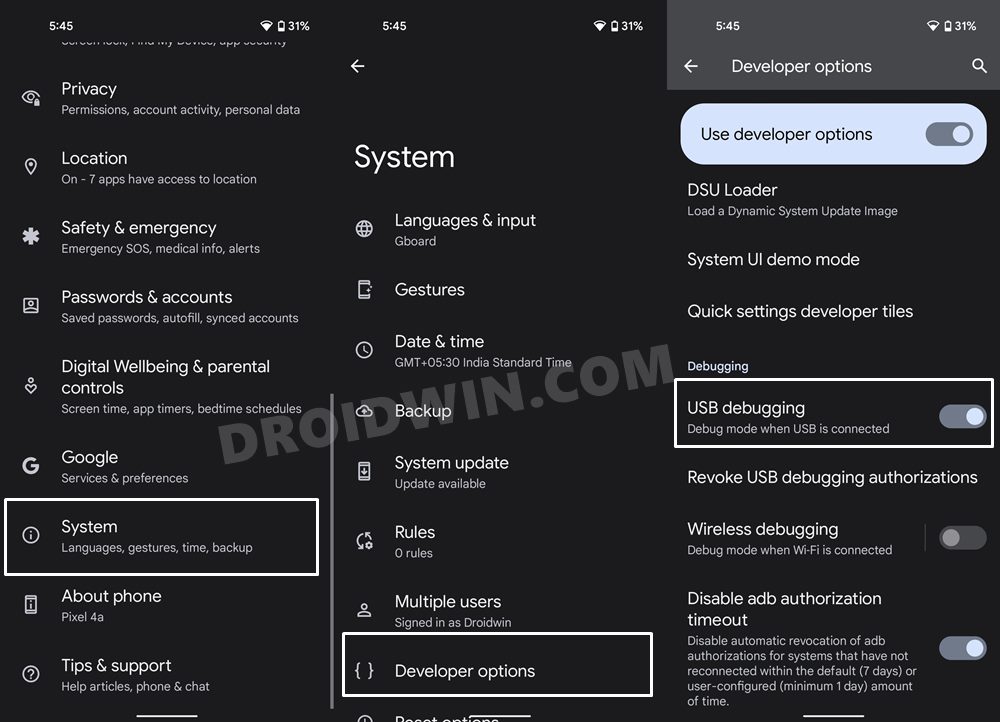
STEP 2: Enable USB Debugging
Next up, you will have to enable USB Debugging on your device so as to make it recognizable by the PC in ADB mode. So head over to Settings > About Phone > Tap on Build Number 7 times [MIUI number for Xiaomi devices] > Go back to Settings > System > Advanced > Developer Options > Enable USB Debugging.
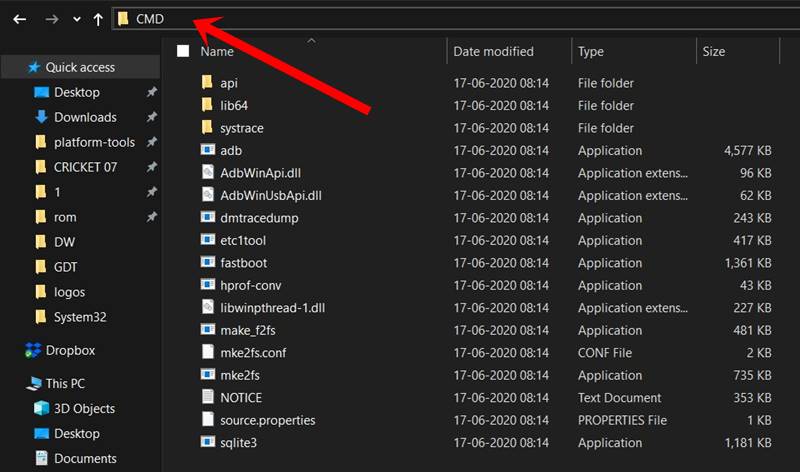
STEP 3: Open CMD inside Platform Tools
- Head over to the platform-tools folder, type in CMD in the address bar, and hit Enter.

- This will launch the CMD window with the platform-tools folder directory.
- You should execute all the ADB and Fastboot commands only in this CMD window.
Most Commonly Used ADB Commands
Here are some of the important as well as the most widely used ADB Commands and their functions.
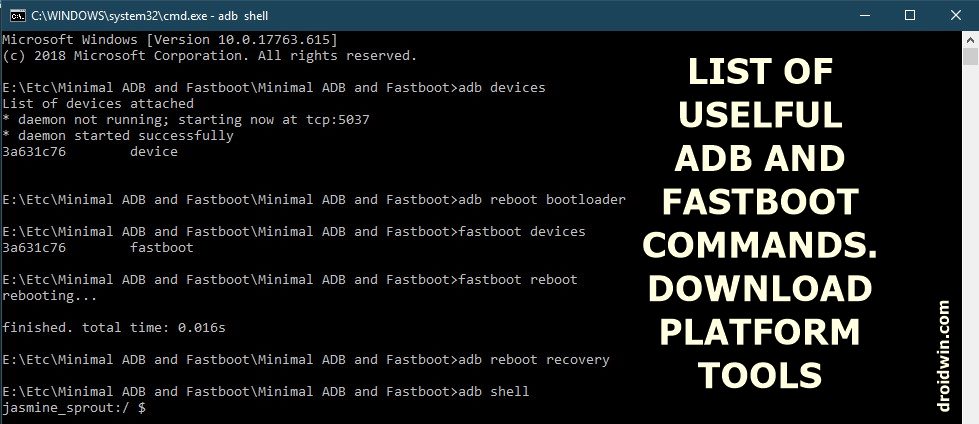
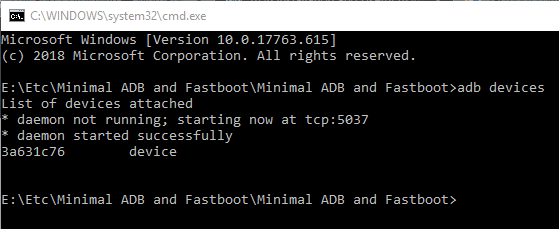
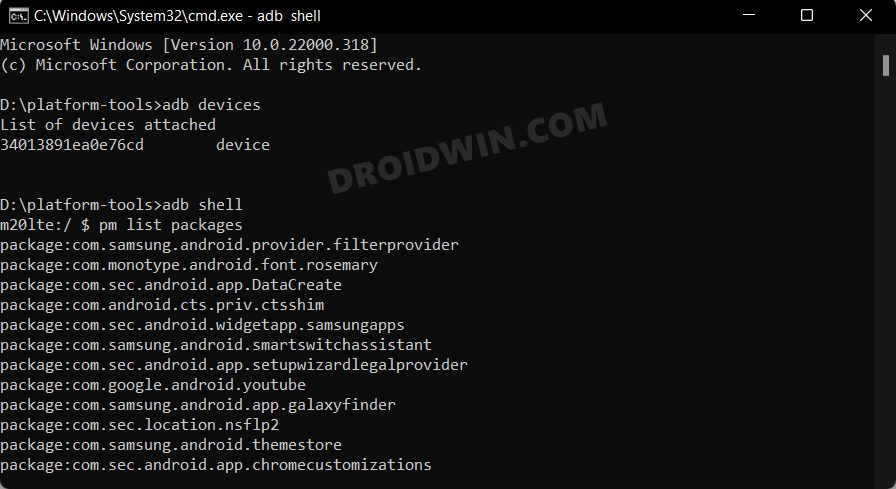
Check ADB Connection
To check whether the device is properly connected and is in ADB, enter the below code. Until you get an alphanumeric code with the word ‘device’ next to it (see screenshot below), you cannot carry out any further operations. Also, make that device is not recognized as ‘unauthorized’. Don’t Miss: Fix Waiting for Device Error in ADB Devices
adb devices
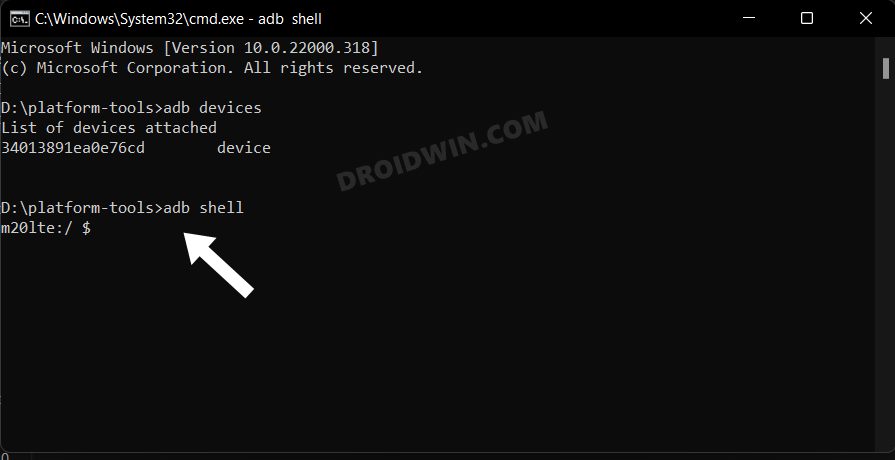
ADB Shell Command
This opens the Shell environment and allows you to carry out tasks that are slightly technical in nature. Well, you could even carry out some root-released tweaks on your non-rooted device using the ADB shell commands.
adb shell
To make sure that the command has been usefully executed, you should see your device name or ID right after entering this command.
Reboot to Bootloader/Fastboot Mode
Use the below command to boot the device to Fastboot or Bootloader Mode. [Read More: How to Boot Android Device to Fastboot Mode]
adb reboot bootloader
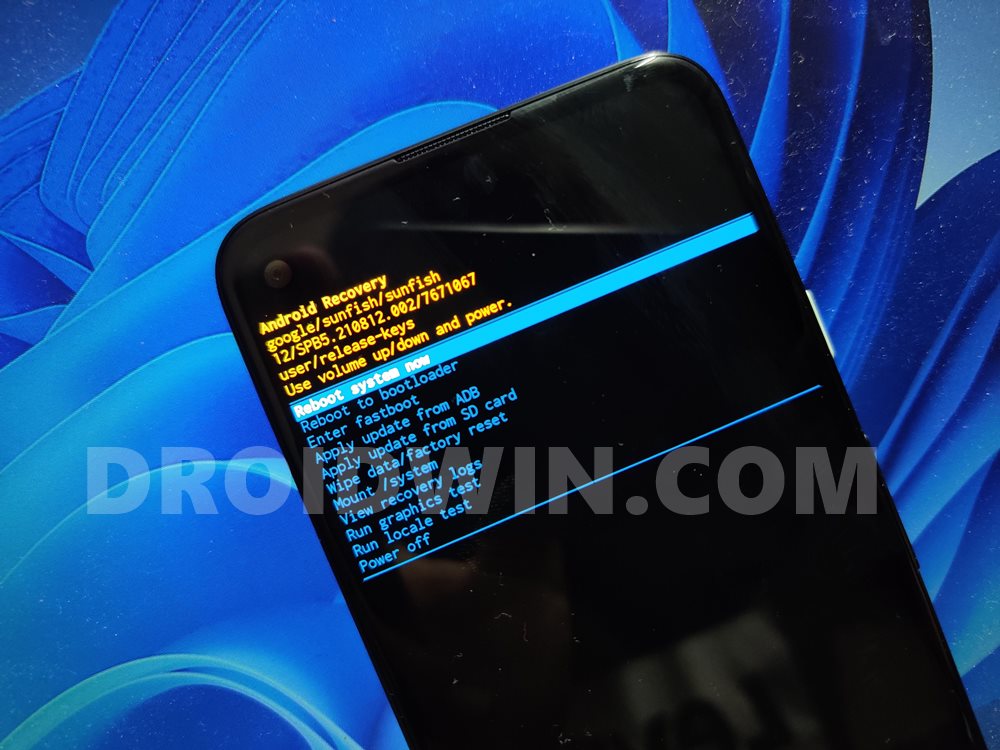
Reboot to TWRP or Stock Recovery
To boot your device to TWRP or stock recovery from the OS, use the below command. [Read More: How to Boot into Recovery (TWRP/Stock)]
adb reboot recovery
Pull Any File via ADB Pull
To ‘pull’ any file from your device and send it over to your PC, enter:
adb pull /file-location-on-device/filename
Push files via ADB Push
Similarly to ‘push’ any file to the device from a PC, type:
adb push filename /location-where-file-is-to-be-sent-on-device
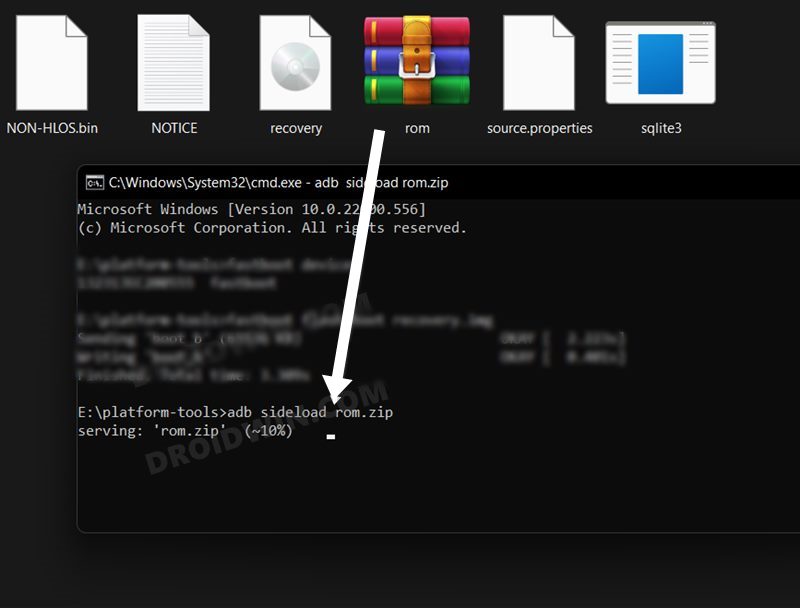
ADB Sideload
Using this command, you could flash (install) ZIP files directly from the command shell. Moroever, you could use it across both the stock and custom recovery like TWRP. [Read More: How to Use ADB Sideload in Android [Stock and TWRP Recovery].
adb sideload filename.zip
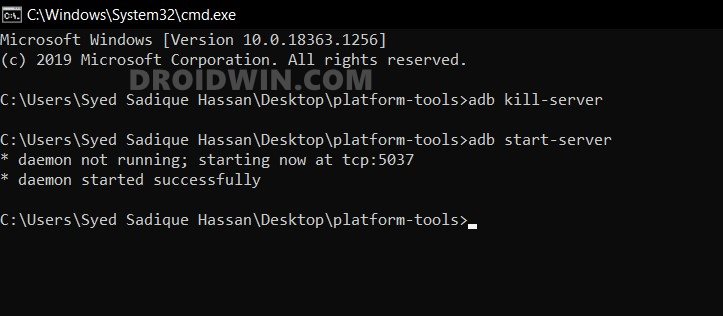
Start ADB Server
When you need to start the ADB server, in case it does not automatically “kills the daemon” and “start on a specific port”, type the below command:
adb start-server
Kill ADB Server
If the command tool gets hanged or is not performing as expected, you may kill the server by entering the below code:
adb kill-server
Install APK via ADB Command
To install an APK file on your device, enter the below command:
adb install filename.apk
Update APK via ADB Command
To reinstall or update an APK, type:
adb install -r filename.apk
Move App to SD Card via ADB
To move the app to sdcard (if supported by your device):
adb install -s filename.apk
Uninstall App via ADB Command
To uninstall an APK file on your device, type:
adb uninstall filename.apk
Check Installed Apps via ADB
To list all the app packages’ name [Read: How to Get App Package Name on Android [3 Methods]
adb shell pm list packages
Check System Apps via ADB
To list all the system apps:
adb shell pm list packages -s
Uninstall System Apps via ADB
To uninstall system apps or any bloatware: [Read: Remove/Uninstall Bloatware Apps from Android via ADB]
adb shell pm uninstall -k –user 0 app-package-name
List All Third Party Apps via ADB
To list third-party apps installed:
adb shell pm list packages -3
Take a Screenshot via ADB
To capture screenshots from your device: [Detailed Guide: How to Take Screenshots in Android via ADB Commands]
adb shell screencap /sdcard/screenshot.png
Then to download the captured screenshot to your PC:
adb pull /sdcard/screenshot.png
Delete File via ADB
To delete a file, type :
adb shell
rm -f /file_location_name
Deleter Folder via ADB
To delete a folder, enter the below code:
adb shell
rm -rR /folder_location_name
Create New Folder via ADB
To create a new folder on your device, type:
adb shell
mkdir /sdcard/NewFolder
Copy Files via ADB
To copy a file from one location and paste it to another location (on your device), type:
adb shell
cp /file_location_name_1 /file_location_name_2
Move Files via ADB
To move a file from one location to another (on your device), enter the below code:
adb shell
mv /file_location_name_1 /file_location_name_2
Most Commonly Used Fastboot Commands
Here are some of the most commonly used as well as the most important Fastboot Commands and their functions.
Reboot to Fastboot Mode
To reboot your device to fastboot or bootloader mode, enter the below code:
adb reboot bootloader
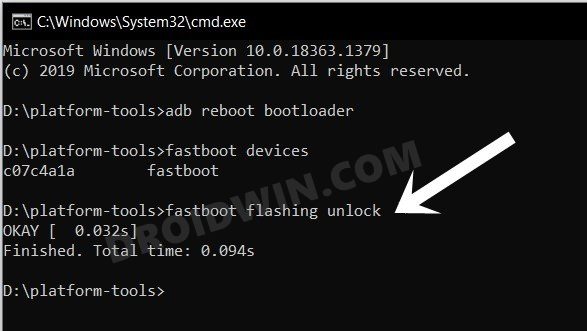
Verify the ADB Connection
Once your device is booted to fastboot mode, enter the below command to check whether the connection is successful or not. If you see an alphanumeric code and the word fastboot written next to it (see screenshot below), it means your device is successfully connected to fastboot mode. Now you may try out other fastboot commands.
fastboot devices

Unlock Bootloader via Fastboot
To unlock the bootloader of your device, type in any of the two codes (make sure ‘OEM Unlocking’ is enabled from the ‘Developer Options). For most devices, the first code works well and fine. However, if that is not the case with you, then go for the second one. Also, note that both of these codes will wipe all your data. Make sure to create a backup before proceeding. Do Read: How to Unlock Bootloader of Any Android Device
fastboot oem unlock
OR
fastboot flashing unlock
Relock Bootloader via Fastboot
To relock the bootloader of your device, enter:
fastboot oem lock
OR
fastboot flashing lock
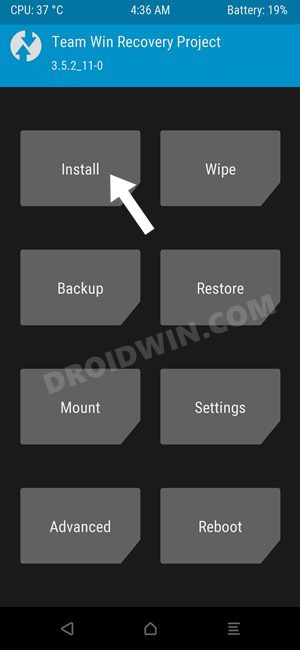
Boot to TWRP via Fastboot
To boot a recovery file on your device, enter the below code: [Read More How to Boot into TWRP Recovery]
fastboot boot recovery twrp.img
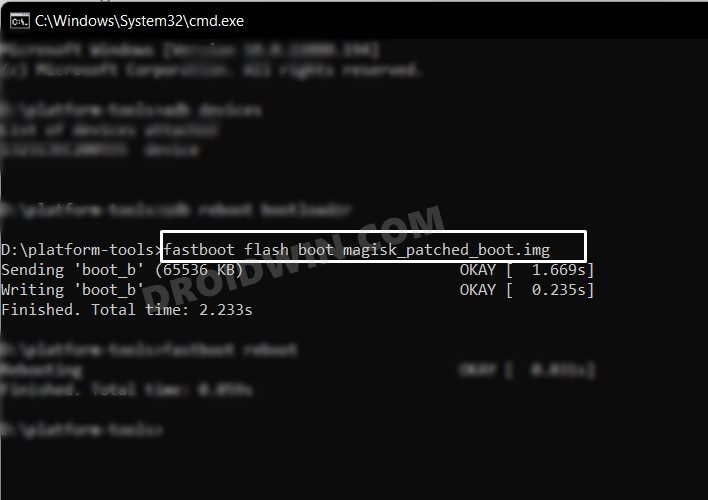
Install File to Boot Partition
To flash (install) a boot file from the command shell, such as flashing magisk patched boot.img, type in the below code:
fastboot flash boot boot-file-name.img
Install TWRP To Recovery Partition
if your device has recovery partition, then use the below command to flash TRP to the recovery partition: [Read More How to Install TWRP Recovery on Android]
fastboot flash recovery recovery-name.img
Install TWRP to Boot partition
If your device does not have a recovery partition, then you will have to flash TWRP in the boot partition, using the below command [Read More TWRP: fastboot flash vs fastboot boot: Which command to use]
fastboot flash boot recovery-name.img
Erase Userdata
To erase all the userdata on your device (i.e.formatting the userdata partition), enter the following code:
fastboot erase userdata
Erase Everything via Fastboot
This will erase everything from your device. Your device will be just as it came out of the box
fastboot -w
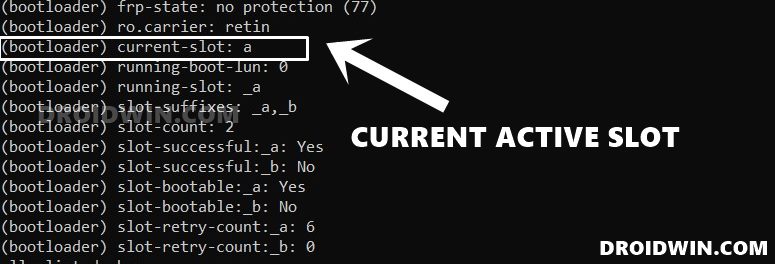
Check Current Active Slot
If you have a dual A/B Partition device, then you could check the current active partition via the following command:
fastboot getvar all
After executing this command, refer to the (bootloader) current-slot: section. [Read More: How to Check and Change Current Active Slot on Android]
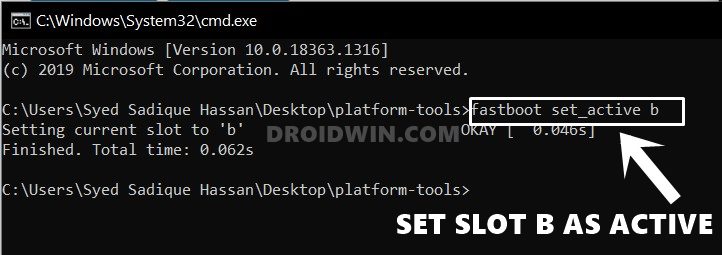
Change Active Partition
If your device is A/B Partition, and you want to switch slots, say from A to B, type the below command: [Read More: How to Check and Change Current Active Slot on Android.]
fastboot set_active b
Reboot to OS from Fastboot
To reboot your device to Android OS, enter the below code:
fastboot reboot

Reboot from Fastboot to Recovery Mode
To Reboot from Fastboot to Recovery Mode, either TWRP or stock, use the below command:
fastboot reboot recovery
fastboot oem reboot-recovery
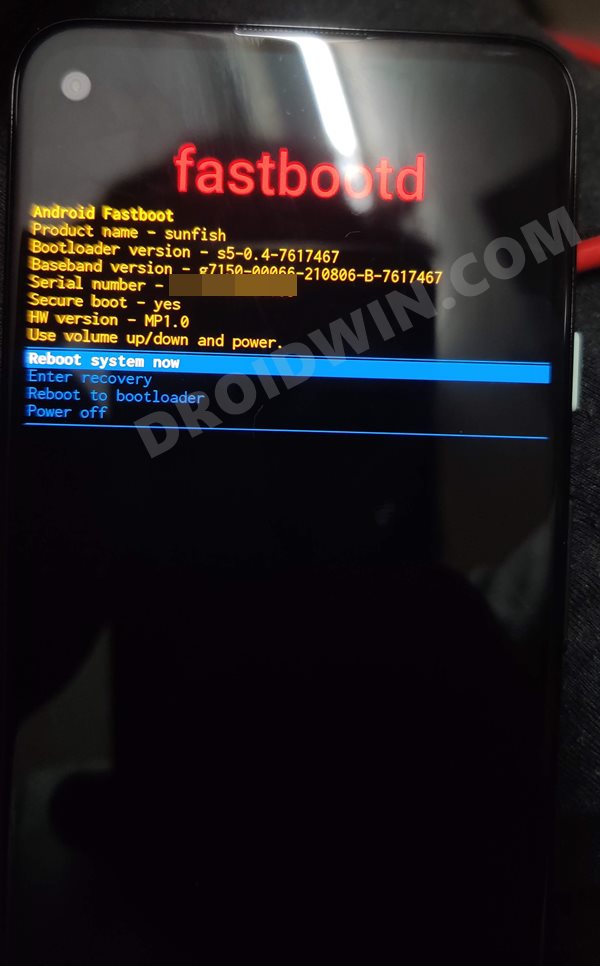
Boot to FastbootD Mode
To boot the device to the newer FastbootD Mode, use the below command. [Read More: What is FastbootD? How to Boot to FastbootD Mode]
From ADB: adb reboot fastboot
From Fastboot Mode: fastboot reboot fastboot
How to Fix All Possible ADB and Fastboot Errors
While on one hand these commands offer a plethora of goodies, on the other hand, they have their fair share of issues as well. Fortunately, each of them could be fixed without much hassle. I have compiled various guides pertaining to all the major ADB and Fastboot Errors as well as the steps to fix them. Likewise, I have also documented a comprehensive guide that acts as a universal guide for all ADB/Fastboot Fixes. So without further ado, let’s check them out:
- A Universal Guide to Fix All Possible ADB and Fastboot Errors [Recommeded]
- Fix Waiting for Device Error in ADB or Fastboot Commands
- Fix adb server version doesn’t match this client; killing.
- How to fix ADB Device not found [List of Devices Attached is blank]
- Detailed Steps to Fix adb is not recognized Error
- How to Fix Unauthorized Device with ADB Commands [3 methods]
- How to Fix Nokia Device Stuck in No Command Screen
- Fix Failed (remote: ‘flashing is not allowed for critical partitions)
- Fix FAILED (remote: Partition should be flashed in fastbootd)
- How to Fix FAILED (remote: Command not allowed)
- Fix fastboot: error: Couldn’t parse partition size ‘0x’
- How to Fix Android Device stuck in Fastboot Mode
That’s it. These were all the important and frequently used ADB and Fastboot Commands. If you have any queries concerning the aforementioned steps, do let us know in the comments. We will get back to you with a solution at the earliest.


Ganapathy
My pixel 4a was working fine until last week and stuck into a fastboot mode loop in the middle of the day for no reason (applied the usual monthly security update one or two days before)! The screen shows:
FastBoot mode
Product revs: sunfish MP1.0 (ROW)
Bootloader revs: s5-0.5-9825683
Baseband revs: g7150-00112-230505-B-10075601
Serial number: 14021XXXnnnnnn
Secure-Boot: PRODUCTION
NOS-production: error
Ddr: 6GB Hynix LPDDR4X
Ufs: 128GB SKHynix
Device-State: error!
Boot-slot: a
Enter Reason: failed to load/verify boot images
On navigating thru volume keys, the options, “Start / Power off / BarCode / Rescue mode / Recovery mode / Restart Bootloader” nothing worked except “BarCode” !!
At this stage, connected my mobile to PC via usb and tried the following command:
C:\Users\Ganpat\AppData\Local\Android\Sdk\platform-tools>adb devices
* daemon not running; starting now at tcp:5037
* daemon started successfully
List of devices attached
C:\Users\Ganpat\AppData\Local\Android\Sdk\platform-tools>
But “fastboot devices” list out my mobile’s serial number!
Now what I wanted is how to take backup of my data (folders like Downloads, Pictures, DCIM, etc… )? Is it possible to take backup of our data using fastboot commands?
Kindly guide,
Thanks
Ganapathy
Uzair
My device is not recognised in fastboot mode on platform tools, miflash tools, etc
Also i dont see my phone in Device manager.
I installed various drivers and was able to find my device in device manager under the name Andriod but when i go to fastboot mode it (Andriod in device manager) vanishes.
CuriousRussian
Could you also advise on this command:
fastboot wipe-super super_empty.img
What it actually does. Does it work on locked devices?
Why system doesn’t boot after switching slot to inactive and how can i fix it? More fixes for loocked bootloaders..
Sadique Hassan
Hi mate, I’m not exactly sure about this command but by looking at the command, we are wiping the super partition to make way for the super.img from another firmware. As of now, I have seen the practical application of this command while flashing Pixel Experience ROM on OnePlus 9RT and Mi A2 and Lineage ROM on Mi 9 and 8 series. Moroever, you cannot flash this super.img [or any file for that matter] on a locked bootloader.
sachin
Hi,
i have query
can we per define the screen recording time period or length of screen recording .
if yes then please share the procedure
Ahsan Saigal
Just a basic question, A bricked Redmi note 9 pro and A Redmi note 9 s . both on bootloop and both were not bootloader enabled before they got bricked .
any solution on how to enable bootloader on bricked devices ?
Marc
Hi,
I’m able to issue ADB commands to my ASUS TF201, already in unlocked bootloader. Fastboot fails, as device is not recognized.
I fail to understand what the cause might be…ADB can reboot into bootloader mode, just before selecting RCK, Android or WipeData.
But from then on, Fastboot commands do nothing. As if the device is not seen by my PC….
What should I do now?
Thanks!
Sadique Hassan
Hi Marc, could you please install the Google’s Android Bootloader Interface Drivers and let me know the results.
محمد
hi
i test your ways that say on this topic
l have a redmi note 10 s . icant install twrp on my phone. in last try in cmd shoe me this : error the imulator not detect .
i dont know what do
Clive
Hello Sadique Hassan,
May I first congratulate you on an excellent set of instructions for adb/fastboot. Your articles are definitely the clearest and easiest to follow I have seen! Thanks!
Now I have a question:
I’m using an Acer Iconia One 8 tablet, model B1-850 running Android 5.1, and also using the original power/data-transfer cable it came with, NOT a cheap alternative. All your instructions worked exactly as described! I was able to do various things on the tablet with adb commands and also reboot it into recovery mode. However, the command “adb reboot bootloader” did NOT put the tablet into fastboot mode as expected, it just turned it off. No restart, it just shutdown. Why? Is there something else I was supposed to do first?
I tried unlocking the bootloader in the developer options menu on the tablet, but that made no difference. Then I thought it could be a driver problem so I installed the Acer drivers downloaded from their official website, but that also made no difference. Then I tired the Android bootloader interface drivers as described in one of your other posts, which also made no difference.
So why doesn’t it go into fastboot mode as expected if all other adb commands work correctly? I’ve had this tablet for 4 years and it’s never failed once. It is NOT rooted, is that necessary first perhaps? Would an OTG interface cable instead of the original one it came with make any difference?
Thanks for your help in advance! Clive.
Kaiser
Sadique Hassan, I cannot begin to tell you how much I really enjoy reading your articles, your knowledge is quite impeccable and I have learned a great deal from them, from my side of the world, Thank you so much!!
Paul
I have an alcatel 5002H_EEA and i cant unlock the bootloader I’ve managed to get to fastboot mode with oem unlock and usb debugging on and neither command, fastboot oem unlock nor fastboot flashing unlock work what can I do?
Ismail
Hello Sir, please tell me that my mobile “Vivo 1601” is able to bootloader unlock…thanking you for very informative website agin
afzal
hello, sir how can I fix this error? failed (remote: partition does not exist) please
Sadique Hassan
Hi Afzal could you please let me the command that you have executed? And also the device on which you are using these commands.
Chris nsa
This is the best, well explained adb and fastboot commands ever
Sadique Hassan
Thanks, Chris for the Appreciation.
Orange Dive 73 16GB Black
It’s a shame you don’t have a donate button! I’d certainly
donate to this superb blog! I suppose for now i’ll settle for bookmarking and adding your RSS feed to my Google account.
I look forward to fresh updates and will share this site with
my Facebook group. Talk soon!
SHAIK SHAFI
Hello sir you are number
Sadique Hassan
Thanks a lot for these encouraging words. Your valuable views and feedback for this site more than compensate for the donations!
sahikh
having issue with device i can only access fastboot not able to boot the device with its os
i tried but boot loader is locked
any way to unlock oem
Veetz
Please help. I opened up a powershell through odin and I entered the command “adb devices” and got adb server version (39) doesn’t match this client (41); killing…
*daemon started successfully
List of devices attached
(Serial number) recovery
I’m trying to sideload magisk. Please help. I’m still learning as this is my first time rooting a phone.
Sadique Hassan
Hi Veetz, It’s because you have two instances of ADB installed on your PC. Do you have Android Studio installed as well? Because it’s looking that the Studio’s ADB binaries are conflicting with the Android SDK one. If you don’t have it, then try removing one instance of ADB from the environmental variables path.