In this guide, we will show you the steps to fix the FAILED (remote: ‘Flashing is not allowed for Critical Partitions) error. When it comes to making full use of the open-source ecosystem, there exists a plethora of options tech enthusiasts could get inclined to. These include the likes of replacing the device’s stock recovery with a custom one such as TWRP, flashing customized Android ROMs, or gaining access to the system partition. The last one is achieved by rooting your device using Magisk via patching and flashing the stock boot.img, or flashing the Magisk Installer ZIP.
But to carry out any of these tweaks, there is a major requirement you need to checkmark- an unlocked bootloader. Until and unless you do so, you wouldn’t be able to flash any custom binary onto your device. But even when you do so, you still haven’t got access to flash files to the partition on your device. And this restriction leads to the FAILED (remote: ‘Flashing is not allowed for Critical Partitions) error. Let’s try and understand this problem in-depth and then we will show you how to fix it.
Table of Contents
The Reason for Failed (remote: ‘flashing is not allowed for critical partitions)
UPDATE: The primary reason why you are getting this error is you are flashing a file in Fastboot Mode [Bootloader] although it is intended to be flashed in FastbootD Mode. The secondary reason is explained below.
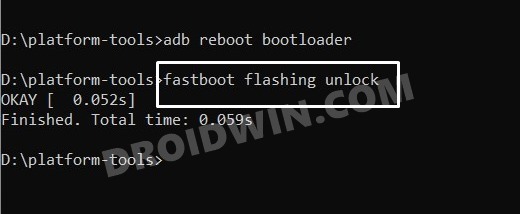
So here is what really happens. When you unlock the device’s bootloader via fastboot oem unlock or fastboot flashing unlock, you have the option to flash custom binaries. However, if you try and flash stock firmware files to their respective partitions via Fastboot Commands, then chances are you might not be able to do so. For example, if you are using fastboot flash vbmeta vbmeta.img (to disable AVB while flashing Android 12 GSI), you are instructing your device to flash the vbmeta IMG file to its dedicated vbmeta slot.
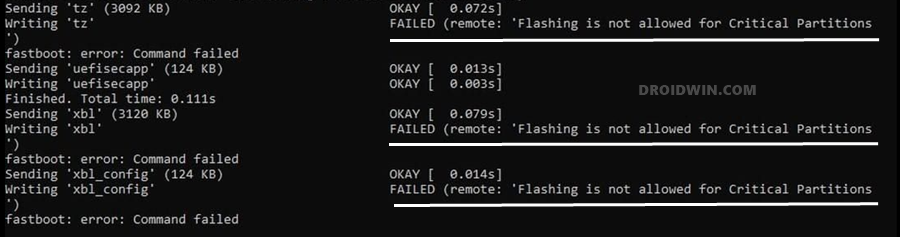
Likewise, you could also get this error while flashing the Xiaomi firmware via Mi Flash Tool. But since your partitions are locked, the files wouldn’t be able to flash to the said partition. And this is the reason why you would get the aforementioned error. While the error message doesn’t give us any hint about the fix, but it at least lists out the issue in a well-defined manner. With that said, the fix for the FAILED (remote: ‘Flashing is not allowed for Critical Partitions) error is quite easy to execute. So without further ado, let’s check it out.
How to Fix Failed (remote: ‘flashing is not allowed for critical partitions)
Do keep in mind that the below process will wipe off all the data from your device, so take a complete backup beforehand. Furthermore, your device’s warranty might become null and void (after unlocking bootloader/partitions). Droidwin and its members wouldn’t be held responsible in case of a thermonuclear war, your alarm doesn’t wake you up, or if anything happens to your device and data by performing the below steps.
FIX 1: Flash File in FastbootD Mode
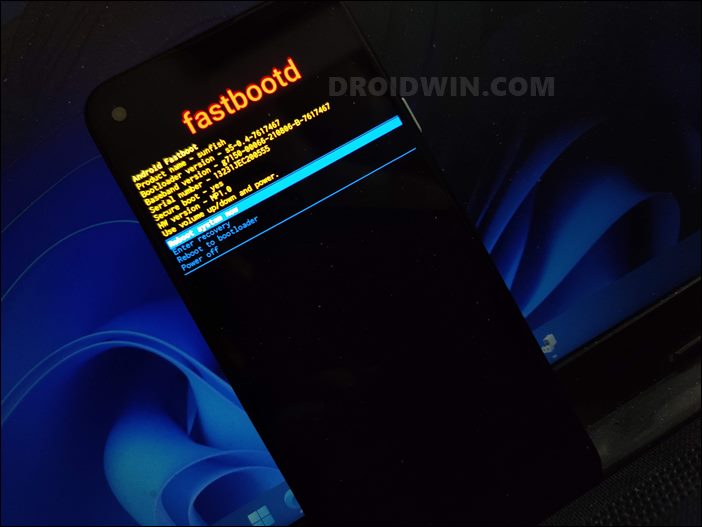
The biggest culprit behind this issue is the fact that you are flashing a file in Fastboot/Bootloader Mode although it is intended to be flashed in FastbootD Mode. So boot your device to FastbootD using this detailed guide or the shorter instructions listed below and then retry flashing the file, you will no longer get the FAILED (remote: ‘Flashing is not allowed for Critical Partitions) error.
- Boot to FastbootD from ADB Mode
adb reboot fastboot
- Boot to FastbootD from Fastboot Mode:
fastboot reboot fastboot
- Boot to FastbootD from Recovery Mode:
Use the Volume Keys to highlight the Enter Fastboot option and press the Power key to confirm.
FIX 2: Unlock Critical Partitions
The below instructions are listed under separate sections for ease of understanding. Make sure to follow the same sequence as mentioned.
STEP 1: Enable USB Debugging and OEM Unlock
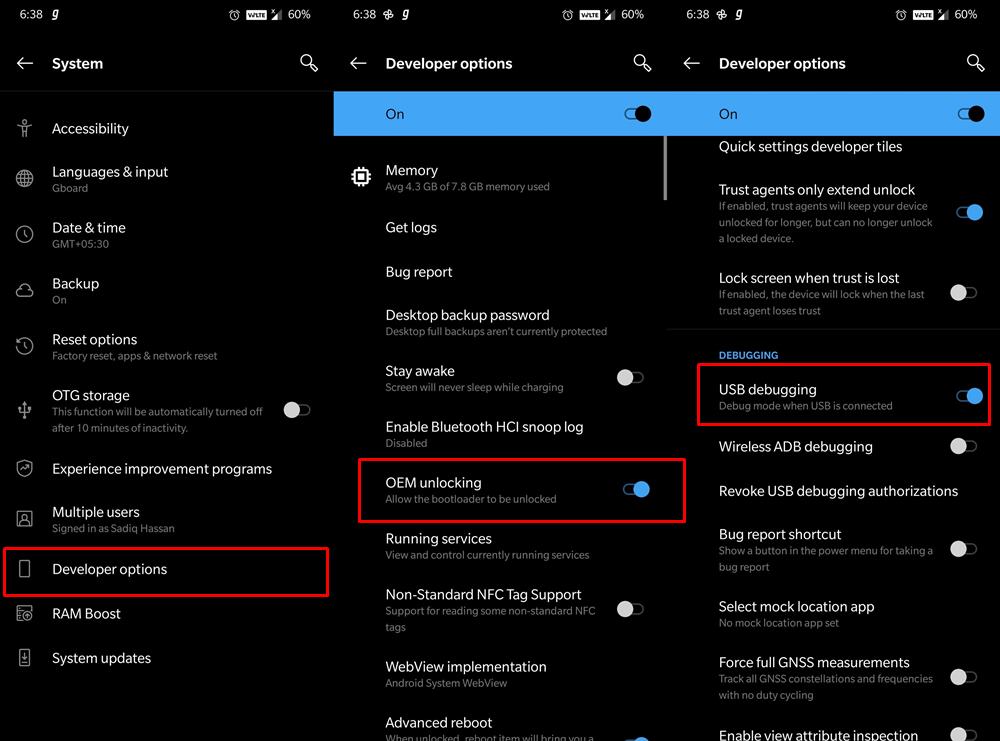
First and foremost, enable USB Debugging on your device. This is required so that your PC is able to interact with the device in ADB Mode. This mode will then be used to boot the device to Fastboot Mode. On the other hand, OEM Unlock is needed to unlock the device’s bootloader. So head over to Settings > About Phone > Tap on Build Number 7 times > Go back to Settings > System > Advanced > Developer Options > Enable USB Debugging and OEM Unlocking.
STEP 2: Install Android SDK
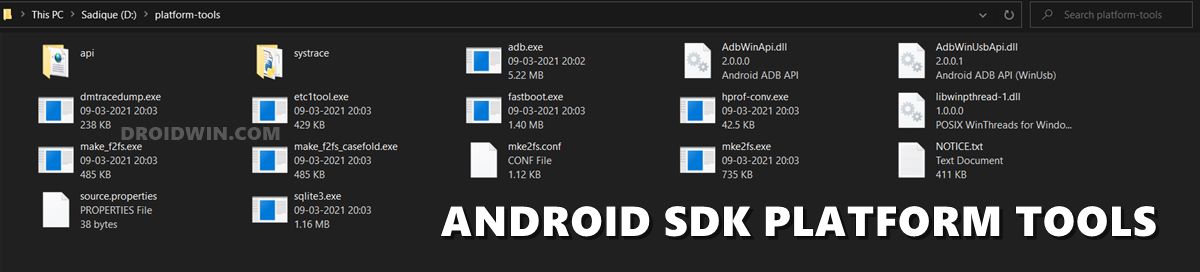
You will also have to install the Android SDK Platform Tools on your PC. This is the official ADB and Fastboot binary provided by Google and is the only recommended one. So download it and then extract it to any convenient location on your PC. Doing so will give you the platform-tools folder, which will be used throughout this guide to fix the FAILED (remote: ‘Flashing is not allowed for Critical Partitions) error.
STEP 3: Unlock Bootloader
Next up, you will have to unlock the bootloader on your device. If you haven’t done so yet, then please refer to our below guides corresponding to your device:
- How to Unlock Bootloader on any Sony Xperia Device
- How to Unlock Bootloader on any Samsung Device [New VaultKeeper Method]
- A Universal Guide to Unlock Bootloader on any Realme Device
- How to Unlock Bootloader on any Motorola Device
- Unlock Bootloader on any Realme Device
- How To Unlock Bootloader on OnePlus Devices
STEP 4: Unlock Critical Partitions via Fastboot Commands
It’s now time to unlock all the critical partitions on your device. For that, we will only be using a single Fastboot Command! Follow along.
- To begin with, connect your device to the PC via USB cable. Make sure USB Debugging is enabled.
- Then head over to the platform-tools folder, type in CMD in the address bar, and hit Enter. This will launch the Command Prompt.

- Type in the following command in the CMD window to boot your device to Fastboot Mode
adb reboot bootloader
- Now finally execute the below command to unlock the critical partitions:
fastboot flashing unlock_critical
- That’s it. You may now reboot your device to the OS via the following command:
fastboot reboot

So this was all from this guide on how to fix the FAILED (remote: ‘Flashing is not allowed for Critical Partitions) error. If you have any queries concerning the aforementioned steps, do let us know in the comments. We will get back to you with a solution at the earliest.
- Fix adb server version doesn’t match this client; killing.
- How to fix ADB Device not found [List of Devices Attached is blank]
- Detailed Steps to Fix adb is not recognized Error
- How to Fix FAILED (remote: Command not allowed)
- Fix FAILED (remote: ‘Slot Change is not allowed in Lock State’)
- How to Fix FAILED (remote: unknown command) Error
- How to fix FAILED (status read failed (Too many links))


Erling
I always get this message:
fastboot flashing unlock_critical
…
FAILED (remote: Device cannot be unlocked for technical reason.)
finished. total time: 0.008s
same with “fastboot oem unlock”.
giorgi
bro please create a video tutorial in youttube (
sergio
I have the same problem, did you manage to find a solution?
Justin Benjamin
When attempting to write an image, it says “FAILED (remote: Flashing is not allowed for critical partition”
But when I follow your instructions to unlock the critical, this is what happens: fastboot flashing unlock_critical
FAILED (remote ‘Device already : unlocked!’)
How do I fix? do I have to re-lock the device and unlock it or again, or does my solution lie elsewhere?
I would post screenshots but the comments interface doesn’t allow for it.
Nitin
If you are trying to install Stock OS on Oneplus, then make sure you are on fastbootd mode -‘fastboot reboot fastboot’ takes you to fastbootd mode(looks like stock recovery) and run the further commands here.
(follow this guide
https://forum.xda-developers.com/t/guide-unbrick-or-restore-to-oos-using-only-fastboot.4289013/)
i guess youre getting critical error coz youre not on fastbootd mode
sergio
I have the same problem, did you manage to find a solution?
Keith
When I try the command I receive a message “FAILED (remote: ‘Device already : unlocked!’)” I tried to flash again and received the “FAILED (remote: ‘Flashing is not allowed for Critical Partitions” message again.
Noam
I have Asus Rog phone 3 with android 10 a/b partitions and System As Root unlocked bootloader. I wonder if I can use it to unlock my partitions. THANKS.
Sadique Hassan
Hi Noam, true to my knowledge, the fastboot flashing unlock_critical command is applicable across all OEMs. But I haven’t yet personally tried it onto any Asus device as of nw. If you are willing to try it, then please let us know the results in the comments section as well. Thanks.