In this guide, we will show you the steps to unbrick your Samsung device by flashing the stock firmware via Odin. Samsung devices have strayed away from the normal conventions. Be it for unlocking the bootloader (fastboot command vs VaultKeeper), flashing firmware (fastboot commands vs device-specific tool), Download Mode vs Fastboot Mode, rooting via the patched boot.img vs rooting via patched AP or boot.img.lz4 and the list goes on.
But in spite of the complexities involved, one cannot neglect the fact that it is among the most active players in custom development. Once you have bypassed the sole restriction of a locked bootloader, there are a plethora of tweaks to try out. These include the likes of flashing custom ROMs, installing custom recovery, or trying out mods such as Magisk Modules, Xposed Framework, Substratum Themes, etc.
However, each of these tweaks comes with an associated risk as well. If you don’t flash them as per the documented instructions or flash them onto the incorrect partition, then you are inviting trouble. And the fact that Samsung has already put in place various restrictive measures like VaultKeeper, Prenormal RMM State, DEFEX, and KNOX only makes the matter worse.
More often than not, they might conflict with the flashing of custom binary and could send your device to a bootloop or bricked state. However, there’s still a silver lining in the dark clouds. You could easily flash the stock firmware via Odin and unbrick your Samsung device. And this guide will show you the steps for just that. So without further ado, let’s get started.
Table of Contents
Unbrick Samsung | Flash Stock Firmware via Odin
The below instructions are listed under separate sections for ease of understanding. Make sure to follow in the exact same sequence as mentioned. Furthermore, you could also use these instructions if Droidwin and its members wouldn’t be held responsible in case of a thermonuclear war, your alarm doesn’t wake you up, or if anything happens to your device and data by performing the below steps.
- Download TWRP for All Samsung Devices (ODIN Installation Steps Included)
- How to Patch Samsung AP Firmware via Magisk
- Flash magisk_patched.tar (patched Samsung AP file) via Odin
- How to Boot Rooted Samsung to Recovery Mode and Rooted OS
Download Samsung USB Drivers
To begin with, download the official Samsung USB Drivers onto your PC. This is needed so that your device would be recognized by your PC. Once downloaded, launch the setup file and proceed with the on-screen instructions to install it onto your PC. Download: Samsung_USB_Drivers.exe
Install Odin
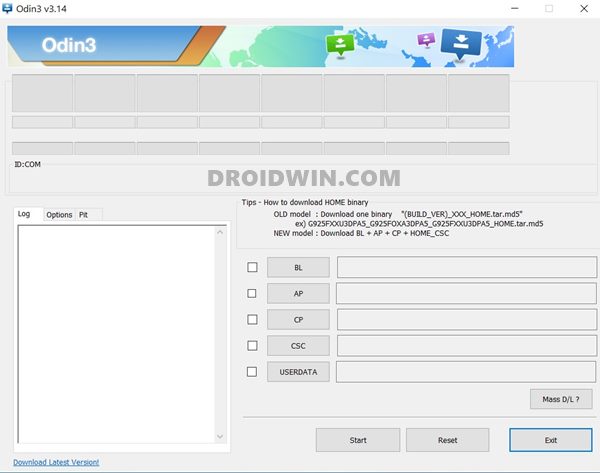
Download and install the Odin Tool onto your PC. This will be used to flash the stock firmware onto your Samsung device and hence unbrick it. Download: Odin3-v3.14.4.zip. Once downloaded, extract it to any convenient location on your PC.
Download Samsung Stock Firmware
Next up, you will have to download the stock firmware for your device. For that, you may refer to our guide to Download Samsung Stock Firmware/ROM via Frija Tool. This linked guide also lists out the steps to check your device’s CSC Number, which would be needed for downloading firmware from Frija or sites like samfw.com or SamMobile.
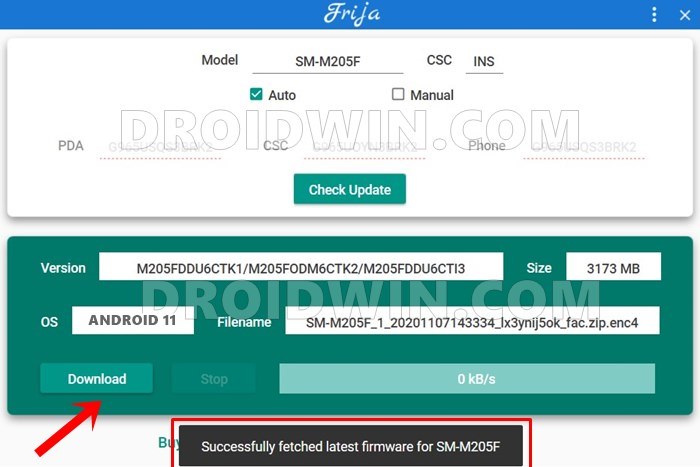
Talking about sites, if you are looking to download and flash an older build (perform a downgrade), then you would have to do so via the site. This is because Frija Tool only provides the latest firmwares. Well, you could even use Samloader for Android and download firmware without the need for the PC.
Extract Samsung Stock Firmware
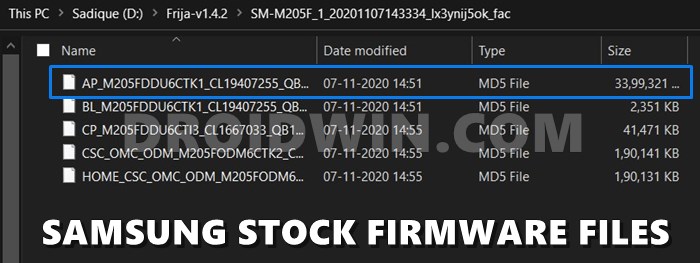
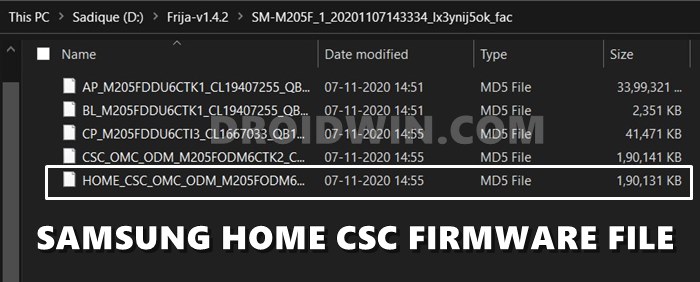
Once you have downloaded the firmware, extract it using any extraction software (WinZip, WinRAR, 7ZIP, etc). Upon extracting it, you should get the following files: AP, BL, CP, CSC, and HOME_CSC. All these files will be in .tar.md5 format.
Boot Samsung Device to Download Mode
Once you have the required firmware, it’s time to boot your device to Download Mode. This is needed so that the Odin Tool recognizes your Samsung device which in turn will allow you to flash stock firmware and unbrick your device. So please refer to our guide on How to Boot any Samsung Device to Download Mode. Here are the shorter instructions:
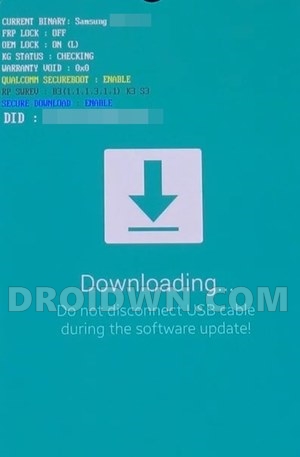
- Power off your device
- Press Volume Up and Volume Down keys
- Release the keys on Bootloader Screen
- Then hit the Volume Up key to enter Download Mode.
If that doesn’t work out, then try these combinations:
- Press and hold the Volume Down + Bixby + Power keys.
- Keep holding these three keys for around 5 seconds.
- Once you see the warning screen, press the Volume Up key to boot to Download Mode.
Now that it is booted to Download Mode, proceed with the next set of instructions to flash stock firmware via Odin and unbrick your device.
Flash Stock Firmware via Odin | Unbrick Samsung
- To begin with, connect your device to the PC via USB cable (make sure that it is booted to Download Mode).
- Then head over to the folder where you have extracted Odin and double click on its EXE file to launch the tool.
- You should see the ID: COM section being highlighted with a COM number. This indicates that the tool has successfully identified your device in Download Mode.

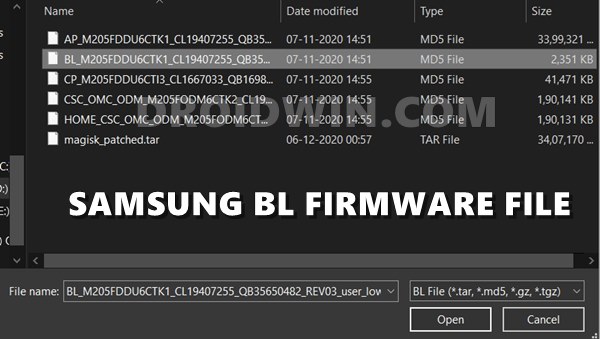
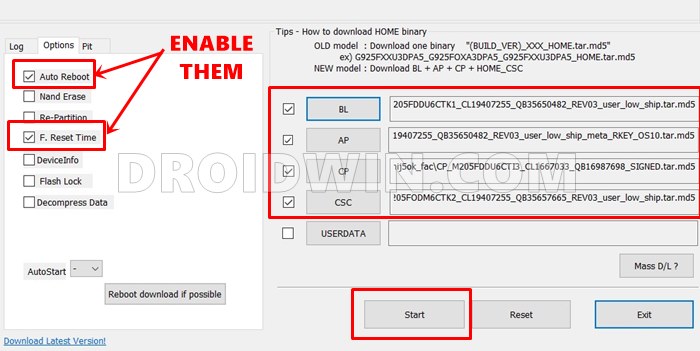
- First off, click on the BL button and upload the BL Firmware file.

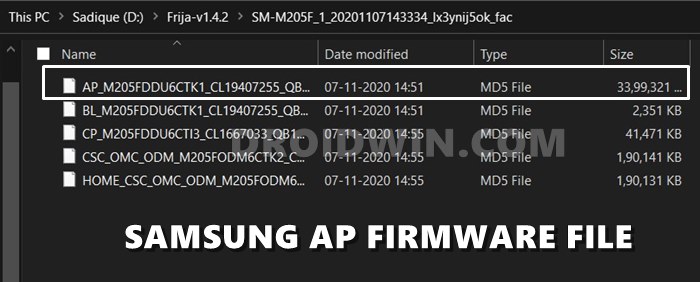
- Then click on the AP button and upload the AP Firmware file (it might take a minute or two, so please be patient).

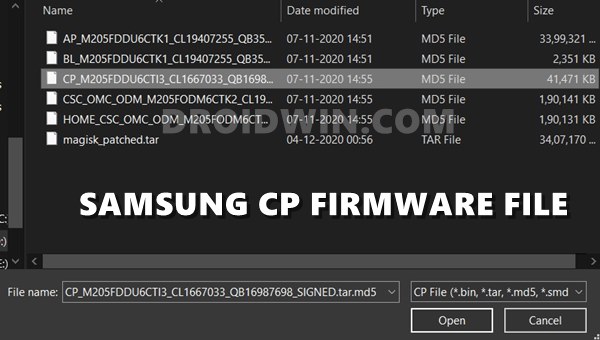
- After this, click on CP and upload the CP firmware file.

- Finally, click on CSC and upload the Home CSC firmware file.

- Once you have loaded all four files, go to the Options section and check-mark Auto Reboot and F.Reset Time.

- When that is done, click on the Start button. The flashing process will now begin and should take a few minutes.
- Once done, you should get the PASS message and your device will then automatically reboot.

- You may now remove your device from the PC and close Odin.
That’s it. These were the steps to flash the stock firmware via Odin and unbrick your Samsung device. If you have any queries, do let us know in the comments section below. We will get back to you with a solution at the earliest.
- How to Nand Erase and Re-Partition Samsung via Odin
- Extract PIT File from Samsung Firmware: Unbrick Guide
- How to Create Samsung Combination Firmware and Flash it via Odin
- How to Install Android 11 (OneUI 3.0) on any Samsung Phone via Odin
FAQs: Fixing Bootloop in Samsung Devices
Here are some other methods that might come in handy if you are looking to unbrick your Samsung device or fix Bootloop. Let’s check them out:
Fix Samsung Device stuck in No Command Screen
This is among the most common issues that a Samsung user faces. Fortunately, the fix for the same is pretty simple- you only need to wipe the data and cache from the stock recovery. Here’s how it could be done:

- To begin with, power off your device.
- Then press and hold the Volume Up + Home (or Bixby) + Power keys together for a few seconds.
- You shall now be taken to the ‘No command’ screen,
- At this screen, hold the Power key and press the Volume Up button once.
- Your device shall now boot to the stock recovery.
- Use the Volume Keys to select the Wipe data/factory reset option and hit the Power key to confirm it.
Flashing Only AP Firmware File via Odin to Fix Samsung Bootloop
Some users have also said that they were able to fix bootloop on their Samsung S8 and S8+ devices by just flashing the AP file via Odin. In other words, they extracted the firmware and only loaded the AP File (and left the BL, CP, and CSC fields). However, I haven’t tested this method, but judging by the success rate, it seems worth a try. And if you are willing to do so, then please share your results with us in the comments as well, it would be highly appreciated.
Fix Prenormal KG/RMM state
If you are unable to unlock the bootloader or flash custom binary because of the Prenormal KG/RMM state being triggered, then there’s a fix available. Please refer to our detailed guide to rectify this issue: How to Fix Samsung Bootloop due to Prenormal KG/RMM state.
As of now, this is all from this section on how to flash stock firmware via Odin and unbrick Samsung/fix bootloop. We will continuously update this section with more fixes as and when we get hold of the same and then test it on our devices.




Aurelian Draghia
Hi! Even I followed all the steps, the firware thaht I endup to is the same from Telekom. I yhink this method is not able to bypas FRP set by mobile carrier. What do you think? I even used Marvel GSM Tool for FRP restart, but it didn’t worked.