In this guide, we will show you the steps to root your device running Android 15 via Magisk Patched Init_boot or boot.img file. The Silicon Valley giant has recently rolled out the fifteenth iteration of the OS. And with that, there are a slew of intriguing features to look forward to. Some of the noteworthy ones include the likes of Private Space, Notification Cooldown, Lock Screen widgets, Battery Health Percentage, App Archive, and the Bluetooth Quick Settings menu.
Likewise, if we turn our attention toward custom development, then there are a plethora of goodies for tech enthusiasts as well. However, it goes without saying that the ability to gain administrative privileges by rooting their Android 15 device via Magisk via Magisk patched boot/init_boot has always been the top of the priority queue for the masses. So in this guide, we will make you aware of the steps through which you could get this job done with ease. Follow along.
Table of Contents
Benefits and Risks of Rooting Android 15

Once you root your device, you will be in a position to flash a plethora of mods. These include the likes of Fox Magisk Modules, Substratum Themes, Xposed Framework via LSPosed, and Viper4Android among others. Along the same lines, you could also flash a custom kernel and implement your desired CPU profile. However, such tweaks do come with a few risks as well.
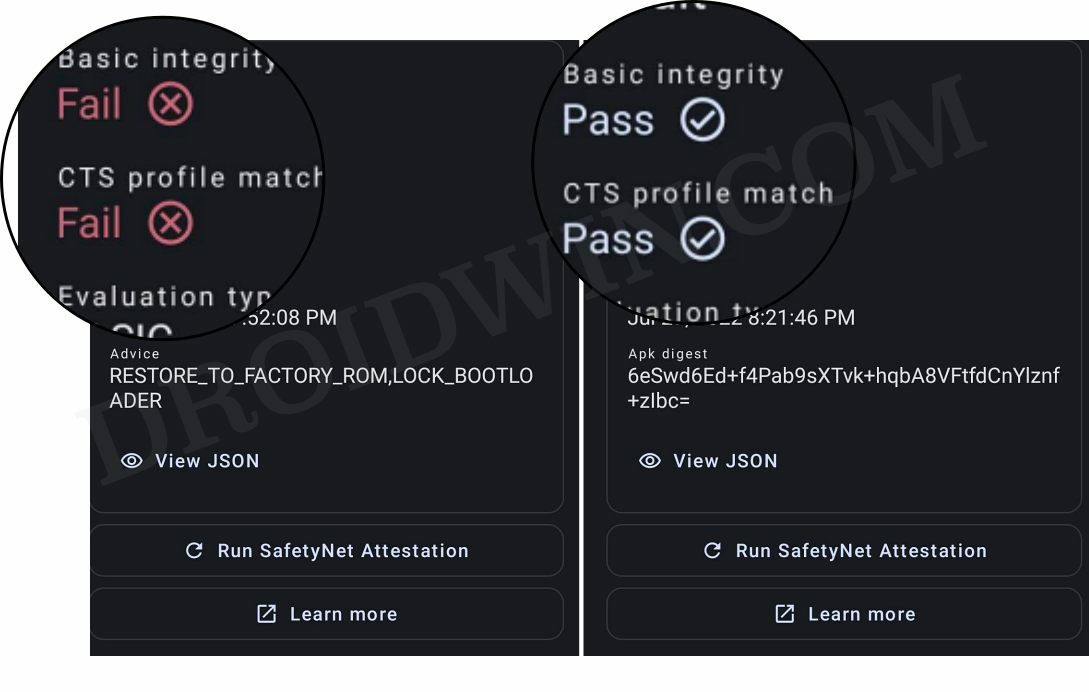
Rooting requires you to unlock the bootloader- which will wipe off all the data and could nullify the warranty as well. Likewise, SafetyNet will be triggered [FIXED] and Play Integrity will fail [FIXED] which will result in your inability to use banking apps [FIXED]. So if that’s all well and good, then let’s get started with the steps to root your Android 15 device via the Magisk.
How to Root Android 15 via Magisk Patched Boot/Init_Boot
The below instructions are listed under separate sections for ease of understanding. Make sure to follow in the exact same sequence as mentioned [Before starting, it is highly recommended that you go through our FAQ 1]. Droidwin and its members wouldn’t be held responsible in case of a thermonuclear war, your alarm doesn’t wake you up, or if anything happens to your device and data by performing the below steps.
STEP 1: Install Android SDK

First and foremost, you will have to install the Android SDK Platform Tools on your PC. This is the official ADB and Fastboot binary provided by Google and is the only recommended one. So download it and then extract it to any convenient location on your PC. Doing so will give you the platform-tools folder, which will be used throughout this guide.
STEP 2: Enable USB Debugging and OEM Unlocking
Next up, you will also have to enable USB Debugging and OEM Unlocking on your device. The former will make your device recognizable by the PC in ADB mode. This will then allow you to boot your device to Fastboot Mode. On the other hand, OEM Unlocking is required to carry out the bootloader unlocking process.
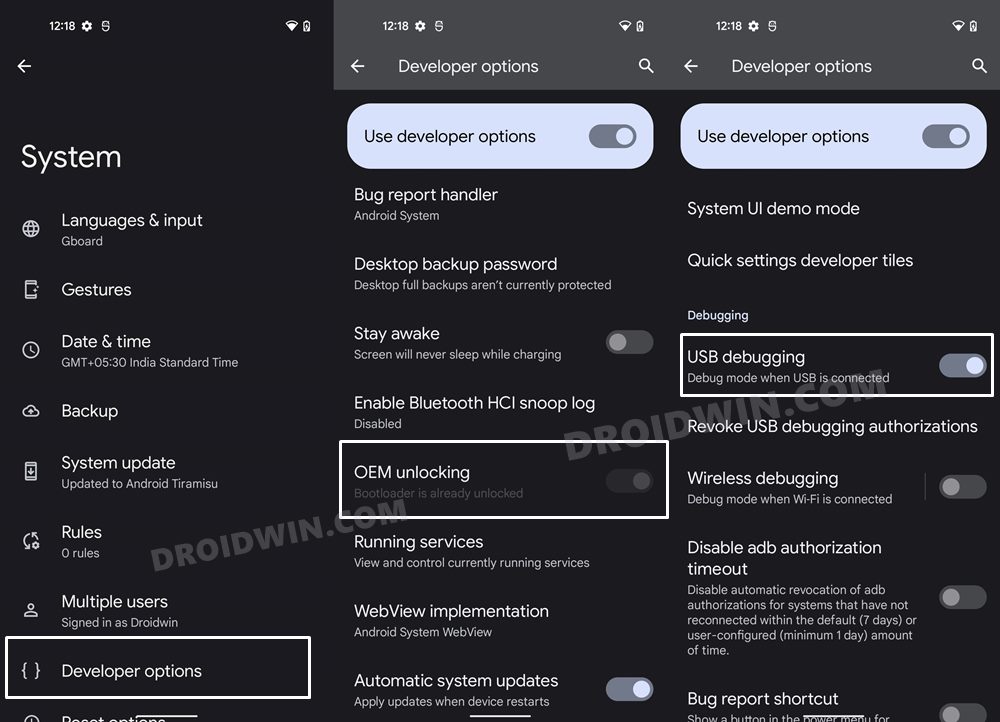
So head over to Settings > About Phone > Tap on Build Number 7 times > Go back to Settings > System > Advanced > Developer Options > Enable USB Debugging and OEM Unlocking.
STEP 3: Unlock Bootloader
Next up, you will also have to unlock the device’s bootloader. Do keep in mind that doing so will wipe off all the data from your device and could nullify its warranty as well. So if that’s all well and good, then please refer to our detailed guide on How to Unlock Bootloader on any Android Device.
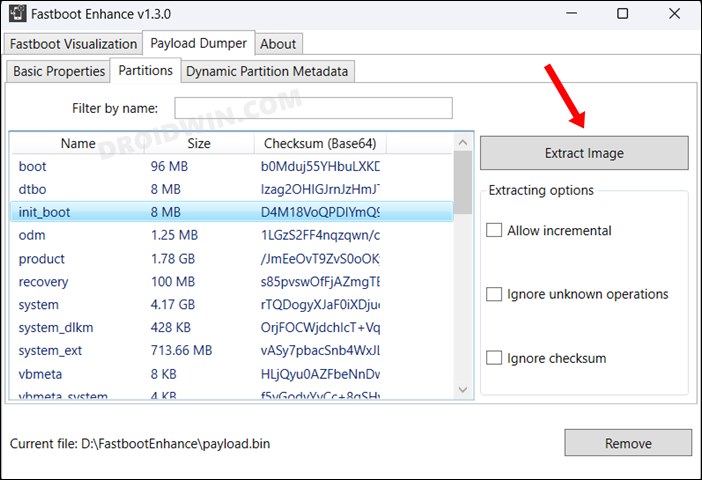
STEP 4: Extract Stock Boot/Init_Boot
If your device shipped with Android 12 or older version out of the box, then you’ll have to use the boot.img and patch and flash it via Magisk. On the other hand, if the device comes with Android 13 or higher versions, then you should use the init_boot.img [both these methods are explained in this guide].
- To begin with, download the stock firmware [factory image] for your device.
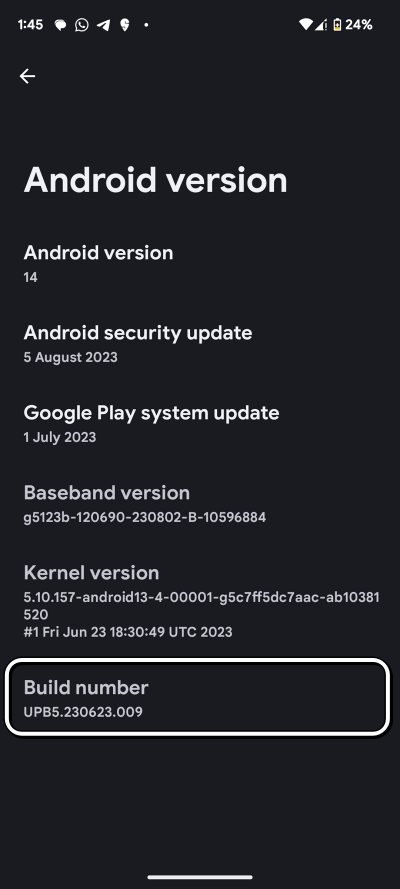
- Make sure to download the same version that is currently installed on your device. To check the same, head over to Settings > About Phone > Build Number.

- Once downloaded, extract it to any convenient location on your PC.
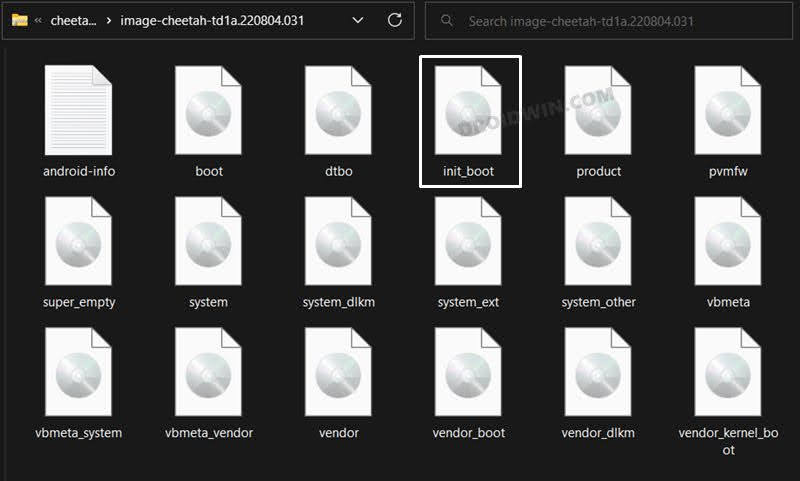
- For Pixel devices, you can simply extract the firmware via WinZIP/WinRAR and get the boot.img/init_boot from the Images folder.
- Likewise, for Xiaomi, download the Fastboot ROM and extract the TGZ followed by TAR folders to get to the Images folder from wherein you can get the boot/init_boot file.
- However, for other OEMs, things are a little bit different. So refer to your device-specific guides to extract the stock boot/init_boot file for your device from the below links:
- Once you have extracted the firmware, copy the boot.img file [if your device shipped with Android 12 or older] or init_boot.img [if your device shipped with Android 13/14/15 out of the box] and transfer it to your device. [See FAQ 1 for more details].
STEP 5: Patch Boot/Init_boot via Magisk
NOTE: The steps to patch the boot.img or init_boot via Magisk are the same.
- Download and install the latest Magisk APK onto your device.
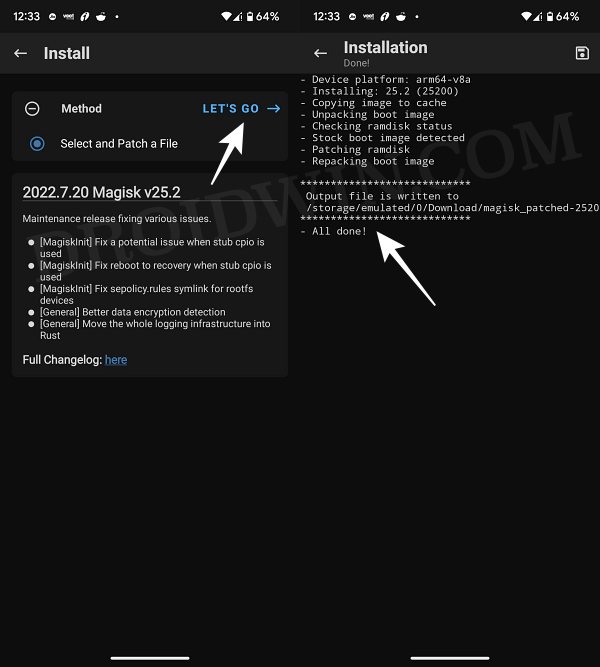
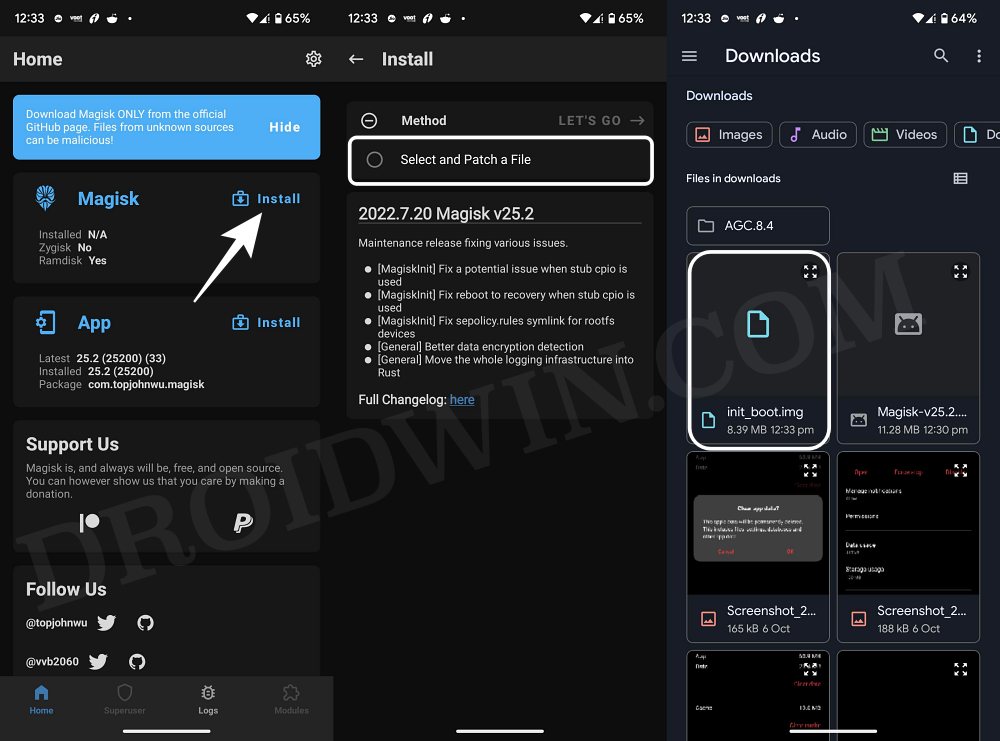
- Then launch it and tap on the Install button next to Magisk.
- After that, choose ‘Select and Patch a File’, navigate to the stock boot.img/init_boot.img file, and select it.
- Then tap on the Let’s Go button situated at the top right.
- The boot.img/init_boot.img file will now be patched and placed under the Downloads folder on your device.
- You should transfer this patched boot/init_boot file to the platform-tools folder on your PC. Also, rename it magisk_patched. We will now be using this file to root your Android 15 device.

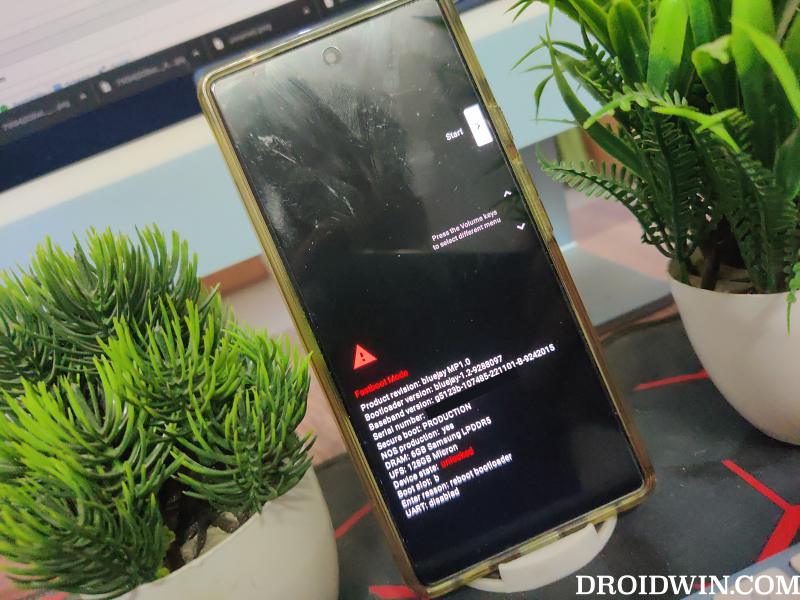
STEP 6: Boot to Fastboot Mode
- Now connect your device to the PC via USB cable. Make sure USB Debugging is enabled.
- Then head over to the platform-tools folder, type in CMD in the address bar, and hit Enter. This will launch the Command Prompt.
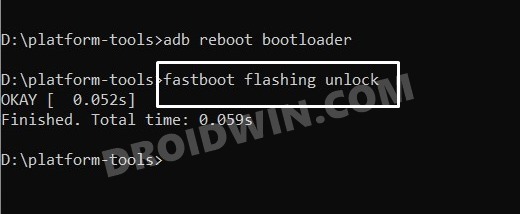
- Type in the following command in the CMD window to boot your device to Fastboot Mode
adb reboot bootloader
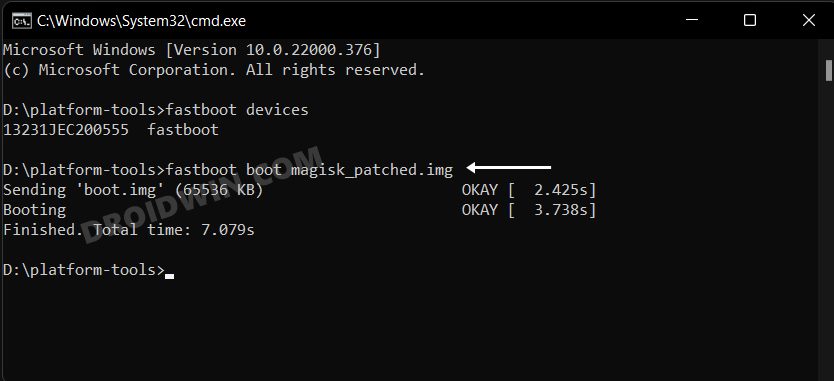
- To verify the Fastboot connection, type in the below command and you should get back the device ID.
fastboot devices

STEP 7A: Root Android 15 using Magisk Patched Boot.img
This step is applicable for those devices that come with Android 12 or older versions. [See FAQ 1 for more details].
It is always recommended to first boot your device via the patched boot.img, rather than directly flashing it. This way you will be able to check if everything is working well or not. If everything is on the good side, then you may proceed to the permanent root. So use the below command to boot your device via magisk patched boot.img and hence attain temporary root.
fastboot boot magisk_patched.img
Now that your device is booted without any issues with a temporary root, let’s now make this root permanent. So refer to the below instruction steps to try it out.
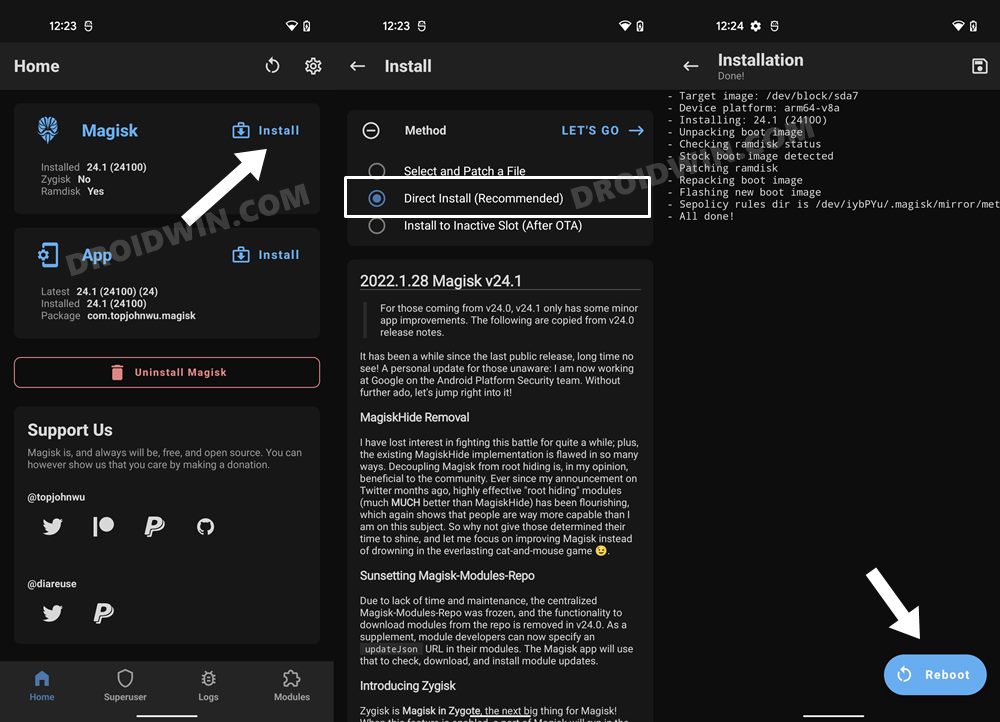
- Launch the Magisk app and tap on Install.
- Then tap on Direct Install (Recommended) > Let’s Go situated at the top-right.
- Wait for the process to complete and then hit Reboot. Once it boots up, launch Magisk.
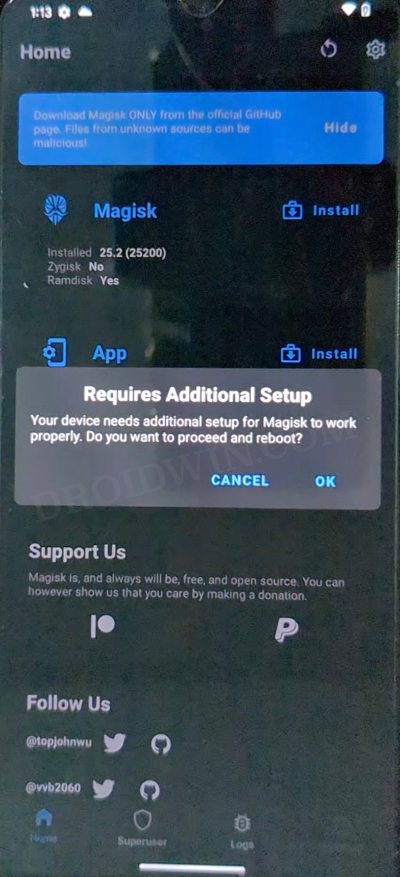
- You might get a Require Additional Setup prompt, tap on OK.
- Your device will then auto-reboot to the OS.
- Once done, hit the Reboot button situated at the bottom right.
- That’s it, your Android 15 device will now boot to the rooted OS.
STEP 7B: Root Android 15 using Magisk Patched Init_Boot.img
This step is applicable for those devices that came with Android 13 or higher version out of the box. [See FAQ 1 for more details].
- First off, make sure that the init_boot file is present in the platform-tools folder and is renamed as magisk_patched.img
- Then type in the below command in the CMD window to flash the patched init_boot.img file:
fastboot flash init_boot magisk_patched.img
- If the above command didn’t work, then you should manually flash the init_boot to both slots using the below command:
fastboot flash init_boot_a magisk_patched.img
fastboot flash init_boot_b magisk_patched.img
- Your device should now boot to the rooted OS. If it doesn’t happen, then you may manually do so via the below command:
fastboot reboot
That’s it. These were the steps to root your Android 15 device via Magisk patched boot.img/init_boot.img. If you have any queries concerning the aforementioned steps, do let us know in the comments section below. We will get back to you with a solution at the earliest.
FAQ 1: Rooting via Init Boot or Boot?
One of the most common queries that some users have is whether they should root their Android 15 device via Magisk patched boot.img or init_patched boot.img? If your device comes with Android 13/14/15 out of the box [such as Pixel 8 and 7 series, OnePlus 11, Xiaomi 13, etc.] then you’ll have to use the init_boot.img file for root.
The init_boot.img file is present in the stock firmware and the patching steps are similar to boot.img, though the flashing steps are different. We have already explained this [extraction, patching, and flashing] in the above steps.
On the other hand, if your device came with Android 12 or older version out of the box and has since been updated to Android 15 [Pixel 6 series, OnePlus 10, Poco F4], then you’ll have to still use the boot.img for root. The entire rooting process is similar to how we did before- extract boot.img, patch it via Magisk, and flash it via Fastboot [all this has already been explained above in this guide].
FAQ 2: Error while flashing Init_boot
If you are getting an error message such as [Flashing is not allowed in lock state], then try flashing the patched init_boot in the FastbootD Mode, as opposed to Fastboot/Bootloader Mode. The flashing commands are the same as listed above. As far as booting to FastbootD is concerned, you could use the adb reboot fastboot command if you want to do so from the OS or use the fastboot reboot fastboot if you want to do so from the Fastboot/Bootloader Mode [see this guide].
FAQ 3: Failed (remote: Flashing is not allowed for partition) error
If you are getting the Failed (remote: Flashing is not allowed for partition) error, then you’ll have to flash the patched init_boot to the FastbootD Mode instead of the Fastboot/Bootloader. For that, use the fastboot reboot fastboot command to directly boot to FastbootD Mode and then use the above [or below] command to flash the file.