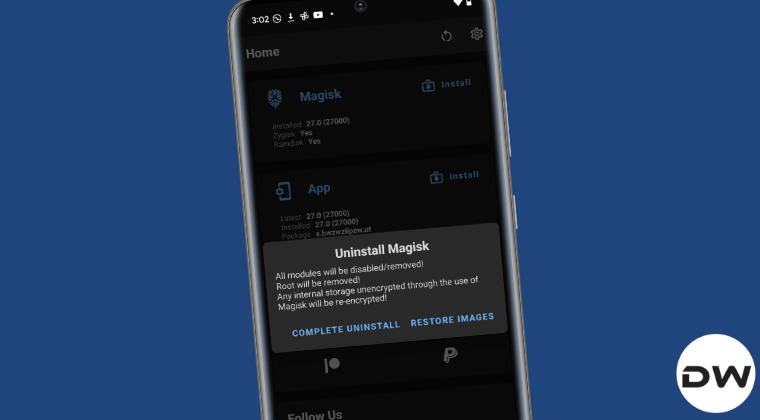
In this guide, we will show you the steps to fix the issue of the Restore Images option not working in Magisk. Before Magisk performs the Direct Install, it makes a backup of the stock boot/init_boot files. Later on, when you wish to install an update, you could use the Magisk Restore Images, take the update, and then Install to Inactive Slot. After reboot you’d have the new OTA update and the root will be preserved as well.
However, many users had voiced their concern that when they used the init_boot method to root their device, they lost the Magisk Restore Images option, and henceforth, the option to Install to Inactive Slot After OTA wasn’t working either. And if we use the patched init_boot method and flash via Fastboot, then Magisk wouldn’t have the required time frame needed to make the backup before the installation. As a result of this, you’ll be unable to restore the images. So in this guide, we will show you the steps to fix the issue of Magisk Restore Images not working along the expected lines. Follow along.
Fix Magisk Restore Images not working
Before starting, please take a backup of all the data on your device, just to be on the safer side. Droidwin and its members wouldn’t be held responsible in case of a thermonuclear war, your alarm doesn’t wake you up, or if anything happens to your device and data by performing the below steps.
The Prerequisites
While it’s along the obvious lines, but let’s reiterate it once again- your device needs to be rooted beforehand. Likewise, you should have the stock boot/init.img file, extracted from the firmware which is currently installed on your device. You could download the firmware from the Oxygen Updater app and extract the boot/init via the Fastboot Enhance Tool.
So which file should you use? Well, if your device came with Android 12 or older versions, you’ll have to use the boot.img, and if it came with Android 13+, then use the init_boot.img file. NOTE: For the sake of reference, we are using init_boot, if you are using the boot, then make sure to replace the same accordingly
- Download and extract the Android SDK Platform Tools on your PC.
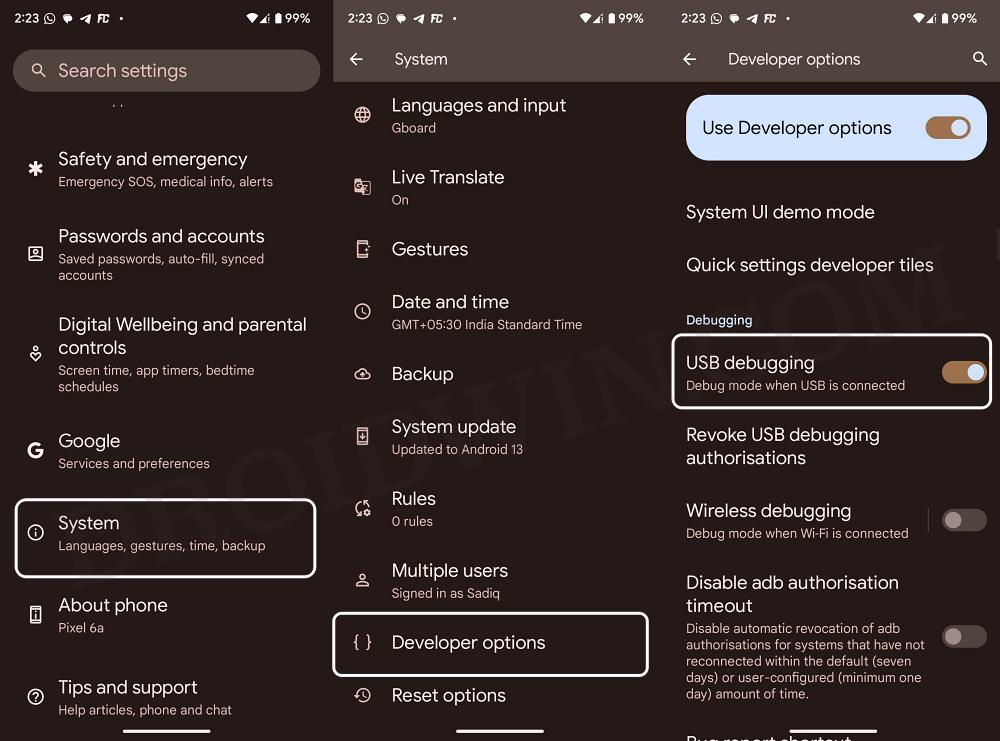
- Then enable USB Debugging and connect your device to PC via USB.

- Now type in the below command to open the shell environment:
adb shell
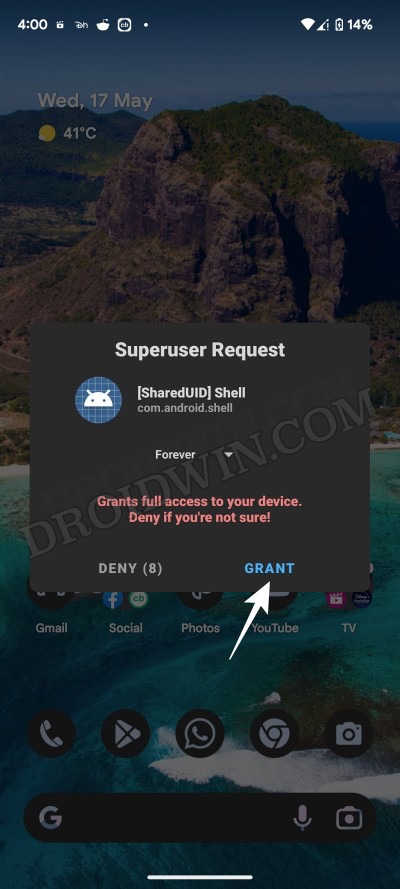
- Type in the below command, you’ll get a SuperUser prompt, tap OK.
su
- Now type in the below command to bring up the partition table:
ls -la /dev/block/bootdevice/by-name
- Refer to the output where you get init_boot_a and init_boot_b [or boot_a and boot_b]. In our case, it is:
lrwxrwxrwx 1 root root 16 1970-09-21 21:40 init_boot_a -> /dev/block/sde32
lrwxrwxrwx 1 root root 16 1970-09-21 21:40 init_boot_b -> /dev/block/sde63
- Now note the block values that have init_boot_a and init_boot_b. For instance, /dev/block/sde32 is init_boot_a and /dev/block/sde63 is init_boot_b.
- Then transfer the stock init_boot.img file to your device, but not inside any folder.
- Now use the below command syntax, replacing the path of the init_boot file as well as the block address.
dd if=/path/to/init_boot.img of=/path/to/init_boot_block_from_above
- For instance, in our case, the above command will transform to:
dd if=/sdcard/init_boot.img of=/dev/block/sde32
dd if=/sdcard/init_boot.img of=/dev/block/sde63
- The first command will flash the stock init_boot to slot A whereas the second will flash to slot B.
- Once the flashing is done, go to Magisk and use DIrect Install. Then tap on Reboot once done.
- Upon reboot, you should still be rooted and have stock init_boot installed. You can test this by opening Magisk and verifying the root.
- Now when an update comes, you can use Magisk to restore images to get the update then do Install to Inactive after the OTA. That’s it.
So these were the steps to fix the issue of the Restore Images option not working in Magisk. If you have any queries concerning the aforementioned steps, do let us know in the comments. We will get back to you with a solution at the earliest. [Credits: XDA Senior Member shootind5nukes].


