In this guide, we will show you the steps to install Viper4Android on Android 12/13/14. The landscape in custom development has completely transformed over the past few years and now there is only a minuscule percentage of tech enthusiasts left who are willing to jump into the rooting domain.
While the caveats involved [SafetyNet, Knox, WideVine Certification] do have a role to play but the major reason is the fact that the OEM themselves provide most of the features that were earlier only possible via root. However, there is just one exception. If you are looking for an exceptional audio mod, then there’s currently no player in the market that would be able to match the quality that Viper4Android has to offer.
Though JamesDSP and Wavelet are slowly catching up, but they still have a long journey to catch up. So for many, installing the Viper Mod is the only reason why they prefer to still root their devices. So without any further ado, this guide will make you aware of the steps to install Viper4Android on Android 12/13/14 devices. Follow along.
Table of Contents
How to Install Viper4Android on Android 12
First off, your device needs to be rooted. If you haven’t done so yet, then please refer to our guide on How to Root Android 12 via Magisk patched boot.img. Once done, you may then start off with the below steps. Droidwin and its members wouldn’t be held responsible in case of a thermonuclear war, your alarm doesn’t wake you up, or if anything happens to your device and data by performing the below steps.
Method 1
- Download the Audio Compatibility Patch and Audio Modification Library from below:
ACP: https://john-fawkes.com/Downloads/acp.zip
AML: https://zackptg5.com/downloads/Audio-Modification-Library_v4.1.zip
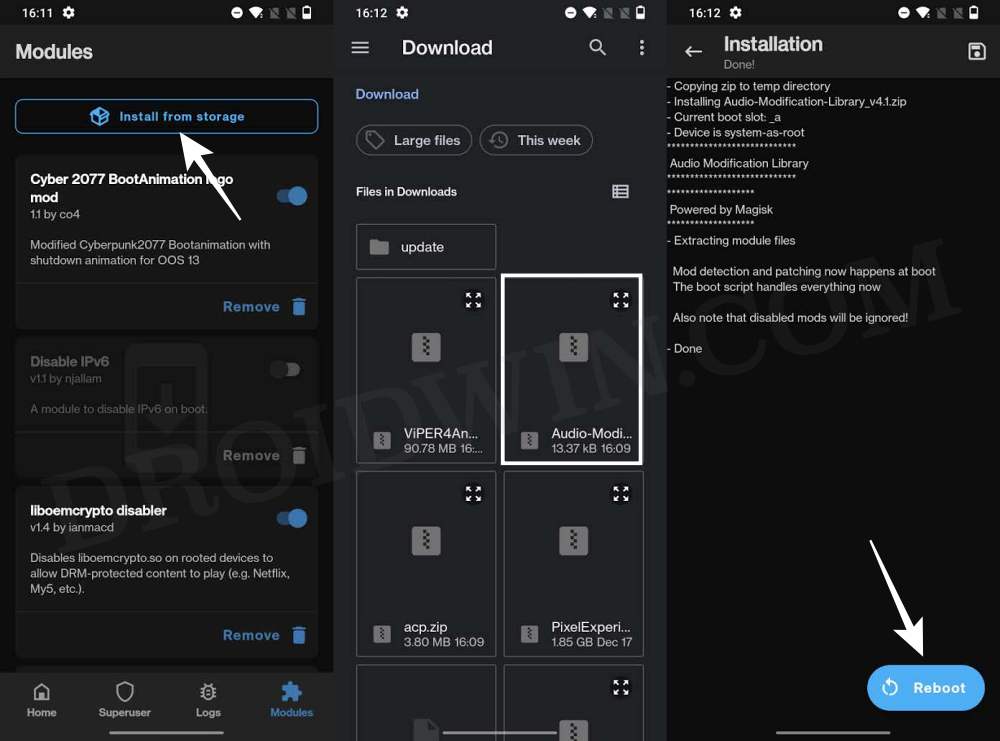
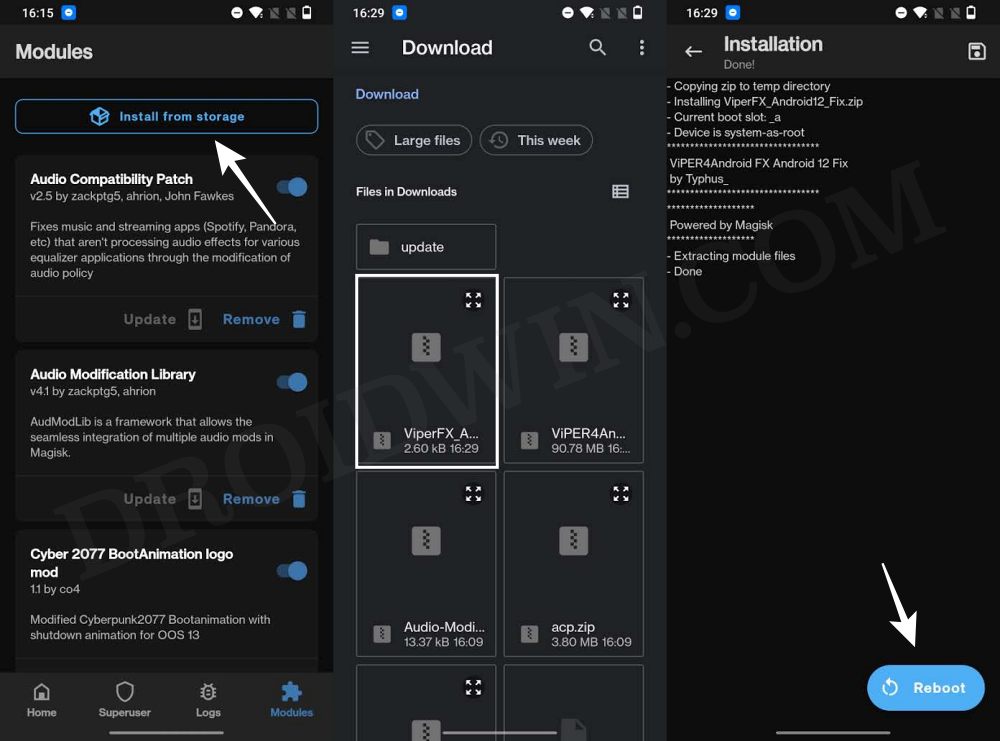
- Then launch Magisk, go to the Modules section, and tap on Install from Storage.
- Now select the AML mod and it will be flashed. Once done, do not reboot your device.

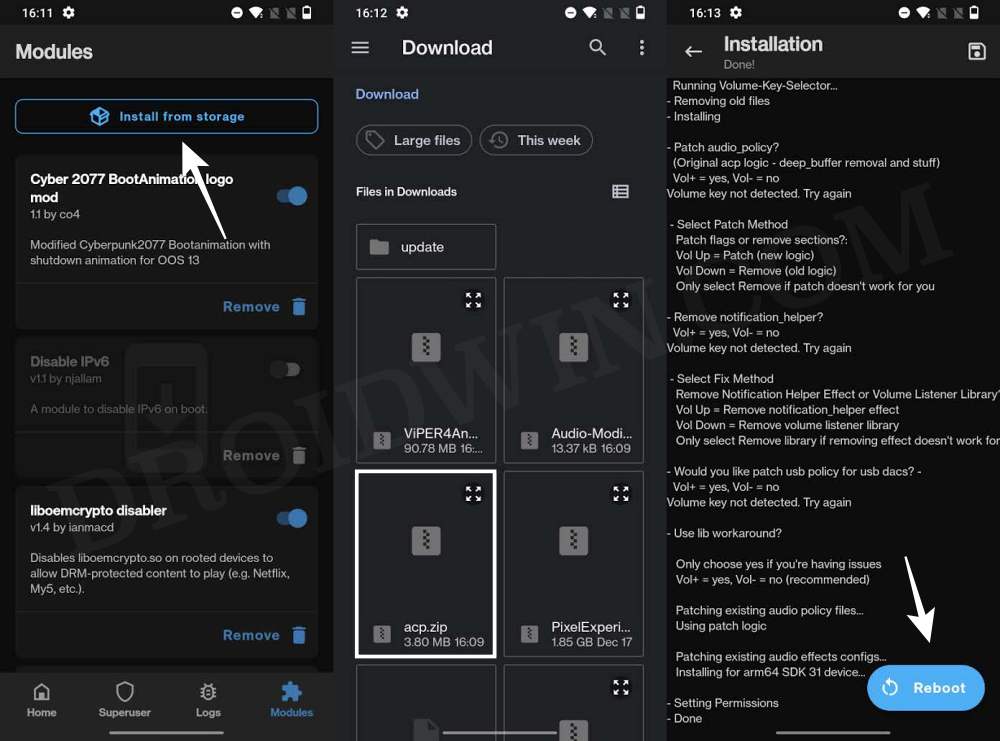
- Rather, select the ACP Mod and flash it. It will bring up a setup wizard [respond via Volume Up/Down keys]
Patch audio_policy ?         | Yes
- Select Patch Method :      | Vol Up - Patch (new logic)
Remove notification_helper ? | Yes
- Select Fix Method :        | Vol Up : Remove notification_helper effect
Patch USB policy for dacs ?  | No
Use Lib workaround ?         | No
- Once done, reboot your device to stock recovery and wipe Dalvik Cache [recommended]. Then reboot to System.
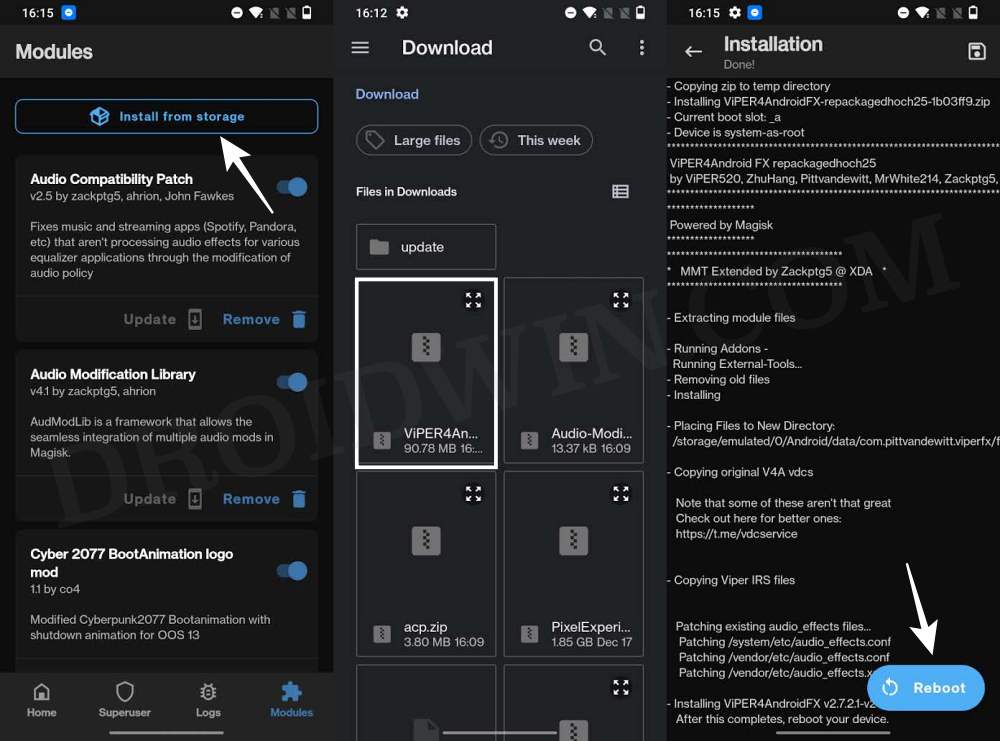
- Now download the Viper4Android from below and flash it via Magisk. Once done, hit Reboot.
Viper4Android
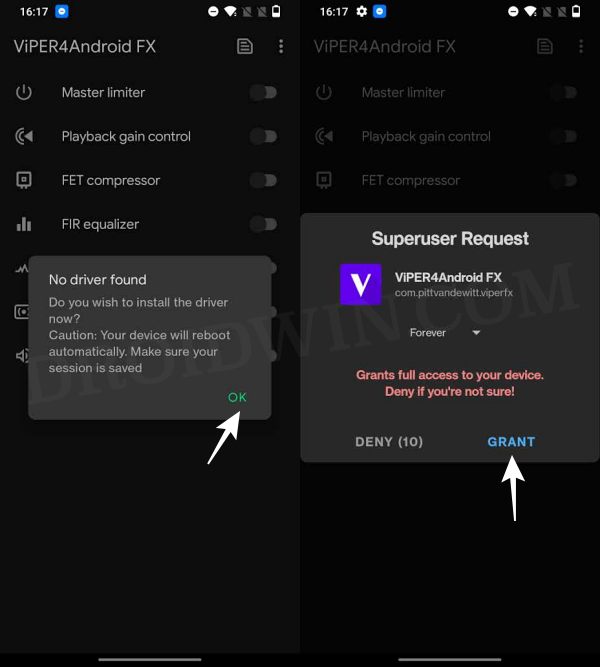
- Once your device boots up, launch Viper4Android. It will ask to install drivers, hit OK.
- Then tap Grant in the Magisk request. Your device will now automatically restart.
- Once it reboots, go to Advanced Settings and set Legacy Mode to Always On.
- Viper4Android is now installed on your Android 12 device [if you face any issues, just delete Dalvik Cache from stock recovery].
Method 2
- Download and install the Viper4Android APK onto your device.
- Once done, reboot your device. Then download the Viper Patch.
- Now launch Magisk, go to the Modules section, and tap on Install from Storage.
- Then select the Viper Patch and it will be flashed. Once done, do not reboot your device.
- Rather open Viper4Android and let it install the drivers. Once done, reboot your device.
- That’s it. Viper4Android is now installed on your Android 12 device.
Method 3
- Download the required files from below and sent them to your device
Ainur Narsil
Audio Modification Library
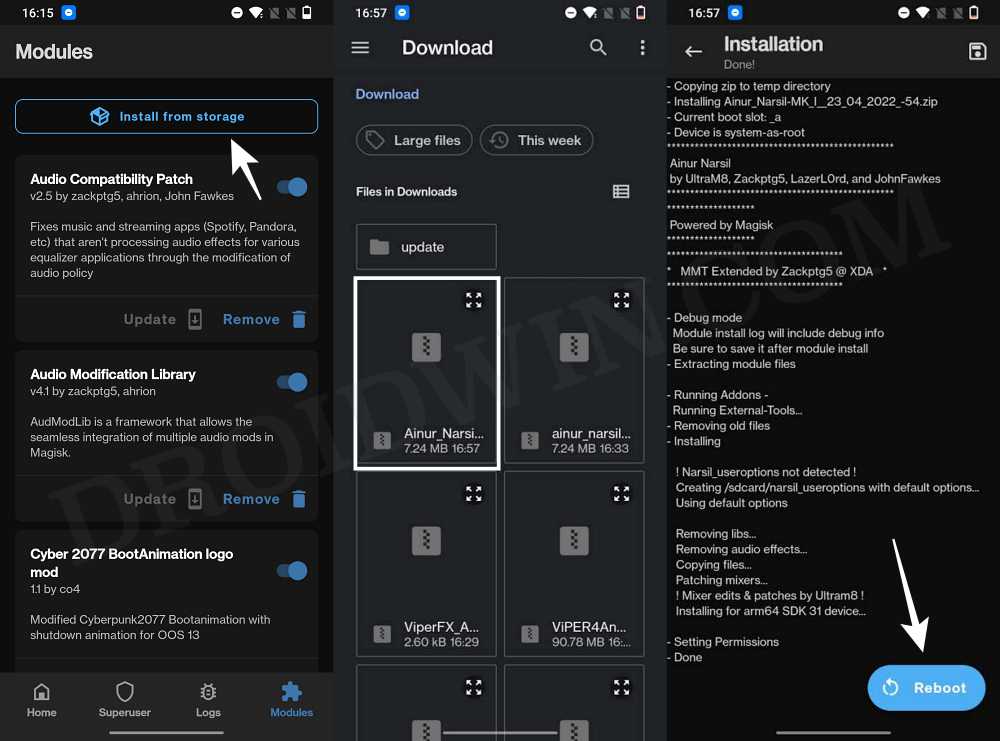
- Now launch Magisk, go to the Modules section, and tap on Install from Storage.
- Then select the Ainur Nasil module to flash it.
- Similarly, flash Audio Modification Library.
- After that, install the Viper4Android APK. Once done, reboot your device.
- Now launch Viper4Android and install the required drivers. That’s it.
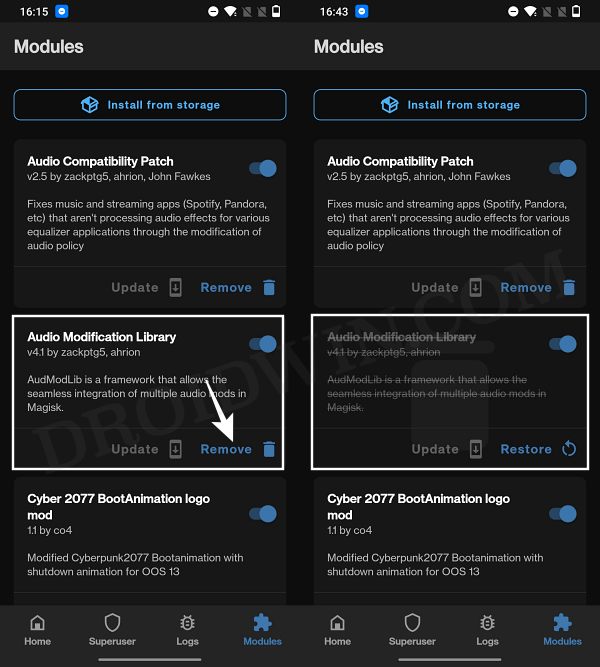
- If you are facing any issues, then disable Audio Modification Library via Magisk.
- Now restart your device, re-enable the mod and then again restart your device.
How to Install Viper4Android on Android 13
When it comes to installing Viper4Android in Android, then there are a few rough edges that still need to be ironed out. Developers are doing their bit by reverse engineering the Android 12 version of Viper as well as the Android 13 based James DSP and we are soon to reach a breakthrough. In the meantime, few OnePlus 9 OxygenOS 13 [AOSP ROM] and Pixel 4 XL users on Android 13 were able to run Viper4Android on their devices using the below-listed instructions.
So let’s give it a try and check out the results. Before starting, make sure that your device is rooted. If that is not the case, then please refer to our guide on How to Root Android 13 via Magisk Patched Boot. Droidwin and its members wouldn’t be held responsible in case of a thermonuclear war, your alarm doesn’t wake you up, or if anything happens to your device and data by performing the below steps.
- Download the Viper4Android and Audio Modification Library from below.
Viper4Android
Audio Modification Library
- Then launch Magisk, go to the Modules section, and tap on Install from Storage.
- Now select Viper4Android and it will be flashed. Once done, do not reboot your device.
- Rather, flash the Audio Modification Library. Again, do not reboot your device.
- Now launch Viper4Android. it will ask to install Drivers and hit OK.
- Then tap Grant in the Magisk pop-up. Your device will now automatically restart.
- Launch Viper4Android, go to Advanced Settings, and set Legacy Mode to Always On. The app will now crash.
- Once that happens, launch Magisk and uninstall Audio Modification Library. Then restart your device.
- Then launch Magisk, go to the Modules section, and tap on Install from Storage.
- Now select Audio Modification Library and it will be flashed. Once done, hit Reboot.
- Your Android 13 device will now restart and the Viper4Android should be up and running.
How to Install Viper4Android on Pixel 6/7 Android 13
Out of all the devices out there, being able to install Viper4Android on Pixel 6/7 running Android 13 was the most challenging task [and the fact that the 7 series don’t support 32-bit apps only made the matter worse]. But thanks to some impressive work done by XDA Senior Member iscle, you could now welcome the popular audio onto your device right away. So do check out our detailed guide linked below:
How to Install Viper4Android on Pixel 6/7/Pro running Android 13
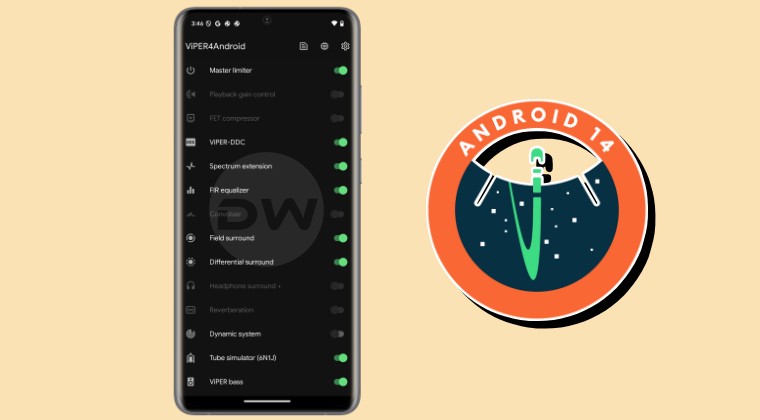
How to Install Viper4Android on Android 14
- To begin with, root your device via Magisk.
- Then download the ViPER4Android-RE Magisk module.
- Likewise, download the ViPER4Android-RE app as well.
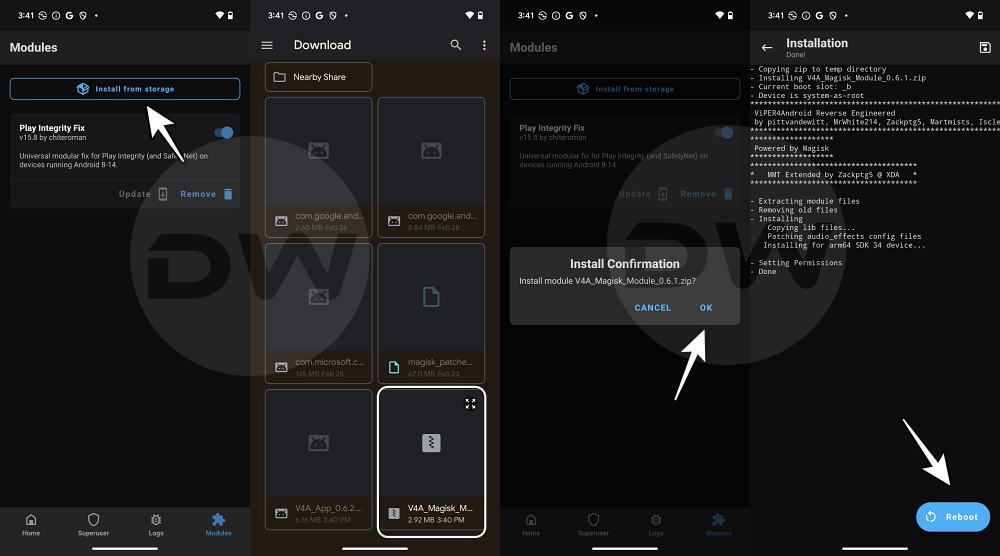
- Now launch Magisk, go to Modules, and tap on Install from Storage.
- Then select the Viper4Android mod and flash it. Once done, hit Reboot.
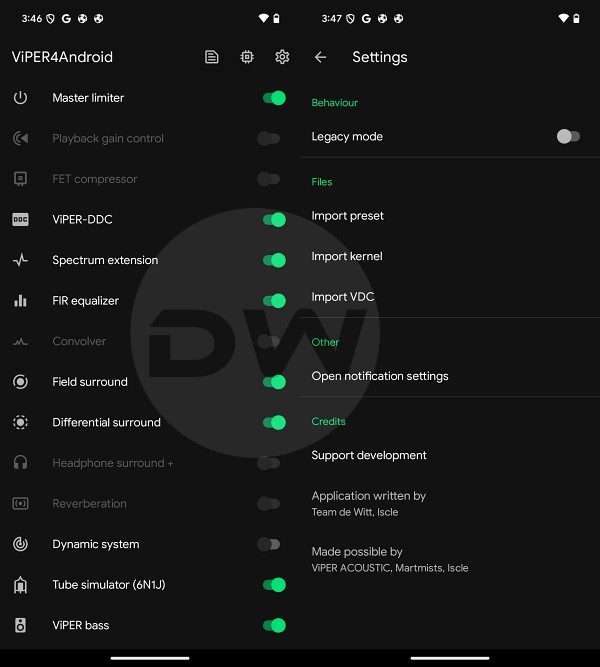
- Now install the Viper4Android app as well.
- Then launch it and tweak it as per your requirements.
That’s it. These were the steps to install Viper4Android on Android 12/13/14 devices. If you have any queries concerning the aforementioned steps, do let us know in the comments. We will get back to you with a solution at the earliest. [TIP: If you are planning to flash James DSP mod on your Android 13 device, then make sure to select “Yes” when it asks if you have a Huawei device].


