In this guide, we will show you two different methods through which you can install the latest Android 15 build onto your device. It’s that time of the year when we are about to be treated with a new set from the Silicon Valley giant. This time around, it’s the Vanilla Ice Cream that has been served to us, although a tad bit later than the previous iterations [Android 14’s Preview was released on February 8, 2023].
With that said, there are still plenty of reasons to get your hands on this iteration, among which, the Private Space has been the talk of the town. Apart from that, there is a slew of other noteworthy features as well, including Notification Cooldown, Lock Screen widgets, Battery Health Percentage, App Archive, Bluetooth Quick Settings menu, the ability to Save App Pair, and a new “Security State” API which will further enhance the security of the OS.
So without any further ado, let’s dive deep into the ingredients [feature list] for the Vanilla Ice Cream, after which we will show you the first-hand impressions [aka the installation steps] to create this ice cream for yourself. Follow along.
Table of Contents
Android 15 Vanilla Ice Cream Features

Here are all the noteworthy and intriguing features that you would come across on the fifteenth iteration of the OS build. [NOTE: Since we are currently in the developer preview phase, there are a few features that are yet to be confirmed/officially announced, but they have been found in the leaks so they will make their presence felt sooner than later (maybe further down the lines of Beta or directly to the stable builds, or even via a Feature Drop. Anyways, till they get the stamp of authority from Google, they will have to wear the badge of uncertainty].
Partial Screen Sharing
This feature will allow you to share your screen just inside an app window instead of the entire device [NOTE: it first made its way to Pixel with Android 14 QPR 2 and is widely available across non-Pixel devices with Android 15].
Notification Cooldown
It will gradually lower down the notification volume when you keep on getting the alerts from the same app.
*Lock Screen Widgets
We first saw a glimpse of Lock Screen widgets all the way back in Android 4.2 but for some reason, Google decided to remove it from Android 5. And now that Apple has added it, how could the Silicon Valley giant be left far behind? As of now, all speculations point towards the ability to add widgets in the lock screen either on the Communal Space or via the At a Glance widget.
*Battery Health Percentage
Another feature taken from the iPhone’s book, it will let you know how far your battery has degraded with time. Or to put it the other way around, the remaining battery health in percentage.
*App Archive
Sorry, but we cannot stop mentioning iPhones in this list. Akin to iOS’s Offload Apps feature that allows you to uninstall the app but keep its user data intact. So when you reinstall that app, you could start from that left-off position, instead of starting from scratch. We are now witnessing a similar in Android 15.
Titled App Archive, it will remove most of the app data from your device and will only hold down to the most crucial ones. You will still get its icon in the app drawer though, clicking on it will take you to the Play Store where you can unarchive it if required. Apart from that, the Archive and Restore options will also be present on the App Info page of each individual app.
*Bluetooth Menu
Till Android 14, when you tap on the Bluetooth Quick Setting tile, then it will simply enable it. However, if you frequently interact with numerous Bluetoo devices, then you’ll have to long press on that tile to open the Bluetooth menu and then choose the desired device.
This is about to change in Android 15 wherein if you tap on the Bluetooth Quick Setting tile, then it will bring up a list of Bluetooth devices right then and there, from where you can directly choose the device that you wish to connect [similar to how the WiFi Quick Setting tile].
*Private Space
Similar to Samsung’s Secure Folder, Private Space will create a locked secure environment wherein you can hide your apps and data. This space could only be unlocked via the password that you had initially set up. Furthermore, you can access it from the Settings > Security & privacy > Private Space menu.
*Save App Pair
The App Pair feature which allows you to couple two apps together in the split screen mode was present in the earlier OS builds as well. However, up until now, you had to manually create the pairs each time you wished to use them in the multi-screen window. With Android 15, this process has been streamlined as it allows you to save those pairs on the home screen. You could then just tap on that icon and it will launch the app pair in one go.
Privacy Sandbox
This feature will limit the sharing of user data with third parties with the major objective being a privacy-enhancing advertising solution where user information is protected.
Other Features
- There’s an update to the Health Connect by Android platform. This will add support for new data types across fitness, nutrition, and other related domains.
- The OS adds a new Android Dynamic Performance Framework capability, including a power efficiency mode wherein the CPU will prefer power > performance.
Android 15 Supported Device List
Android 15 is supported across all the Pixel devices running the Tensor chipset, namely:
- Pixel 6 and 6 Pro
- Pixel 6a
- Pixel 7 and 7 Pro
- Pixel 7a
- Pixel Fold
- Pixel Tablet
- Pixel 8 and 8 Pro
Android 15 Release Schedule
Here’s the timeline for the Android 15 release starting from the first Developer Preview up to the latest stable build:

- February till Mid March: Android 15 Developer Previews
- Mid-March till September [tentative]: Android 15 Beta Builds
- June onwards: Platform Stability [Usable Beta Builds]
- October [tentative]: Android 15 Stable Builds.
Now that you are aware of the Android 15 features, supported devices, and its release date, let’s get you acquainted with the steps to install this build onto your device. So get yourself ready for some tasty Vanilla treats!
How to Install Android 15 Vanilla Ice Cream
The below process will wipe off all the data from your device, so take a complete device backup beforehand. Droidwin and its members wouldn’t be held responsible in case of a thermonuclear war, your alarm doesn’t wake you up, or if anything happens to your device and data by performing the below steps.
STEP 1: Install Android SDK
First and foremost, you will have to install the Android SDK Platform Tools on your PC. This is the official ADB and Fastboot binary provided by Google and is the only recommended one. So download it and then extract it to any convenient location on your PC. Doing so will give you the platform-tools folder, which will be used in this guide.

STEP 2: Enable USB Debugging and OEM Unlocking
Next up, you will have to enable USB Debugging and OEM Unlocking on your device. The former will make your device recognizable by the PC in ADB mode. This will then allow you to boot your device to Fastboot Mode. On the other hand, OEM Unlocking is required to carry out the bootloader unlocking process.
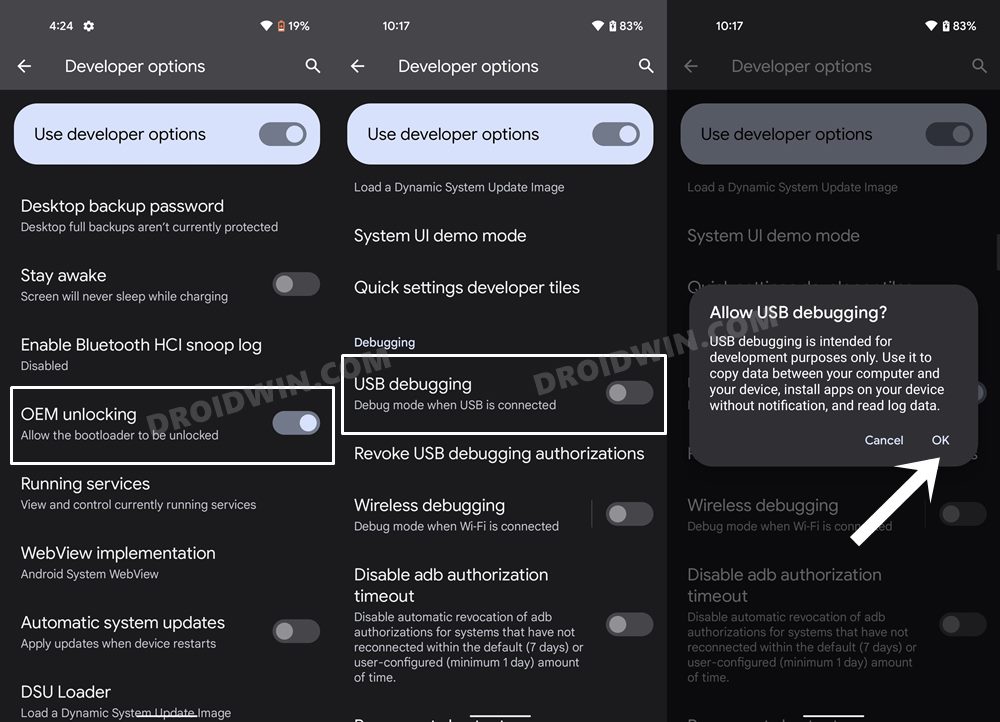
So head over to Settings > About Phone > Tap on Build Number 7 times > Go back to Settings > System > Advanced > Developer Options > Enable USB Debugging and OEM Unlocking.
STEP 3: Unlock Bootloader
Next up, you will also have to unlock the device’s bootloader. If you had performed the update via Flash Tool or Fastboot, then the bootloader would already be unlocked. However, if you had performed the upgrade via ADB sideload, then would you need to carry out this task? Do keep in mind that doing so will wipe off all the data from your device and could nullify its warranty as well. So if that’s all well and good, then please refer to our detailed guide on How to Unlock the Bootloader on any Android Device.
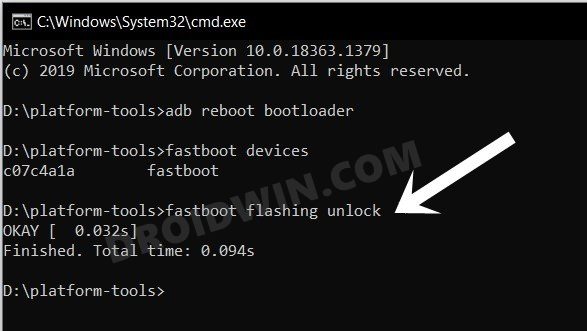
UPDATE 1: We are unlocking the bootloader because as of now we won’t be getting the OTA updates for Android 15 till the initial few Developer Preview builds. Once it reaches the beta stage, you can enroll as a beta tester and get the latest Android 15 as an OTA update without the need to unlock the bootloader. [With that said, if you are planning to install it via Android Flash Tool or Fastboot Script, then unlocking the bootloader is a must, irrespective of the fact whether it’s Developer Preview, Beta, or Stable].

UPDATE 2: At the time of writing, the Developer Preview OTA updates are not working, so you have no other option but to opt for AFT or Fastboot Script. So keeping that in mind, you can now choose either STEP 4A or STEP 4B from below to carry out the update process. The 4A method is mainly automated whereas the 4B method requires you to manually carry out most of the process. With that said, go through each of these methods once and then try out the one that is in sync with your requirements.
UPDATE 3: Devices running Android 15 DP1 (build AP31.240119.016) or Android 14 QPR3 Beta 1 (build AP21.240119.009) are not able to sideload the images of the Android 15 Beta 1 build (build AP31.240322.018) due to a bug in the installed build. If you would like to sideload Android 15 Beta 1, first take the OTA update to Android 15 DP2 (build AP31.240223.016.A3) or Android 14 QPR3 Beta 2 (build AP21.240305.005).
STEP 4A: Install Android 15 Android Flash Tool

- To begin with, connect your device to the PC via a USB cable.
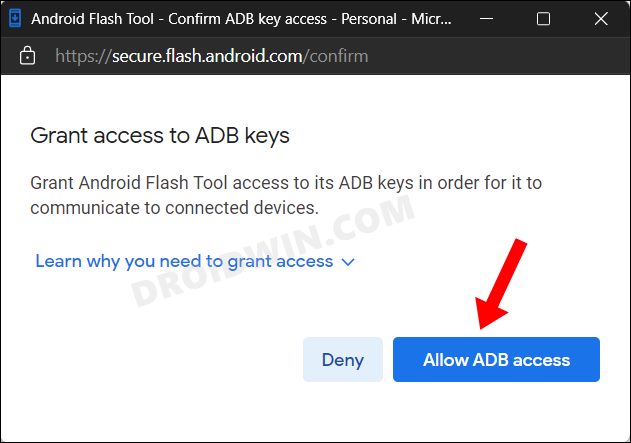
- Then head over to the Android Flash Tool website and click on Allow ADB Access.

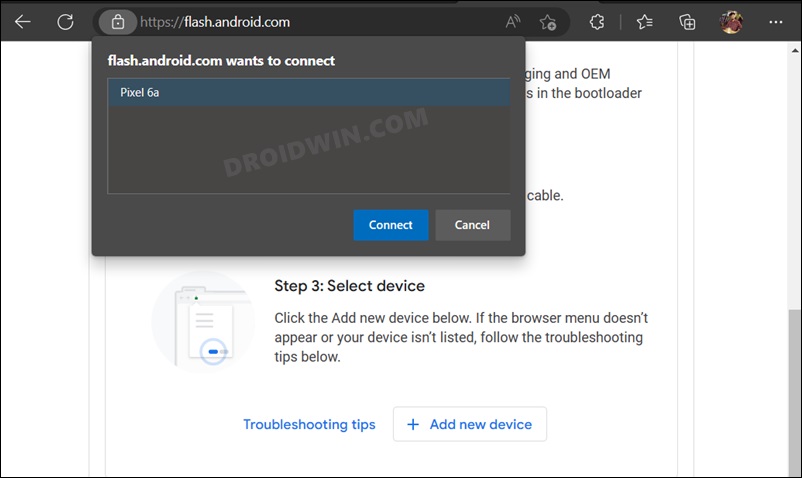
- Now click on Add new device, select your device from the pop-up, and hit Connect

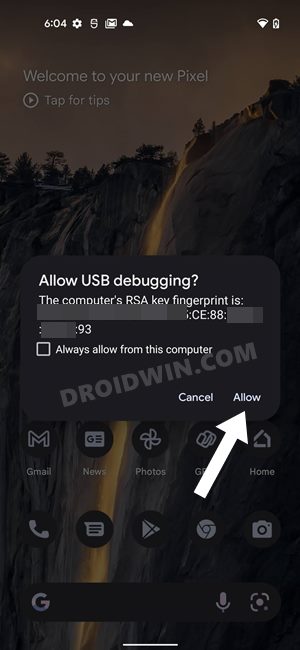
- You will get a Debugging prompt on your device, click Allow.

- Now select the desired Android 14 build from the list [the latest one is usually recommended]

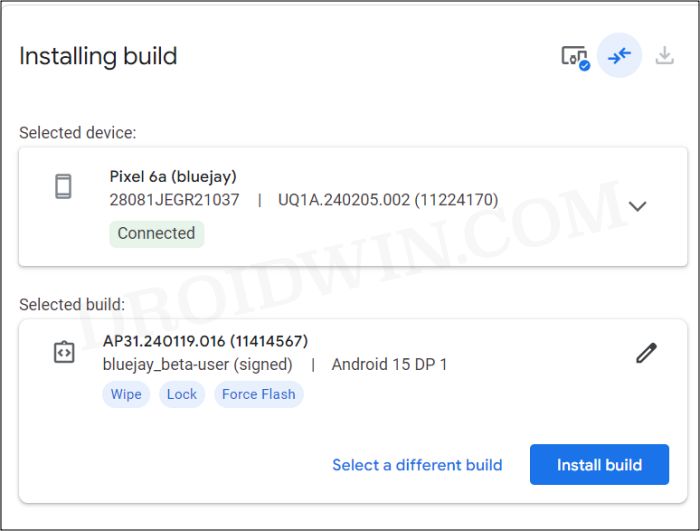
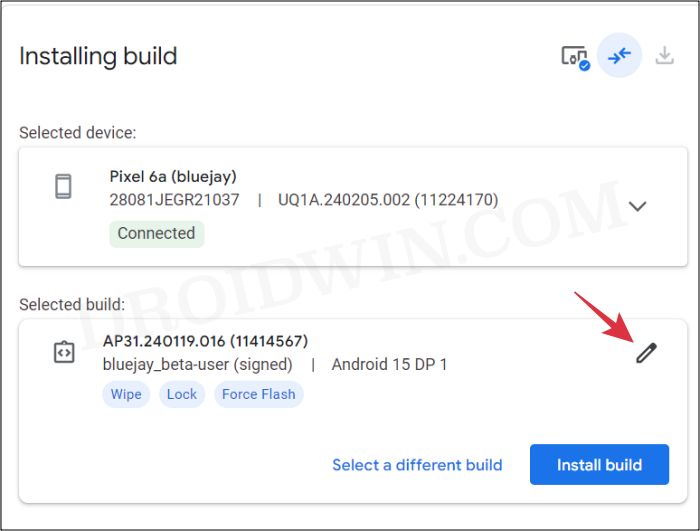
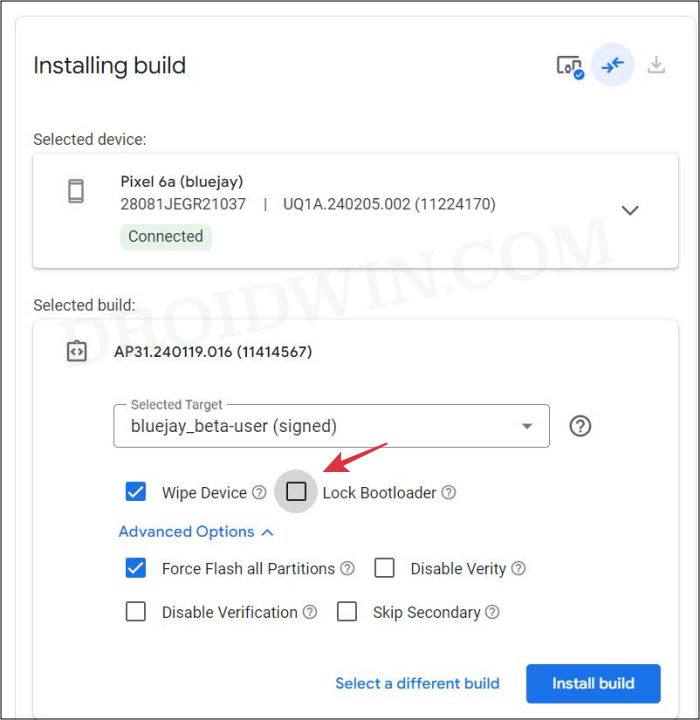
- Now click on the pencil (edit) icon next to Selected build and you should see Wipe Device, Lock Bootloader, and Force Flash All Partitions being enabled by default.

- In this regard, Wipe Device and Force Flash All Partitions are compulsory, so leave those boxes checked.

- On the other hand, the bootloader option depends on your personal preference. I wish to have it unlocked even after the flashing is complete, so I have unchecked the Lock Bootloader option.
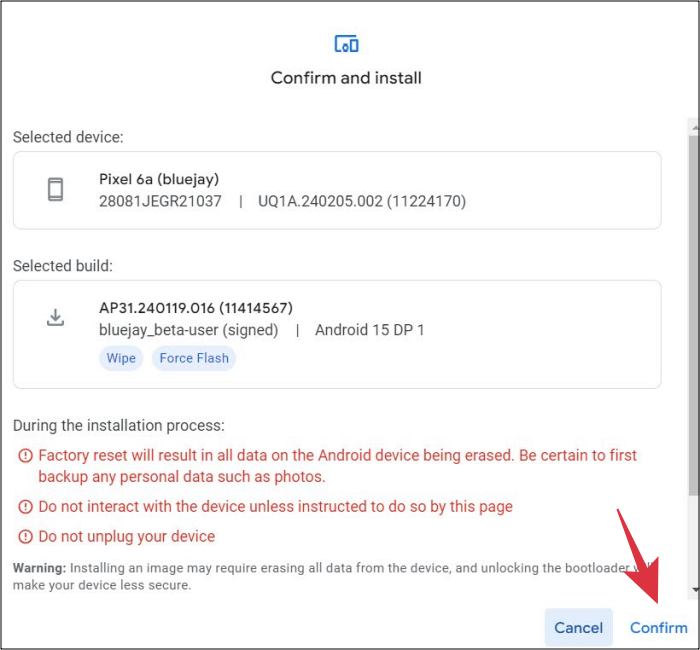
- Once you have made the selection, click on Install Build. The tool will now show you the selected build and your device name if it’s all well and good, then click on Confirm.

- The tool will now start downloading and subsequently flash the Android 14 build onto your device.
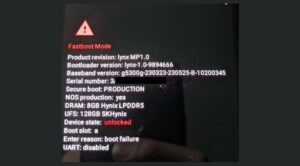
- During the flashing process, your device will automatically boot to Fastboot and FastbootD Modes.

- Once the flashing is done, you will be notified of the same. You may now unplug your device and boot it to the OS [if it doesn’t boot up automatically].
STEP 4B: Install Android 15 via Fastboot Script
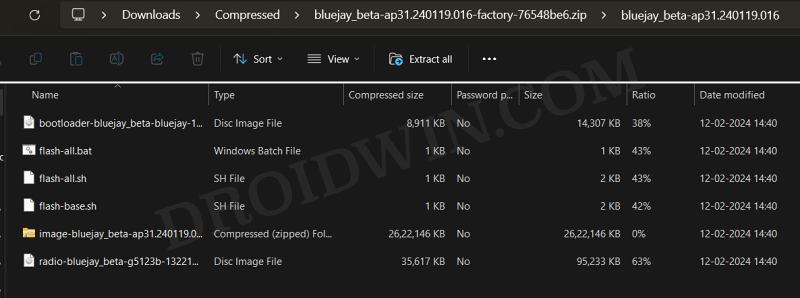
- To begin with, download the Android 15 factory image for your device (not the OTA).
- Once downloaded, extract it inside the platform tools folder.

- Now head over to this platform-tools folder, type in CMD in the address bar, and hit Enter. This will launch the Command Prompt.
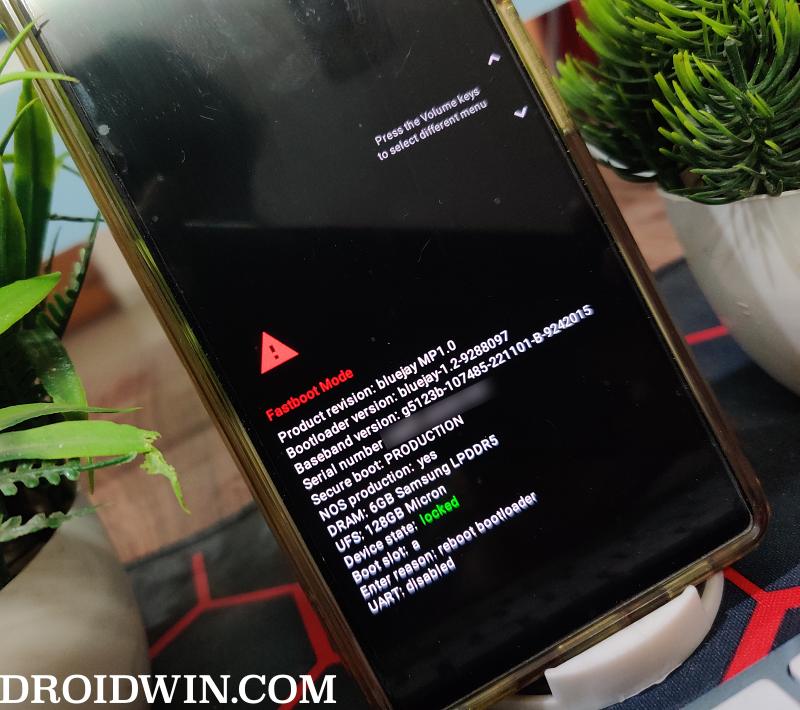
- Then type in the following command in the CMD window to boot your device to Fastboot Mode
adb reboot bootloader

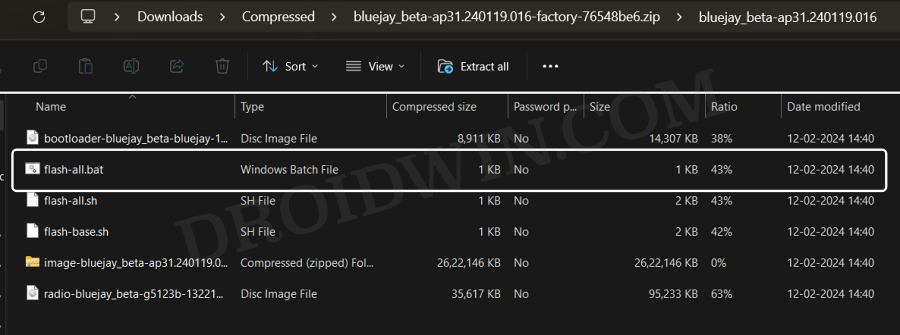
- Now double-click on the flash-all batch file and the flashing process will now begin.

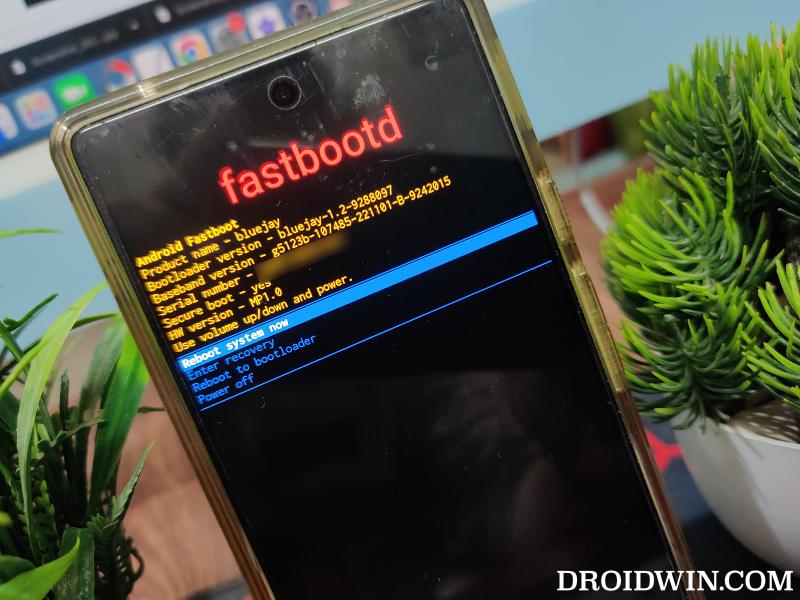
- While it’s going on, your device will automatically boot to Fastboot and FastbootD Modes, which is completely normal.


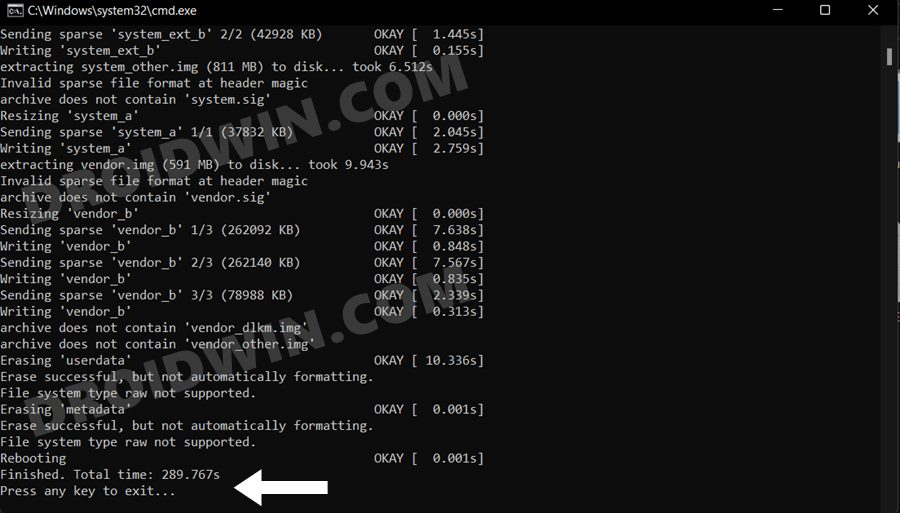
- Once the process is complete, you will be notified of the same. Likewise, your device will automatically boot to the updated OS.

So with this, we round off the guide on how you could install the latest Android 15 Vanilla Ice Cream. We have listed three different methods for the same. If you have any queries concerning the aforementioned steps, do let us know in the comments. We will get back to you with a solution as soon as possible.
STEP 4C: Via ADB Sideload
Note: Devices running Android 15 DP1 (build AP31.240119.016) or Android 14 QPR3 Beta 1 (build AP21.240119.009) are not able to sideload the images of the Android 15 Beta 1 build (build AP31.240322.018) due to a bug in the installed build. If you would like to sideload Android 15 Beta 1, first take the OTA update to Android 15 DP2 (build AP31.240223.016.A3) or Android 14 QPR3 Beta 2 (build AP21.240305.005).
How to Install OTA Updates via ADB Sideload on Pixel Devices
How to Downgrade Android 15 to Android 14
At the time of writing, the OS is still in its infancy stage, so you may come across a few bugs and issues. Likewsie, there might be a few apps that are yet to be made compatible it this latest OS release. In all these vases, your best bet is to downgrade your device from Android 15 to Android 14. And for that, you may refer to our below-linked guide:
