In this guide, we will show you the steps to unlock the bootloader on your OnePlus device. While it’s hard not to recall the early times when this OEM reigned supreme, however, users were quite optimistic this time around with the eleventh iteration of the device. So did it manage to do justice and make us fall back on the nostalgia factor? Well, not exactly.
While it does offer top-of-a-end specs sheet, which might be the best in this price range, however, there is one glaring omission that is sure to ruffle a few feathers- the lack of wireless charging on a flagship device might not be welcomed by many. Along with that, the new ColorOS ecosystem isn’t something worth craving for either.
Fortunately, as far as the latter one is concerned, we could easily escape from the shackles of Oppo and tweak the device as per our liking. All that is needed is to unlock the bootloader on your OnePlus. And in this guide, we will show you how to do just that. So without further ado, let’s get started.
Table of Contents
Benefits and Risks of Bootloader Unlocking

Unlocking the bootloader is the gateway to extract maximum benefits of Android’s open-source ecosystem. For example, you will be able to install a custom ROM or flash a custom recovery like TWRP. Likewise, you will also be able to get access to the system partition as well as administrative privileges by rooting your device via Magisk.
This will then allow you to flash Magisk Modules, Xposed Framework, Substratum Themes, Viper4Android among others. Likewise, you will also be able to flash OxygenOS on top of ColorOS. However, carrying out these tweaks brings in a few uninvited risks as well. To begin with, it will wipe off all the data and could nullify the device’s warranty as well.
Along the same lines, it will degrade the Widevine L1 certification to L3, thereby preventing you from streaming content in HD [FIXED]. The SafetyNet will be triggered as well [FIXED], thereby preventing you from using banking apps [FIXED]. So if that’s well and good then let’s get started with the steps to unlock the bootloader on OnePlus.
How to Unlock Bootloader on OnePlus
The below process will wipe off all the data from your device. So please take a complete device backup beforehand. Droidwin and its members wouldn’t be held responsible in case of a thermonuclear war, your alarm doesn’t wake you up, or if anything happens to your device and data by performing the below steps.
STEP 1: Install Android SDK

First and foremost, you will have to install the Android SDK Platform Tools on your PC. This is the official ADB and Fastboot binary provided by Google and is the only recommended one. So download it and then extract it to any convenient location on your PC. Doing so will give you the platform tools folder, which will be used throughout this guide.
STEP 2: Enable USB Debugging and OEM Unlocking
Next up, you will have to enable USB Debugging and OEM Unlocking on your device. The former will make your device recognizable by the PC in ADB mode. This will then allow you to boot your device to Fastboot Mode. On the other hand, OEM Unlocking is required to carry out the bootloader unlocking process.
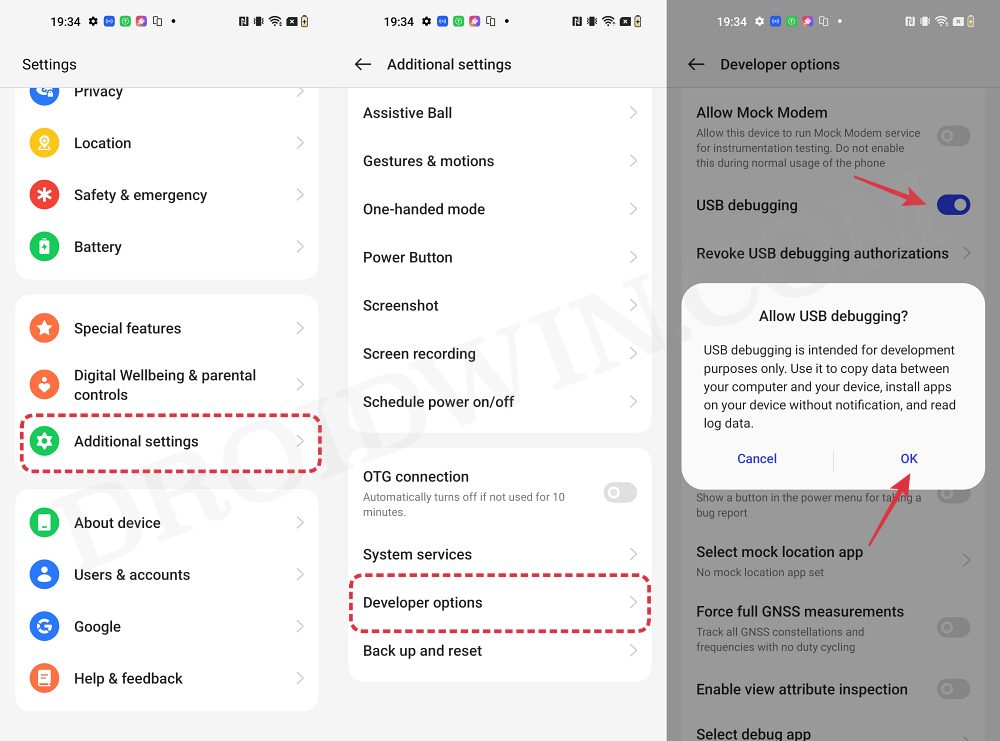
So head over to Settings > About Phone > Tap on Build Number 7 times > Go back to Settings > System > Advanced > Developer Options > Enable USB Debugging and OEM Unlocking.
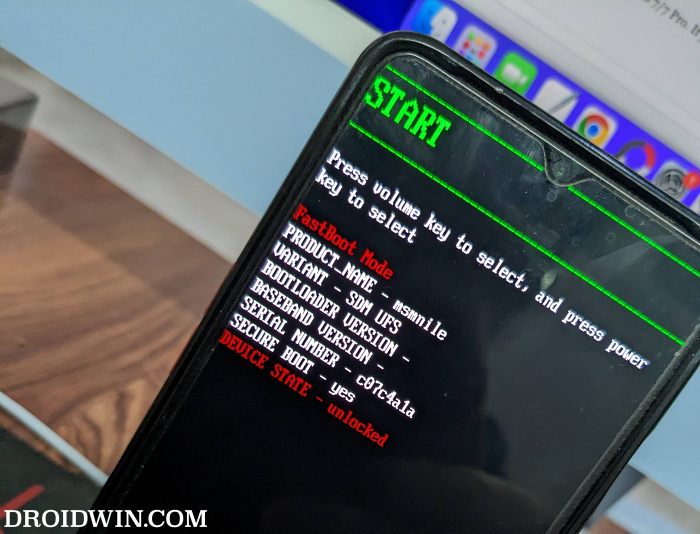
STEP 3: Boot OnePlus to Fastboot Mode
- Connect your device to the PC via a USB cable. Make sure USB Debugging is enabled.
- Then head over to the platform-tools folder, type in CMD in the address bar, and hit Enter. This will launch the Command Prompt.
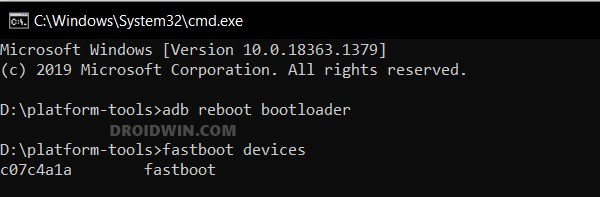
- Type in the following command in the CMD window to boot your device to Fastboot Mode
adb reboot bootloader

- Now type in the below command to verify the Fastboot Connection
fastboot devices
- If you get a device ID followed by the fastboot keyword, then the connection stands successful and you may now proceed ahead to unlock the bootloader on your OnePlus device.
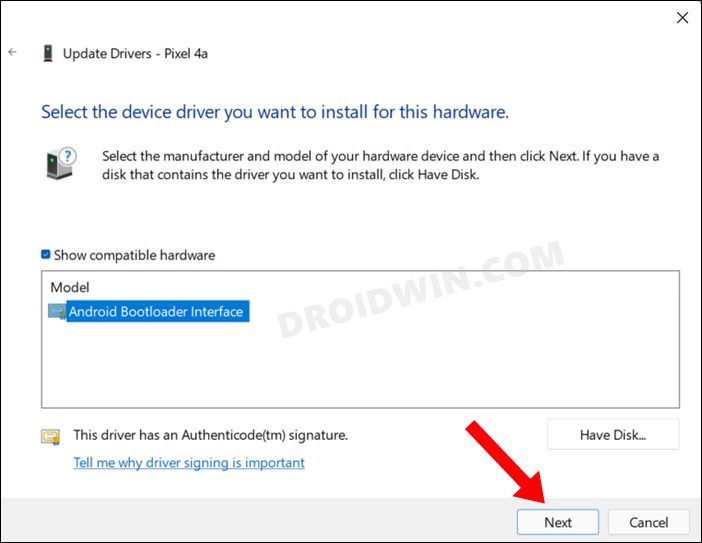
STEP 4: Install Fastboot Drivers
Next up, you will have to install the Fastboot Drivers so that your PC is able to identify the connected device in Fastboot Mode. So please check out our guide on How to Install Fastboot Drivers in Windows 11.
STEP 5: Unlock the Bootloader on OnePlus
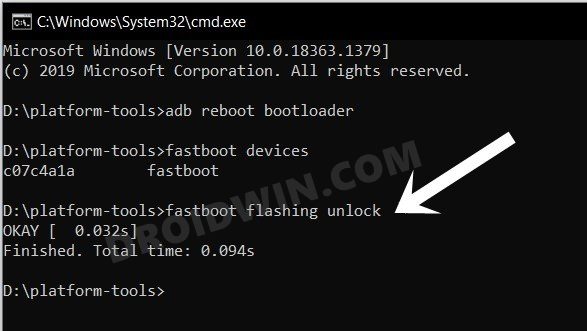
- Type in the below command in the CMD window that is opened inside the platform-tools
fastboot flashing unlock
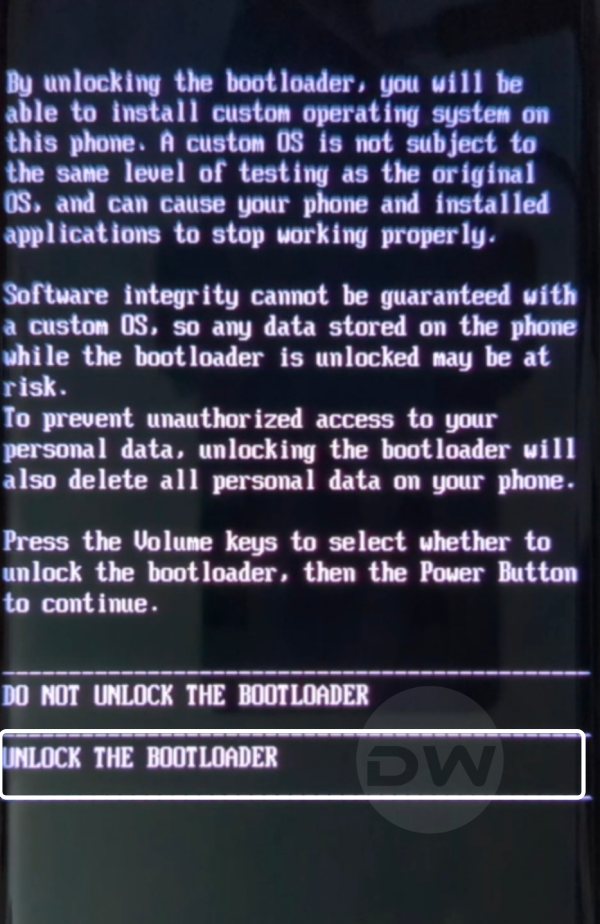
- At this point in time, you will get a confirmation message on your device. Use the Volume keys to select the Unlock the Bootloader option and hit the Power key to confirm.
- The device will undergo a reset and then the bootloader will be unlocked. Do keep in mind that the first boot might take up to a minute, this is completely normal.
- Furthermore, you will have to log in to Google ID and set up your device from scratch, since a wipe has taken place. That’s it.
These were the steps to unlock the bootloader on your OnePlus device. If you have any queries concerning the aforementioned steps, do let us know in the comments. We will get back to you with a solution at the earliest.


l
i did fastboot flashing lock after fastboot flashing unlock, now device keeps looping and wont boot up
Marcos Cintron
I tried fastboot OEM unlock and I get this message
PS C:\platform-tools> fastboot oem unlock
…
FAILED (remote: Please flash unlock token first.)
finished. total time: 0.008s
PS C:\platform-tools>
mehmet
hello, were you able to solve this problem?
Marcos Cintron
when trying to put fastboot flashing unlock command I get this message please advice:
PS C:\platform-tools> fastboot flashing unlock
usage: fastboot [ ]
commands:
update reflash device from update.zip
flashall flash boot, system, vendor and if found,
recovery
flash [ ] write a file to a flash partition
erase erase a flash partition
format[:[][:[]] format a flash partition.
Can override the fs type and/or
size the bootloader reports.
getvar display a bootloader variable
boot [ [ ] ] download and boot kernel
flash:raw boot [ [ ] ] create bootimage and
flash it
devices list all connected devices
continue continue with autoboot
reboot reboot device normally
reboot-bootloader reboot device into bootloader
help show this help message
options:
-w erase userdata and cache (and format
if supported by partition type)
-u do not first erase partition before
formatting
-s specify device serial number
or path to device port
-l with “devices”, lists device paths
-p specify product name
-c override kernel commandline
-i specify a custom USB vendor id
-b specify a custom kernel base address.
default: 0x10000000
-n specify the nand page size.
default: 2048
-S [K|M|G] automatically sparse files greater
than size. 0 to disable
PS C:\platform-tools>
Jason
On Windows 10 I had issues with nothing being shown when running ‘fastboot devices’ and in device manager, the ‘Android’ device was under ‘Other Devices’ and had a yellow ! next to it. This forum post helped me install the correct OnePlus drivers so I could then run ‘fastboot devices’
HeySiri
Thanks, you saved me 👍
Sadique Hassan
Hi Jason, thanks for pointing it out. Will update my guide accordingly. However, it’s really strange that OnePlus still provides unsigned drivers!
HeySiri
Can you integrate the XDA post link into the article? I also had the same problem as SADIQUE HASSAN and after hours of trying thanks to his comment I solved
massel
hi,
after “fastboot flashing unlock” i got only a commands list in cmd an no message confirm on phone… with the “fastboot oem unlock” i got the message on the phone. which is now correct?
Sadique Hassan
While both the commands are known to work, but most newer Android devices accept the fastboot flashing unlock command. As to why the fastboot oem unlock command didn’t work out for you, I have some research to do it seems. If other users also come with this issue, then I would be able to better document this issue. In the meantime, you were able to successfully unlock the bootloader via the fastboot oem unlock command?