In this guide, we will show you the steps to install the Viper4Android on your OnePlus 12. When it comes to audio mods, then there are quite a few noteworthy players in this domain, with the likes of JamesDSP and Wavelet making quite a name for themselves. However, it’s fair to say that Viper still remains the undisputed player in the town. Beholding tons of audio enhancement and improvements tweaks, it has become the go-to choice for tech enthusiasts.
However, over the past couple of years, installing it is no easy task in itself. Apart from issues with legacy drivers, the complications involved with Audio Compatibility Patch and Audio Modification Library, and the viability of many forks of the original project make it quite a challenging task for many to try out this mod. Well, not anymore! This guide will list the steps through which you can easily install the Viper4Android on your OnePlus 12 without any intricacies as such. So without further ado, let’s get started.
How to Install Viper4Android on OnePlus 12
Droidwin and its members wouldn’t be held responsible in case of a thermonuclear war, your alarm doesn’t wake you up, or if anything happens to your device and data by performing the below steps.
- To begin with, root your device via Magisk.
- Then download the ViPER4Android-RE Magisk module.
- Likewise, download the ViPER4Android-RE app as well.
- Now launch Magisk, go to Modules, and tap on Install from Storage.

- Then select the Viper4Android mod and flash it. Once done, hit Reboot.
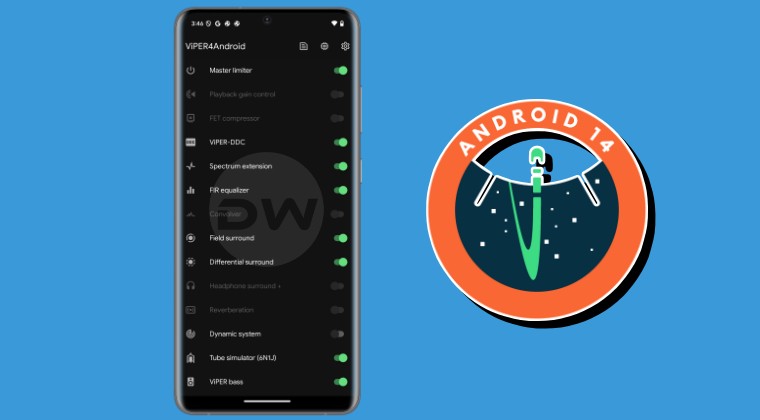
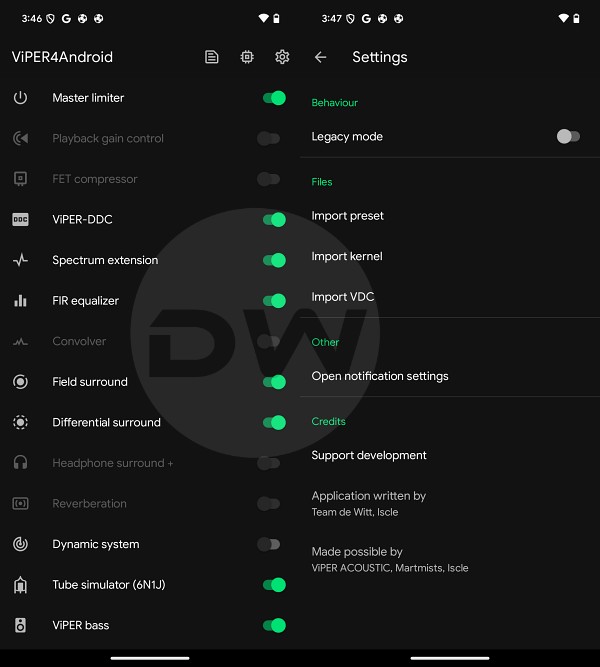
- Now install the Viper4Android app as well.
- Then launch it and tweak it as per your requirements.

That’s it. These were the steps to install the Viper4Android on your OnePlus 12. If you have any queries concerning the aforementioned steps, do let us know in the comments. We will get back to you with a solution at the earliest.


