In this guide, we will show you the steps to install the TWRP Recovery on your Galaxy S24 Ultra. If you are planning to step into custom development, then having a custom recovery in your arsenal could be your best bet. However, that has proved to be easier said than done due to the complications involved in porting these recoveries. Fortunately, Samsung is among the very few OEMs wherein developers are still actively creating these recoveries.
And one shouldn’t look any further than the latest flagship from the South Korean conglomerate which has just been blessed with TWRP. As a result of which, you could now easily flash the desired ZIP file, take a backup of numerous partitions on your device, including the likes of data, modem, and efs [which houses your IMEI number], and carry out a slew of other related crucial activities. So without further ado, let’s make you aware of the steps to install the TWRP Recovery on your Galaxy S24 Ultra. Follow along.
Table of Contents
Perks and Risks of TWRP Recovery
Once you have installed the TWRP Recovery, you could then flash a plethora of mods and ZIPs onto your device. Along the same lines, you could also take a backup of all the partitions on your devices via its Nandroid Backup feature. Then if you root your device via Magisk, you would have gained access to the system partition. Consequently, you could try out a plentitude of mods, including the likes of Magisk Modules, Viper4Android, Xposed Framework, and Substratum Themes among others.
However, these tweaks come with a few risks as well. First off, the process requires an unlocked bootloader. Doing so will wipe off all the data and could nullify the warranty as well. Likewise, Knox will also be tripped which will result in the inability to use banking apps. Likewise, Netflix WideVine L1 will be degraded to L3, hence Full HD resolution might not be supported. If that’s well and good, then let’s proceed ahead with the steps to install TWRP Recovery on Galaxy S24 Ultra.
How to Install TWRP Recovery on Galaxy S24 Ultra
The below instructions are listed under separate sections for ease of understanding. Make sure to follow the same sequence as mentioned. Moreover, before starting, please take a backup of all the data on your device. Droidwin and its members wouldn’t be held responsible in case of a thermonuclear war, your alarm doesn’t wake you up, or if anything happens to your device and data by performing the below steps.
STEP 1: Unlock Bootloader on Galaxy S24 Ultra
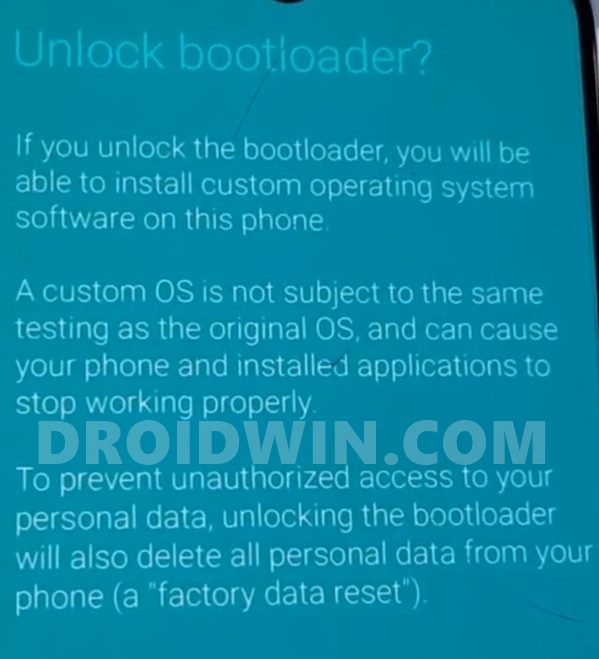
First and foremost, you will have to unlock the bootloader on your device. For that, you may refer to our comprehensive guide on How to Unlock Bootloader on Galaxy S24/Plus/Ultra. Once the process is complete and your device boots up, don’t restore the data yet, as your device will again have to go for a wipe in the subsequent step.
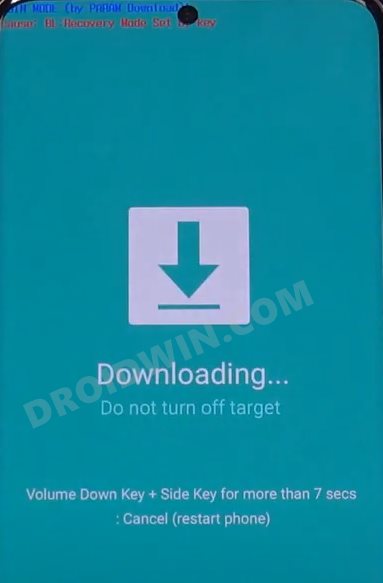
STEP 2: Boot Galaxy S24 Ultra to Download Mode
You will have to boot your device to Download Mode so that you can flash the required mods. So either refer to our detailed guide on How to Boot Galaxy S24/Plus/Ultra to Download Mode [3 Methods] or refer to the below shorter instructions:
- To begin with, power off your device.
- Then press and hold the Power and Volume Up keys and your device will be booted to Stock Recovery.
- Now highlight the Reboot to Bootloader option using the Volume keys and then press the Power key to confirm it.
- Your device should now boot to the Download Mode.
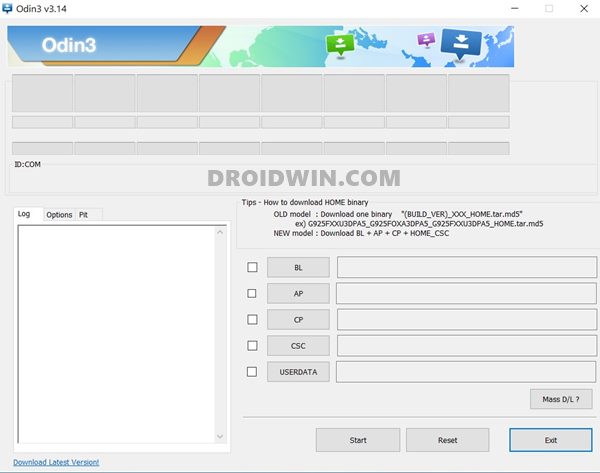
STEP 3: Install Odin
Next up, you will have to download and install the Odin Tool onto your PC. This is needed to flash the TWRP and to disable AVB on your device. So get hold of the latest Odin from here: Download: Odin3-v3.14.4.zip. Once downloaded, extract it to any convenient location on your PC.
STEP 4: Disable Android Verified Boot on Galaxy S24 Ultra
Next up, you will have to disable AVB on your device which would then allow you to flash the desired custom binary (in this case, TWRP and Magisk).
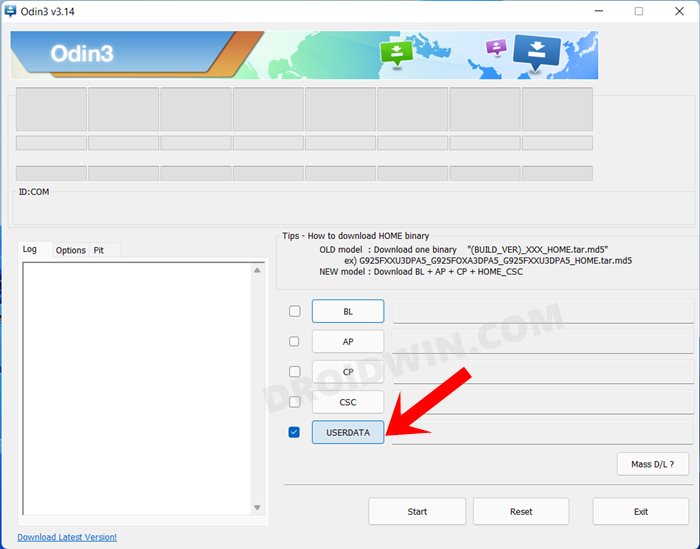
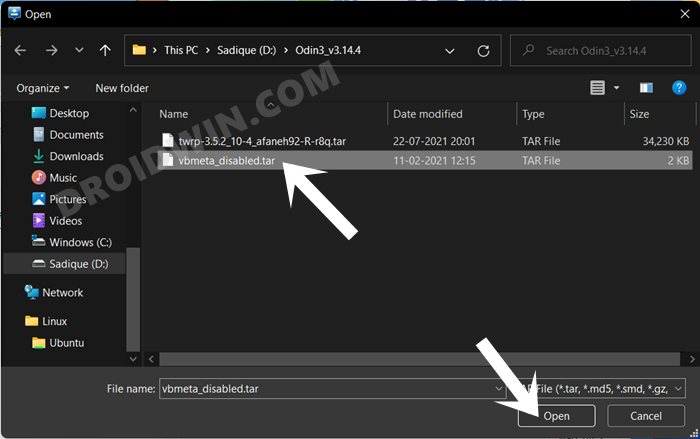
- So start off by downloading the vbmeta_disabled.tar file onto your PC.
- Now connect your device to the PC via USB cable (make sure that it is booted to Download Mode)
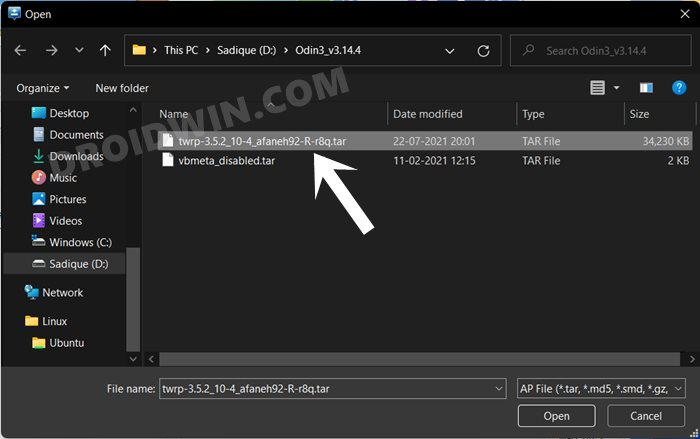
- Then launch the Odin Tool and click on the Userdata button.

- Navigate to the vbmeta_disabled.tar file, select it, and click Open.
- Finally, click on the Start button. You shall now get a prompt on your device, stating that “You have to reset your device to factory settings”.
- So use the Volume Keys to select the reset option and hit the Power key to confirm it.
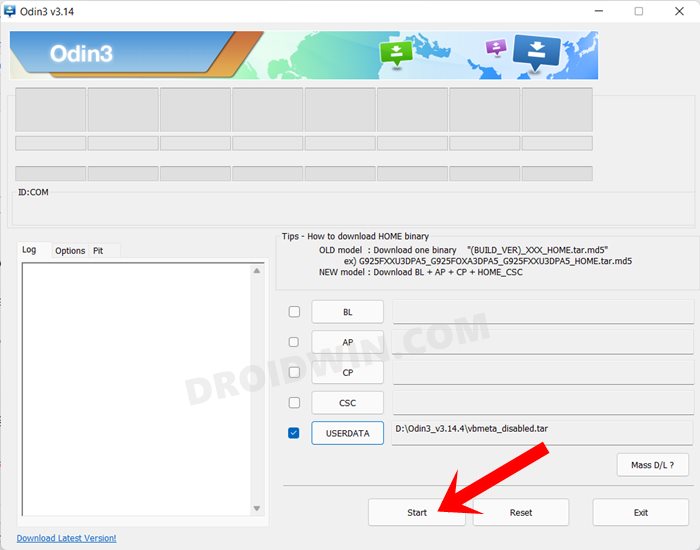
Your device will now undergo a reset and then, the AVB stands disabled. You may now proceed ahead to install the TWRP Recovery on your Samsung Galaxy S24 Ultra.
STEP 6: Download TWRP Recovery for Samsung Galaxy S24 Ultra
You can now grab the latest custom recovery for your device from the below link [Credits: XDA Senior Member Ungeskriptet]
TWRP for Galaxy S24 Ultra [SM-S928B]: twrp-3.7.1_12-0-e3q.img
STEP 7: Install TWRP Recovery on Samsung Galaxy S24 Ultra
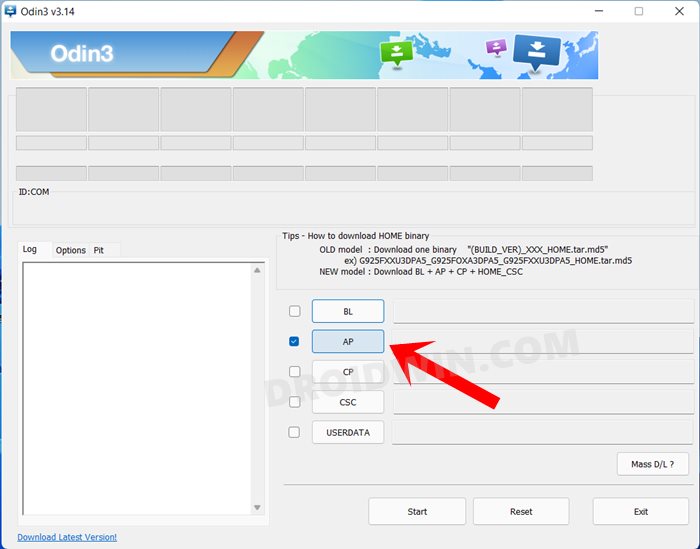
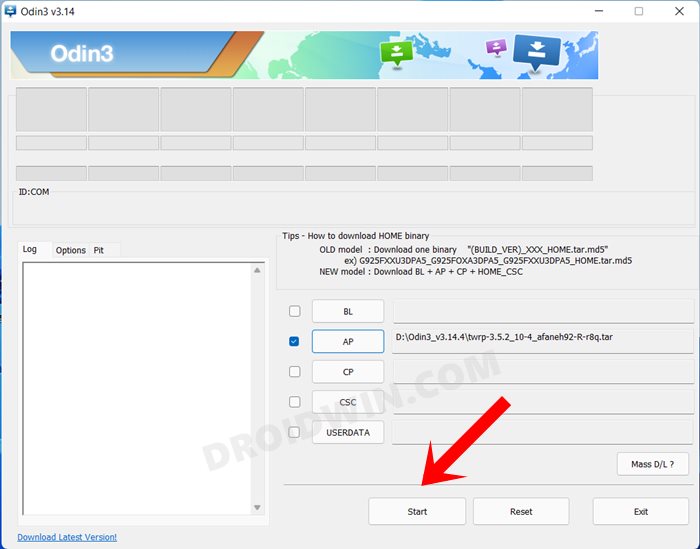
- Launch the Odin Tool on your PC and click on the AP button.
- Navigate to the downloaded TWRP.tar file, select it and click Open.
- Finally, uncheck Auto Reboot and hit the Start button to flash TWRP.
- As soon as the flashing is complete, hold the Volume Down and Power buttons until the screen goes black.
- Once that happens, immediately switch to holding the Volume Up and Power buttons to reboot into TWRP
STEP 8: Format Galaxy S24 Ultra
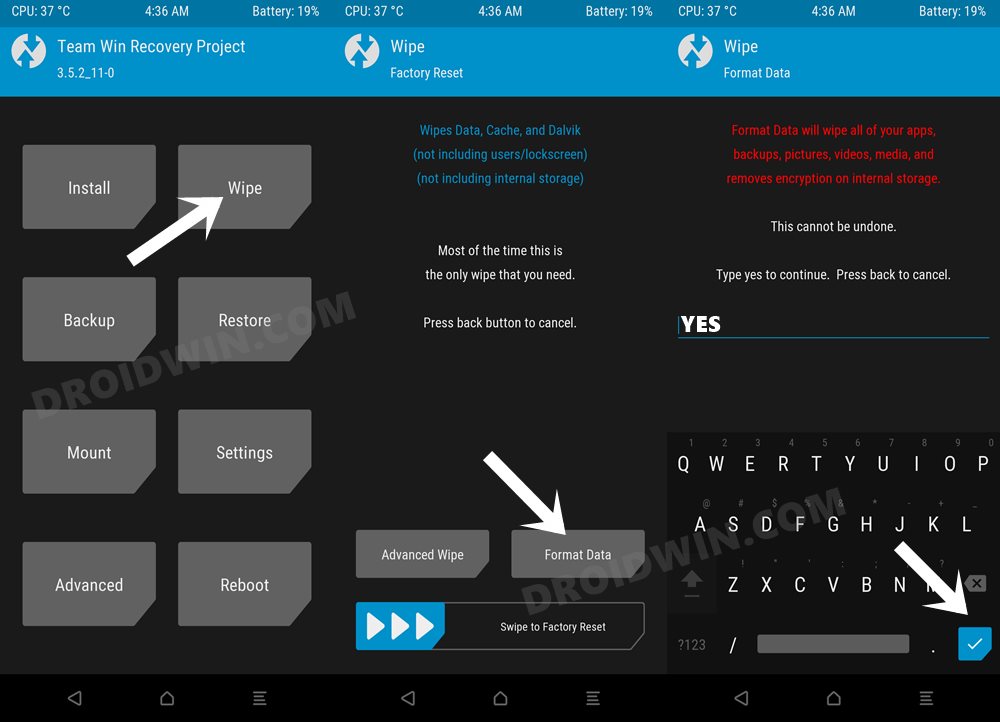
- From TWRP, go to Wipe and select Format Data.
- Then type in YES in the space provided and tap on the checkmark situated at the bottom right.
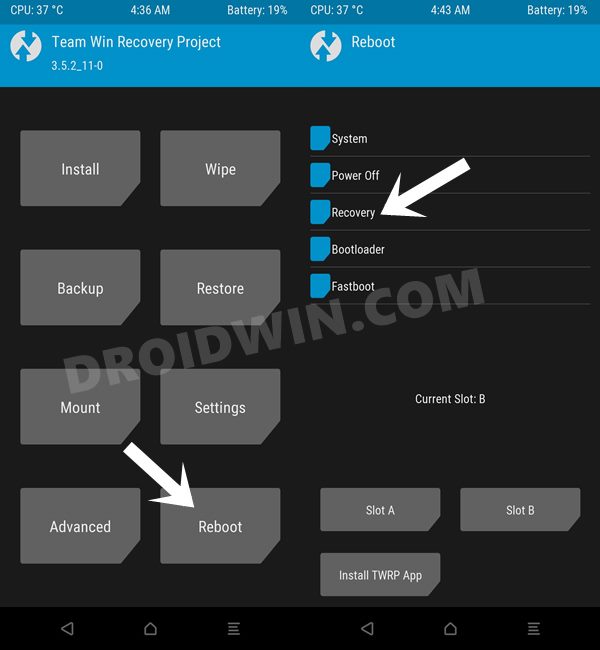
- Once the format is complete, you will have to reboot the device to TWRP. So go to Reboot and select Recovery.
STEP 9: Fix Stock Recovery Restoration
To prevent the custom recovery from being replaced by stock recovery upon reboot, you’ll have to flash the repack.zip file.
- To begin with, transfer the repack.zip file to your device.
- Then go to Install, select the repack.zip file, and flash it.
- Finally, go to Reboot and select System to boot to the OS.
That’s it. These were the steps to install the TWRP Recovery onto your Galaxy S24 series. If you have any queries concerning the aforementioned steps, do let us know in the comments. We will get back to you with a solution at the earliest.