In this guide, we will show you the steps to root your Android device without using the Fastboot Mode. Gaining administrative privileges via Magisk has always been the preferred tweak for tech enthusiasts. However, it goes without saying that the drawbacks attached to rooting are forever on an upward trajectory. Not only that, but the changes to the rooting procedure [patching init_boot instead of boot] have also made it quite difficult for the newcomers.
And now, the OEMs are making life all the more difficult. The latest one to make its presence felt is OnePlus which seems to have drastically fallen down in the custom development ever since its so-called merger with Oppo. If you thought the fiasco with the MSM Tool was a cause for concern, then that’s nothing compared to what we are about to blow the lids off- the bootloader is no longer accessible on numerous OnePlus devices after installing the latest OxygenOS update.
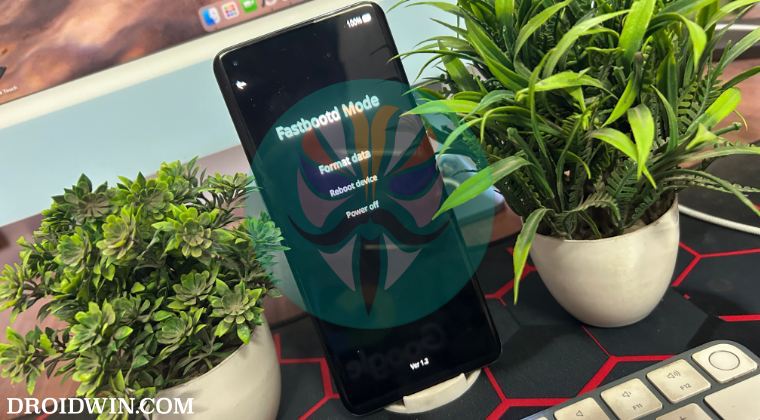
The devices in question are the OnePlus 10 Pro and 11. What seemed like any other normal OTA update had hidden something much worse within itself. Right after installing it, users were unable to boot their device to Fastboot Mode, neither via the adb reboot bootloader command nor via the hardware key combinations or any third-party apps.
While we cannot yet cement the fact whether it’s due to a buggy update or an intentional move from OnePlus, but don’t be surprised if it’s the latter. With that said, many users are now left out in the open with no way to root their devices. Well, not anymore! In this guide, we will show you a nifty method using which you could root your Android device without using the Fastboot Mode. So without further ado, let’s get started.
Table of Contents
How to Root Android without using Fastboot Mode [via FastbootD]
It goes along the obvious line that your device’s bootloader needs to be unlocked beforehand. So this tweak is only applicable to those users who had their device’s bootloader unlocked before installing the OTA update that nullified the Fastboot Mode. If your device’s bootloader is still locked and you cannot use the Fastboot Mode, then you’ll first have to downgrade your device to OxygenOS 13, unlock the bootloader, and then install OxygenOS 14. Once that is done, you may proceed with the below steps:
We have only tested this guide for those OnePlus devices that use boot.img for root [i.e. launched with Android 12 or older version out of the box]. We haven’t tested this for those OnPlus that use init_boot.img [devices launched with Android 13+], still we will be listing out the steps for them as well.
Before starting, please take a backup of all the data on your device, just to be on the safer side. The below instructions are listed under separate sections for ease of understanding. Make sure to follow the same sequence as mentioned. Droidwin and its members wouldn’t be held responsible in case of a thermonuclear war, your alarm doesn’t wake you up, or if anything happens to your device and data by performing the below steps.
STEP 1: Install Android SDK
 First and foremost, you will have to install the Android SDK Platform Tools on your PC. This is the official ADB and Fastboot binary provided by Google and is the only recommended one. So download it and then extract it to any convenient location on your PC. Doing so will give you the platform-tools folder, which will be used throughout this guide.
STEP 2: Enable USB Debugging and OEM Unlocking
Next up, you will have to enable USB Debugging and OEM Unlocking on your device. The former will make your device recognizable by the PC in ADB mode. This will then allow you to boot your device to Fastboot Mode. On the other hand, OEM Unlocking is required to carry out the bootloader unlocking process.
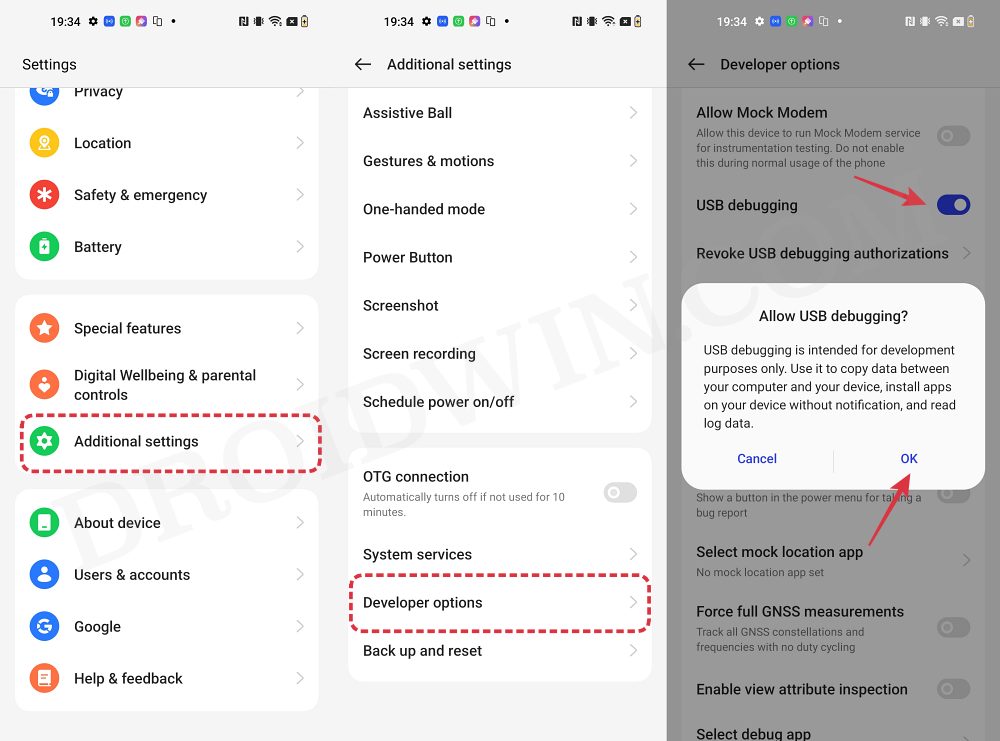
So head over to Settings > About Phone > Tap on Build Number 7 times > Go back to Settings > System > Advanced > Developer Options > Enable USB Debugging and OEM Unlocking.
STEP 3: Download Firmware
Next up, download the stock firmware for your device from the OnePlus official website or via the Oxygen Updater App. Make sure to download the same version which is currently installed on your device. You can verify the same from Settings > About Device > Version > Build/Version Number.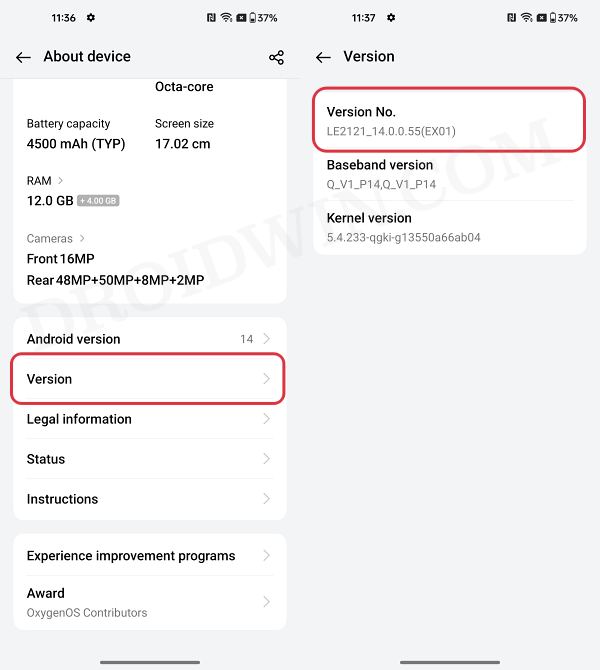
STEP 4: Extract Boot/Init from Payload.bin
Once you have downloaded the firmware, extract it to any convenient location on your PC. Doing so shall give you a couple of files, including the payload.bin.

For the unaware, OnePlus packs all its partition IMG files inside this payload.bin file, so you will have to extract it first. For that, you may refer to our guide on How to Extract payload.bin and get the stock boot/init image file.
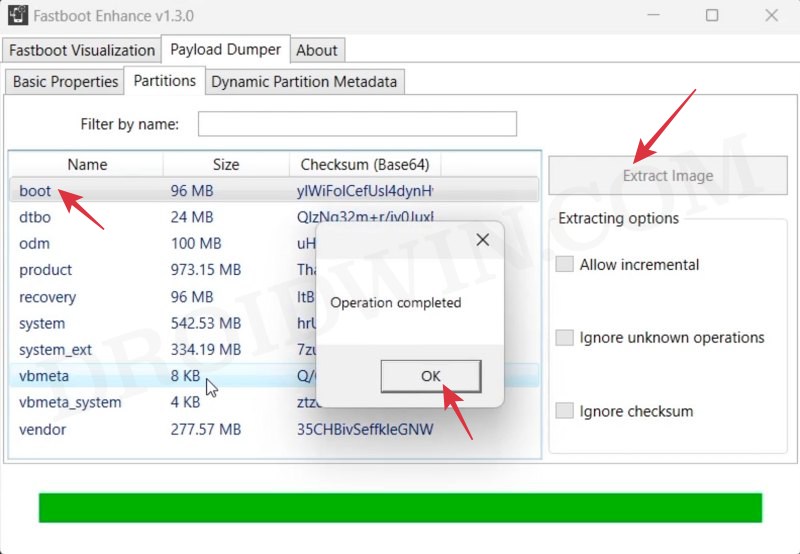
STEP 5: Patch Boot/Init Boot via Magisk
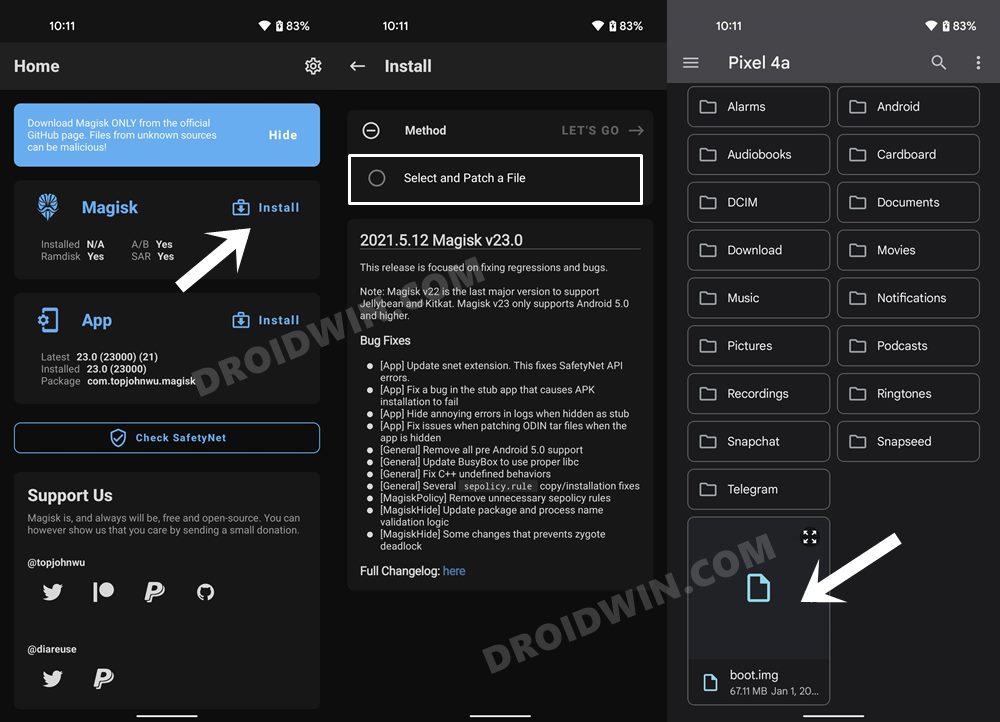
- Download and install the Magisk App on your device.
- Then launch it and tap on the Install button next to Magisk.
- After that, choose ‘Select and Patch a File’, and navigate to the stock boot.img file, and select it.

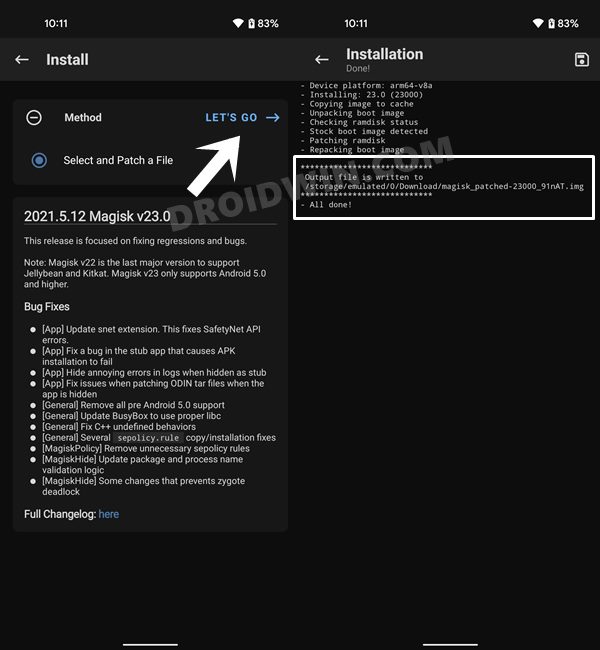
- Then tap on the Let’s Go button situated at the top right.

- The boot/init_boot file will now be patched and placed under the Downloads folder on your device.
- You should transfer this file to the platform-tools folder on your PC. We will now be using this file to root your Android device without Fastboot Mode.

STEP 6: Boot Android to FastbootD Mode
- Now connect your device to the PC via USB cable. Make sure USB Debugging is enabled.
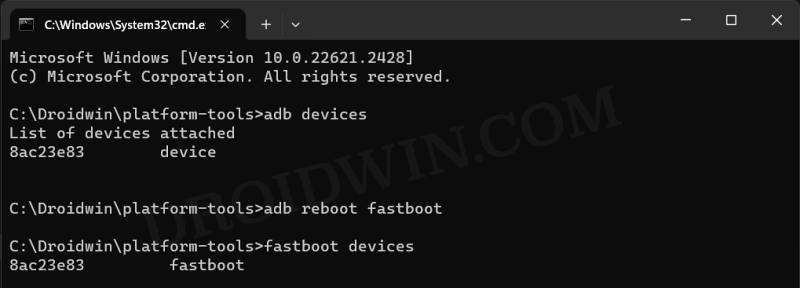
- Then head over to the platform-tools folder, type in CMD in the address bar, and hit Enter. This will launch the Command Prompt.

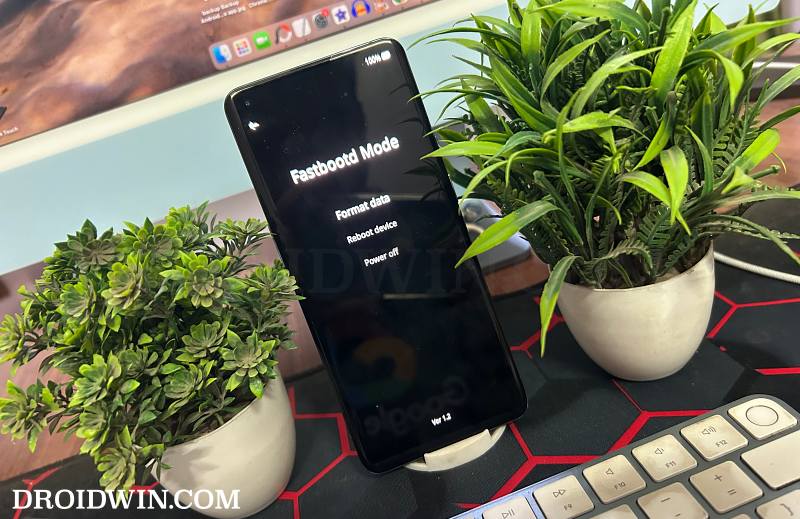
- Type in the following command in the CMD window to boot your device to FastbootD Mode
adb reboot fastboot

- To verify the Fastboot connection, type in the below command and you should get back the device ID.
fastboot devices

- If you are not getting any Serial ID, then please install Fastboot Drivers.
STEP 7: Root Android via FastbootD
If you are using the boot.img, then execute the below command to flash the patched boot.img to the boot partition [NOTE: You cannot use the fastboot boot command in FastbootD Mode, fastboot flash is your only way out in this mode]
fastboot flash boot magisk_patched_boot.img
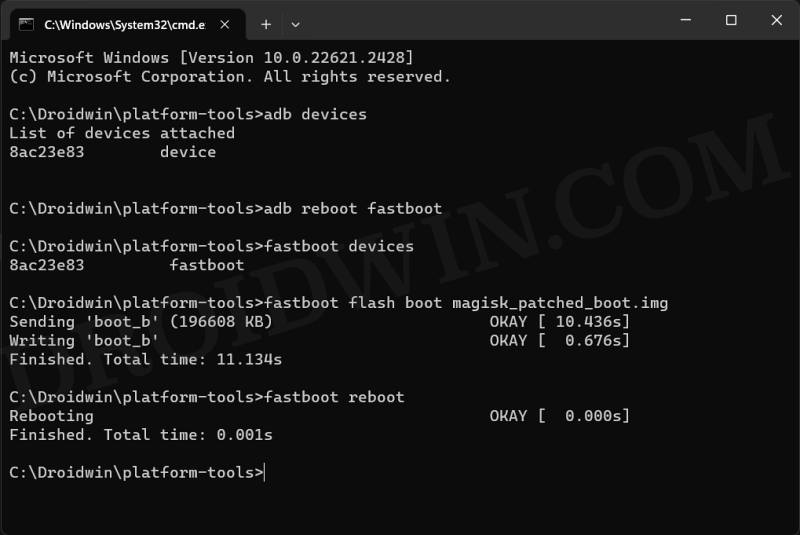
On the other hand, if you are using the init_boot.img, then execute the below command to flash the patched init_boot.img to the init_boot partition
fastboot flash init_boot magisk_patched_boot.img
That’s it. These were the steps to root your Android device without using Fastboot Mode [via FastbootD Mode]. If you have any queries concerning the aforementioned steps, do let us know in the comments. We will get back to you with a solution at the earliest.
