In this guide, we will show you various methods through which you can pass the Play Integrity Test on any custom ROM. The custom development has seen quite a massive change in recent months. Gone are the days when you just needed to pass the SafetyNet Test to use banking and payment apps in a modified environment. Instead of that, you’ll now have to pass Play Integrity, which is proving to be quite a challenging task with each passing day.
The reason for the same is the fact that this time around there is direct involvement from Google. As soon a developer manages to find a custom build.prop/fingerprint that passes this test and releases it in the form of a module, the Silicon Valley giant tends to patch it right away [since the module is open source, the tech giant could easily get hold of all the required information].
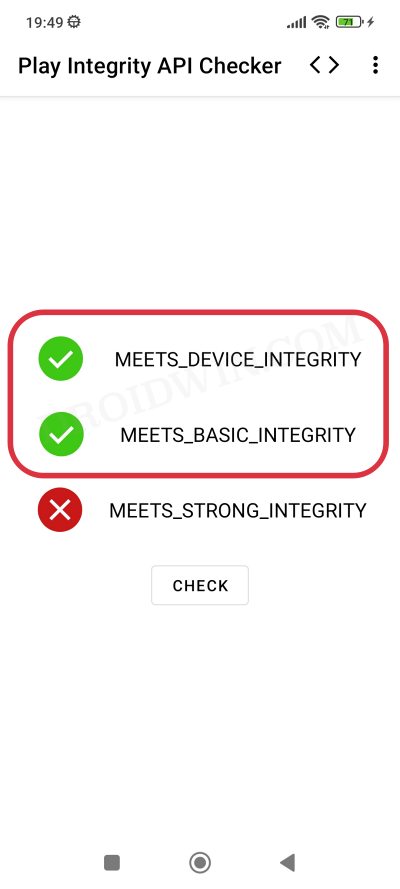
Therefore, as of now, your best bet is to manually find a fingerprint from one of the least popular devices out there in the market, grab hold of its build,prop, create a JSON file using it, and then flash the resultant module. However, finding such a device is in itself quite a tough job as Google has already patched most of the devices. So if you manage to get hold of one, make sure to keep it with yourself and implement it only on your device.
If shared with others, then it will be patched by Google sooner than later. If we talk about this in the custom ROM domain, then most ROMs tend to fail both the Basic and Device Integrity Tests, even if you haven’t rooted it. As a result, you wouldn’t be able to use any banking and payment apps with your preferred ROM. To overcome these roadblocks, this guide will show you various methods to pass the Play Integrity Test on your custom ROM. So without further ado, let’s get started.
Table of Contents
How to Pass Play Integrity Test on any Custom ROM
Before starting with any of these methods, please take a complete device backup beforehand. Moreover, you’ll have to root your custom ROM, or else none of the below-listed methods will work. So make sure to checkmark that requirement before proceeding ahead. Droidwin and its members wouldn’t be held responsible in case of a thermonuclear war, your alarm doesn’t wake you up, or if anything happens to your device and data by performing the below steps.
Via APK [NEW]
Some custom ROMs like the Evolution X provide an APK that comes with a custom fingerprint that passes the Play Integrity Test out of the box! We will be keeping track of those ROMs and uploading their APKs below. Moreover, after installing the APK, restart your device, delete the data of Play Store, and once again do a reboot. Also, keep in mind that similar to other methods, this APK is also only valid until Google ends up patching it.
APK Version 1
APK Version 2 [NEW]
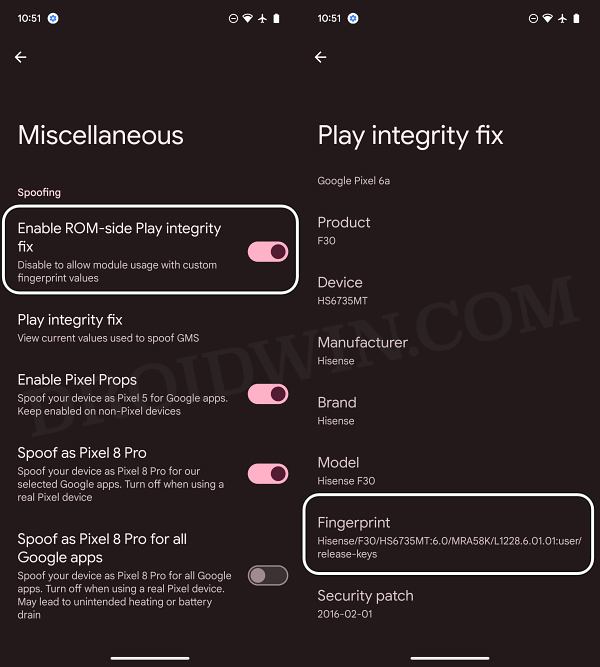
You can verify which fingerprint the APK is using by heading over to Settings > Miscellaneous > Play Integrity Fix section.
Via Module
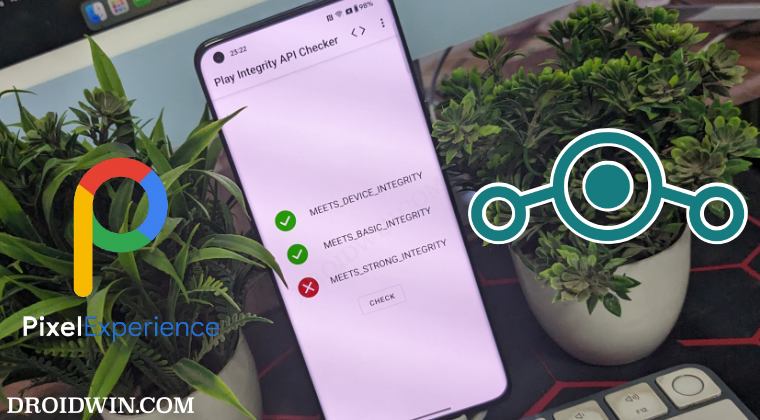
This is the easiest of all the methods, however since this module is open source, the fingerprints might end up being patched sooner than later. In that case, it’s completely up to the developer when he releases a new build [if the existing one gets patched]. Keeping that in mind, here’s what you need to do:
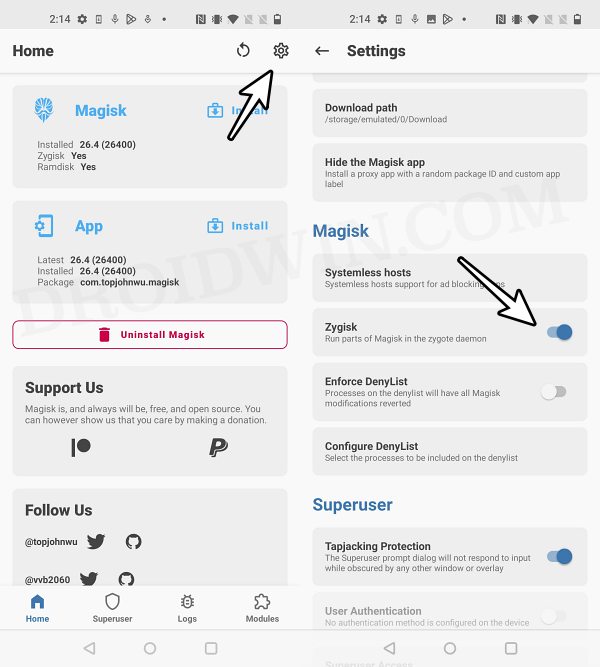
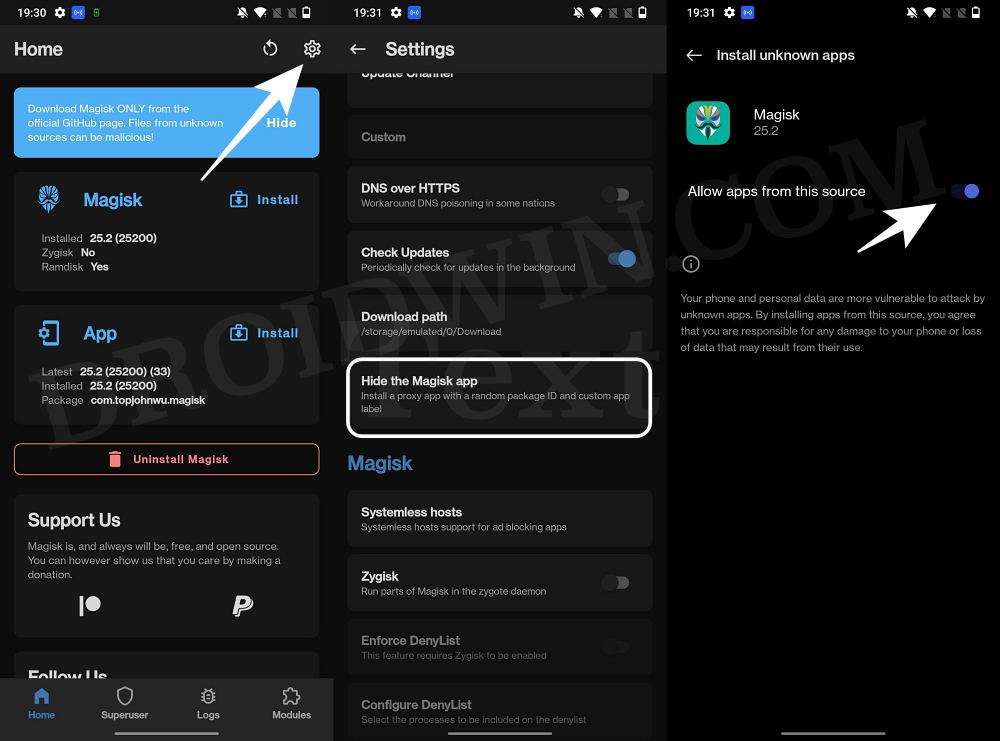
- Launch the Magisk App and tap on the settings icon situated at the top right.
- Then enable the toggle next to Zygisk.

- Now tap on Hide the Magisk App > Enable the toggle next to Allow apps from this source.

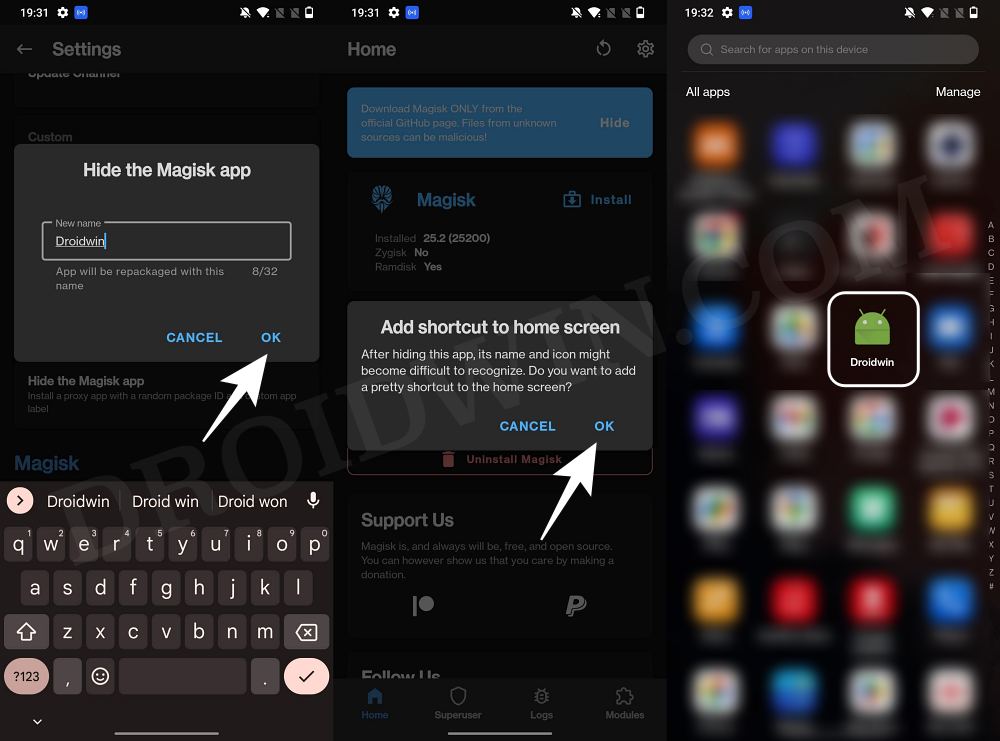
- Assign a new random name to this Magisk app and hit OK.
- It will now ask for a home-screen shortcut, tap OK [recommended].

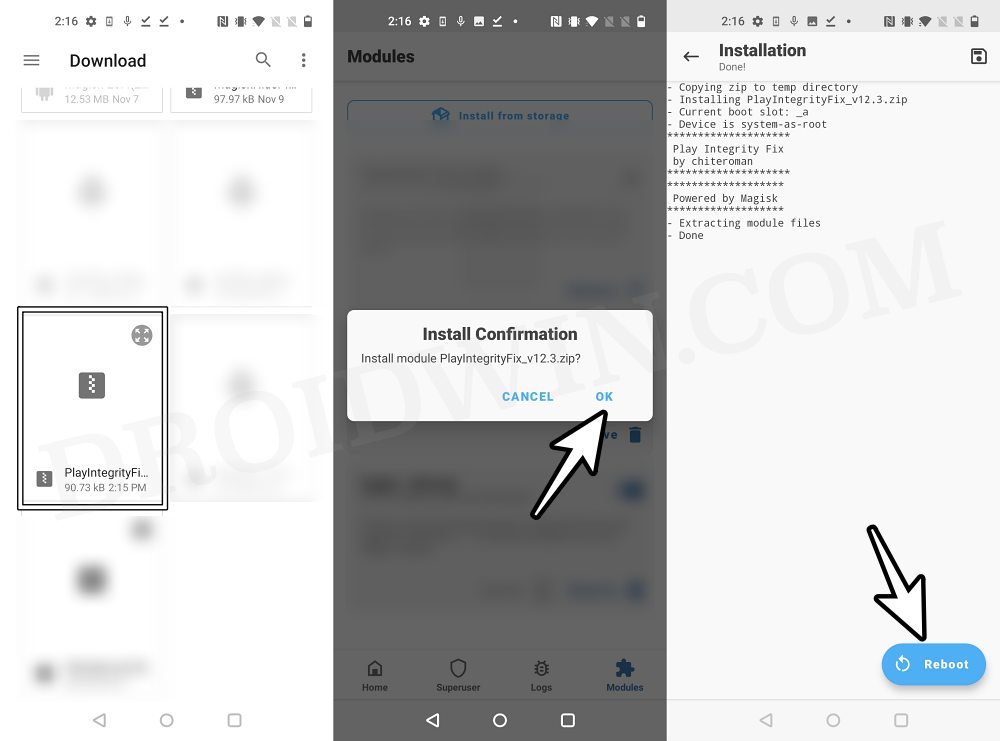
- Now download the “latest version” [extremely important] of Play Integrity Fix from GitHub.
- Then flash the module via Magisk and restart your device.

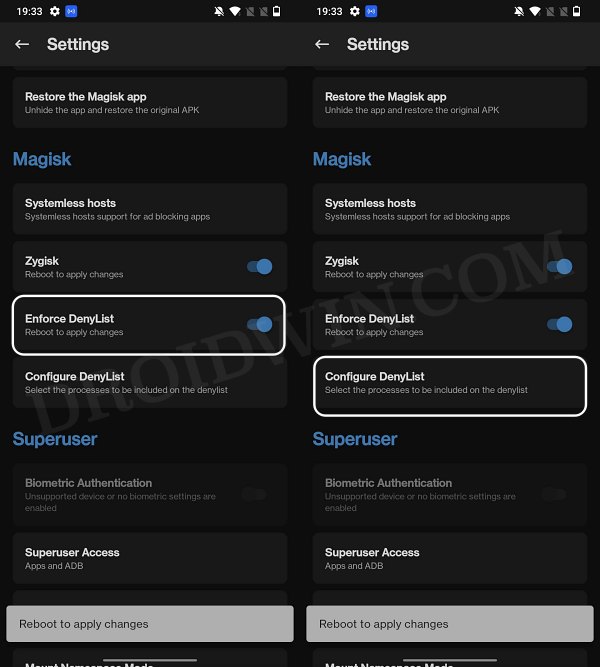
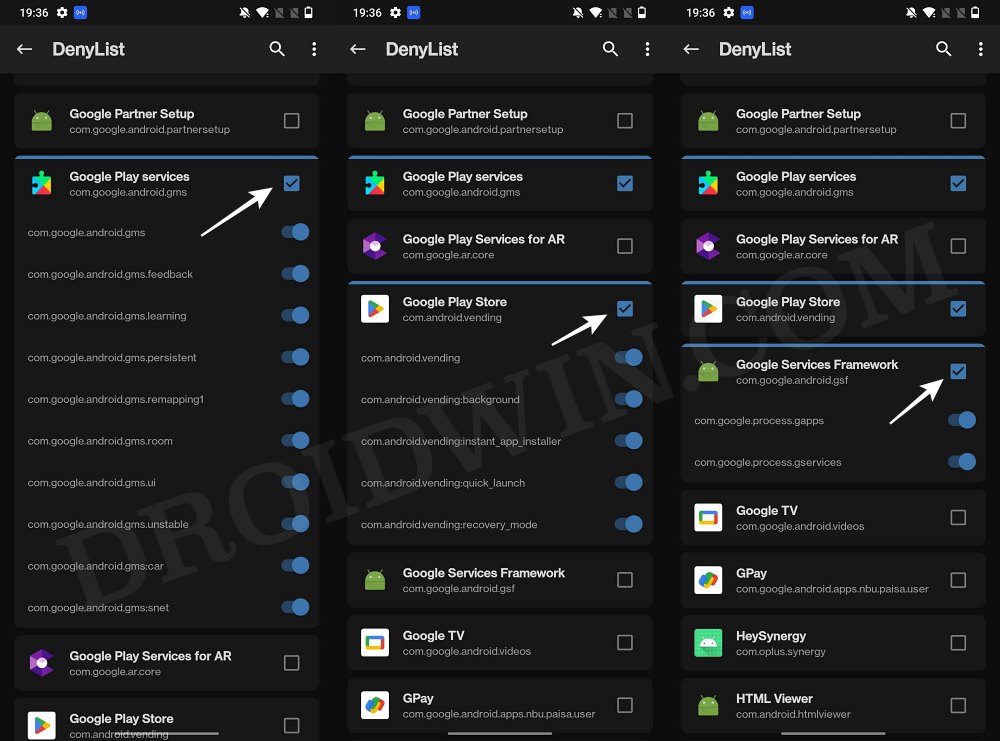
- Then enable the toggle next to Enforce Denylist. Now tap on Configure Denylist.

- Then expand the following apps and checkmark all its services
Google Play Service
Google Play Store
Google Service Framework
Google Play Protect Service [if present]

- Likewise, do the same for the banking/payment apps of your choice.
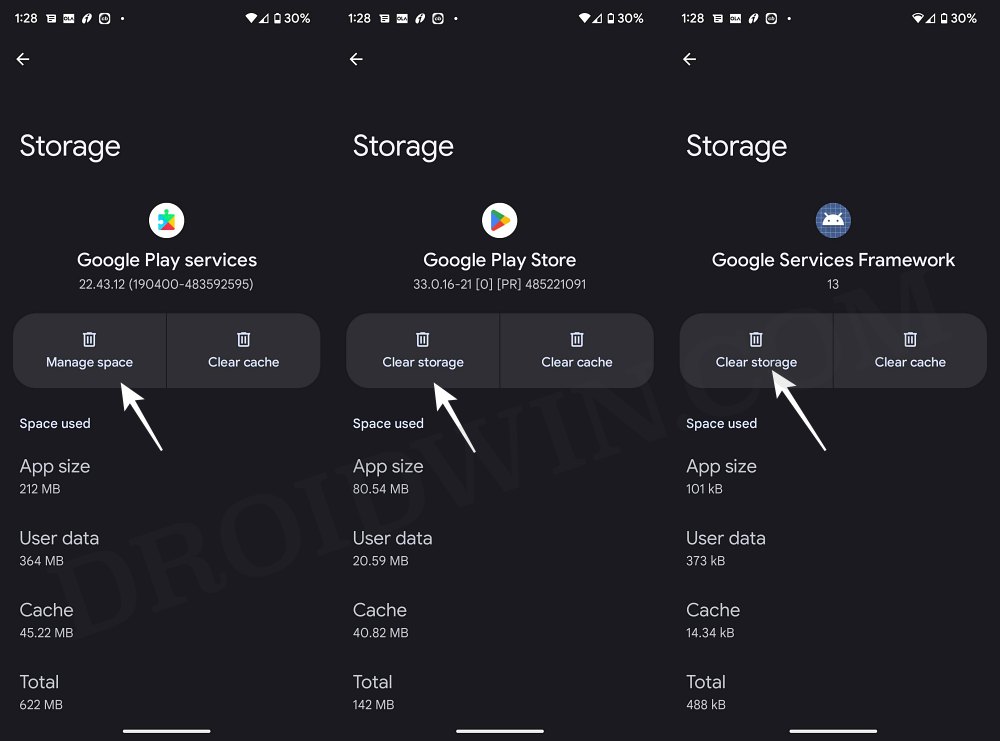
- Finally, delete the data from all the apps from which you have hidden root.

- Once done, restart your device [compulsory] and check out the result.
Via Pixel Flasher
Initially, Pixel Flasher gave us the platform to directly upload the build.prop JSON file that is passing the Play Integrity Test [instead of manually pushing it to the device]. Now, it has gone a step ahead and even incorporated a feature that will generate a random JSON file for you. So the major task of creating a JSON file is taken care of by the tool itself.
Use Custom Fingerprint/Build.Prop to Pass Play Integrity Test
You only need to do a couple of clicks to generate this file and send it to your device. After that, perform the test and check if your device is passing it. If it’s not, then again instruct the tool to generate a new JSON file and keep on doing so until you achieve success. All of this is given in the above linked guide, do check it out.
Manual Method
In this method, you’ll have to manually find a less popular device that is unknown to the masses, then get hold of the build.prop files. After that, you’ll need to find the PRODUCT (ro.*.name), DEVICE (ro.*.device), MANUFACTURER (ro.*.manufacturer), BRAND (ro.*.brand), MODEL (ro.*.model), and FINGERPRINT (ro.*.fingerprint), and the SECURITY_PATCH (ro.build.version.security_patch from system build.prop) values.
Use Custom Fingerprint/Build.Prop to Pass Play Integrity Test
Then you’ll have to create a JSON file using these values and transfer it to your device. While this is the most tedious out of all the three methods listed here, but it has the least chance of getting caught by Google and hence comes with the highest success rate. So if you wish to try it out, then do refer to the above guide, it will directly take you to the required section.


James
The PIFPrebuilt.apk won’t install: Xiaomi Redmi Note 11, A14, crDroid v10. (and there is no other version of this app installed)
“App not installed as package conflicts with an existing package.”
adb install –bypass-low-target-sdk-block PifPrebuilt.apk
platform-tools>adb install –bypass-low-target-sdk-block PifPrebuilt.apk
Performing Streamed Install
adb: failed to install PifPrebuilt.apk: Failure [INSTALL_FAILED_SHARED_USER_INCOMPATIBLE: Reconciliation failed…: Reconcile failed: Package com.goolag.pif has no signatures that match those in shared user android.uid.system; ignoring!]
PI Checker still fails device integrity, even with PIF 15.2. I see it says “no fingerprint” with the release so what solution to get one? Play shows not certified now as well.