In this guide, we will show you a couple of methods to fix the corrupt boot partition on your Android device. Recently, I came across an intriguing query wherein a user had permanently flashed the TWRP Recovery to the boot partition. He had verified that his device does not have a recovery partition and so he proceeded ahead to flash the TWRP to the boot partition. And this is where things began to go south.
First off, checking for the presence/absence of a recovery partition is definitely recommended before flashing a custom recovery before the flashing command is dependent on that. If your device does have a recovery partition, then you could directly flash it via fastboot flash recovery twrp.img. However, if your device doesn’t have a recovery partition, then you cannot directly flash the recovery to the boot partition, in other words, you cannot use fastboot flash boot twrp.img.
So what else could be done? Well first off, temporarily boot to TWRP via fastboot boot twrp.img and then permanently flash it via the available methods. But since the user had already flashed it to the boot partition, every time he tries to access the OS he was taken back to TWRP [because the boot partition now has TWRP installed].
While this sounds like a scary situation to be stuck in, fortunately, there does exist a couple of methods that should help you fix the corrupt boot partition on your Android device. So without further ado, let’s check them out.
Table of Contents
Fix Corrupt Boot Partition on Android [Cannot Boot to OS]

There exist two different methods to get the job done, both with its fair share of issues and drawbacks. So go through both of them once and then try out the one which is in sync with your requirement. Droidwin and its members wouldn’t be held responsible in case of a thermonuclear war, your alarm doesn’t wake you up, or if anything happens to your device and data by performing the below steps.
FIX 1: Flash Boot.img
This is the shorter and easier of the two methods and all that you need to do is simply flash the boot.img to the boot partition. However, the boot.img should be of the exact same firmware version which is currently installed on your device. Unfortunately, currently, there is no way of checking the same, so only proceed with the below steps if you could recall the currently installed firmware, otherwise, skip over to the next method.
- Download the firmware which is currently installed on your device and extract the boot.img from it.
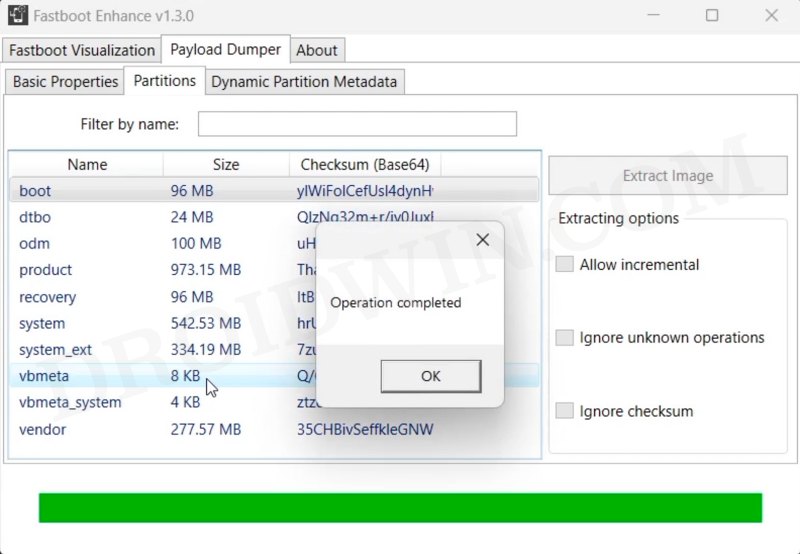
- If it’s in ZIP, then you could 7ZIP/WinRar. If it’s in payload.bin, then use Fastboot Enhance Tool.

- Now download and extract Android SDK Platform Tools on your PC.
- Then transfer the boot.img file to the platform-tools folder.
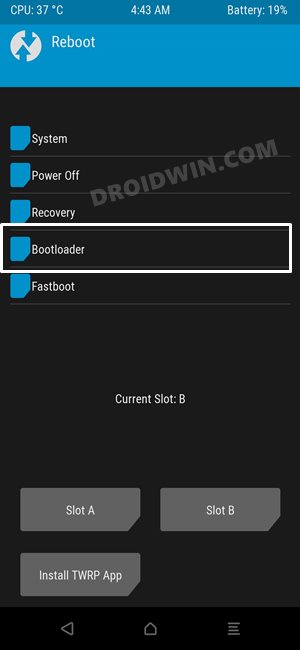
- Now, if your device is in TWRP, then go to Reboot and select Bootloader.
- It should now boot to Fastboot Mode. So connect it to PC via a USB cable.
- Now open CMD inside the platform-tools folder and type in the below command:
fastboot flash boot boot.img
- The file will be flashed within seconds. Once done, type in the below command:
fastboot reboot
- The corrupt boot partition is now fixed and your device should boot to the OS.

FIX 2: Flash Firmware
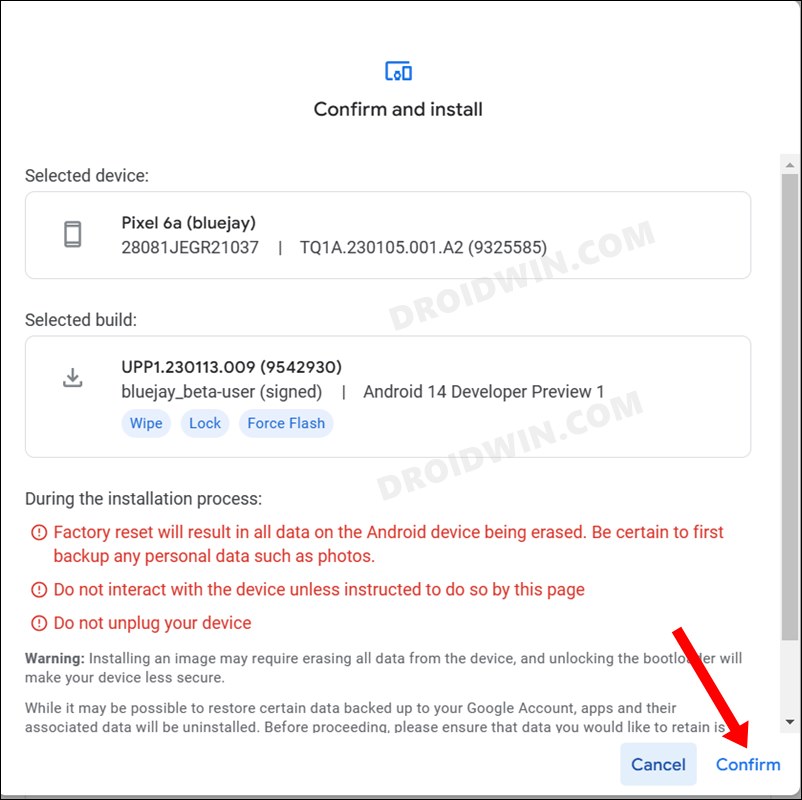
If you are not sure of the currently installed firmware version, then you have no other choice but to flash the entire firmware. In the case of Pixel, you could use the Android Flash Tool, OnePlus users could use the Fastboot Enhance Tool, and Xiaomi users could flash the Fastboot ROM. However, do note that by default, the OEM will reset your device as well. If you want to avoid it [not recommended], then you could modify the flash.bat file and remove the fastboot -w command.
That’s it. These were the various methods that should help you fix the corrupt boot partition on your Android device. If you have any queries concerning the aforementioned steps, do let us know in the comments. We will get back to you with a solution at the earliest.