In this guide, we will show you various methods to fix the Thunderbolt to Ethernet adapter not working in Mac. Many users have voiced their concern that whenever their mac wakes from sleep, then it takes some time for the “Display Ethernet” to detect that it has a cable connected to it.
And once it detects it, it is unable to get a DHCP lease. As a result of which, it goes to the self-assigned IP address. This issue was first reported in macOS Monterey 12.1 and has again made its way over to Ventura. If you are also getting bugged with these issues, then this guide shall help you out. Follow along for various fixes.
Table of Contents
Fix Thunderbolt to Ethernet adapter not working in Mac
It is recommended that you try out each of the below-mentioned workarounds and then see which one spells out success for you. So with that in mind, let’s get started.
FIX 1: Using Terminal
Many users were able to temporarily resolve this issue after performing a reboot. This is because whenever you restart your Mac, it will force-detect everything connected to a USB. So since our main aim is to force detect, we could also do so via the terminal window, instead of a restart. Here’s how:
- Open Launchpad, go to Others, and launch Terminal.
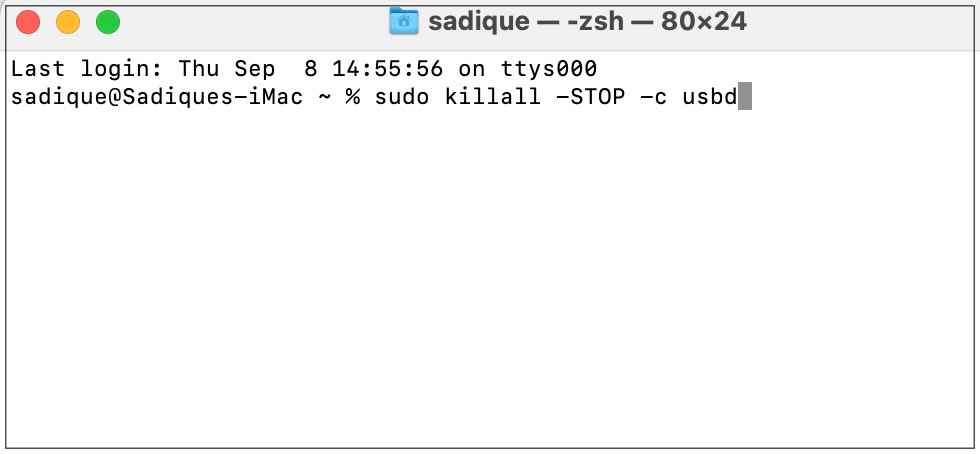
- Then execute the below command in the terminal window:
sudo killall -STOP -c usbd
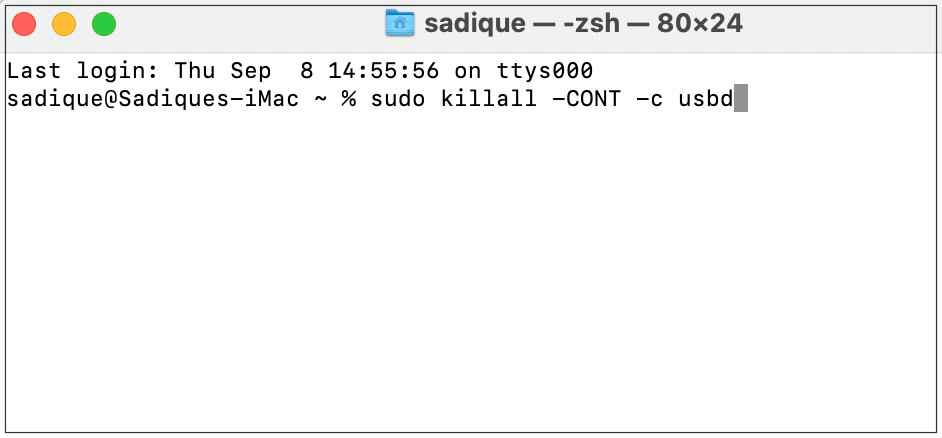
- After that, execute the following command:
sudo killall -CONT -c usbd
- Check if it fixes the Thunderbolt to Ethernet adapter not working in Mac.
FIX 2: Assign Static IP
For many users, assigning IP information statically seems to have worked out for them. So let’s give it a try and check out the results.
- Click on the Apple logo situated at the top left and select System Preferences.
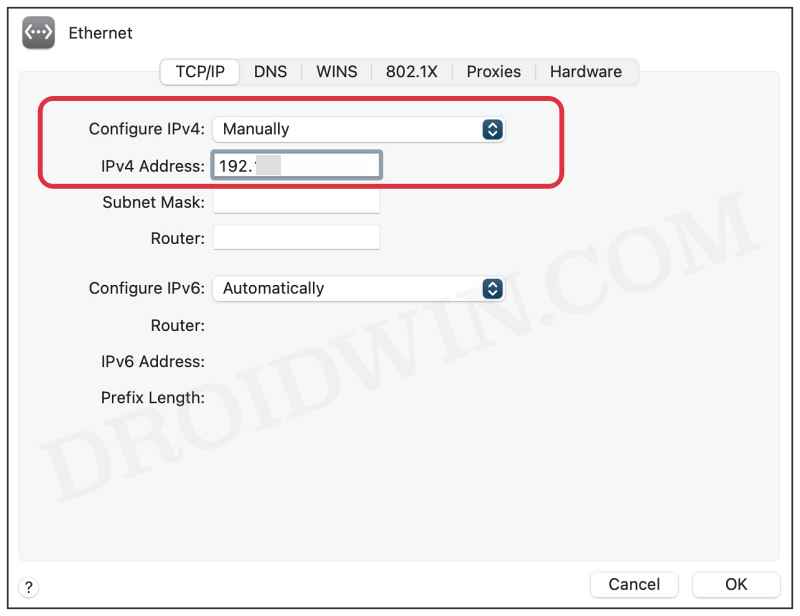
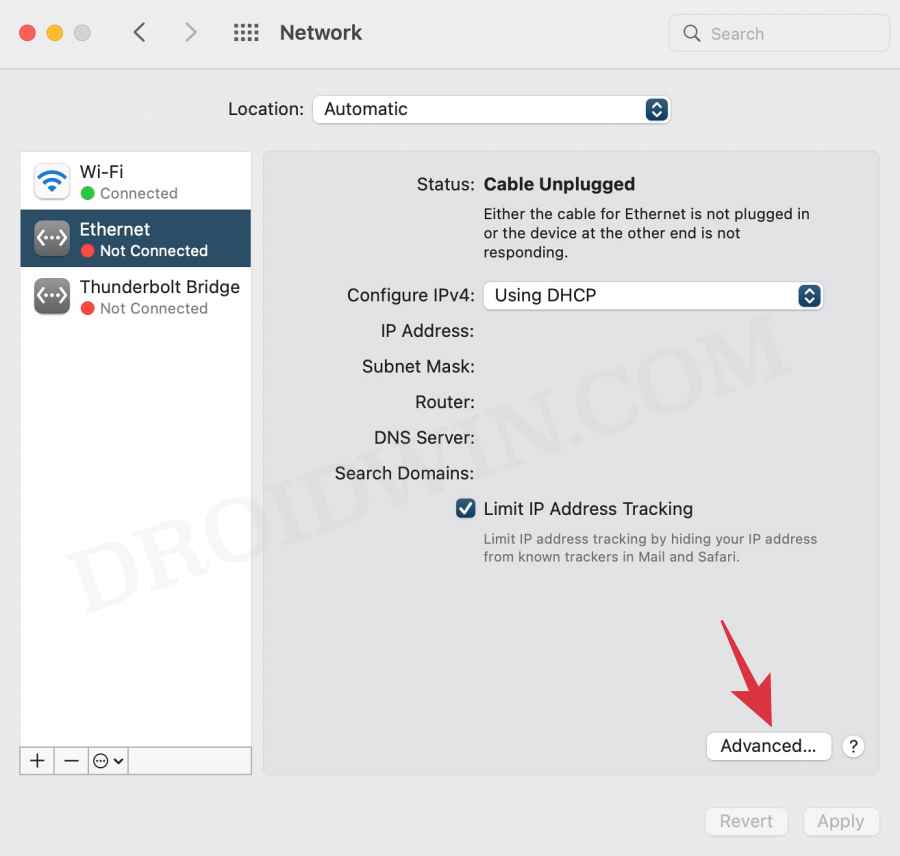
- Then go to Network, select Ethernet from the left-hand side, and click Advanced.

- Now click on Configure IPv4, choose Manually, and enter the address in the IP Address field.

- Check if it fixes the Thunderbolt to Ethernet adapter not working in Mac.
FIX 3: Disable AVB/EAV Mode
- Click on the Apple logo situated at the top left and select System Preferences.
- Then go to Network, select Ethernet from the left-hand side and click Advanced.


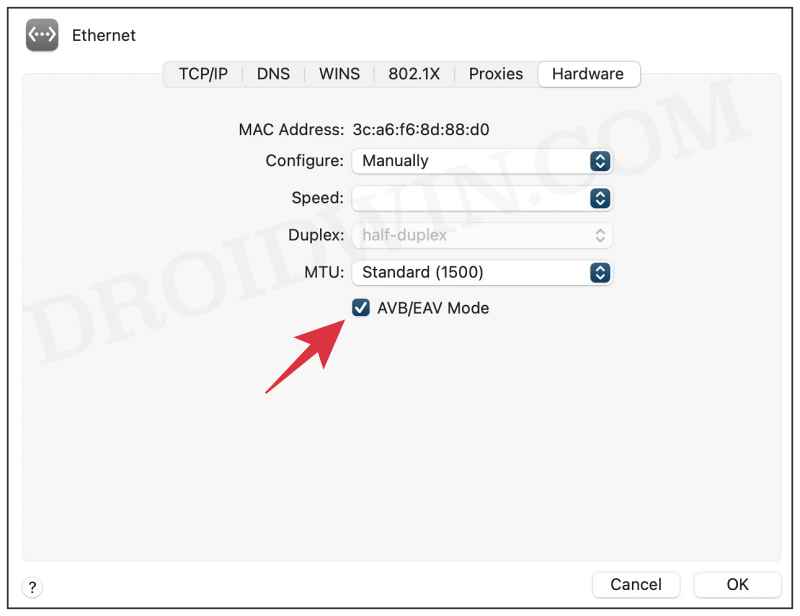
- Now go to the Hardware tab, select Manually next to Configure, and uncheck AVB/EAV Mode.

- Check if it fixes the Thunderbolt to Ethernet adapter not working in Mac.
FIX 4: Use Safe Mode
A few users had multiple SSIDs configured with different IP subnets. In the normal mode, their Mac was unable to pull an IP from DHCP on any of those subnets. However, upon booting to Safe Mode, users were able to connect instantly to each of these subnets every time they made a change to a different SSID. So let’s give it a try and check out the results:
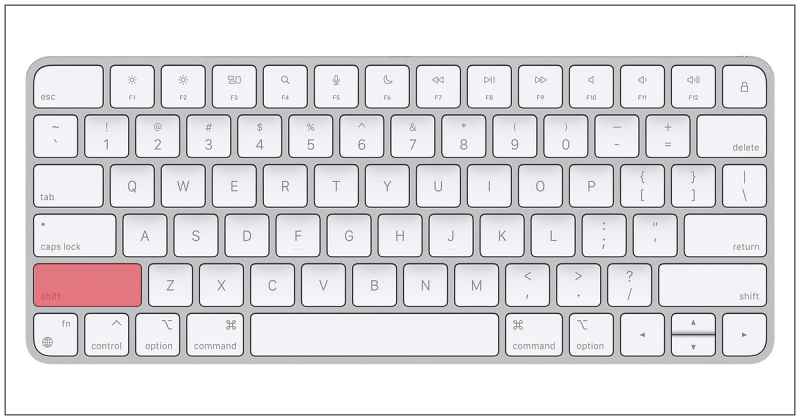
- To begin with, restart your Mac. Then press and hold the Shift key.
- Once you see the login screen, release the Shift key.

- Then type in your credentials and the Mac should now be booted to Safe Mode.
- Now check if it fixes the Thunderbolt to Ethernet adapter not working in Mac.
FIX 5: Manually Renew DHCP
- Click on the Apple logo situated at the top left and select System Preferences.
- Then go to Network and select Ethernet from the left-hand side.


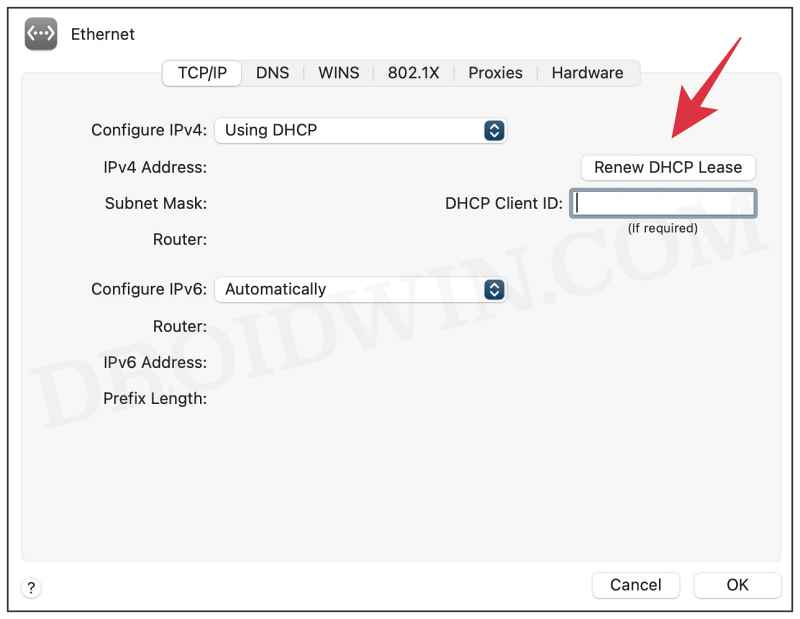
- After that, click on Advanced and click on Renew DHCP Lease.

- That’s it. This should rectify the underlying issue.
So these were the five different methods that shall help you fix the Thunderbolt to Ethernet adapter not working in Mac. If you have any queries concerning the aforementioned steps, do let us know in the comments. We will get back to you with a solution at the earliest.
