In this guide, we will show you the steps to flash the Black Iron Project ROM onto your OnePlus 9 Pro. Up until the eleventh iteration of the OS, OnePlus had one of the best OS skins out there. But ever since its merger with Oppo, it bought about a new UI which is more along the lines of ColorOS than OxygenOS and the end results turn out to be quite disastrous, to say the least.
However, the biggest saving grace among all this is the fact that its ninth series is the most active player in the custom development, so there’s a never-ending support for developers, with one strange-Pixel Experience ROM. It was last rolled out based on Android 12 and since then it’s nowhere to be found. In place of that, we were treated with the Pixel Extended which turned out to be quite exceptional.
Unfortunately, the developer had to leave that project as well and he has moved on to his next venture, which is the Black Iron Project ROM for our OnePlus 9 Pro! So if you are looking to get a fast, stable, and snappy with a few Pixel goodies on the cards, then your best bet is to welcome abode this ROM onto your device. And in this guide, we will show you how to do just that. Follow along.
Table of Contents
How to Flash Black Iron Project on OnePlus 9 Pro [Video]
Before starting with the process, make sure to take a complete device backup beforehand. Droidwin and its members wouldn’t be held responsible in case of a thermonuclear war, your alarm doesn’t wake you up, or if anything happens to your device and data by performing the below steps.
STEP 1: Install Android SDK
First and foremost, you will have to install the Android SDK Platform Tools on your PC. This is the official ADB and Fastboot binary provided by Google and is the only recommended one. So download it and then extract it to any convenient location on your PC. Doing so will give you the platform-tools folder, which will be used throughout this guide.

STEP 2: Enable USB Debugging and OEM Unlocking
Next up, you will have to enable USB Debugging and OEM Unlocking on your device. The former will make your device recognizable by the PC in ADB mode. This will then allow you to boot your device to Fastboot Mode. On the other hand, OEM Unlocking is required to carry out the bootloader unlocking process.
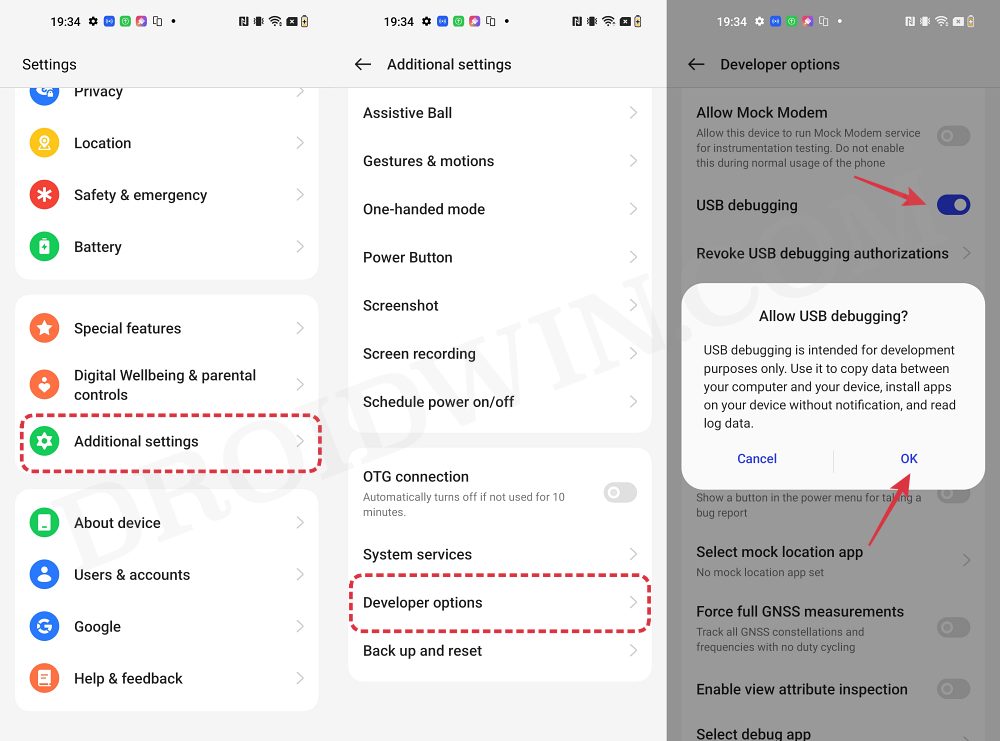
So head over to Settings > About Phone > Tap on Build Number 7 times > Go back to Settings > System > Advanced > Developer Options > Enable USB Debugging and OEM Unlocking.
STEP 3: Unlock Bootloader
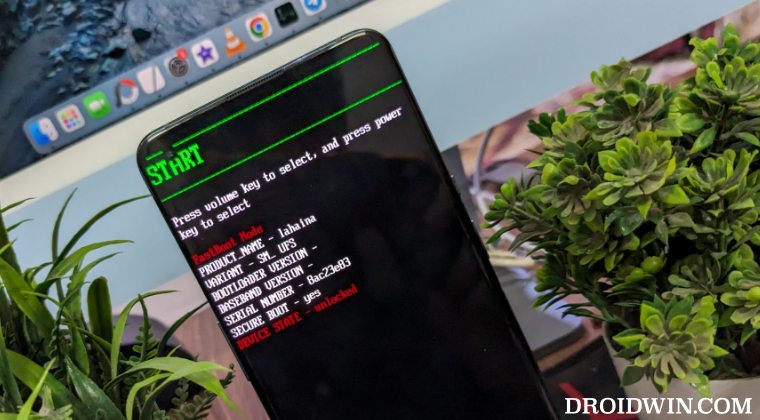
Next up, you will also have to unlock the device’s bootloader. Do keep in mind that doing so will wipe off all the data from your device and could nullify its warranty as well. So if that’s all well and good, then please refer to our detailed guide on How to Unlock Bootloader on OnePlus 9, 9 Pro and 9R
STEP 4: Download Black Iron Project for OnePlus 9 Pro
- Get hold of the desired ROM and its associated files from below:
BLACK IRON PROJECT ROM [GAPPS INCLUDED]: DOWNLOAD LINK
FLASH UTILITY: DOWNLOAD LINK
ONEPLUS 9 PRO FIRMWARE: DOWNLOAD LINK
SUPER_EMPTY.IMG [SEE NOTE BELOW]: DOWNLOAD LINK
- It’s recommended to rename the custom ROM to rom.zip
- Once that is done, transfer the files to the platform-tools folder on your PC.
- NOTE: We are using the super_empty.img to avoid Error Update 7 (status 1).
STEP 5: Boot to Fastboot Mode
- Connect your device to the PC via a USB cable. Make sure USB Debugging is enabled.
- Then head over to the platform-tools folder, type in CMD in the address bar, and hit Enter. This will launch the Command Prompt.
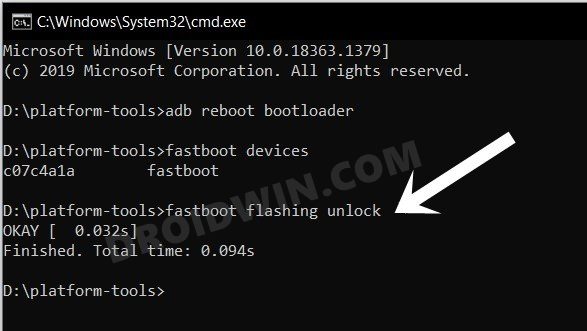
- After that, type in the following command in the CMD window to boot your device to Fastboot Mode
adb reboot bootloader

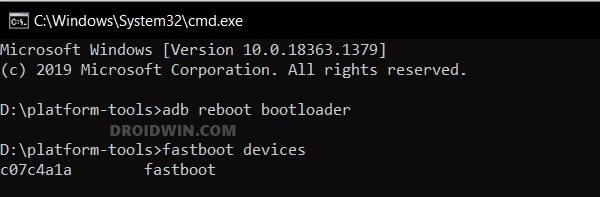
- To verify the Fastboot connection, type in the below command and you should get back the device ID.
fastboot devices
- If you’re not getting any ID, then please install Fastboot Drivers on your PC.
STEP 6: Flash Firmware on OnePlus 9 Pro
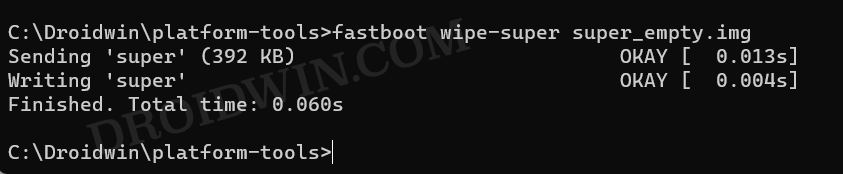
- First off, wipe the super_empty.img file via the below command:
fastboot wipe-super super_empty.img
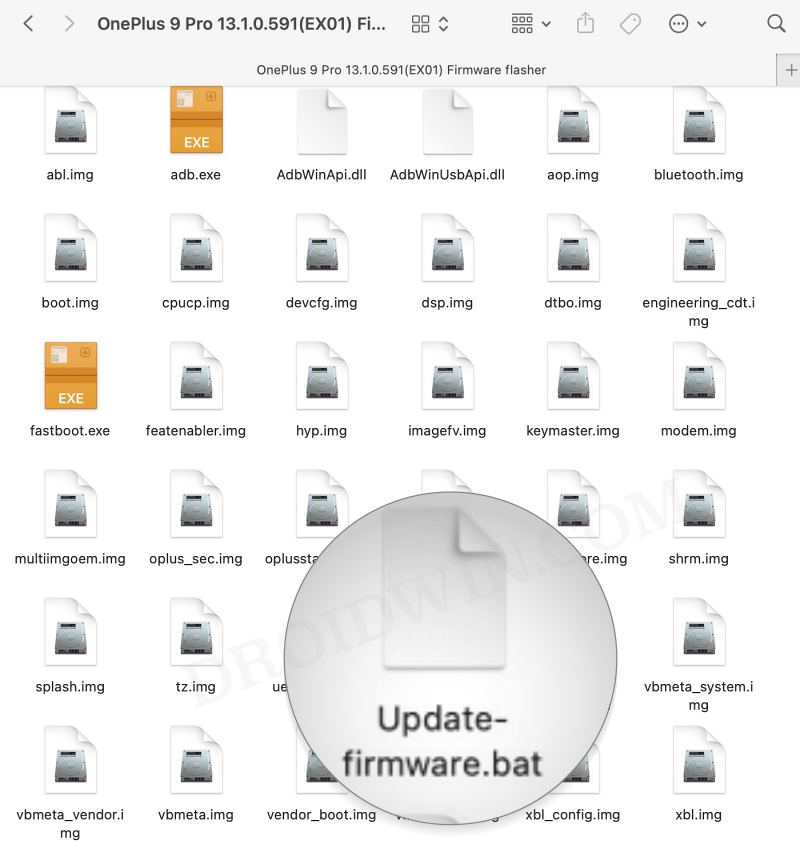
- Now download and extract the latest version of Firmware Flasher.
- Then launch the Update-firmware.bat file. It will flash the required files.
- Once done, your device will automatically reboot to the recovery mode.
- Select Advanced > Reboot to Bootloader and your device will boot to Fastboot Mode.
STEP 7: Flash Black Iron Project on OnePlus 9 Pro
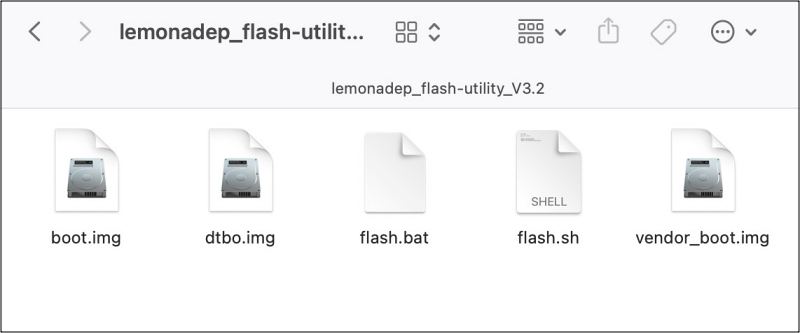
- To begin with, download and extract the flash_utility package zip.
- Then double-click on flash.bat. It will flash boot, dtbo, and vendor_boot.
- Now reboot your device to the recovery via the below command:
fastboot reboot recovery
- Then go to Factory reset > Format data/factory reset and do a reset.
- Now go back to recovery home & tap on Apply update > Apply from ADB.
- Then type in the below command in the CMD to start the sideload:
adb sideload rom.zip
- Wait for the flashing to complete. Once done, select Reboot System.

That’s it. These were the steps to flash the Black Iron Project ROM onto your OnePlus 9 Pro. If you have any queries concerning the aforementioned steps, do let us know in the comments. We will get back to you with a solution at the earliest.


