In this guide, we will show you the steps to root your Moto G20 via Magisk patched boot.img file. The G series from Motorola has always been the fan’s favorite. Right from its first device launch with Google to its current partnership with Lenovo, they always have a lot to offer to the end-users. And the newest addition to this family is new different either.
With Android 11 out of the box, 128GB 4GB RAM, 5000mAh battery, and a quad rear camera are all equally impressive in their own rights. What might not be impressive is the underlying Unisoc T700 chipset. This has resulted in the change in firmware format from ZIP to PAC and complicated the firmware extraction process up to an extent. But fret not, this guide will show you the instructions to extract the boot.img from the PAC firmware as well.
Once you do so, you would get the stock boot.img file which could then be used for rooting purposes. Once rooted, you could gain administrative rights as well as access to the system partition. This in turn will allow you to flash Magisk Modules, Xposed Framework, Substratum Themes, Viper4Android, among others. So without further ado, let’s get started with the guide to root your Moto G20 via Magisk patched boot.img file.
Table of Contents
How to Root Moto G20 via Magisk Patched Boot.img

The below instructions are listed under separate sections for ease of understanding. Make sure to follow in the exact same sequence as mentioned below. Droidwin and its members wouldn’t be held responsible in case of a thermonuclear war, your alarm doesn’t wake you up, or if anything happens to your device and data by performing the below steps.
Install Android SDK

To begin with, install the Android SDK Platform Tools on your PC. This is the official ADB and Fastboot binary provided by Google and is the only recommended one. So download it and then extract it to any convenient location on your PC. Doing so will give you the platform-tools folder, which will be used throughout this guide.
Enable USB Debugging and OEM Unlocking
Next up, you will have to enable USB Debugging and OEM Unlocking on your device. The former will make your device recognizable by the PC in ADB mode. This will then allow you to boot your device to Fastboot Mode.
On the other hand, OEM Unlocking is required to carry out the bootloader unlocking process. So head over to Settings > About Phone > Tap on Build Number 7 times > Go back to Settings > System > Developer Options > Enable USB Debugging and OEM Unlocking.
Unlock Bootloader on Moto G20
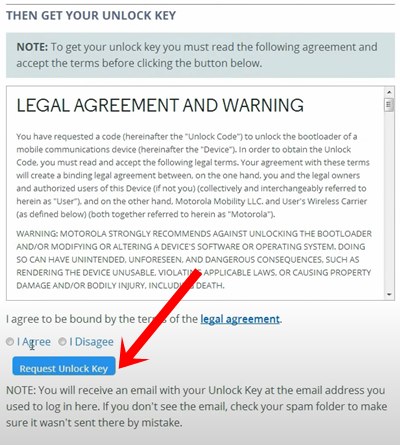
You will also have to unlock the bootloader on your Moto 20 if you wish to root it via Magisk without using TWRP. Do keep in mind that doing so will wipe off all the data and might make the device’s warranty null and void as well. So if that’s well and good, then refer to our guide to How to Unlock Bootloader on any Motorola Device.
Extract Moto G20 Boot.img from PAC Firmware
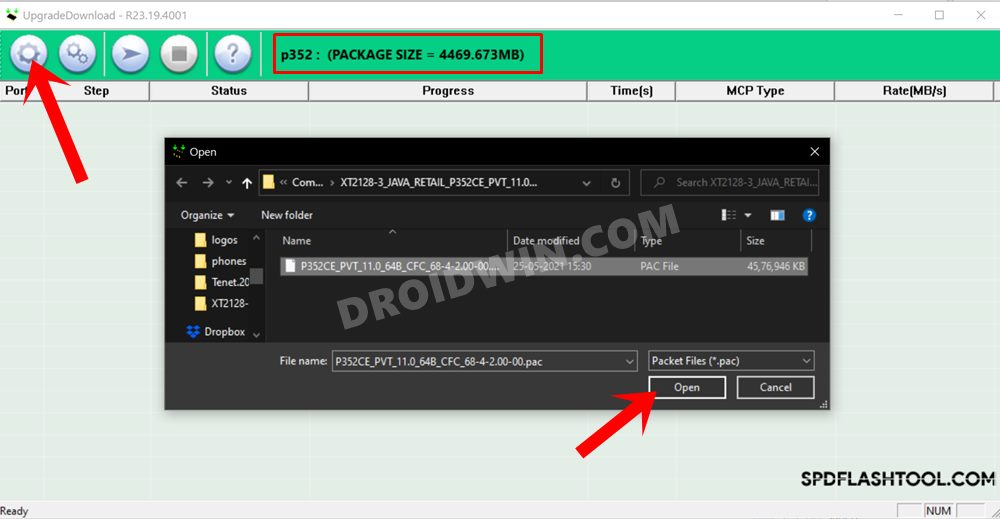
To begin with, download the stock firmware from Lolinet Mirror corresponding to your device/region/current firmware. Here’s the direct link to the firmware that I am currently using: MotoXT2128-3_JAVA_RETAIL. Once downloaded, extract it to any convenient location on your PC. Then refer to our comprehensive tutorial on How to Extract Motorola PAC Firmware using SPD Flash Tool.
Once that is done, copy the boot.img from the extracted firmware folder and transfer it to your device. We will now patch this file to root your Moto G20 via Magisk patched boot.img
Patch Moto G20 Stock Boot.img via Magisk
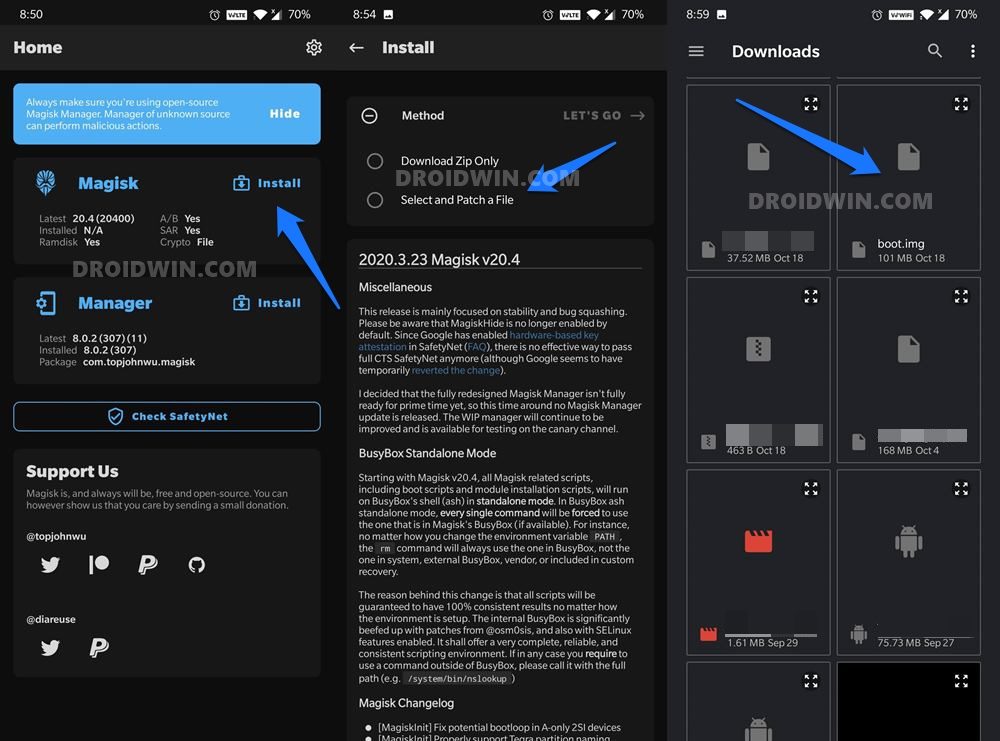
- First off, install the Magisk App onto your Moto G20 so that we could patch the stock boot.img and hence root it.
- Then tap on the Install button situated next to Magisk.
- From the Method section, choose Select and Patch a file.

- Browse to the extracted boot.img file and select it.
- Then tap on the Let’s Go option situated at the top right.
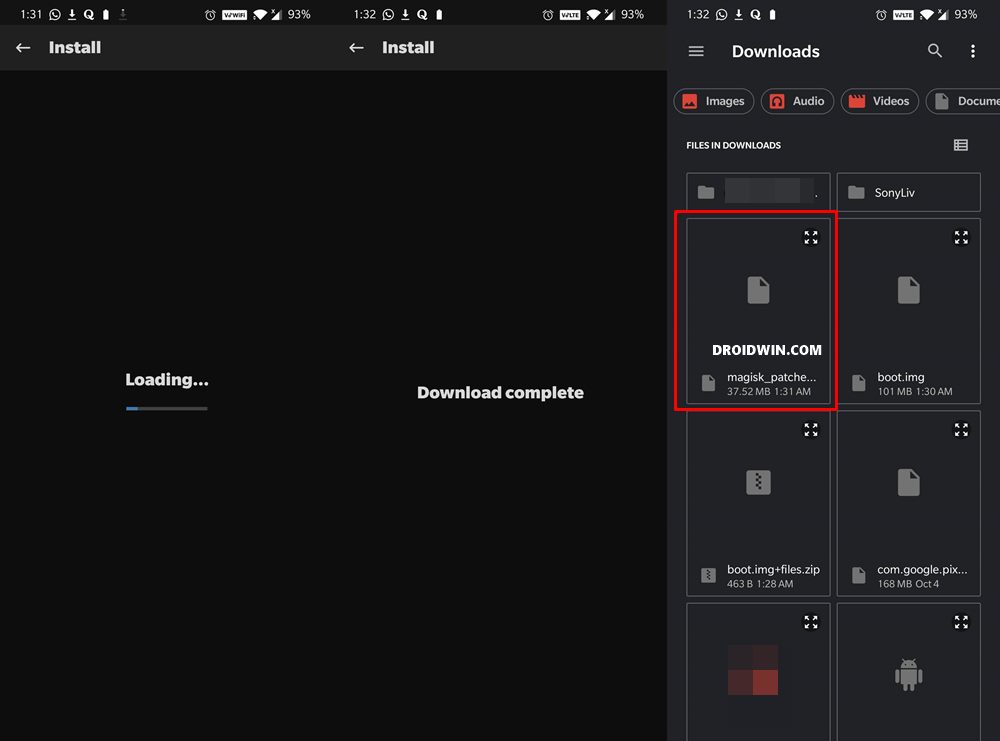
- Magisk will now load the boot.img file and will patch it accordingly. Once that is done, you would get the Download Complete message.
- The patched boot image file will be saved in Internal Storage > Downloads. The name of the file will be magisk_patched.img. If you see some extra characters at the end, delete them so that the complete name stays magisk_patched.img.
Boot Moto G20 to Fastboot Mode
- Connect your device to the PC via USB cable. Make sure USB Debugging is enabled.
- Then head over to the platform-tools folder, type in CMD in the address bar, and hit Enter. This will launch the Command Prompt.
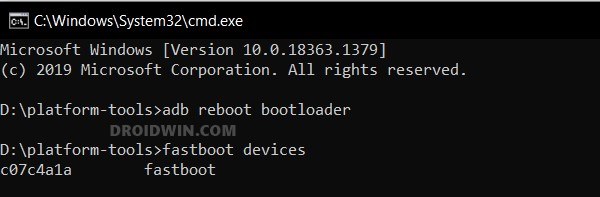
- Type in the following command in the CMD window to boot your device to Fastboot Mode:
adb reboot bootloader
- To verify the connection, type in the below command. You should get the device ID followed by the Fastboot keyword, signifying that the connection has been successfully established.
fastboot devices
- Let’s now proceed to the final step of this guide to root Moto G20 via Magisk patched boot.img
Flash Magisk Patched Boot.img and Root Moto G20
- To begin with, make sure that you have transferred the magisk_patched.img file to the platform-tools folder.
- Now type in the below command in the CMD window (that is opened inside the platform-tools folder) to flash the Magisk Patched file:
fastboot flash boot magisk_patched.img
- Once that is done, reboot your device to the OS via the following command:
fastboot reboot
That’s it. These were the steps to root Moto G20 via Magisk patched boot.img. If you have any queries concerning the aforementioned steps, do let us know in the comments. We will get back to you with a solution at the earliest.


Gi
Qro entrar no zfonts3