In this guide, we will show you the steps to extract the Motorola PAC Firmware file using SPD Flash Tool. Motorola devices have always provided their firmware files in a ZIP format. As a result, it became quite an easy task in the extraction of the stock firmware. But why the need to extract the firmware arises in the first place? Well, there could be quite a few reasons for the same.
To begin with, it could be used to fix bootloop or soft-brick issues by flashing the stock firmware files via Fastboot Commands. Along the same lines, you could also get the stock boot.img file that could then be patched via Magisk and flashed via Fastboot to obtain root. However, as of now things seems to be changing in the Motorola ecosystem.
Its devices might be shifting to the Unisoc chipset and we already have a member in the form of Moto G20. For the unawares, Unisoc and Spreadtrum chipset device’s firmware comes in a PAC format, which cannot be extracted the normal way. So you would instead have to use a standalone tool to carry out this process. And this guide shall help you with just that. Given here are the steps to extract the Motorola PAC Firmware file using SPD Flash Tool. Follow along.
- How to Extract Spreadtrum and Unisoc PAC Firmware File
- Root Spreadtrum Devices via Magisk Patched boot.img
- How to Pass Magisk SafetyNet on Rooted Android
- How to Unlock Bootloader on any Motorola Device
How to Extract Motorola PAC Firmware using SPD Flash Tool
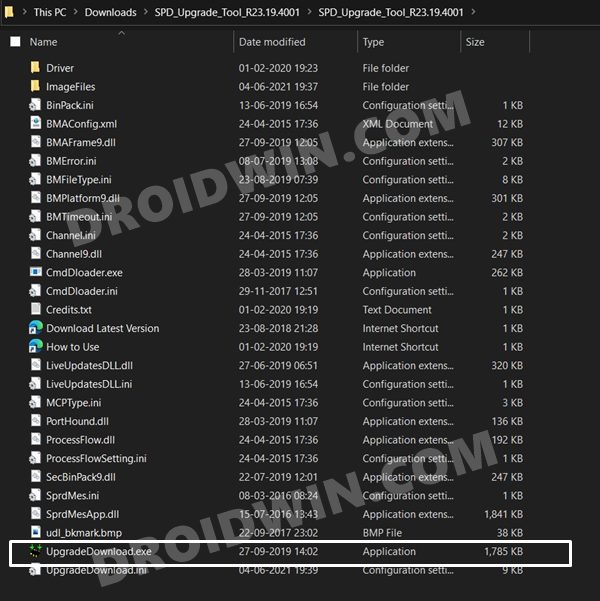
- To begin with, download the SPD_Upgrade_Tool_R23.19.4001. Do keep in mind that as of now, only this version is able to work with Motorola Firmware, others are showing package load error. So please stick with this version only.
- Once downloaded, extract it to any convenient location on your PC. Go to that folder and click on the UpgradeDownload.exe file to launch the tool.

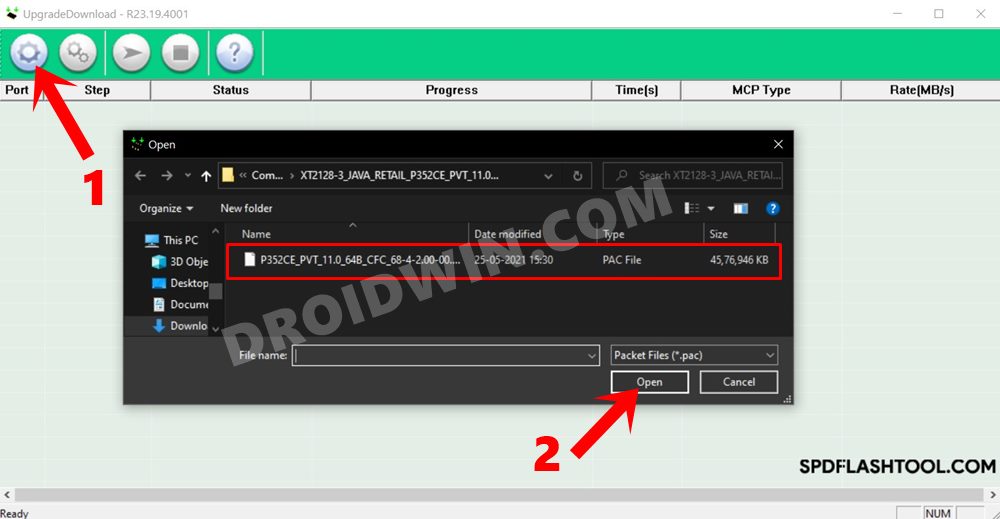
- Then click on the Load Packet button situated at the top left. Browse to the Motorola PAC Firmware file and select it.

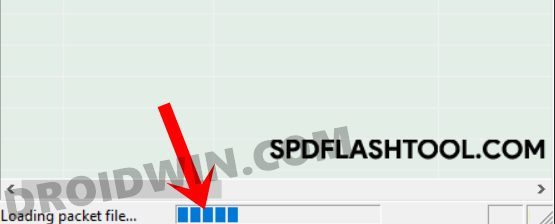
- The firmware will now be loaded to the tool.

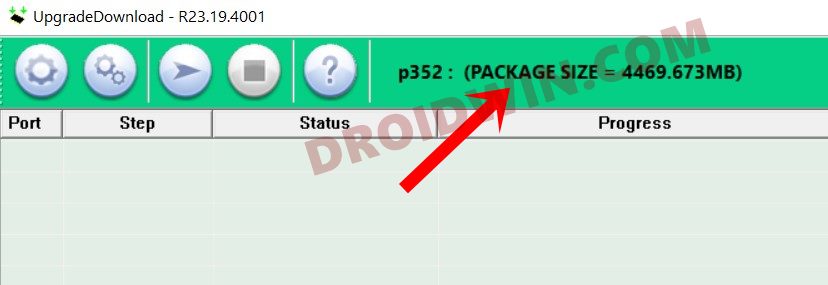
- Once done, you shall see the Package Size menu at the top of the tool.

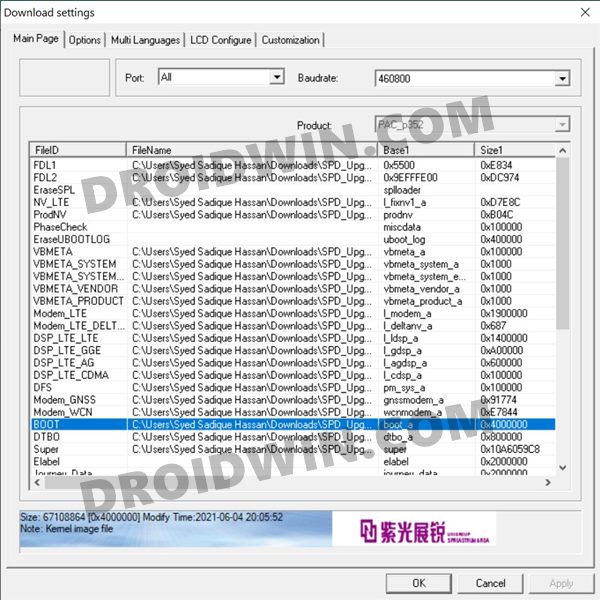
- Now click on the Settings icon and it shall show you a list of all PAC firmware extracted files. Refer to the FileName section, it denotes the location where all the extracted files are present. It’s usually the same location where you have extracted the SPD Upgrade Tool.

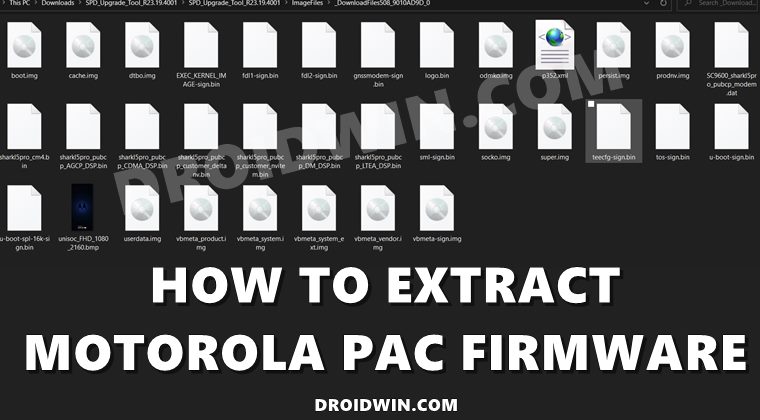
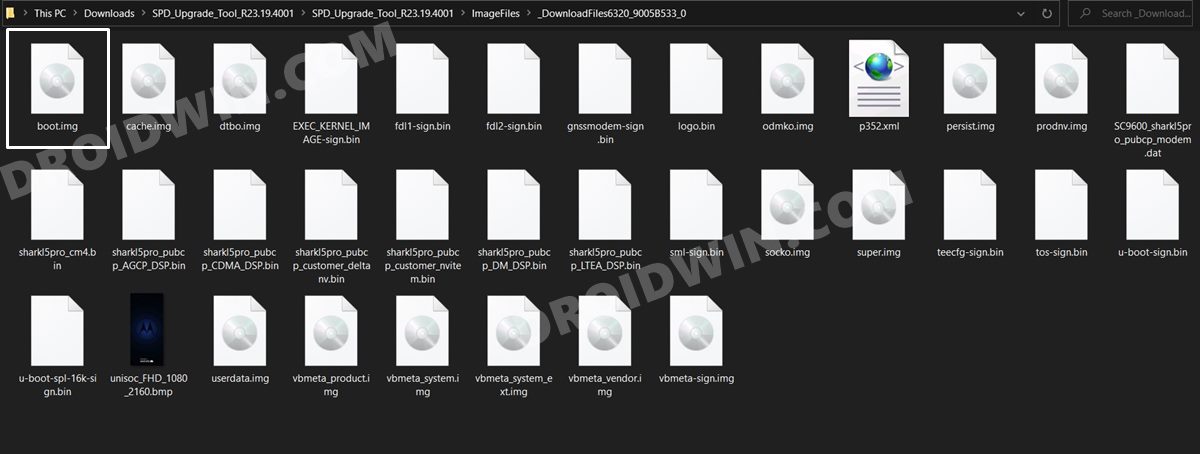
- So go to the SPD_Upgrade_Tool_R23.19.4001 folder and you should see the ImageFiles folder. Inside that, all the firmware files will be present. You may now use the required file and carry out the desired task of your choice.

That’s it, the process stands complete. So this was all from this guide on how you could extract the Motorola PAC Firmware file using SPD Flash Tool. If you have any queries, do let us know in the comments section below. We will get back to you with a solution at the earliest.


Kit
Looked for in every corner of the internet for this. Thank you.
Sadique Hassan
Glad that it hepped you out.