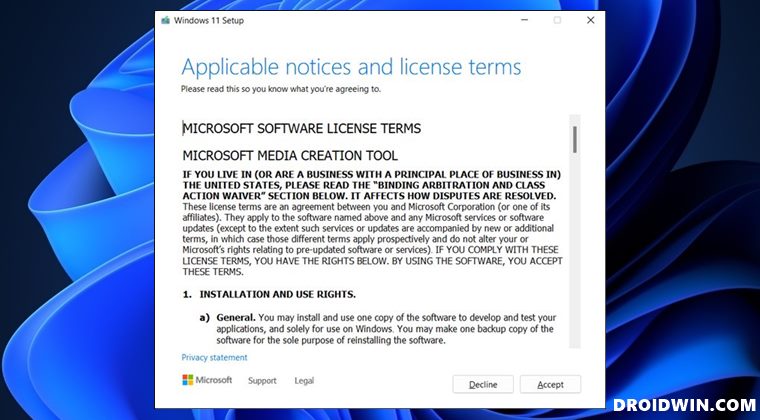
In this guide, we will show you numerous methods to fix the issue of the Media Creation Tool not working in Windows 11. There exists quite a few methods through which you could upgrade your PC to the latest iteration of the OS. While the most straightforward approach is to do so via the Settings menu, but that might not be the most viable method for some.
For example, if your PC is stuck in a bootloop, or it does not meet the recommended requirements [it has TPM 1.2 instead of TPM 2.0], then you wouldn’t be able to get hold of this update via the Settings menu. In such instances, you could opt for quite a few alternative methods. These include the likes of using a Windows 11 Installation Assistant, downloading an ISO and mounting it on a USB Drive via a third-party app like Rufus, or letting Windows do this task via the Media Creation Tool.
In this regard, the latter method is mostly preferred as it easily creates a bootable USB without any interaction with a third-party app. However, not many users are currently able to make full use of this software. Many have voiced their concern that Media Creation Tool is not working on their Windows 11 PC. If you are also in the same boat, then fret not. This guide will make you aware of a few nifty workarounds that shall help you resolve this issue. Follow along.
Table of Contents
Fix Media Creation Tool not working in Windows 11
It is recommended that you try out each of the below-mentioned workarounds and then see which one spells out success for you. So with that in mind, let’s get started.
FIX 1: Run as Administrator
- First and foremost, you should run the tool with elevated permissions.
- So right-click on MediaCreationToolW11.exe and select Run as administrator.

- After that, click YES in the confirmation dialog box. That’s it.
- Now launch the Media Creation Tool and see if it working on your Windows 11 PC or not.

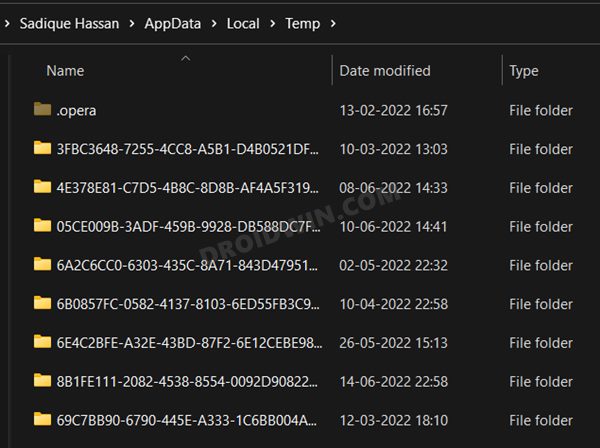
FIX 2: Clear Temporary Folder
If a lot of temporary data gets accrued over the due course of time, then not only will it slow down the app but it could well conflict with the app’s normal behavior as well. Therefore, you should consider deleting these data at regular intervals, and now could be just the right time to do so.
- Bring up the Run dialog box via Wndows+R shortcut keys.
- Then type in the below command to open the Temporary folder
%TEMP%
- Select all the files via Ctrl+A and hit the Delete key.
- Now launch the Media Creation Tool and check if it working on your Windows 11 PC.
 Select all the files via Ctrl+A and hit the Delete key.
FIX 3: Disable Windows Defender
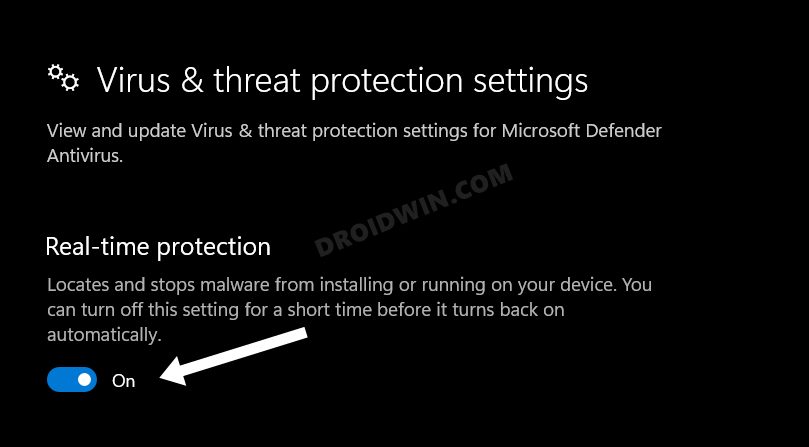
In some instances, the antivirus app might raise a red flag against a non-malicious program and hence could end up blocking its normal functionality. Therefore, you should consider temporarily disabling your antivirus app and then try running the tool. Given below are the steps for Windows Defender [the instructions might be different for other third-party antivirus apps].
- Open Windows Security and go to Virus and Threat Protection
- Then click on Manage Settings under Virus and Threat Protection Settings.
- After that, disable the toggle next to Real-Time Protection.
- Now launch the Media Creation Tool and check if it working on your Windows 11 PC.
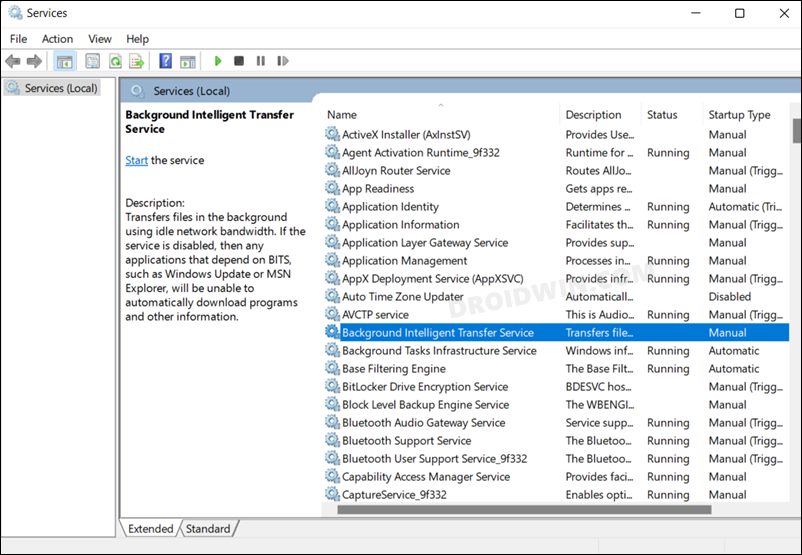
FIX 4: Re-Enable Windows Services
If the background Windows services related to updates aren’t functioning along the expected lines, then its consequences would be felt by all the processes and apps that are dependent on it. So your best bet is to restart those services and let them start off with a fresh instance from scratch. Here’s how it could be done:
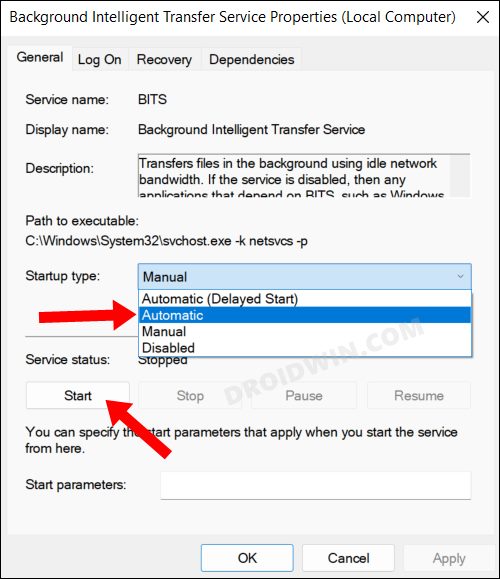
- To begin with, launch the Services app from the Start Menu
- Then double click on the Background Intelligent Transfer Service to open it.
- Change its Startup Type to Automatic and then click on the Start button.
- Likewise, do the same for the following services:
Server
TCP/IP NetBIOS Helper
Workstation
IKE and AuthIP IPsec Keying Modules
Windows Update or Automatic Updates
- Once done, launch the Media Creation Tool and check if it working on your Windows 11 PC.
FIX 5: Registry Editor Tweak
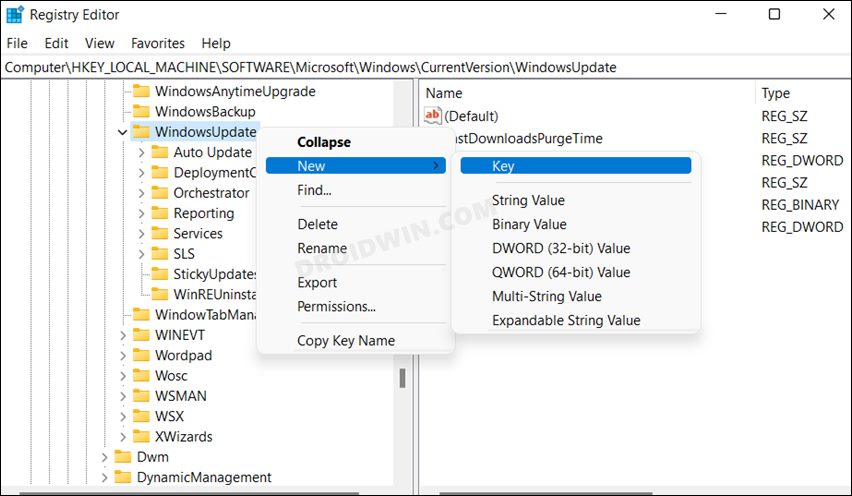
In this method, we will be manually instructing the system to pave the way for an OS upgrade. For that, we will create a new DWORD file titled AllowOSUpgrade and then assign it the 1 binary value to enable it. This file will then clear all the roadblocks for the upgrade and the tool would then be able to function without any issues. So let’s put this fix to the test right away.
- Launch Registry Editor and head over to the below location:
Computer\HKEY_LOCAL_MACHINE\SOFTWARE\Microsoft\Windows\CurrentVersion\WindowsUpdate
- Then right-click on WindowsUpdate and select New > Key. Name it OSUpgrade.
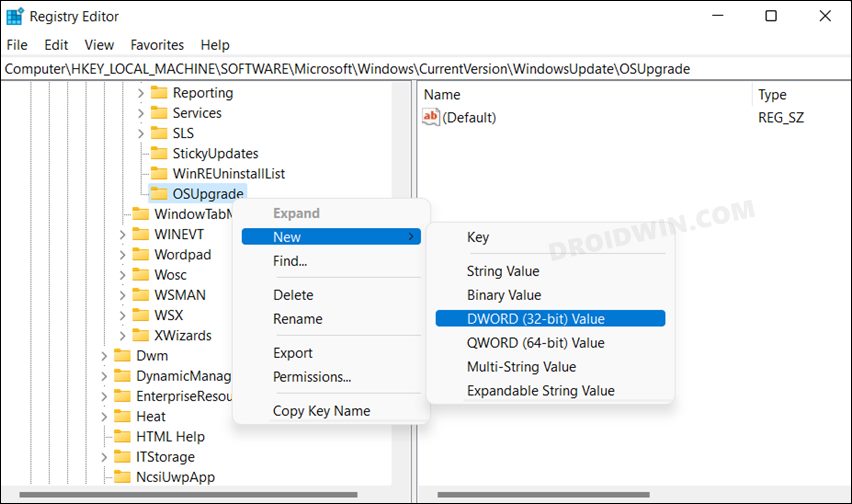
- After that, right-click on OSUpgrade and select the New > DWORD (32-bit) Value.
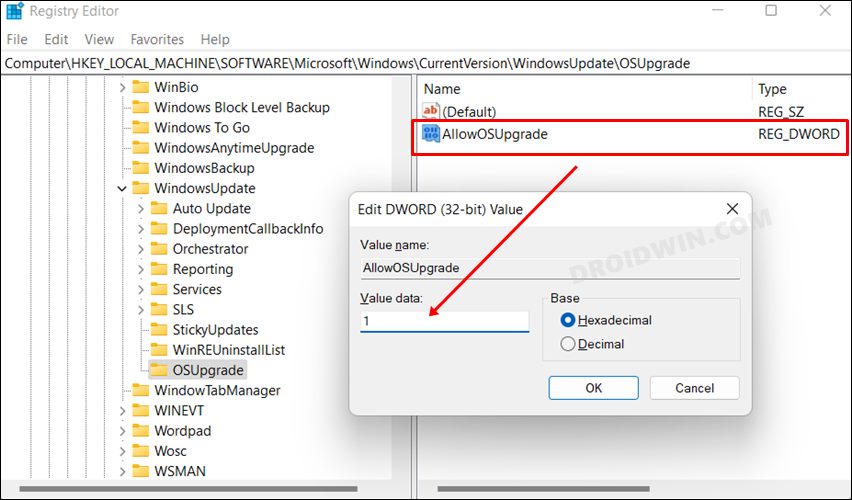
- Name it AllowOSUpgrade and double click to open it. then type in 1 in the Value Data field and hit OK.
- Finally, restart your PC and check if it fixes the Media Creation Tool not working issue in Windows 11.
FIX 6: Use Rufus and Windows 11 ISO
If none of the aforementioned methods managed to spell out success, then your last course of action should be to minimize your dependency on this tool and instead take the help of a third-party tool, at least for creating a bootable USB. Here’s what you need to do in this regard [For detailed step-by-step instructions, check out our guide on How to Install Windows 11 Using ISO File and Bootable USB]
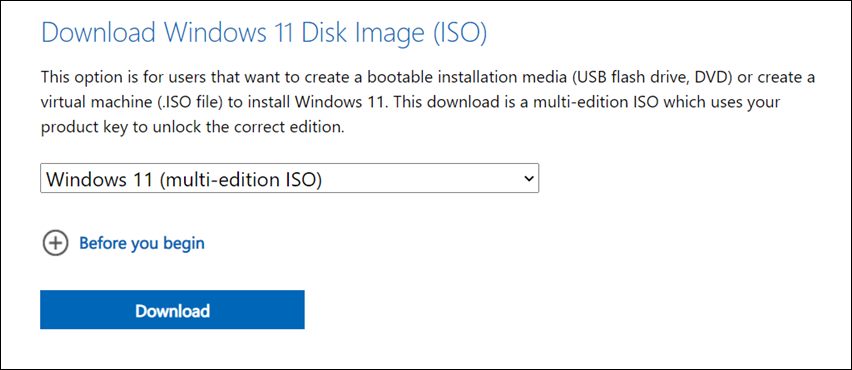
- To begin with, download the Windows 11 ISO file from its official site.
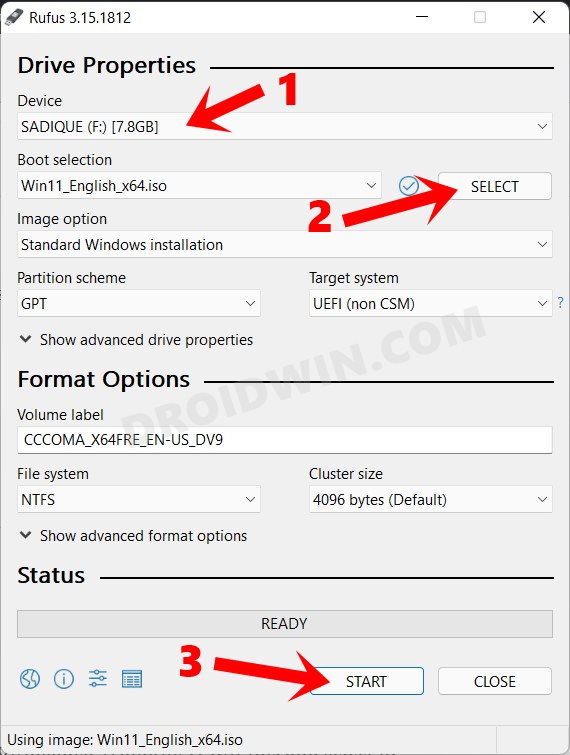
- Then plug in the Pendrive to your PC [make sure it has at least 8GB free space].
- Now download and install the Rufus Tool.
- Then launch it and select the Windows 11 ISO file under the Image Option.
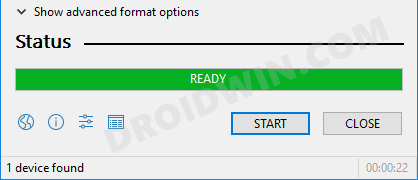
- Next up, change the Partition Scheme to GPT and hit Start. Rufus will now create a bootable Pendrive with Windows 11.
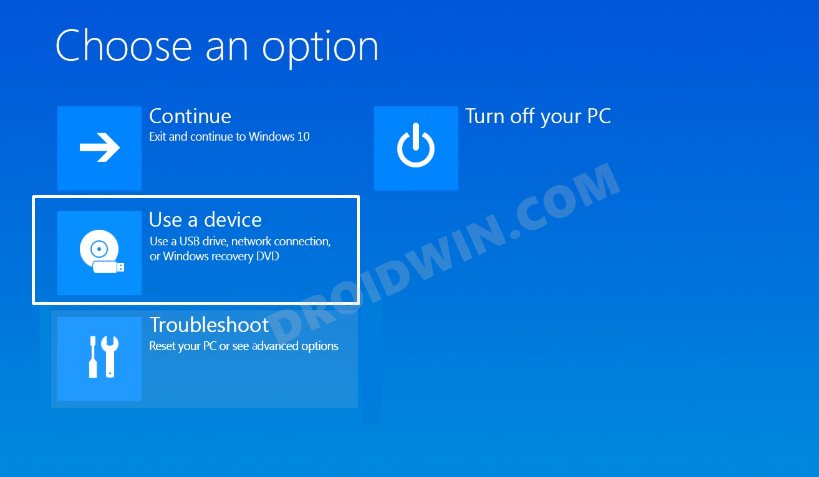
- Once done, power off your PC. Now turn it back on and press the F8 key before Windows boots to the OS.
- You shall now be taken to the Advanced Boot Menu. Click on Use a Device and select your Pendrive from the list.
- Now proceed with the on-screen instructions to complete the setup.
That’s it. These were the six different methods to fix the issue of the Media Creation Tool not working in Windows 11. If you have any queries concerning the aforementioned steps, do let us know in the comments. We will get back to you with a solution at the earliest.


