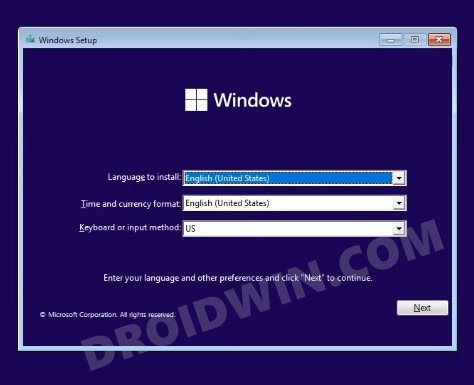
In this guide, we will show you the steps to install Windows 11 using the ISO file and a bootable USB. The latest iteration of the OS brings in quite a few noteworthy features and a few UI tweaks as well. The new taskbar design with icons occupying the centralized position, new Start menu, revamped Settings menu, and new icon sets are sure to catch the attention of the masses.
At the time of writing, the build has just gone live to the stable build. So if you are willing to give this OS a try, now could be a perfect time. In this regard, there are four different approaches that you could take (listing the easiest one first):
- Via Windows Settings menu
- Using the New Windows 11 Installation Assistant
- By Mounting Windows 11 ISO File
- By Booting via Windows 11 ISO
Taking an in-depth look at all these four methods, and the last one comes out to be the most effort-taking approach. So why would one opt for this method? Well, this is because it is the only method that would work on a PC that is unable to boot to the OS. In other words, the first three methods do require you to have your PC up and running and then proceeded with the on-screen instructions to complete the setup.
On the other hand, by using the fourth method (booting via the Windows 11 ISO), you could install Windows 11 even without booting to Windows 10, all that is needed is access to Advanced Startup (explained below). So on that note, let’s get started with this guide to install Windows 11 using the ISO file and a bootable USB. Follow along.
Table of Contents
How to Install Windows 11 Using ISO File and Bootable USB
The below instructions are listed under separate sections for ease of understanding. Make sure to follow in the exact same sequence as mentioned. Droidwin and its members wouldn’t be held responsible in case of a thermonuclear war, your alarm doesn’t wake you up, or if anything happens to your PC, USB, and their data by performing the below steps.
STEP 1: Download Windows 11 ISO File
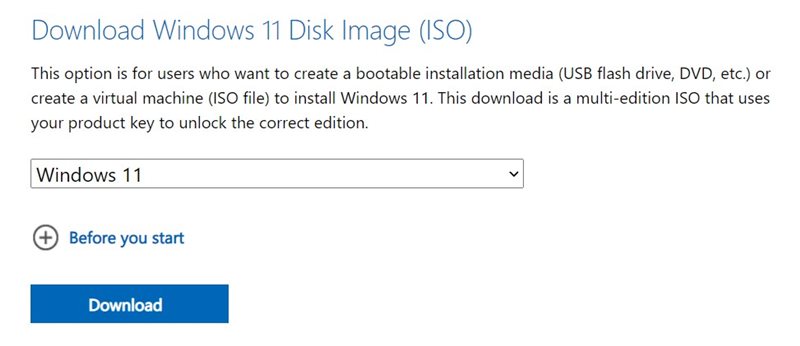
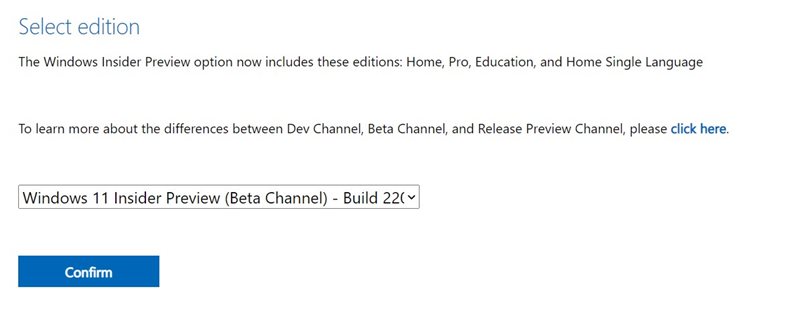
To begin with, you will have to get hold of the Windows 11 ISO file. We have shared the download link for both the Insider Preview and Stable Builds. Unless you are a developer and planning to test or debug certain features, it is recommended to download the stable build.
- Windows 11 Stable ISO File: Download Link

- Windows 11 Insider Preview ISO File (Developer/Beta Channel): Download Link.

STEP 2: Format USB Device
You will now have to create a bootable USB, which requires you to format it first. So take a backup of all the data on your USB device and then proceed with the below instructions:
- Start off by connecting your USB device to the PC.
- Then open File Explorer via Windows+E shortcut keys.
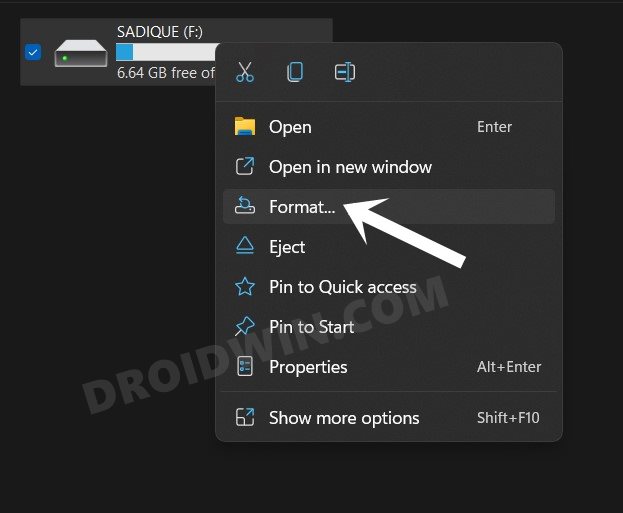
- Now right-click on the USB device and select Format.

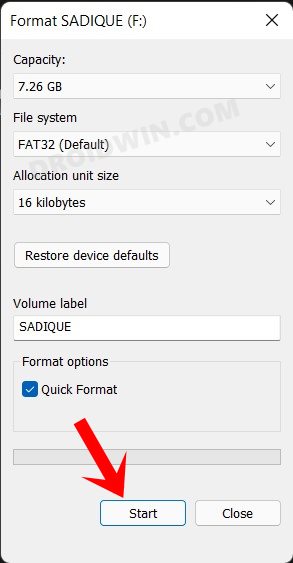
- Finally, hit the Start button and wait for the format to complete.

STEP 3: Create a Bootable USB Device
Now that you have formatted the device, it’s time to make it bootable. Here’s how it could be done:
- To begin with, download the Rufus software [it will be used to create a bootable USB].
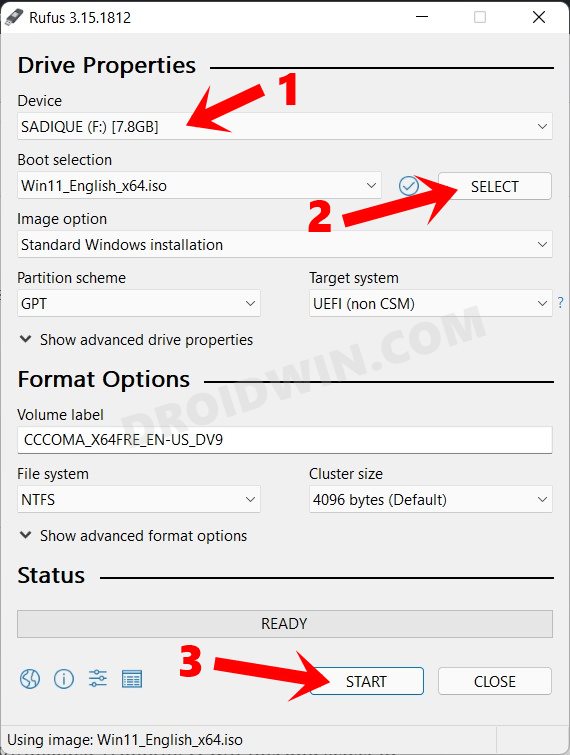
- Then open it via its EXE file and select the USB device from the list.
- After that, click on the Select button, navigate to the downloaded Windows 11 ISO file, and select it. Then click on Start.

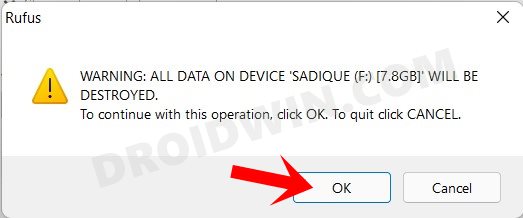
- You will now get a format USB device warning, click OK.

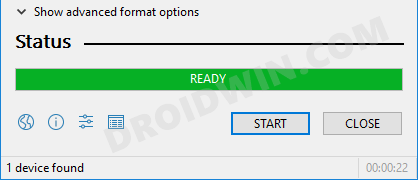
- The process will now start and could take a few minutes. Once done, you shall be notified via the Ready message.

You may now close this tool and move over to the next step to install Windows 11 using the ISO file and a bootable USB.
STEP 4: Boot PC to Advanced Bootup Screen
- To begin with, connect the USB device (that is having the bootable Windows 11 ISO file) to your PC.
- Then power off your PC. Now turn it back on and press the F8 key before Windows boots to the OS.
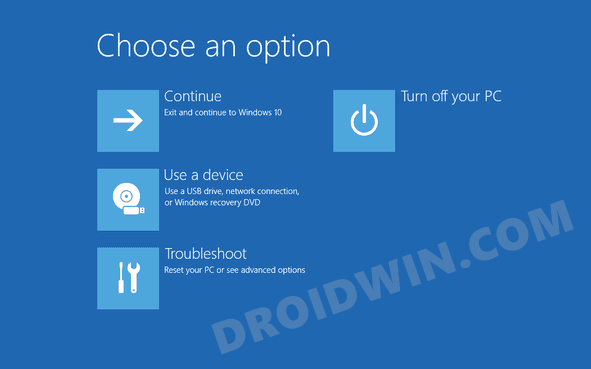
- You shall now be taken to the Advanced Boot Menu.
STEP 5: Install Windows 11 using ISO file
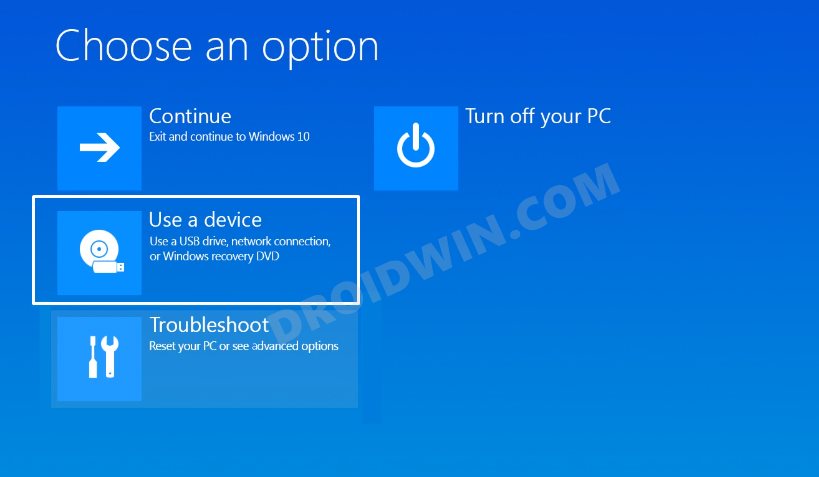
- Click on the ‘Use a Device’ option from the Choose an Option screen.

- After that, select your USB device from the list.
- It shall now launch the Windows 11 setup. Just proceed with the on-screen instructions to install it onto your PC.

That’s it. These were the steps to install Windows 11 using the ISO file and a bootable USB. As already mentioned before, this is the sole method that works out your PC is unable to boot to the OS. As a result, it is the preferred method for most tech enthusiasts. With that said, we round off this guide. All your queries are welcomed in the comments section below.
