In this guide, we will show you the steps to use Google Pay [GPay] on your rooted Android device. One of the biggest perks of having an open-source ecosystem like Android is the plethora of goodies that it brings in with itself. Once you checkmark the first prerequisite of an unlocked bootloader, you will be in a position to welcome a plentitude of tweaks onto your device. Among them, it is the inability to gain administrative privileges by rooting your device via Magisk that has forever been the preferred tweak for tech enthusiasts.
However, it is just one side of the coin. Unlocking the bootloader or rooting your device trips the Safety Net. As a result, all the apps and games which are dependent on it will refuse to function on such a device. While it is mostly done from the security point of view as an unlocked bootloader device is more prone to attacks, however, the user who has carried out all these tweaks is already aware of the risks involved and has voluntarily proceeded with the steps.
So it should ultimately be the choice of the end-user whether or not they wish to run banking and payment apps on their device or not. At the very most, the app developers could notify the user and gain their acknowledgment that they are trying out their app on an unlocked/rooted device at their own risk. But while [unfortunately] that isn’t the case, you could still use Google Pay [GPay] on your rooted Android device using a nifty workaround. And in this guide, we will show you how to do just that. Follow along.
Table of Contents
How to Use Google Pay [GPay] on Rooted Android Devices

Before starting, please take a complete device backup beforehand. Moreover, the process requires a rooted device. If you haven’t done so yet, then please refer to our guide on How to Root Android 12 via Magisk patched boot.img (without TWRP). Once done, you may then proceed with the below steps. Droidwin and its members wouldn’t be held responsible in case of a thermonuclear war, your alarm doesn’t wake you up, or if anything happens to your device and data by performing the below steps.
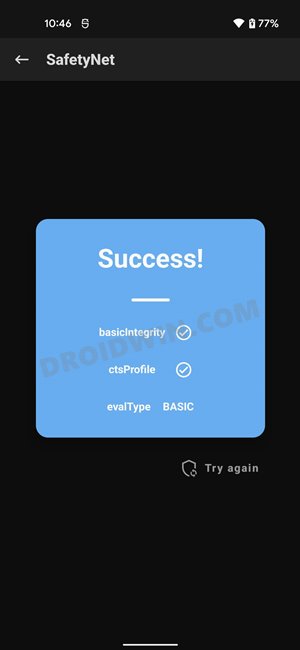
STEP 1: Pass SafetyNet
First and foremost, your device should have passed the SafetyNet Test either via Universal SafetyNet Fix or Magisk Hide Props Config module. If that isn’t the case, then do so via the instructions given in this guide- How to Pass SafetyNet on Rooted Android 12.
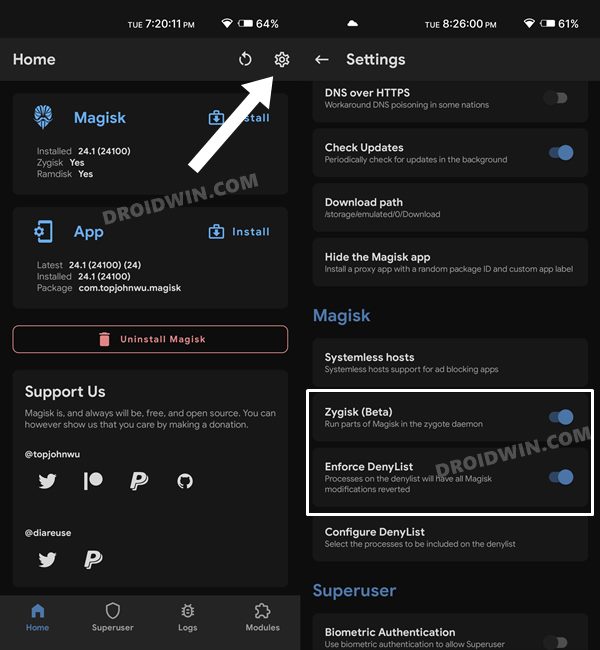
STEP 2: Enable Zygisk and Enforce DenyList
- Launch the Magisk App on your device tap on the Settings icon situated at the top right.
- After that, scroll to the Magisk section and enable the toggle next to Zygisk and Enforce Deny List.

- Now restart the device for the changes to take place. Also, verify that Zygisk status is YES under Magisk.
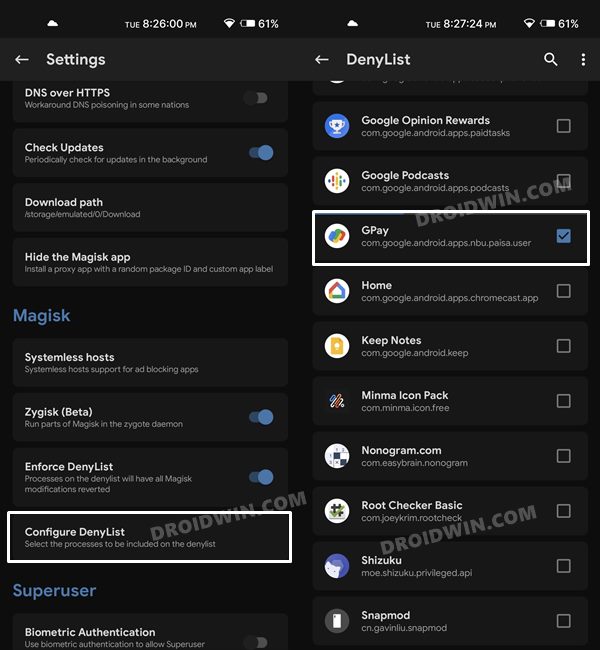
STEP 3: Configure DenyList
- Under the Magisk Settings menu, tap on Configure DenyList.
- Now, checkmark Google Pay/GPay in order to hide root from it.
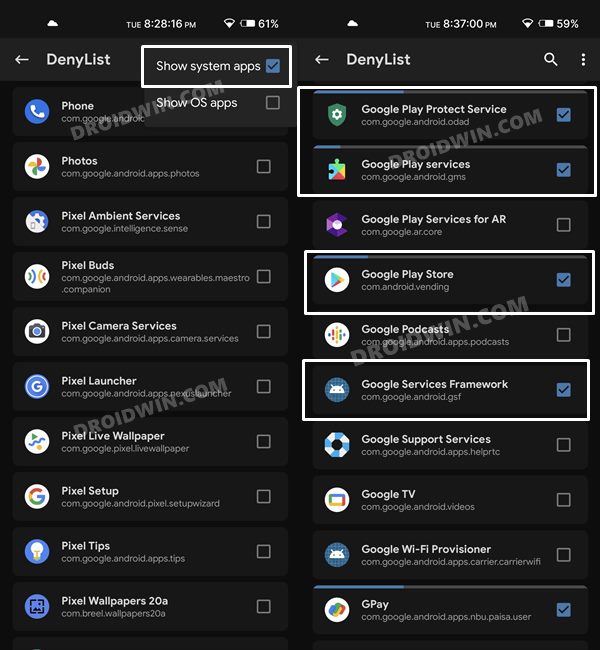
- After that, tap on the overflow icon situated at the top right and select Show System App.
- Now checkmark Google Play Protect Services, Google Play Services, Google Play Store. and Google Service Framework.
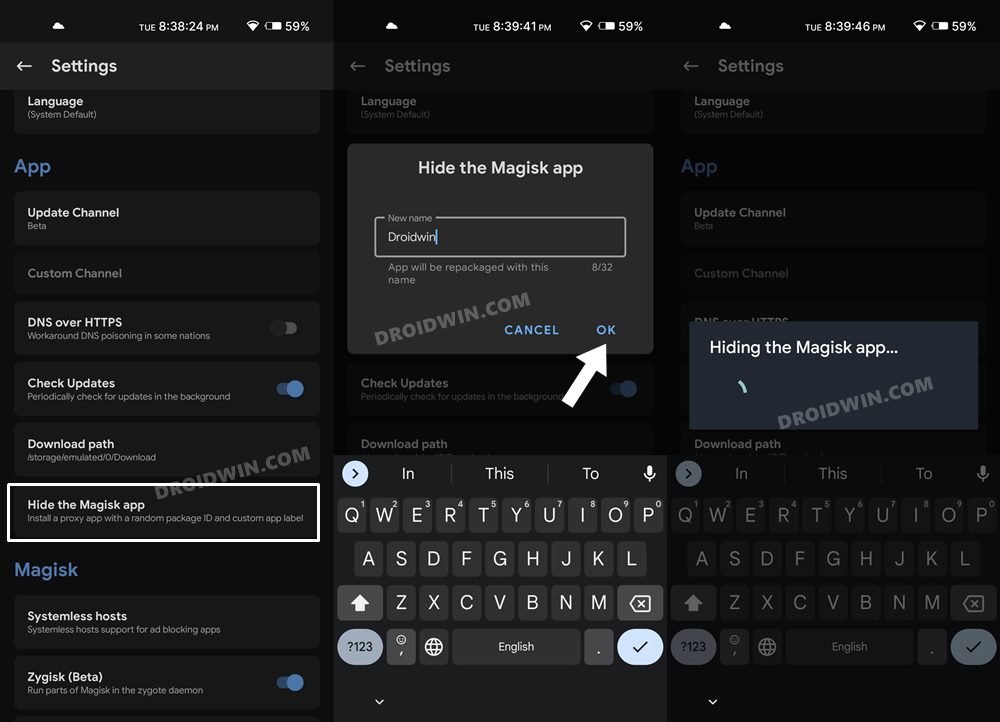
STEP 4: Hide Magisk App
- Go to the Magisk settings menu and tap on Hide the Magisk App.
- Then give it the desired name of your choice and tap OK.
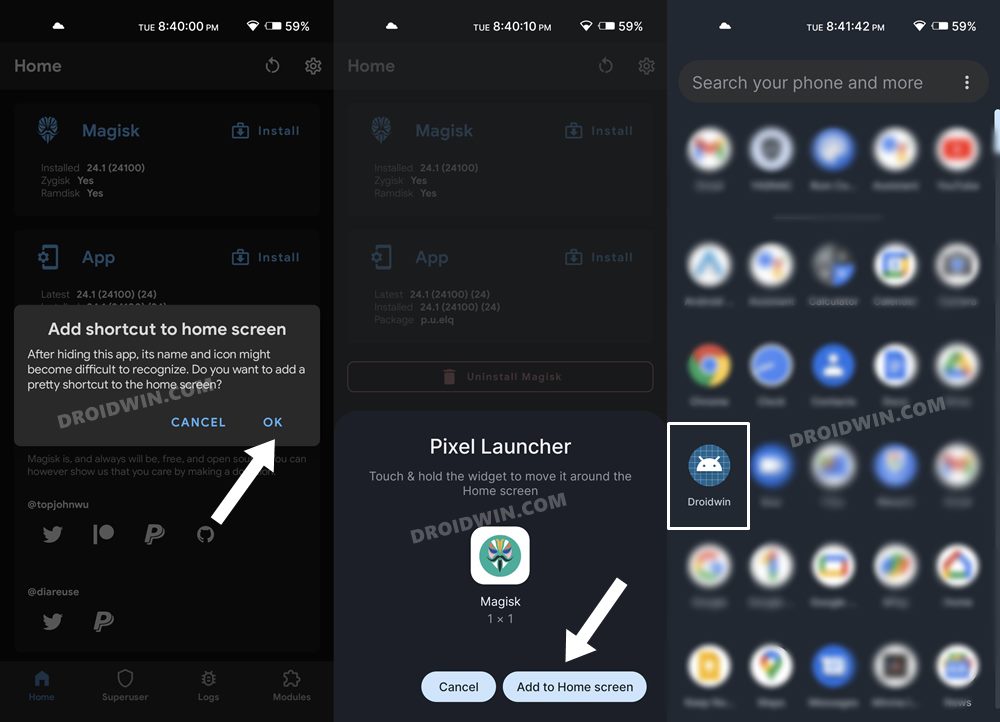
- The hiding process will now begin. Once done, it will ask whether you wish to have the app shortcut on the home screen.
- For ease of convenience, you may select Yes and then tap on the Add to Home Screen button.
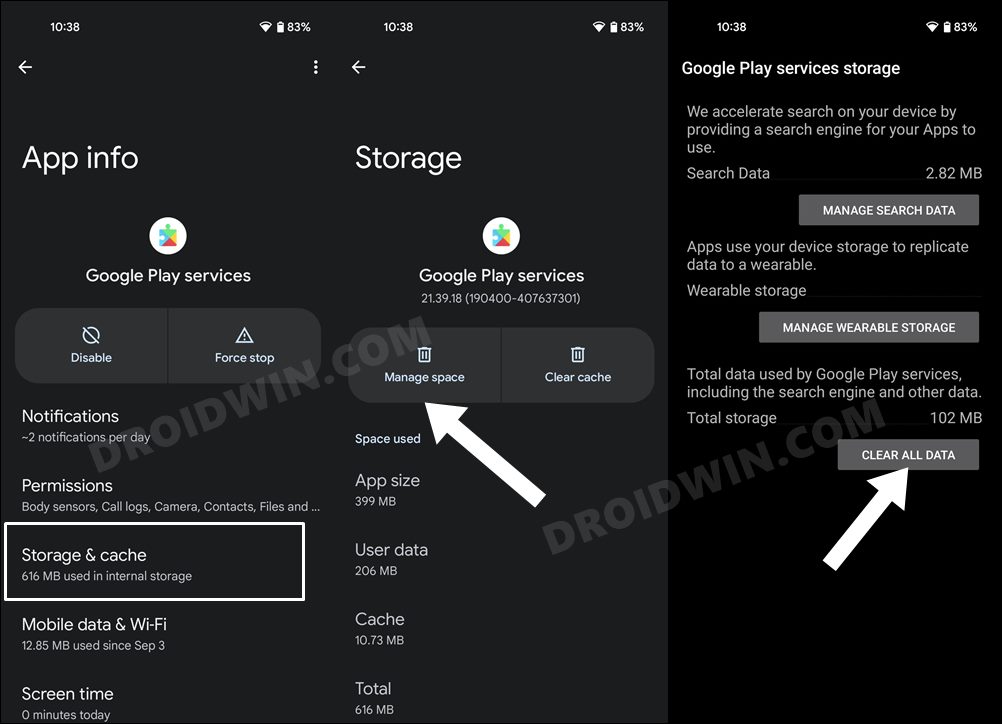
STEP 5: Delete Play Service and Play Store Data
- Head over to Settings > Apps > See All Apps.
- Then select Google Play Service and go to its Storage and Cache section.
- After that, tap on Manage Space > Clear All Data.
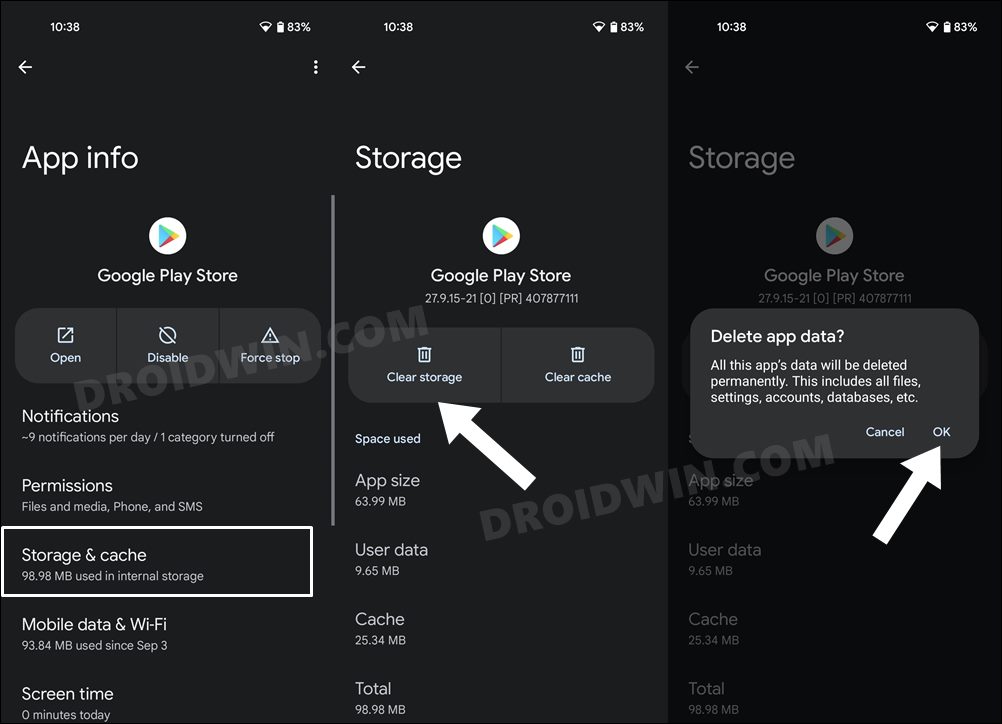
- Once that is done, go back and select Google Play Store.
- Then go to the Storage and Cache section and tap on Clear Storage > OK.
- Finally, restart your device for the changes to take place. You will now be able to use the Google Pay app on your rooted device without any issues.
That’s it. These were the steps to use Google Pay [GPay] on your rooted Android device. If you have any queries concerning the aforementioned steps, do let us know in the comments. We will get back to you with a solution at the earliest.


helias
Hello,
I did all this on a new Xiaomi 12t pro, my device passes safetynet, but Google Pay / Wallet still says: “this phone can’t be set up to tap to pay”.
damn
I did all the above and safetynet still can detect the rooted phone.
You can check with https://play.google.com/store/apps/details?id=rikka.safetynetchecker&hl=en&gl=US
Sadique Hassan
Hi mate, could you please let me knwo oyur device name and whci device you have chosen for fingerprint spoofing
denis
Hello There. I´ve read all your posts, back and forth and I think I am missing something. I also did the “how to pass safetynet” , and its working . I dont know when, but now GooglePay changed to Google Wallet ? I deleted it, reinstalled it, cleared all the caches and data from Google apps that you mentioned. Only thing I could not find is Google Framework Services… After all your steps being followed, Google pay still says that my phone is rooted. I am using android 12 with Beyondrom .