In this tutorial, we will show you how to install OTA on rooted Android devices. There are quite a few perks associated with a rooted device including the installation of Magisk Modules, Viper4Android, and LSPosed Frameworks are all possible. But every side has two coins. Getting your warranty null and void, SafetyNet getting tripped, and WideVine Certification being downgraded to L3 are just some of the caveats of having your device rooted.
Along the same lines, there is another major roadblock: you cannot easily install OTA on your rooted Android device. But for many, this is just a small roadblock that pales in comparison to the benefits that one accrues after rooting their device. If you also share the same thought process, then this guide will make you aware of the steps to install OTA on your rooted Android device.
Table of Contents
What is the Issue?
With Android 5.0, Google introduced blocked-based OTAs. With this, as and when an Over The Air update arrived, it first verified and made sure there is no tweaking with any device partition. These included the recovery (yes, recovery partition was a thing before A/B slots made its way), boot, system, vendor, dtbo, etc.
So if the OTA found out that there are some modifications to any of these partitions, installing OTA was next to impossible. Then entered Magisk and its systemless modifications opened the door to a plethora of opportunities. This was one of the major reasons why people switched over to Magisk from SuperSU. Anyways, using this Magisk only, we will carry out the steps to install OTA on a rooted Android device. Let’s begin.
How to Install OTA on Rooted Android Device
In a nutshell, this is how the entire process will be carried out:
OTAs are installed to the inactive slot and Magisk to the current active slot. So it means the inactive slot is untouched as of now.
Hence we will be restoring the stock boot file via Magisk, then installing OTA to inactive slot. But just before the reboot, we will install Magisk to inactive slot (where OTA is installed) using the “Install to Inactive Slot After OTA” option of Magisk. Dont worry if all these sounds confusing. The below detailed step by step instructions will help you out.
The Prerequisites
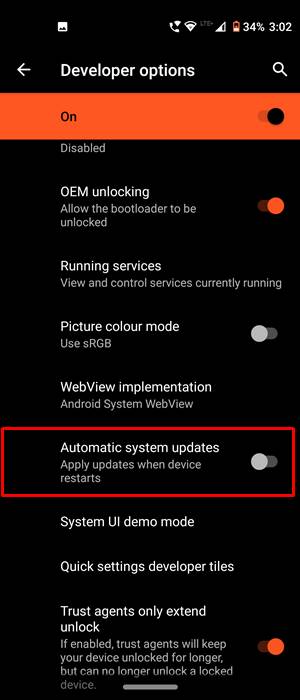
Before starting with the process, there are a re couple of prerequisites that you need to checkmark off the list- Disable Automatic Updates and Disable All Modules. here’s how both of these tasks could be carried out.
- Head over to Settings > About Phone > tap on Build Number 7 times.
- Then go to Settings > System > Developer Options.
- Now scroll to Automatic System Updates and disable it.

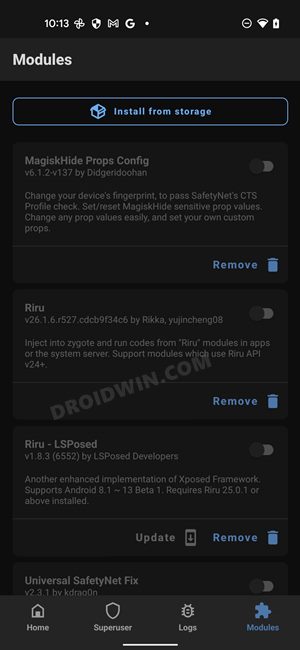
- Once done, launch the Magisk app and go to the Modules tab.
- Then turn off the toggle next to all the modules and restart your device.
NOTE: If your device was launched with Android 12 or older versions [such as Pixel 6 Pro, Poco F4, or OnePlus 10], then you’ll have to use boot.img across all the methods listed below. On the other hand, if your device is launched with Android 13 or higher versions [such as Pixel 7 Pro, Poco F5, or OnePlus 11], then you’ll have to use init_boot.img to get the job done.
Method 1: Via Direct OTA
This is the easiest and shortest method out of the four when it comes to installing OTA Updates on your rooted Android device. Here’s what you need to do:
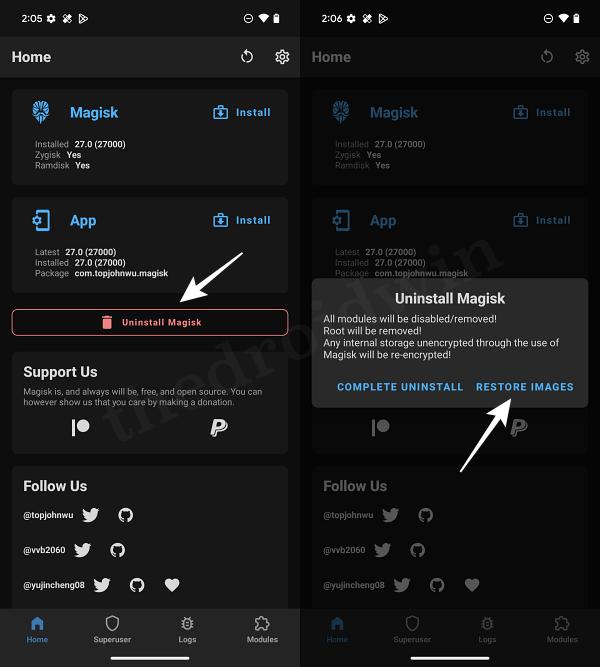
- Launch the Magisk App > tap on Uninstall Magisk > Restore Images.
- Then go to Settings > System > System Update and download the available update.
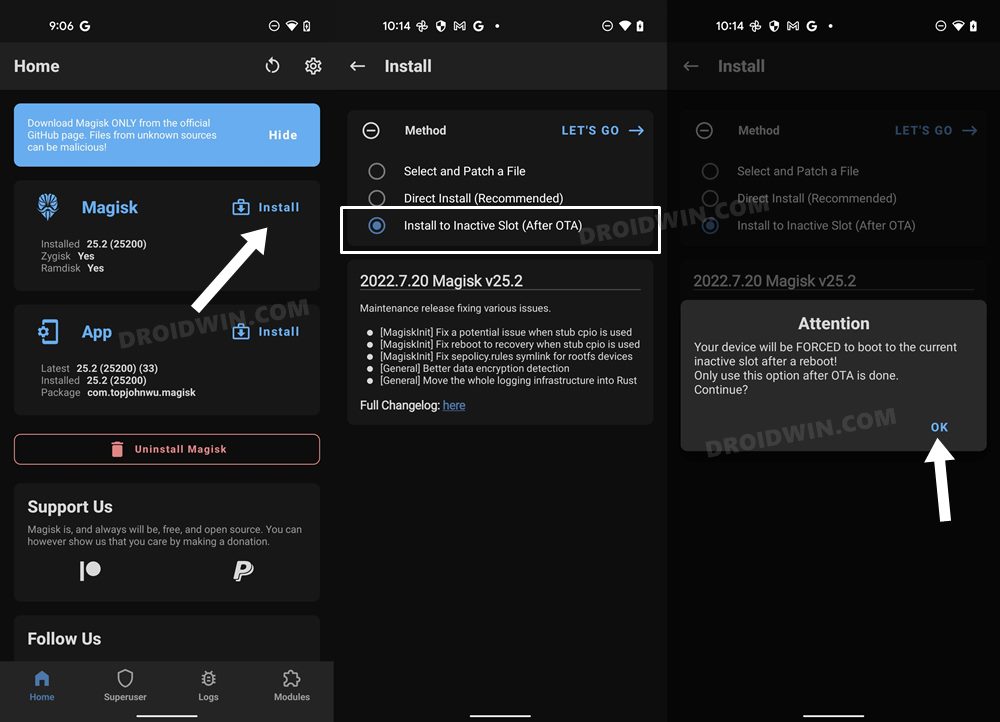
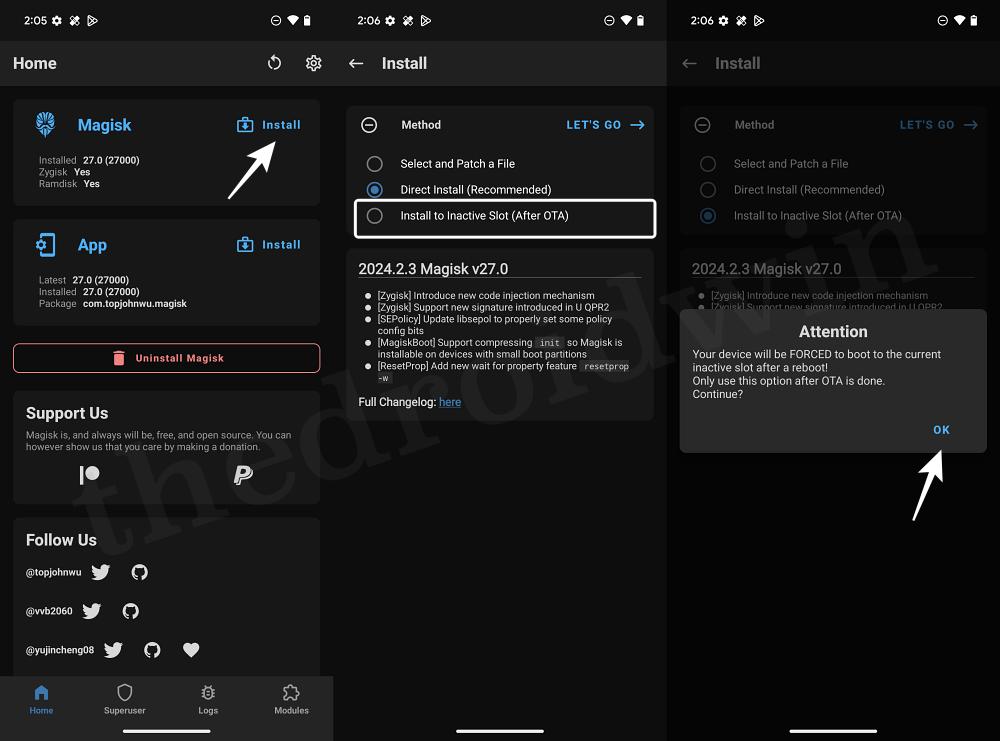
- Once downloaded, do not reboot your device. Rather, launch the Magisk App.
- Then tap on Install next to Magisk. After that, select Install to Inactive Slot.
- You will now get a prompt, tap OK. Magisk will now be installed to the inactive slot.
- Once done, your Android device will automatically restart to the updated and rooted OS!

Method 2: Via ADB Sideload [OTA]
- To begin with, download the Android SDK Platform Tools. Then extract it to any location on your PC. Doing so shall give you the platform-tools folder, which we will be using throughout this guide.
- Next up, download the OTA image for your device from your device’s official website or an unofficial trusted source like XDA
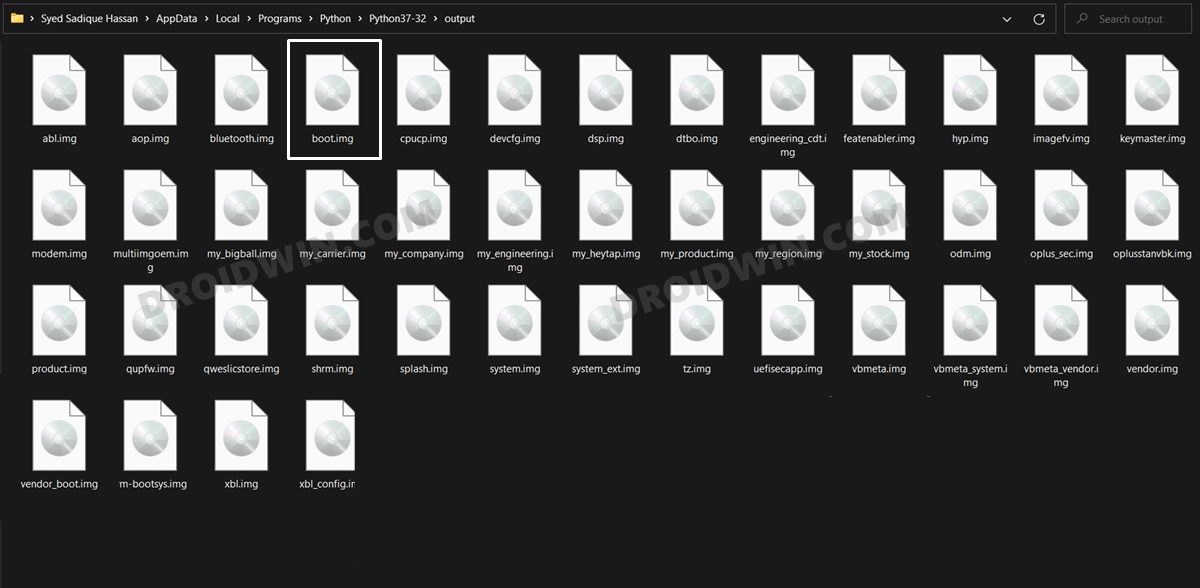
- Now extract the boot.img/init_boot.img from the Images ZIP file and transfer it to your device.
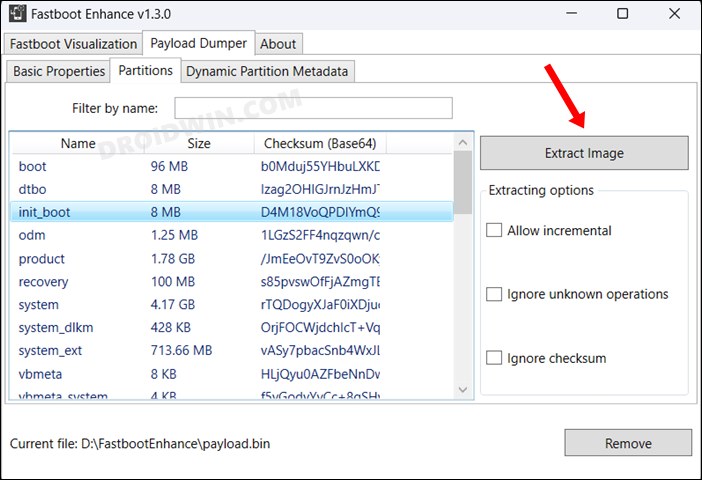
- If the OTA is in a paylod.bin format, then you could use the Fastboot Enhance Tool to unpack it and extract boot.img/init_boot.img.
- Next up, transfer the OTA file to the platform-tools folder as well. Also, make sure to rename the downloaded the file to ota, so that the complete name becomes ota.zip.
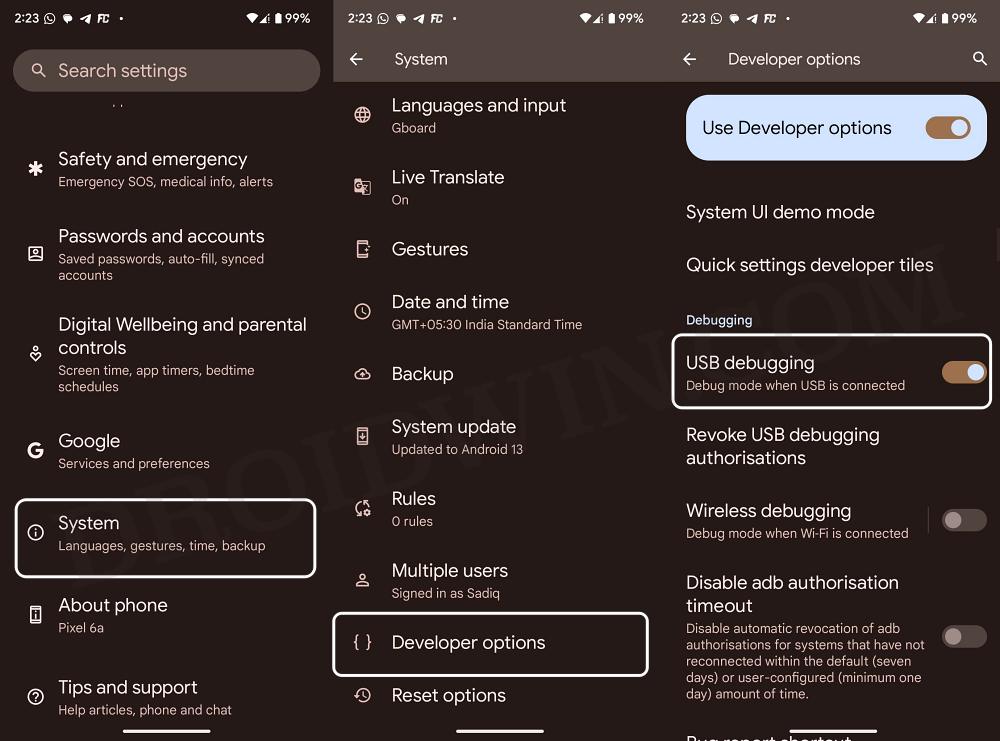
- After that, enable USB Debugging on your device [Settings > System > Tap on Build Number 7 Times > Settings > System > Developer Options > USB Debugging].
- Connect your device to the PC via USB cable. Then head over to the platform-tools folder, type in CMD in the address bar, and hit Enter.
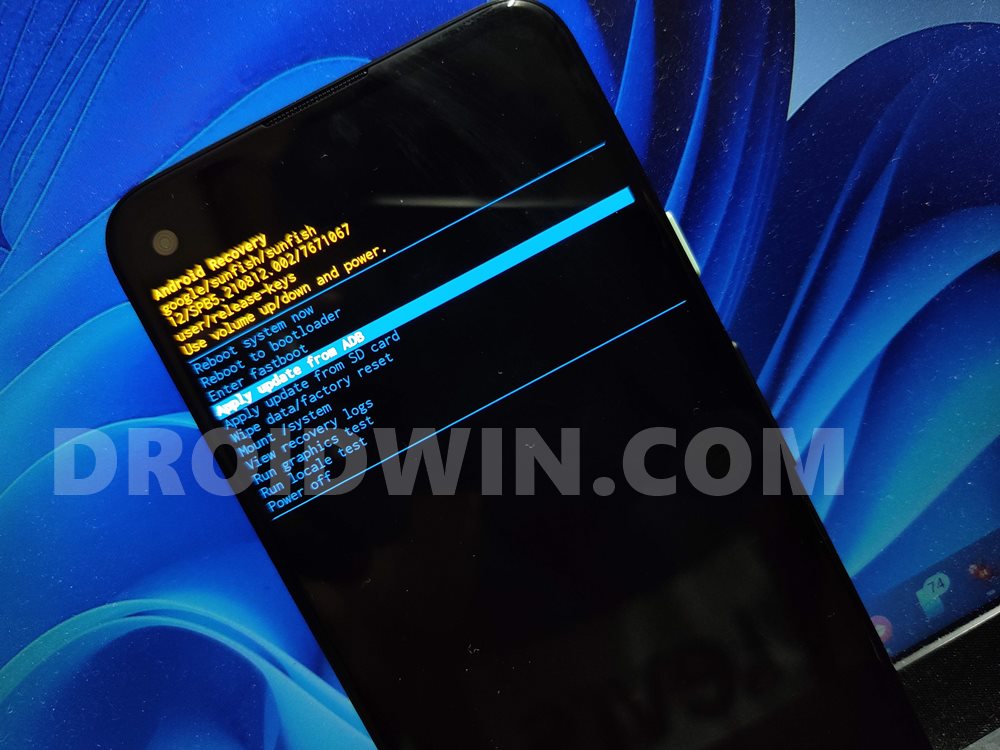
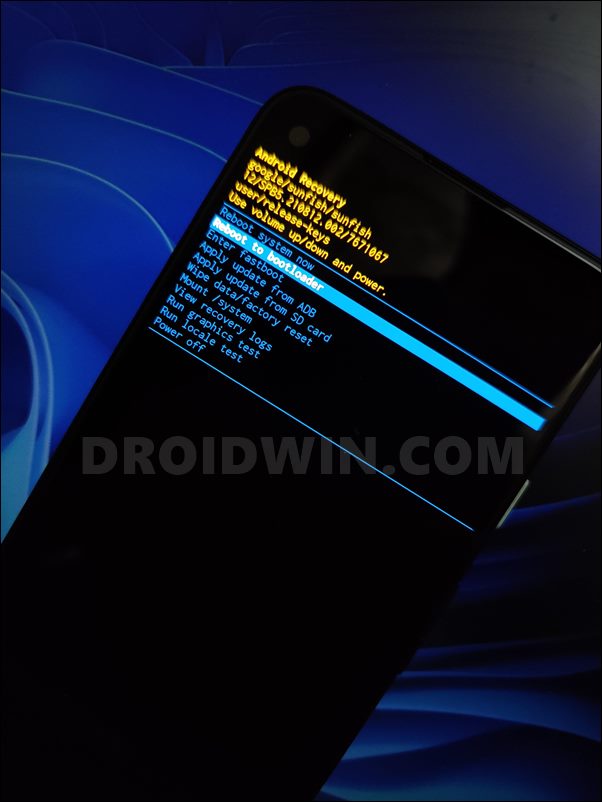
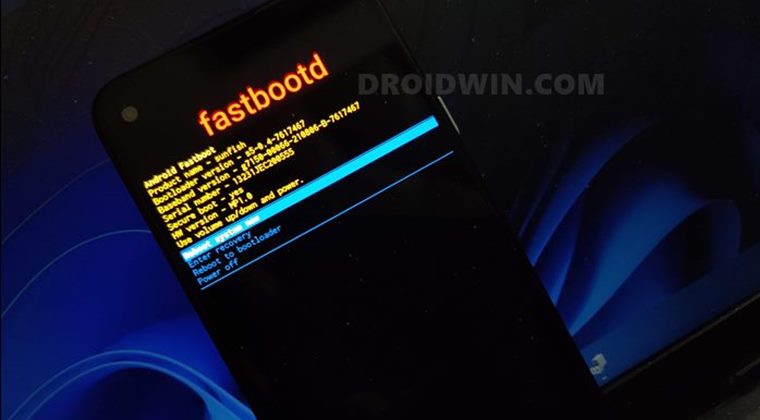
- This will launch the Command Prompt. Type in the following command in the CMD window to boot your device to Recovery Mode
adb reboot recovery
- Now use the Volume Keys to select Apply Update via ADB and hit the Power key to confirm it.
- Then head over to the Command Prompt that is opened inside platform-tools and execute the below command to flash the OTA file:
adb sideload ota.zip
- Once the flashing is complete, use the Volume key to select Reboot System now and hit the Power key to confirm it.
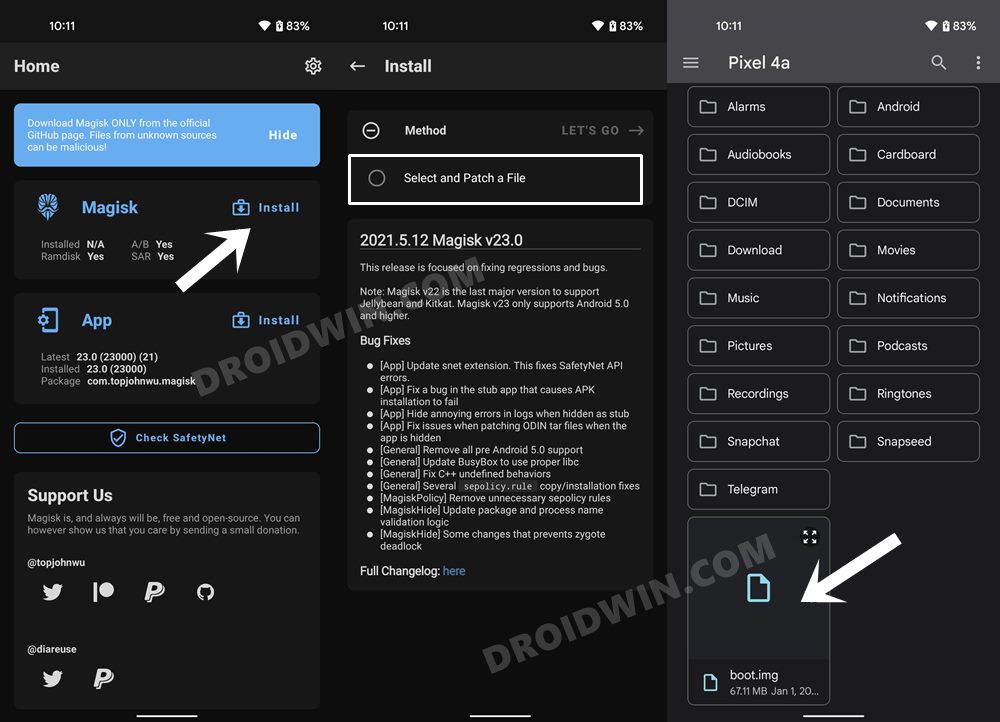
- Now install the Magisk App onto your device. Then launch it and tap on the Install button next to Magisk.
- Then choose Select and Patch a File. Navigate to the boot.img file and select it.
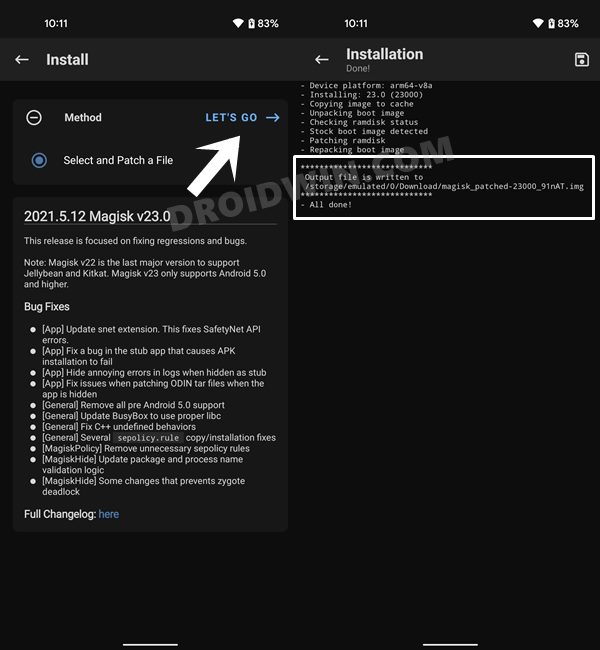
- Then tap on the Let’s Go button situated at the top right to patch the file.
- Once done, connect your device to the PC via USB. Then transfer this patched boot.img to the platform-tools folder. Likewise, rename it to magisk_patched_boot.img.
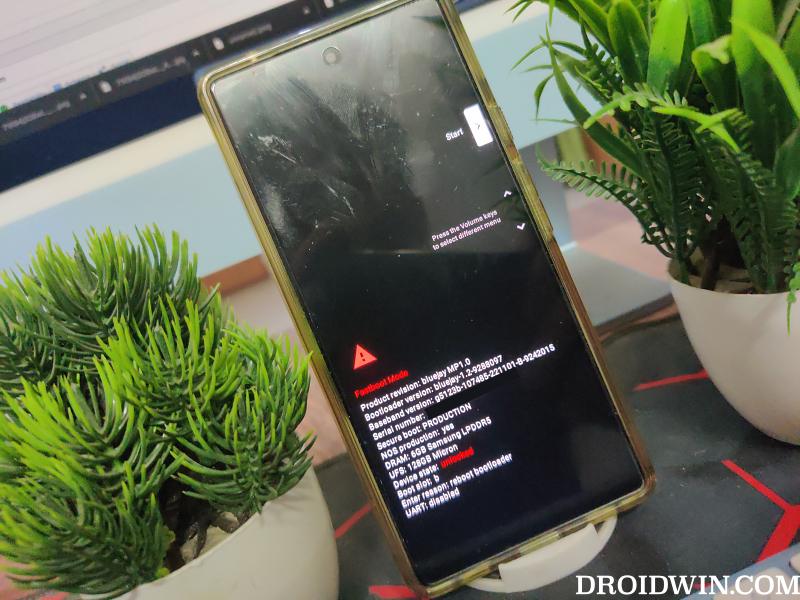
- Now use the below command to boot your device to Fastboot Mode:
adb reboot bootloader
- Now execute the below command to boot your device via the patched boot.img using the below command:
fastboot boot magisk_patched_boot.img
- If everything is working well and good, then you could proceed for permanent root. This could be done by launching the Magisk App, then tap on Install > Direct Install > Let’s Go.
- Now, wait for the process to finish. Once done, tap on the Reboot button situated at the bottom right. That’s it


So this was the second method to install OTA Updates on your rooted Android device. Let’s now make you aware of the other two methods.
Method 3: Via Factory Image [Recommended]
This is the lengthiest of the four methods but is also the safest one, so it’s usually the recommended approach.
- To begin with, download a text editor like Notepad++ on your PC.
- Then download and extract the Android SDK Platform Tools on your PC.

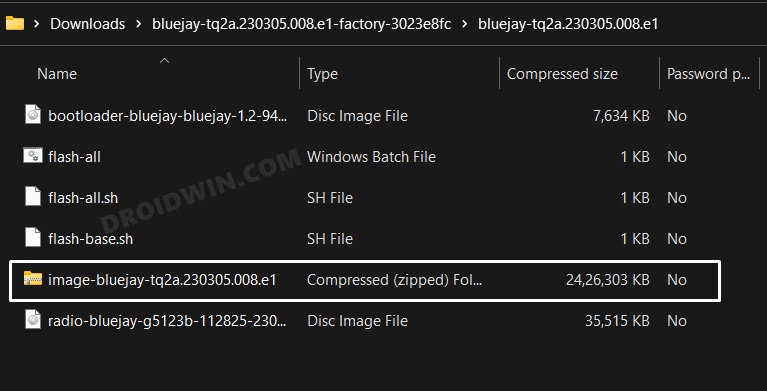
- Now download the firmware or Fastboot ROM for your device and extract it inside the platform-tools folder.
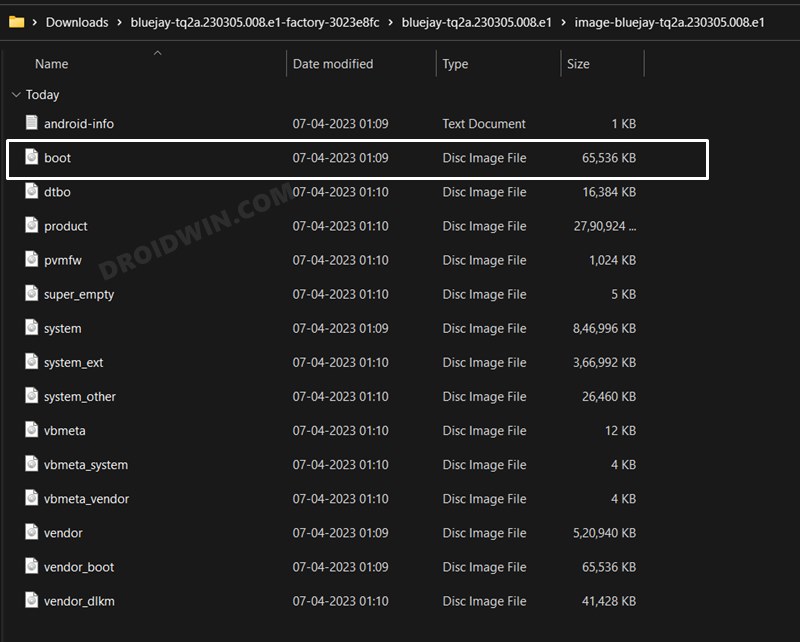
- Then go to the Images folder and extract the boot.img/init_boot.img file. Now transfer this file to your device.
- Now launch the Magisk App, tap on Install next to Magisk, and tap on Select and Patch a File.
- Now select boot.img/init_boot.img and hit the Let’s Go button situated at the top right.
- The file will now be patched and placed in the Downloads folder on your phone.
- Transfer it to the platform-tools folder on your PC and rename it to magisk_patched_boot.img.
- Now enable USB Debugging on your device and connect it to your PC via a USB cable.
- Then launch CMD inside the platform-tools folder and type in the below command to boot your device to Fastboot Mode:
adb reboot bootloader
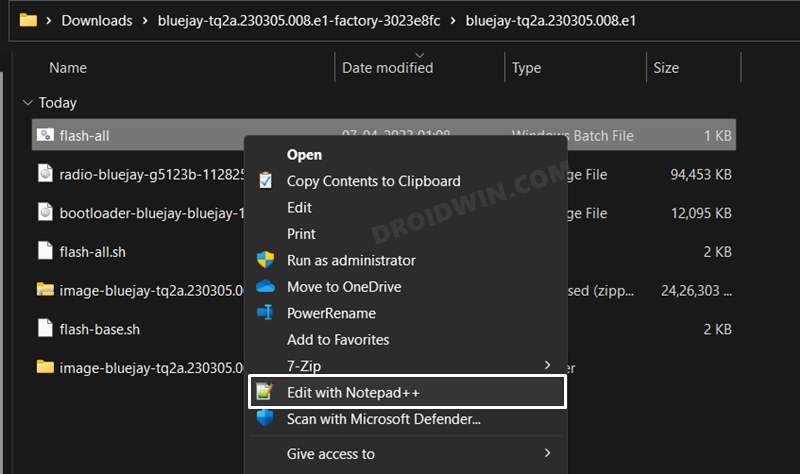
- Now go to the extracted firmware folder, right-click on the flash-all.bat file, and select More Options > Edit with Notepad++.
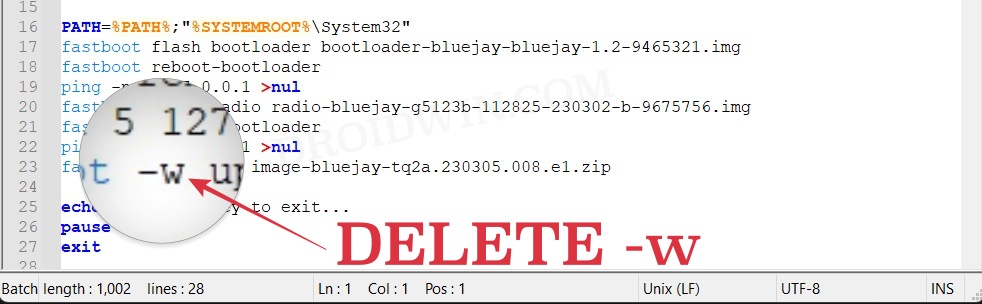
- Move your cursor over to the fastboot -w update image-filename.zip and delete the -w keyword. Now hit the Ctrl+S to save the changes. The line should now look something like this:
fastboot update image-filename.zip
- Now run this flash-all.bat file. The flashing will now start and during the process, your device will automatically reboot to Fastboot and FastbootD Modes, that’s completely normal.
- Once done, your device will boot to the OS. Now enable USB Debugging and execute the below command to boot your device to Fastboot Mode:
adb reboot bootloader
- If you are dealing with boot.img, then go to STEP 16, 17,18, and 20 [skip STEP 19] whereas init_boot users should directly go to STEP 19 and then STEP 20.
- Now execute the below command to boot your device via Magisk patched boot.img:
fastboot boot magisk_patched_boot.img
- If everything is working well and good, then you could proceed for permanent root. This could be done by launching the Magisk App, then tap on Install > Direct Install > Let’s Go.
- Now, wait for the process to finish. Once done, tap on the Reboot button situated at the bottom right. That’s it.
- Execute the below command to flash the patched init_boot.img to the init_boot partition:
fastboot flash init_boot magisk_patched_init_boot.img
- Once your device boots to the OS, you could now verify root via Magisk and then re-enable all the disabled modules [do so one module at a time].
This was the third method to install OTA Updates on Rooted Pixel 6A/6/Pro. Let’s now make you aware of the final method to carry out this task. But before that, let’s discuss something interesting.
NOTE: We first flashed the factory image file [STEP 8], booted our phone to OS, patched the stock boot.img, then booted to Fastboot, and finally booted our phone via the patched boot. But, apart from that, there exists another method of getting this job done [only for boot.img users]:
- You could first patch the stock boot.img via Magisk and place it in the platform-tools folder,
- Then boot to Fastboot Mode and flash the update.ZIP file but instruct it not to boot to the OS
- This could be done by modifying the flash command to
fastboot update --skip-reboot image.zip
- So once the OTA gets flashed, you will still be in the Fastboot Mode and you could then directly boot using the Magisk patched boot file via
fastboot boot magisk_patched_boot.img
- Once done, you could then perform the Direct Install to obtain permanent root.
Method 4: Via Android Flash Tool [Only for Pixel]
- To begin with, download the Android SDK Platform Tools. Then extract it to any location on your PC. Doing so shall give you the platform-tools folder, which we will be using throughout this guide.
- Next up, download the factory images for your device from here.
- Now extract the boot.img file from the Images ZIP file and transfer it to your device.
- Next up, connect your device to the PC via a USB cable. Then head over to the platform-tools folder, type in CMD in the address bar, and hit Enter.
- This will launch the Command Prompt. Type in the following command in the CMD window to boot your device to Fastboot Mode
adb reboot bootloader
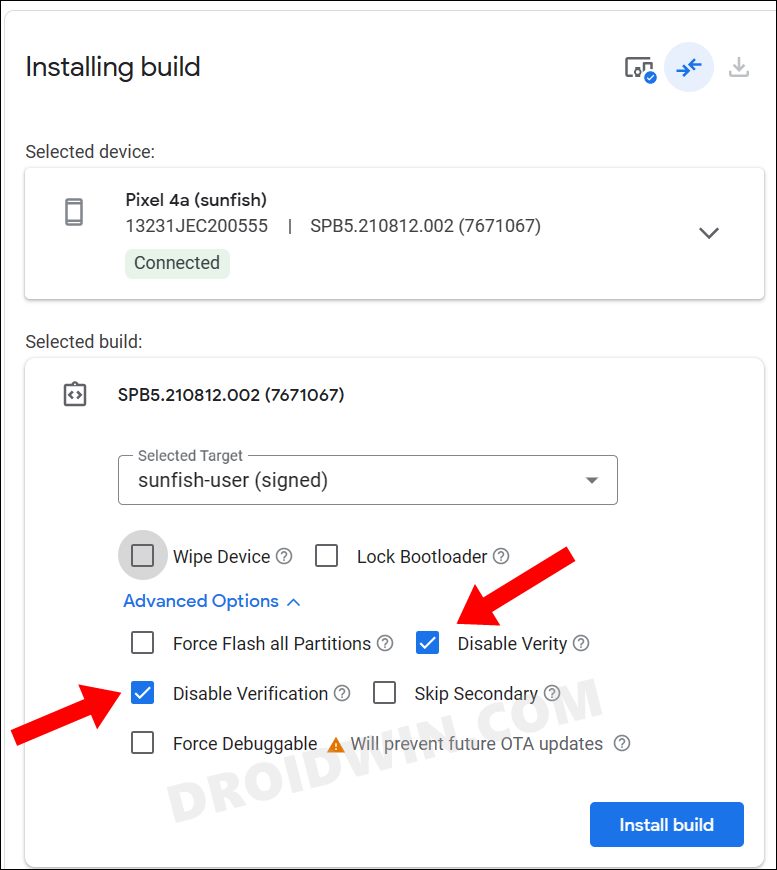
- Now head over to the Android Flash Tool site and proceed with the on-screen instructions to flash the firmware. You could also refer to our standalone guide that has detailed instructions and screenshots: How to Flash Firmware on Pixel via Android Flash Tool.
- There’s just one important thing to keep in mind- at the Selected Build screen, expand the Advanced options section and checkmark “only” the Disable Verity and Disable Verification.
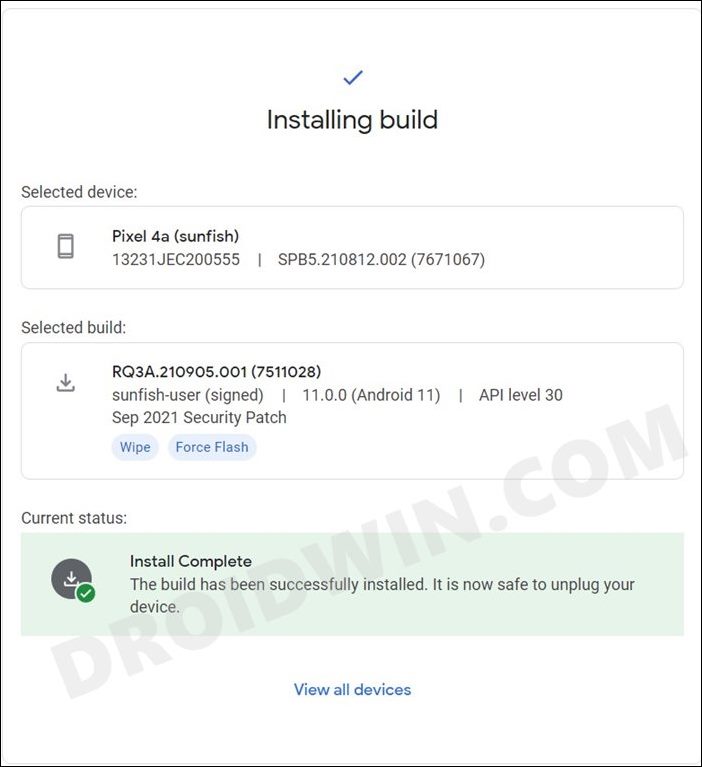
- As soon as the flashing is complete, your device will boot to the OS. Now install the Magisk App onto your device.
- Then launch it and tap on the Install button next to Magisk.
- Then choose Select and Patch a File. Navigate to the boot.img/init_boot file and select it.
- Then tap on the Let’s Go button situated at the top right to patch the file.
- Once done, connect your device to the PC via USB. Then transfer this patched boot.img to the platform-tools folder. Likewise, rename it to magisk_patched_boot.img.
- Now use the below command to boot your device to Fastboot Mode:
adb reboot bootloader
- If you are dealing with boot.img, then go to STEP 15, 16,17, and 19 [skip STEP 18] whereas init_boot users should directly go to STEP 18 and then STEP 19.
- Now execute the below command to boot your device via Magisk patched boot.img:
fastboot boot magisk_patched_boot.img
- If everything is working well and good, then you could proceed for permanent root. This could be done by launching the Magisk App, then tap on Install > Direct Install > Let’s Go.
- Now, wait for the process to finish. Once done, tap on the Reboot button situated at the bottom right. That’s it.
- Execute the below command to flash the patched init_boot.img to the init_boot partition:
fastboot flash init_boot magisk_patched_init_boot.img
- Once your device boots to the OS, you can now verify root via Magisk and then re-enable all the disabled modules [do so one module at a time].
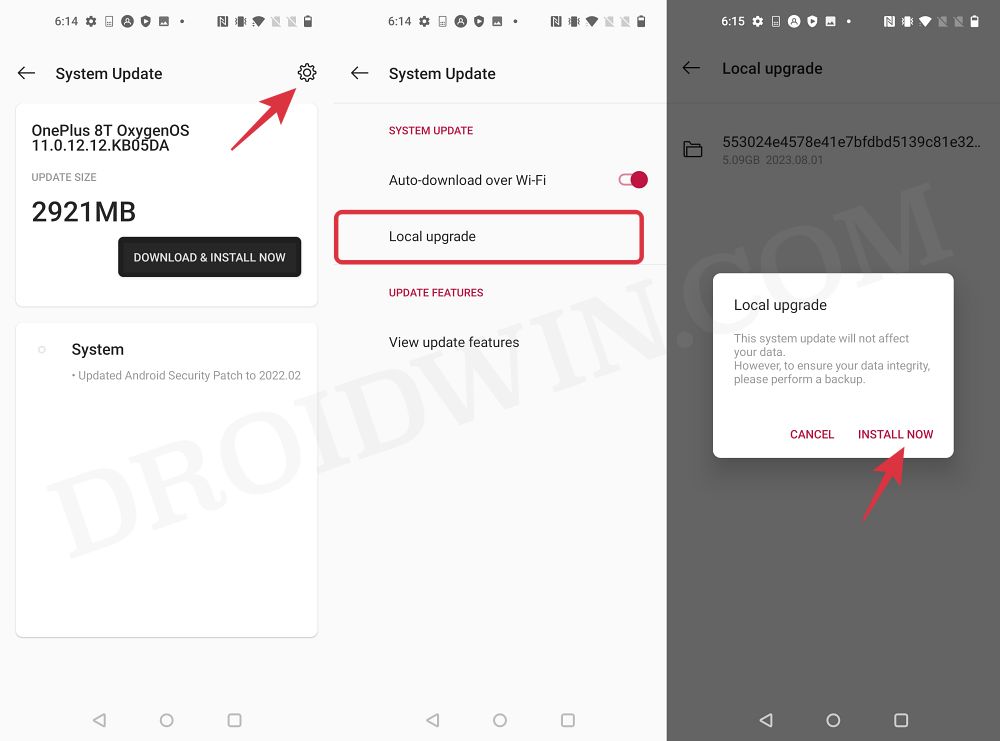
Method 5: Via Local Install [OnePlus]
- Launch Magisk, tap on Uninstall Magisk, and select Restore Images.
- Now download the latest OTA and transfer it to your device’s Internal Storage.
- Then install the OnePlus Local Update App on your device.
- Now install the downloaded OTA via the Local Update option in the upper right corner.
- Once installed, do not reboot your device. Instead, launch Magisk and select Install to Inactive Slot.
- Now reboot your device and it should boot to the rooted OS with new a update installed!
Method 6: By Reinstalling Magisk
This is the lengthiest of all the methods listed here as it will remove the root from your device which in turn will uninstall all your mods. However, this is the safest of all the approaches out there. So if you are looking for a fail-safe approach, then this should be your go-to choice [you could take a screenshot of the Magisk Module and LSPosed Modules page so as to keep track of all the installed mods].
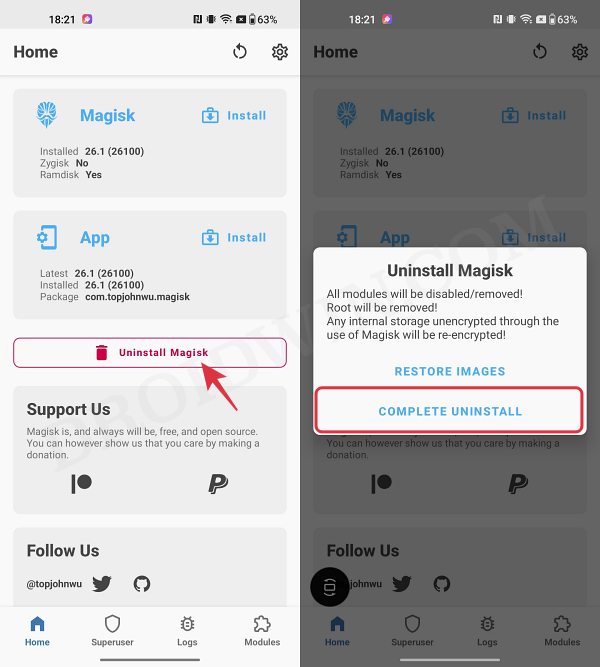
- Launch Magisk, tap on Uninstall Magisk, and select Complete Uninstall.
- Your device will now reboot to the non-rooted environment.
- Proceed ahead and install the OTA updates on your device.
- Once done, now refer to our guide on How to Root Android Devices via Magisk patched boot/init_boot.img

That’s it. These were the five different methods to install OTA Updates on your rooted Android devices. If you have any queries concerning the aforementioned steps, do let us know in the comments. We will get back to you with a solution at the earliest. Rounding off, we would like to thank XDA Recognized Contributor v0latyle for sharing this valuable information over at the XDA Forums.
- How to Root any Android Device without a PC
- How to Permanently Install TWRP without TWRP ZIP File (only using TWRP.img file)
- Root Android Devices Without TWRP Recovery
- How to Fix TWRP Error 7 (While Flashing Custom ROM via TWRP)
Old Method [2020 and before]
While the underlying steps are near about similar to our new method, the reason why we have listed this as the old method is mainly due to the screenshots attached. These images are from 2020 when Magisk Manager was still a thing. If you want to get a touch of nostalgia, then you are free to go through this thread, or else, the aforementioned section should have already helped you out. [If for some reason you are trying out this method, then make sure to checkmark the requirements from the above section].
STEP 1: Restore Stock Boot.img
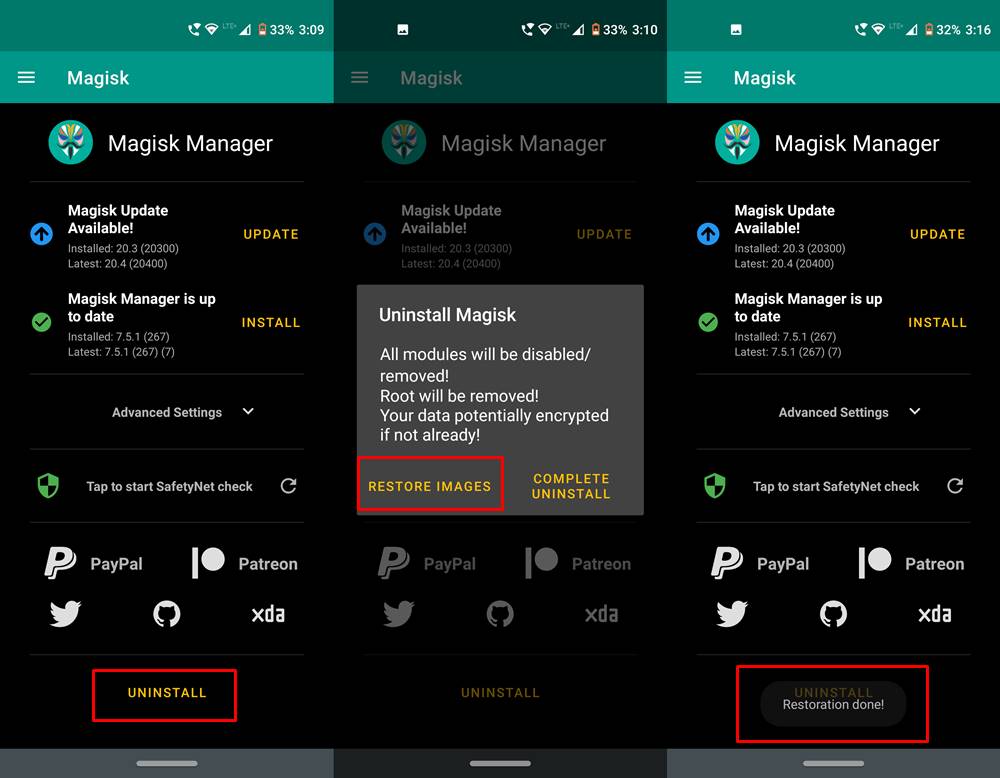
- Open Magisk Manager APK on your device and tap on the Uninstall Option/
- In the pop up that appears, click on Restore Images.
- Don’t reboot your device at this instance as you will completely remove Magisk and hence root. As of now we only need to temporarily disable root.
- Install Custom ROMs on any Android Device- Includes A/B Partition
- Flash Custom ROM After Wiping Internal Storage Without SD Card or OTG
- How to Go Back to Stock ROM from GSI ROM (All Android Devices)
- How to Flash Xiaomi Fastboot ROM without Mi Flash Tool
STEP 2: Install OTA
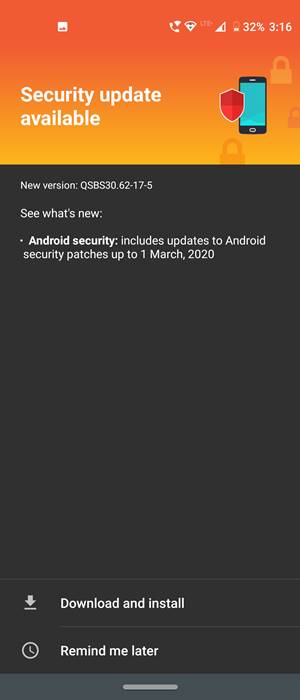
It’s now time to install the OTA update. Head over to Settings > System > System Update > Download and install the latest available OTA. Again, please do not reboot your device after installing the OTA.
STEP 3: Retain TWRP after OTA (Optional)
If you had TWRP recovery before. then you might wish to get it back. In that case, here is what needs to be done. Do keep in mind that this step is optional. users who rooted their device via TWRP might need it. On the other hand, those who rooted their device without TWRP, just by using the stock boot.img file, they might not want to retain it. Anyways, it is completely optional, and if you need TWRP, then follow these steps:
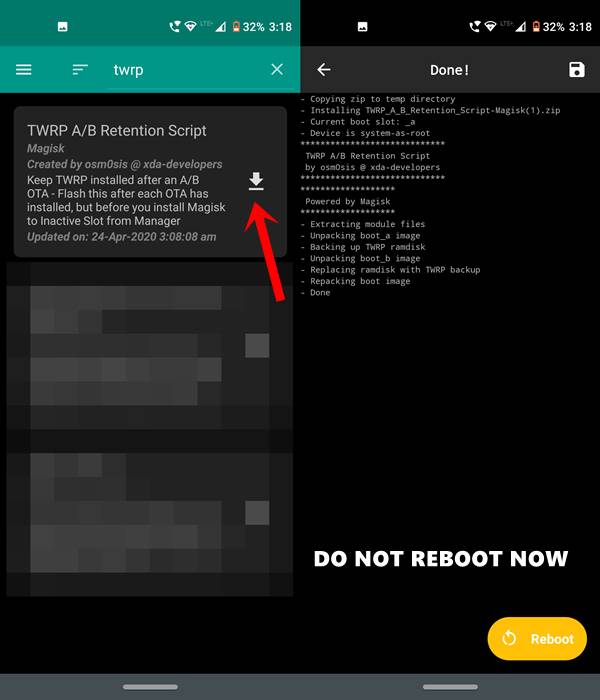
- Open the Magisk Manager app and tap on the hamburger menu situated at the top left.
- Head over to Downloads and search for TWRP A/B Retention Script. Hit the Download icon next to it followed by the Install option in the popup that appears.
- Once the installation of the module is complete, you will get a Reboot option. Do not tap it. You don’t have to reboot your device even at this stage.
- How to Fix Unauthorized Device with ADB Commands [3 methods]
- Fix Magisk Module Bootloop without TWRP Recovery
- Fix Mi Account Authorization | Unbrick Xiaomi | EDL Mode
- How to Fix Error: Cannot load recovery.img
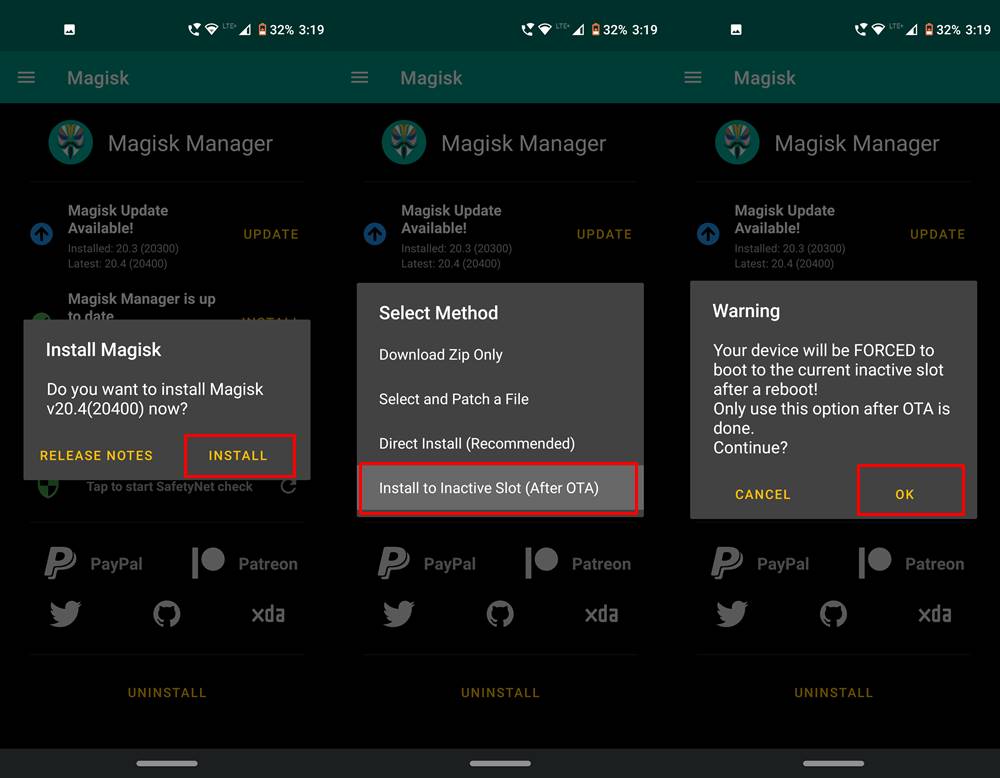
STEP 4: Getting back Root after OTA Installation
- Now that you have installed the OTA and retained TWRP, here is how to re-enable the root that we had temporarily disabled.
- Launch the Magisk Manager app on your device.
- Tap on Install > Install > ‘Install to Inactive Slot (After OTA).
- In the warning message that appears, tap on OK. Now, wait for the process to finish, which should only take a few seconds.
- Once that is done. you will see the Reboot option at the bottom right. You could now reboot your device. With this, you have successfully installed OTA on your rooted Android device.
What if I Rebooted my Device Mid-Way?
The reason why we told you not to reboot your device earlier was the fact that at that point in time, you had installed OTA in the inactive slot, but the Magisk wasn’t yet installed there. So if you had rebooted, you would have gone to the inactive slot and enjoyed the new OTA, but without Root and Magisk. But now that we have installed Magisk to the inactive slot as well (where the OTA has been installed), you could reboot this slot and enjoy both the new OTA as well as the root.
Just for extra knowledge, since you have booted to this slot, it now becomes your active slot and the earlier one will be your inactive slot. On that note, if you wish to know more about this topic, i.e. how A/B slots work, how to install ROMs, Kernel, Magisk in these slots, etc, then please check out our below guides. Likewise, if you have any doubts about this article on how to install OTA updates on a rooted Android device? Do drop in your queries in the comments section below.


Precious
In Magisk, as I clicked the restore image button under the uninstall button, it’s showing “stock backup does not exist” hence I couldn’t proceed with the OTA update.
Artium
Hi, thank you for your tutorial.
I am now trying install an OTA update on my rooted OnePlus 8T.
In Step 2 of your tutorial I get the following message:
“root is detected, system will begin downloading the full upgrade package. To ensure your data integrity, please perform a backup. Your device will be unrooted once the upgrade is completed.”
Can you please help me?
Sadique Hassan
Well, it seems that the OEM is recommending to take a backup beforehand. So do take a backup and then install the OTA but don’t reboot your deivce after installing the update. Rather proceed ahead to the next step of retaining TWRP [which is optional] and then the Install to Inactive Slot via Magisk [compulsory].
Foxy
During installation of OTA in realme narzo 30 pro it automatically reboot. And update also fails due to twrp presence.