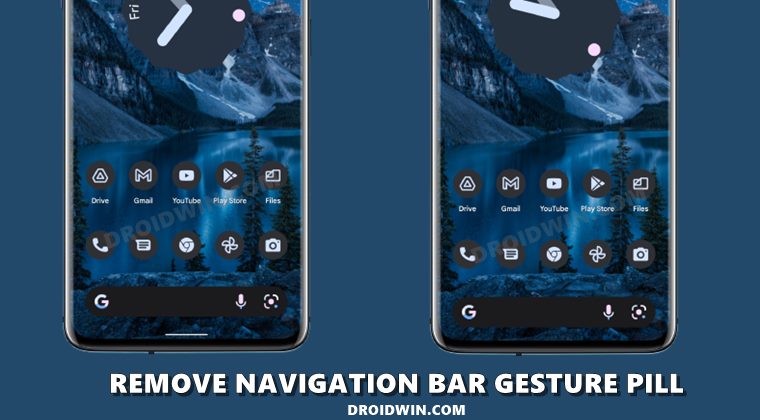
In this guide, we will show you the steps to remove the navigation bar gesture pill on your Android 12 device without root. There have been quite a few noteworthy additions in the latest iteration of the OS. Among them, it is the new Material You UI and Wallpaper based theming engine that has managed to grab most of the limelight. For the unaware, this feature themes the OS and its associated component by picking up the primary color from the wallpaper.
Along the same lines, Android 12 has carried forward the previous build’s navigating styles, with the three-button and full-screen navigations being part of this family (well, you could even bring back the two-button navigation style). As of now, it seems the users are generally inclined towards full-screen gesture navigation. However, there’s just one minor hiccup- there will still be a small pill at the bottom of the screen.
This tends to disrupt the immersive user experience. In this regard, there already exists a plethora of rooted tweaks through which you could remove this pill. But what about the non-rooted devices? Well, you could now remove the navigation bar gesture pill on your Android 12 device without root as well. And in this guide, we will show you how to do just that. Follow along.
How to Remove Navigation Bar Gesture Pill on Android 12 Without Root
- To begin with, download Android SDK Platform Tools and extract it to any convenient location on your PC. This will give you the platform-tools folder, which we will be using throughout this guide.

- Next up, download and install the Shizuku App from Play Store. Then launch it and as of now, you should see the Shizuku is not running message, not an issue, we will make it run via ADB command.
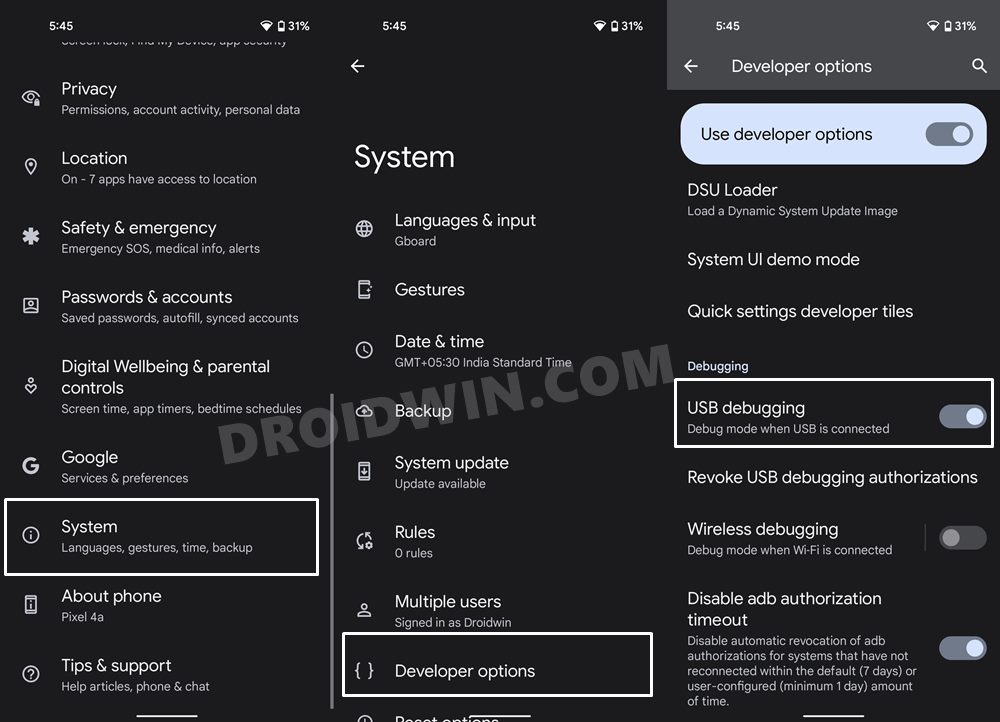
- So head over to Settings > System > Tap on Build Number 7 Times > Go back to Settings > System > Developer Options > Enable USB Debugging.
- Now connect your device to the PC via USB cable. Then head over to the platform-tools folder, type in CMD in the address bar, and hit Enter. This shall launch the Command Prompt.
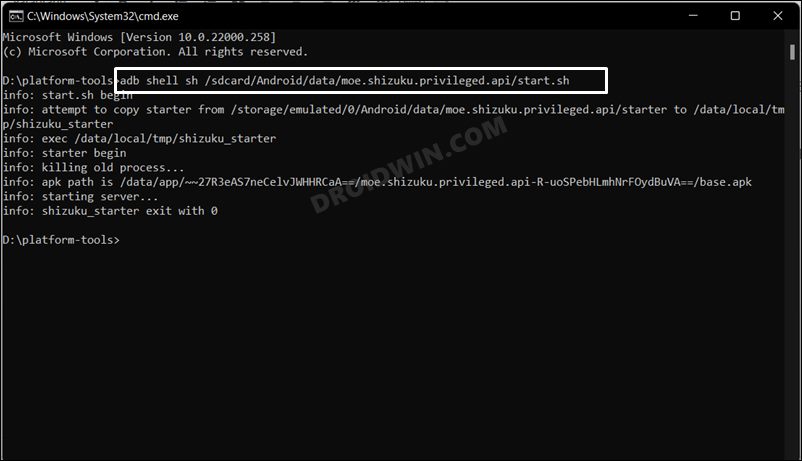
- Now type in the below command in the CMD window to launch the Shizuku App:
adb shell sh /sdcard/Android/data/moe.shizuku.privileged.api/start.sh
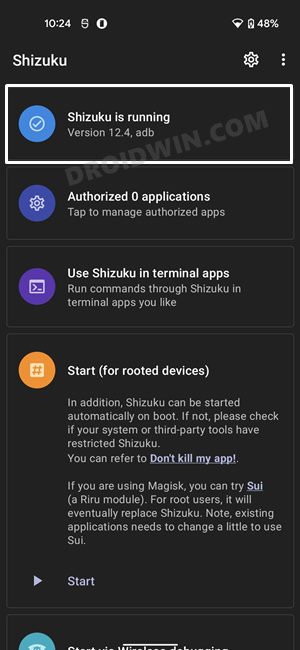
- You should now see the Shizuku is running message and we are now good to go ahead.
- Now download and install the Fabricate Overlay app on your device from GitHub.
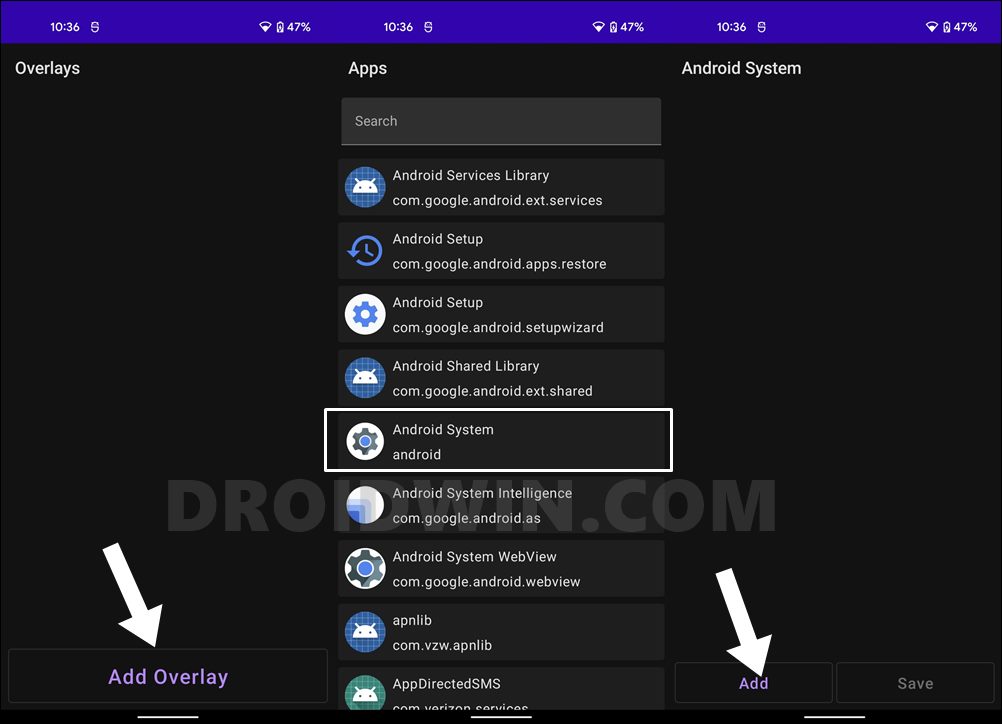
- Launch the app and tap on the Add overlay button situated at the bottom.
- After that, select Android System from the list and tap on Add.
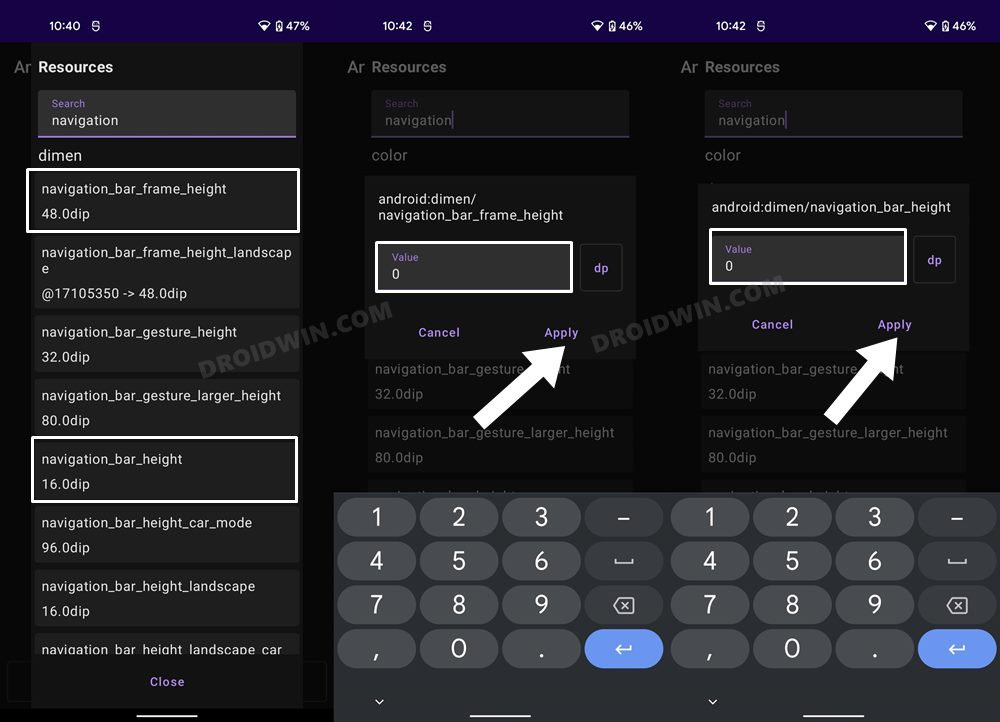
- Then type in navigation in the search bar and scroll to the Dimen.
- Now select the navigation_bar_frame_height, input 0 in the Value field and tap Apply.
- Then select the navigation_bar_height, type in 0 in the Value field and tap Apply.
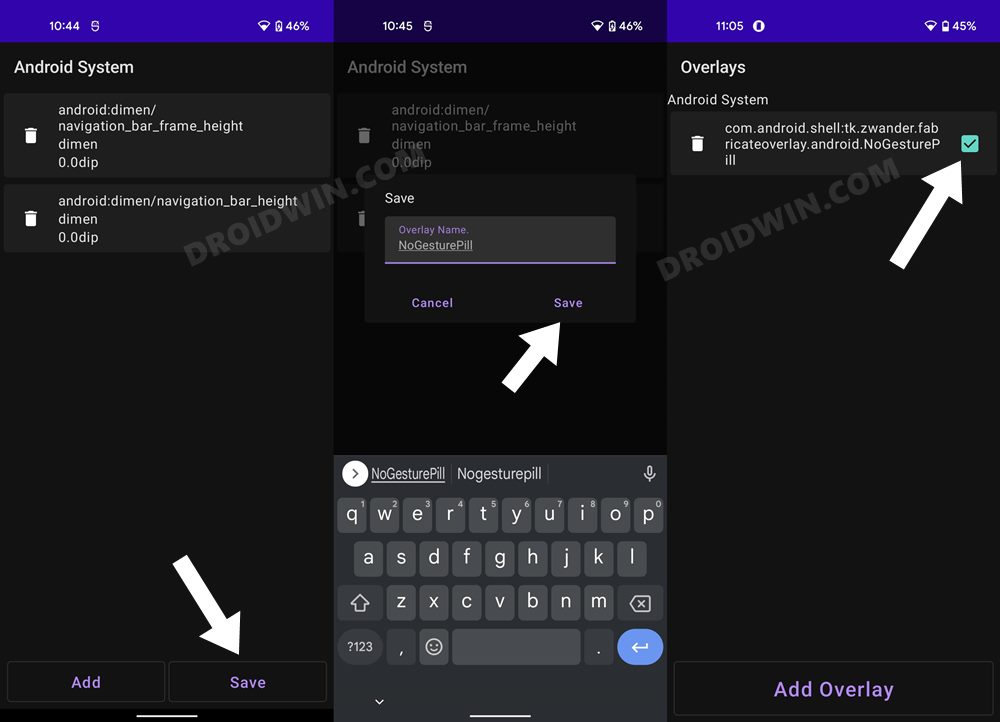
- Now hit the Save button, give this overlay a name, and hit Save.
- Finally, checkmark this overlay to activate it.
- That’s it, the overlay will now be activated and subsequently, the pill will be hidden.


So with this, we round off the guide on how you could remove the navigation bar gesture pill from your non-rooted Android 12 device. If you have any queries concerning the aforementioned steps, do let us know in the comments. We will get back to you with a solution at the earliest.


faralway
not work any longer
rob
the overlay app keeps crashing while i try to save overlay
Chan
same here