In this guide, we will show you the steps to root your Poco X6/X6 Neo via Magisk. Poco devices have always been known as the true flagship killers- offering amazing features and a powerful specs sheet at a price that is affordable by the masses. Likewise, if we turn our attention toward custom development, then right from its first iteration it has performed exceptionally well in this domain. And the newest addition to this family is no different either.
The devices have been blessed with tons of custom ROMs, mods, tweaks, and kernels. However, the ability to gain administrative privileges has always been the preferred choice for tech enthusiasts. Once you checkmark that requirement, you could then welcome abode a plethora of modules and rooted binaries. So without further ado, let’s make you aware of the steps to root your Poco X6/X6 Neo via Magisk.
Table of Contents
Benefits and Risks of Rooting
Once you root your device by flashing the Magisk patched boot.img via Fastboot Commands, you will be in a position to try out a plethora of customizations on your device. These include the likes of flashing custom ROMs, installing a custom recovery like TWRP, or flashing a custom kernel. Along the same lines, you could also flash Magisk Modules, Xposed Framework, Substratum Themes, Viper4Android, and the like. However, this is just one side of the story.
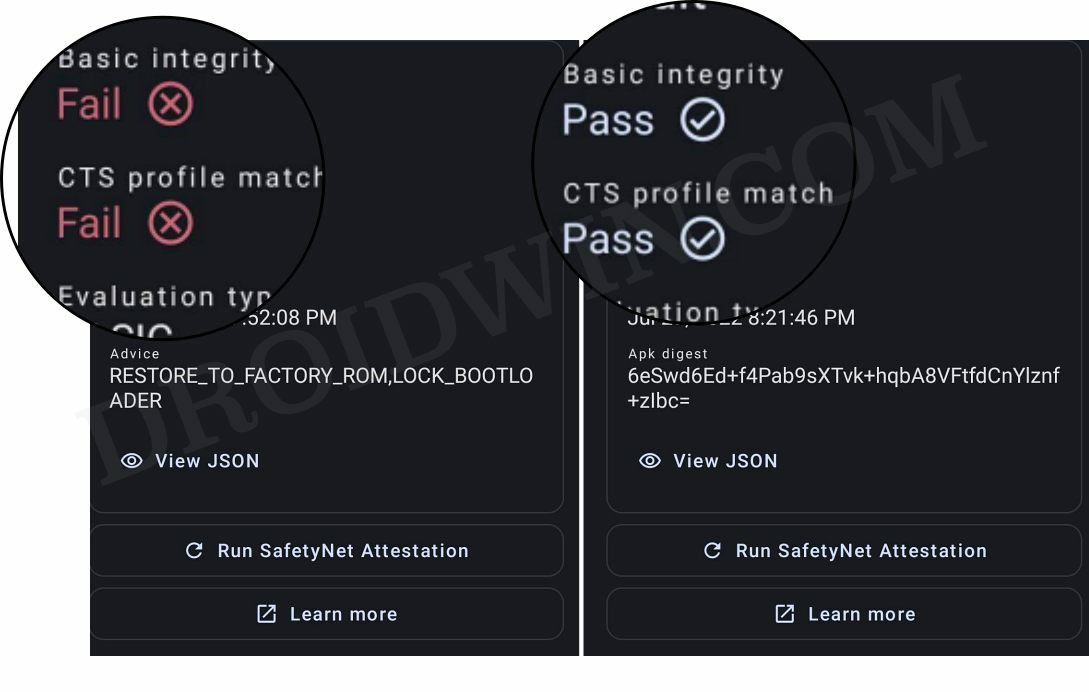
Carrying out this process also has its downsides. First off, the process requires an unlocked bootloader. Doing so will wipe off all the data and could nullify the device’s warranty as well. Likewise, WideVine L1 will be degraded to L3, resulting in the inability to stream Netflix in HD [FIXED]. Then the Play Integrity will be triggered, which might cause issues with banking apps [FIXED]. So if that’s all well and good, then let’s get started with the steps to root Poco X6/X6 Neo.
How to Root Poco X6/X6 Neo via Magisk

The below instructions are listed under separate sections for ease of understanding. Make sure to follow in the exact same sequence as mentioned below. Droidwin and its members wouldn’t be held responsible in case of a thermonuclear war, your alarm doesn’t wake you up, or if anything happens to your device and data by performing the below steps.
Install Android SDK

To begin with, install the Android SDK Platform Tools on your PC. This is the official ADB and Fastboot binary provided by Google and is the only recommended one. So download it and then extract it to any convenient location on your PC. Doing so will give you the platform-tools folder, which will be used throughout this guide.
Enable USB Debugging and OEM Unlocking
Next up, you will have to enable USB Debugging and OEM Unlocking on your device. The former will make your device recognizable by the PC in ADB mode. This will then allow you to boot your device to Fastboot Mode.
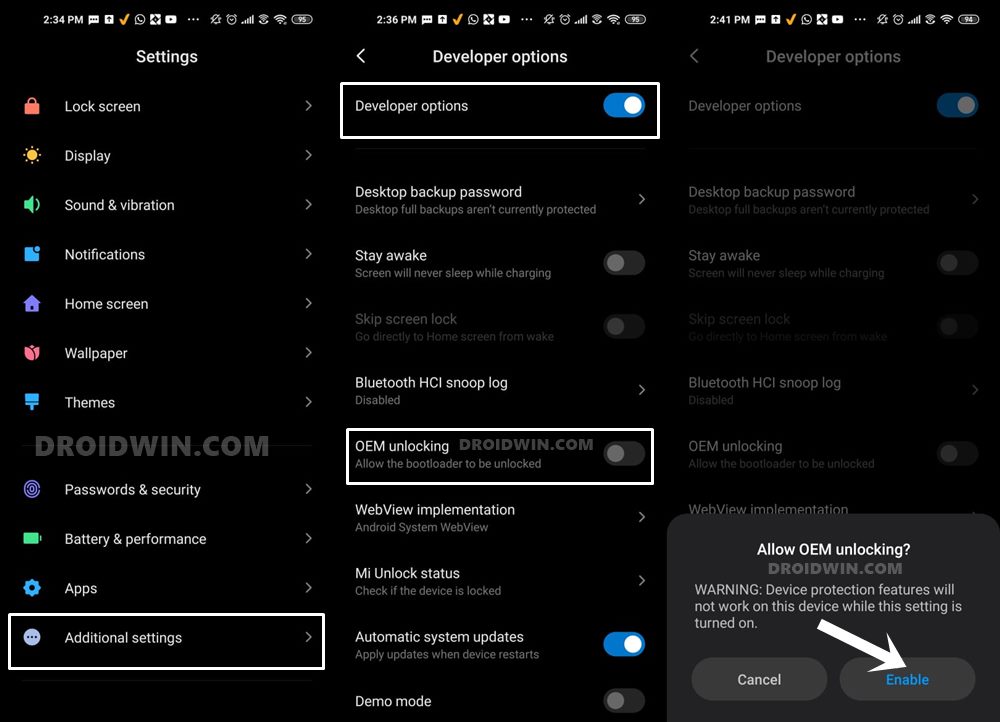
On the other hand, OEM Unlocking is required to carry out the bootloader unlocking process. So head over to Settings > About Phone > Tap on MIUI Number 7 times > Go back to Settings > System > Developer Options > Enable USB Debugging and OEM Unlocking.
Unlock Bootloader on Poco X6/X6 Neo
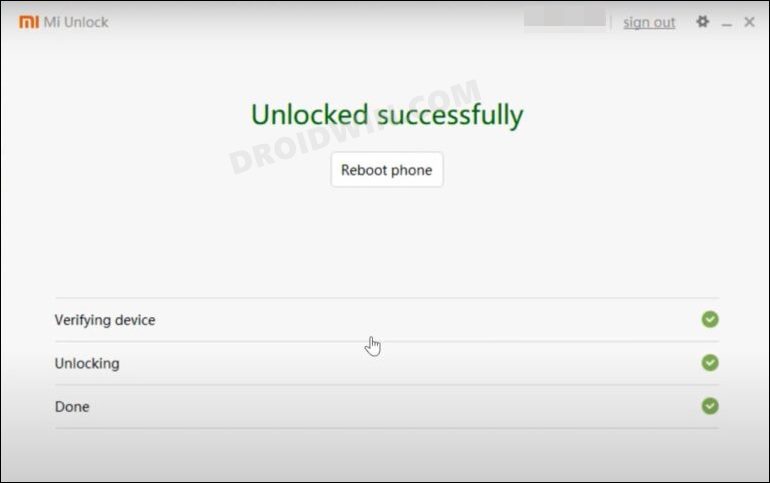
You will also have to unlock the bootloader on your Poco X6/X6 Neo if you wish to root it via Magisk. Do keep in mind that doing so will wipe off all the data and might make the device’s warranty null and void as well. So if that’s well and good, then refer to our guide to Unlock Bootloader on any Xiaomi Device.
Download Poco X6/X6 Neo Fastboot ROM
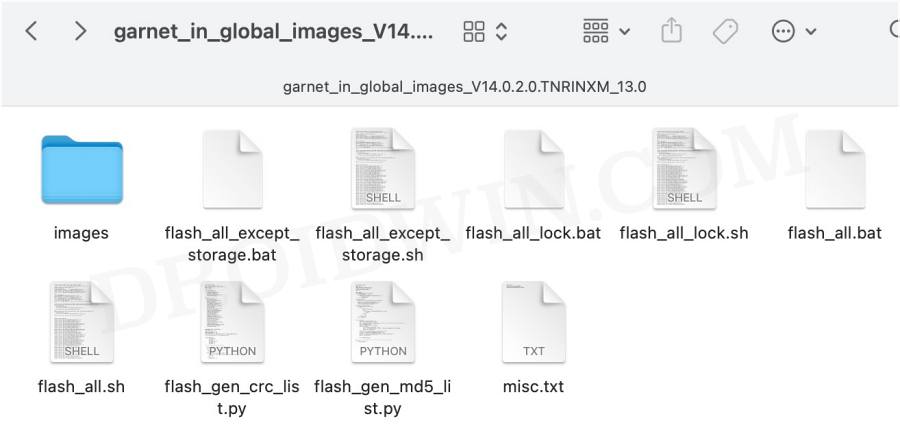
Next up, download the Fastboot ROM for your device. As for this guide, I am using the Poco X6 Fastboot Stable ROM V14.0.2.0.TNRINXM. You are free to try any version of your choice, but it is recommended to try the newer builds only and that of your region. To download the firmware, you may use the official MIUI Forum or a third-party site Xiaomi Firmware Updater.
Extract Stock Boot.img
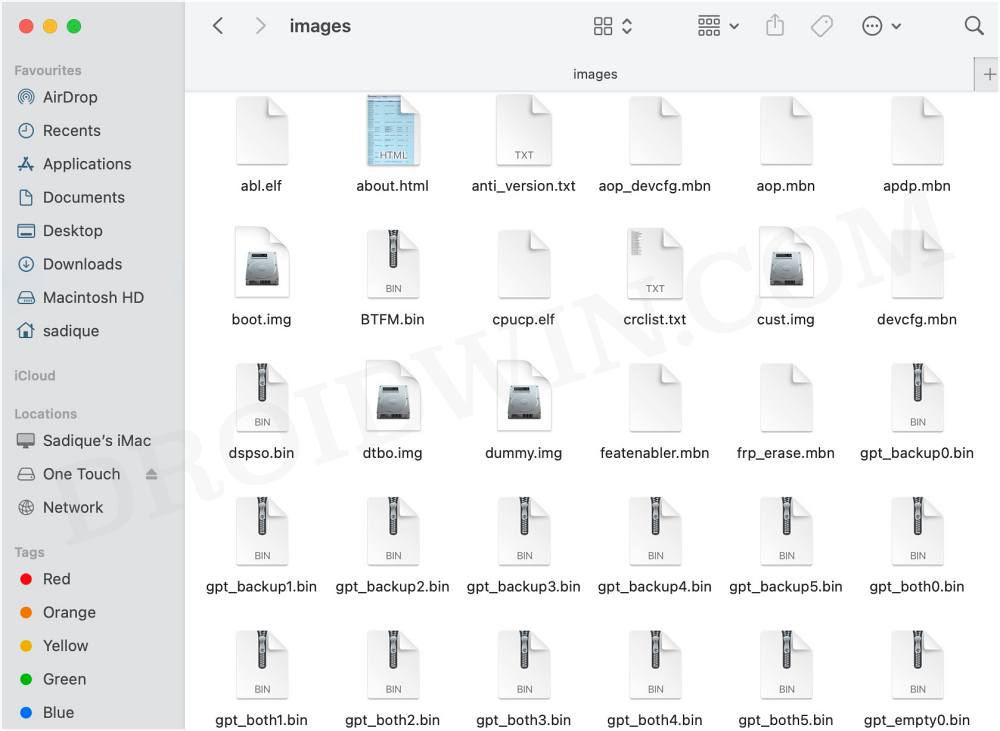
- Extract the ROM to any convenient location and go to the Images folder.
- Within that, you should see all the partition files in IMG format.
- Copy the boot.img file from there and send it to your device.

Patch Poco X6/X6 Neo Stock Boot via Magisk
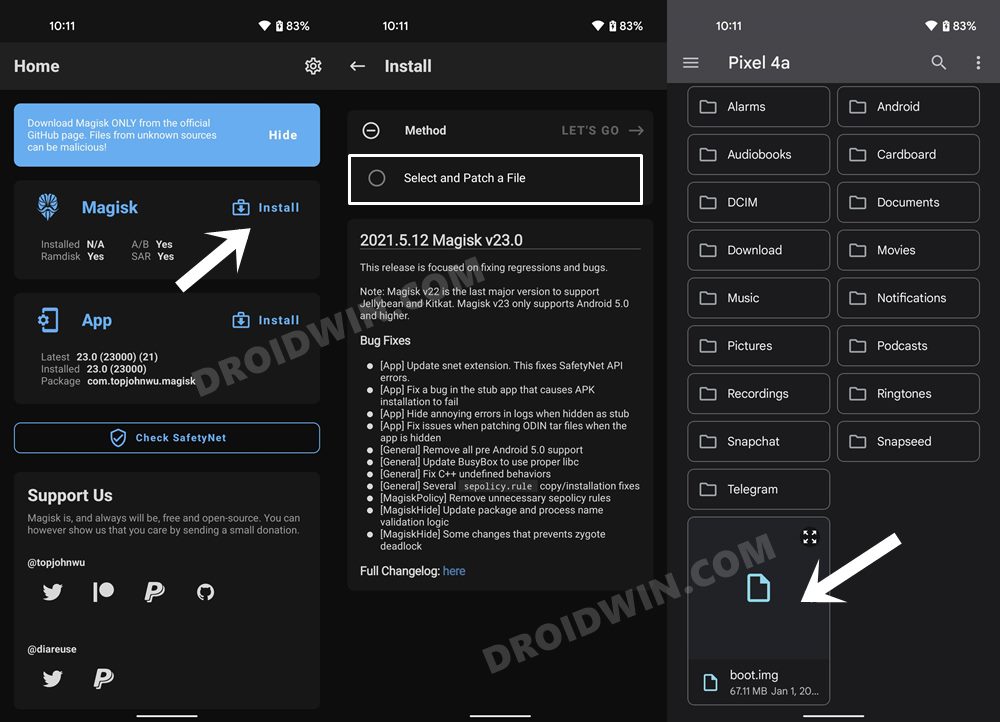
- First off, install the Magisk App on your device.
- Then tap on the Install button situated next to Magisk.
- From the Method section, choose Select and Patch a file.
- Browse to the extracted boot.img file and select it.
- Then tap on the Let’s Go option situated at the top right.
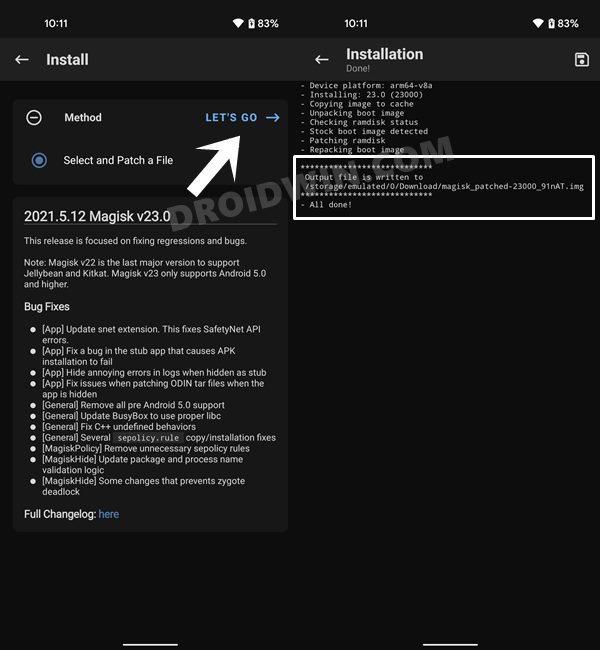
- Magisk will now load the boot.img file and will patch it accordingly.
- Once that is done, you would get the Download Complete message.
- The patched boot image file will be saved in Internal Storage > Downloads.
- Make sure to rename it to magisk_patched.img, if that is already not the case.
Boot Poco X6/X6 Neo to Fastboot Mode
- Connect your device to the PC via a USB cable. Make sure USB Debugging is enabled.
- Then head over to the platform-tools folder, type in CMD in the address bar, and hit Enter. This will launch the Command Prompt.
- Type in the following command in the CMD window to boot your device to Fastboot Mode
adb reboot bootloader

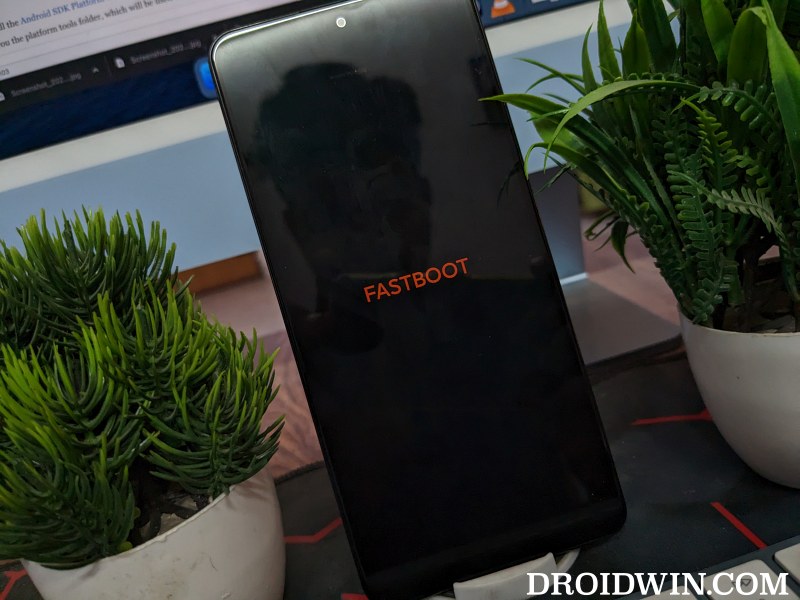
You should now see the famous MI Bunny Logo along with the Fastboot text written underneath it, signifying that the device has successfully booted to Fastboot. Let’s now move over to the final set of instructions and root Note 13/Pro 5G.
Flash Magisk Patched Boot.img and Root Poco X6/X6 Neo
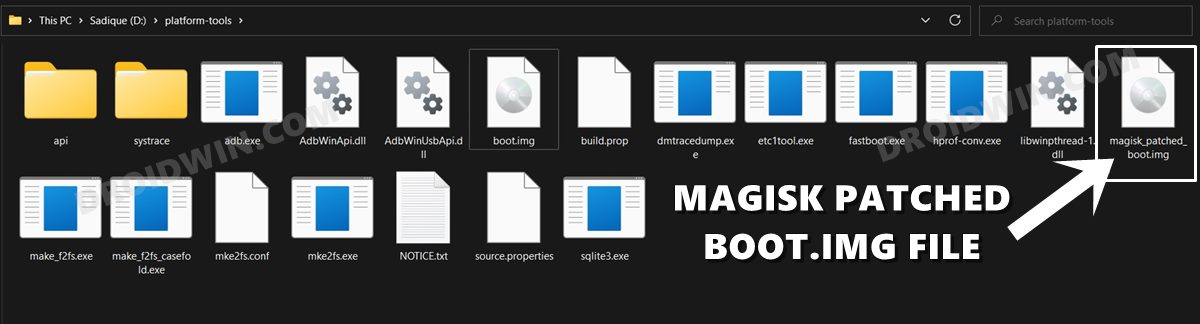
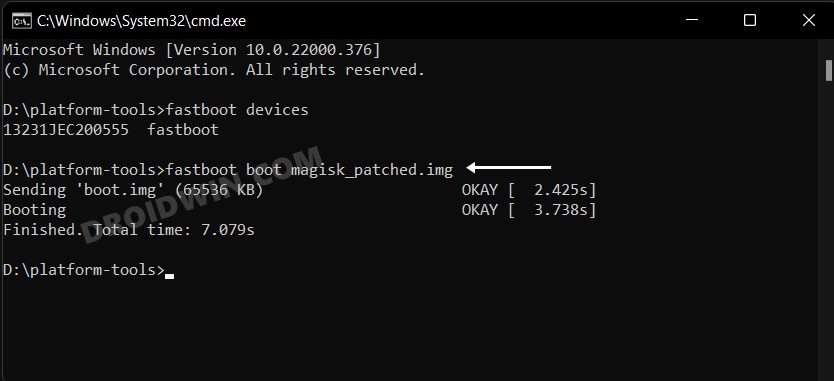
- Make sure that you have transferred the magisk_patched.img file to the platform tools folder.
- Now boot your device using the patched boot.img file [also read FAQ at the end]:
fastboot boot magisk_patched.img
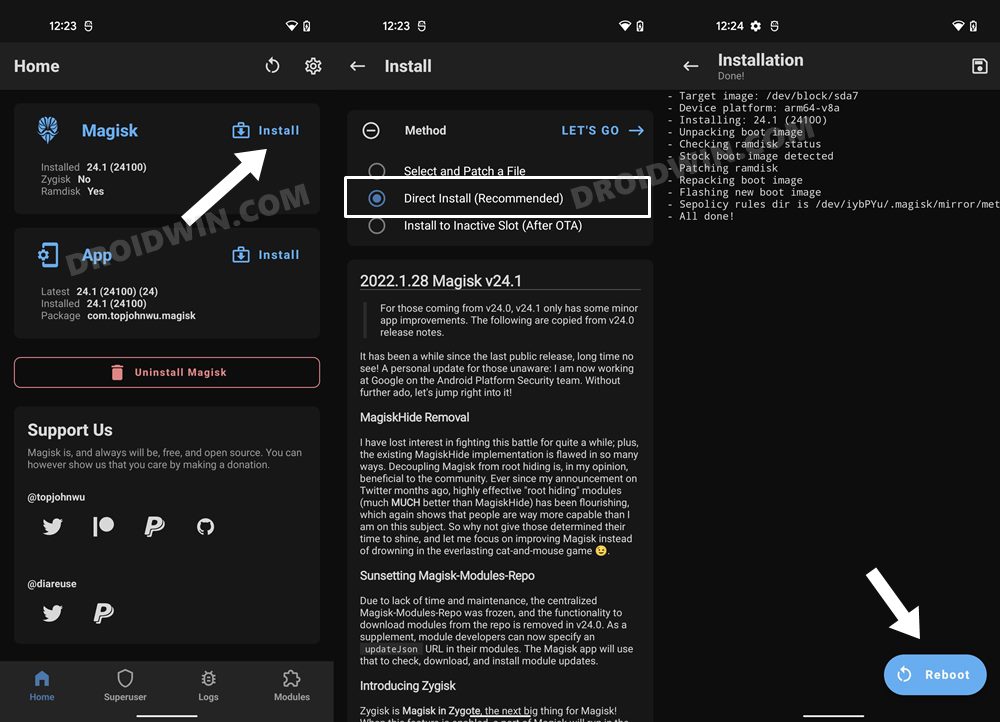
- Now launch the Magisk app and tap on the Install button next to Magisk.
- Then select Automatic Installation (or Direct Installation) and wait for the process to complete.
- Once done, tap on the Reboot button that appears at the bottom right. Your device will now boot to the rooted OS
That’s it. These were the steps to root your Poco X6/X6 Neo via Magisk. If you have any queries concerning the aforementioned steps, do let us know in the comments section. We will get back to you with a solution at the earliest.
FAQ: Fastboot Boot Boot.img vs Fastboot Flash Boot Boot.img
Instead of directly flashing the patched boot via fastboot flash boot magisk_patched.img, we first temporarily booted it via fastboot boot magisk_patched.img and then used the Direct Install method of Magisk. While a tad longer, but it is the recommended method for your device. This is because by first temporarily booting via the patched file, we could check if everything is working well and good.
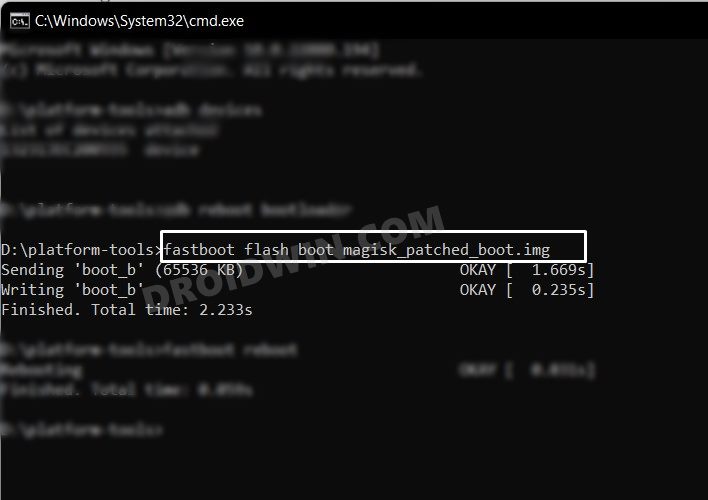
If it doesn’t, then you just need to do a simple reboot and the patched boot will be replaced by stock and your device will be booted to the OS. On the other hand, if everything works well and good, then you could permanently flash the patched boot via the Direct Install method.
How to Fix Poco X6/X6 Neo Stuck in Bootloop after Root
If your Poco X6/X6 Neo is stuck in a bootloop, then you should try the below-listed tweaks to fix the underlying issue and make the device boot to the OS:
Disable DM-Verity
- Extract vbmeta.img from the Fastboot ROM and transfer it to the platform-tools folder.
- Then execute the below command to flash vbmeta and disable dm-verity:
fastboot --disable-verity --disable-verification flash vbmeta vbmeta.img
- Now type in the below command to boot your device using the patched boot.img file
fastboot boot magisk_patched.img
- If your device boots up, then simply perform Direct Install via Magisk as discussed above.
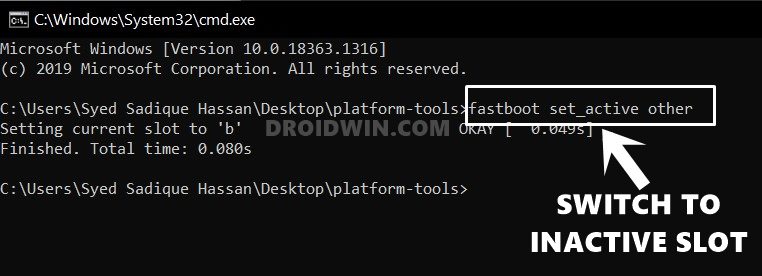
Switch Slots
Use the below two commands to switch the active slot and reboot via the second slot.
fastboot set_active other
fastboot reboot
Flash Stock Boot
Next up, you should consider flashing the stock boot.img files to both slots:
fastboot flash boot_a boot.img
fastboot flash boot_b boot.img
fastboot reboot
Flash Fastboot ROM
If none of the aforementioned methods spelled out success, then your last course of action should be to flash the entire Fastboot ROM on your device. To do so, please check out our guide on How to Unbrick Redmi Note 13 5G / Poco X6 Neo 5G via Fastboot | How to Unbrick Redmi Note 13 Pro 5G/Poco X6 5G via Fastboot

That’s it. These were the steps to root the Poco X6/X6 Neo via Magisk. If you have any queries concerning the aforementioned steps, do let us know in the comments. We will get back to you with a solution at the earliest.


