In this guide, we will show you the steps to put the inactive tabs to sleep in Chrome. When it comes to resource-intensive browsers, then it’s an open secret that the offering from the Silicon Valley giant is right there at the top. Such has been the impact that in low-end PCs, it tends to slow down the entire system itself. Fortunately, slowly but surely Google is addressing its concern. The first step in this direction is the ability to put the inactive tabs to sleep in Chrome.
So if you haven’t interacted with a tab for a certain amount of time, then Chrome will put it to sleep. As a result, those tabs will no longer consume additional resources, and hence this saved resource could be allocated to other components of the browser. All in all, a fast, snappy, and sutter-free browsing experience might be on the cards. So on that optimistic note, let’s test this feature right away.
How to Put Inactive Tabs to Sleep in Chrome
- Launch Chrome and click on the overflow icon.
- Then select Settings from the drop-down menu.
- Then select Performance from the left-hand side.
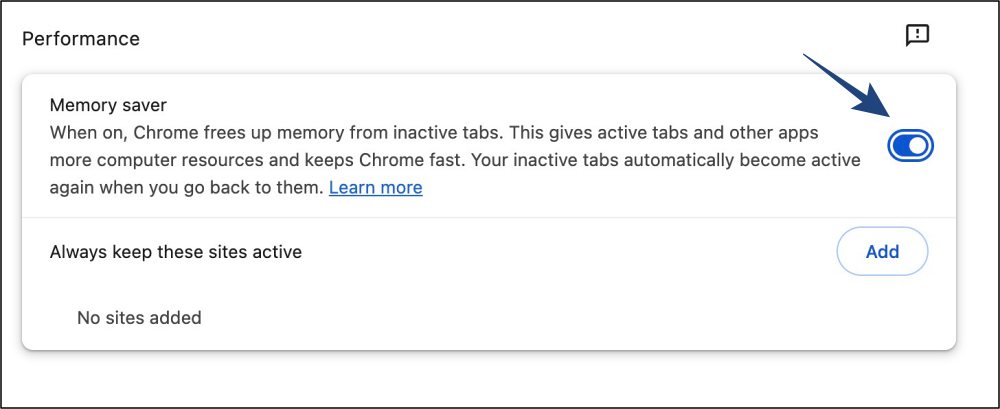
- Finally, enable the toggle next to Memory Saver.

How to Make Some Websites Stay Active
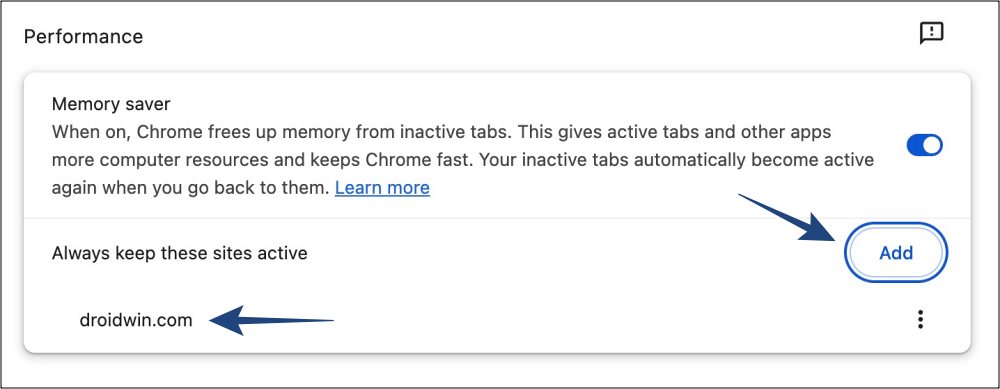
Chrome also gives you the option to exclude some websites from being put to sleep even if they are inactive for quite some time. Here’s how it could be done:
- Launch Chrome and head over to the below location:
chrome://settings/performance
- Then click on Add, type in the website URL, and hit Add.
- Likewise, you may add other websites to this exclusion list.

That’s it. These were the steps to put the inactive tabs to sleep in Chrome. If you have any queries concerning the aforementioned steps, do let us know in the comments. We will get back to you with a solution at the earliest.


