In this guide, we will show you the steps to enable the new Open with dialog box on your Windows 11 PC. With the release of the latest Windows 11 22H2 update, features such as Taskbar overflow, Tabs in File Explorer, and Suggested Actions have become the talk of the town. However, there has been another major UI tweak that silently went under the radar.
We are talking about the revamped Open with dialog box which has been blessed with some much-needed changes. For starters, you now get two different methods to choose from- Just Once and Always. For example, if you are planning to make an app the default one for dealing with a specific file type, then select that app from the list and hit Always. On the other hand, if you wish to use that app just for one-time, then the Just Once option will suffice.
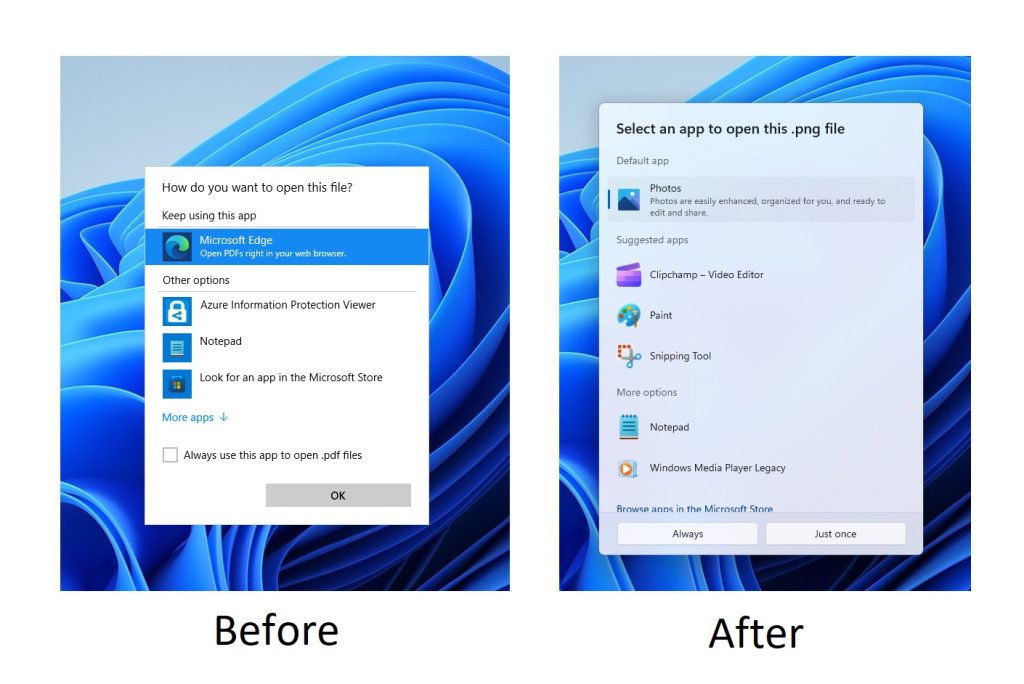
Onto the UI front, you now get rounded corners with support for both the light and dark them and respecting Windows 11’s Fluent Design in the process. However, the rollout for this functionality might take some time, even if you are a part of the Insider Preview group. But using a nifty workaround, you could welcome the new Open with dialog box onto your Windows 11 PC right away. Follow along for the tweak.
How to Enable the new Open with dialog box in Windows 11
- To begin with, download the open-source ViveTool from GitHub.
- Then extract it to any convenient location on your PC.
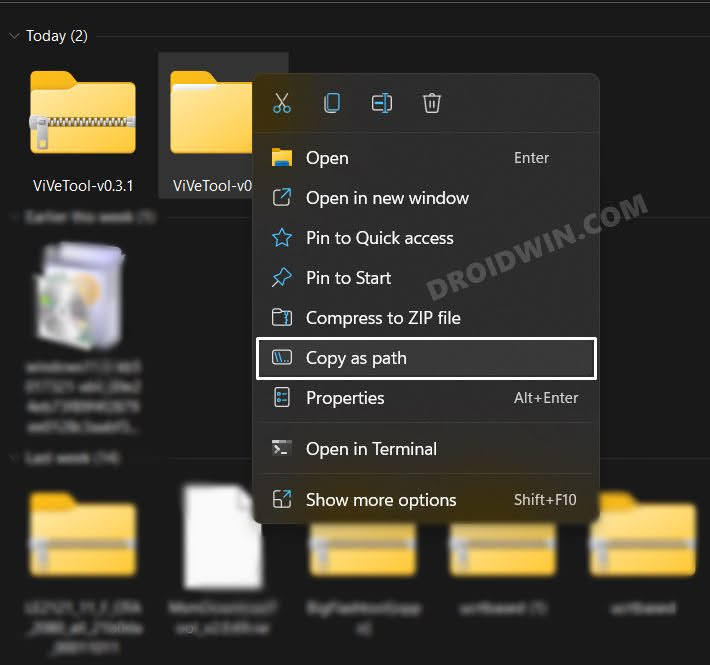
- After that, right-click on it and select Copy as path.

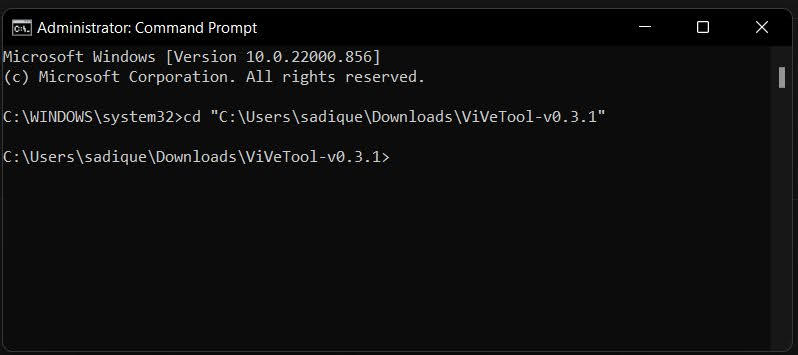
- Now launch Command Prompt as an administrator.
- Then type in cd and paste the copied path via Ctrl+V.
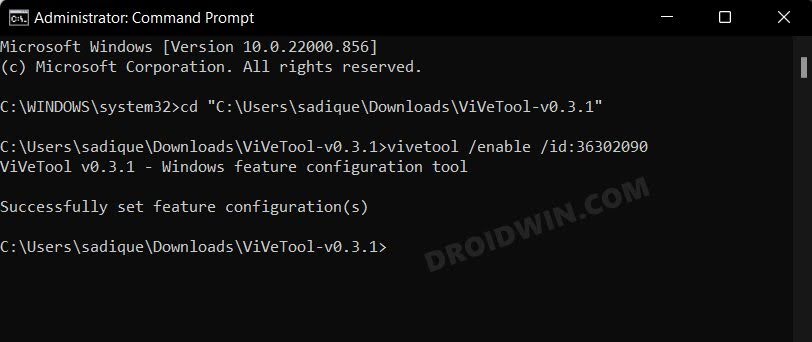
- Finally, execute the below command to enable the new Open with dialog box in Windows 11:
vivetool /enable /id:36302090
How to Disable new Open with dialog box in Windows 11
If for some reason the new Open with dialog box is not in sync with your requirement, then you could easily revert to the older version. Here’s how:
- Right-click on the ViveTool folder and select Copy as path.
- Now launch Command Prompt as an administrator.
- Then type in cd and paste the copied path via Ctrl+V.
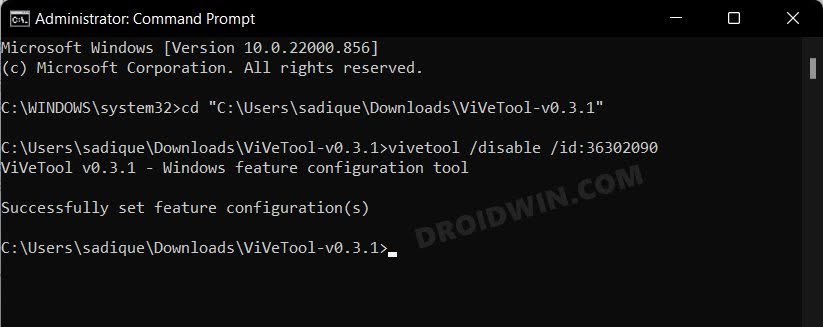
- Finally, execute the below command to disable the new Open with dialog box in Windows 11:
vivetool /disable /id:36302090
That’s it. These were the steps to enable/disable the new Open with dialog box on your Windows 11 PC. If you have any queries concerning the aforementioned steps, do let us know in the comments. We will get back to you with a solution at the earliest.