In this guide, we will show you the steps to connect and use your Apple Magic Mouse on your Windows 10/11 PC. There’s no denying the fact that Apple peripherals are probably the best in the business. To justify this claim, one shouldn’t look any further than its wireless mouse. Granted it is a tad more costly than its counterpart, but upon daily usage, you might be able to justify this high cost.
While the look and feel of this mouse play a part, but the major reason why users are inclined towards it is the built-in gesture support. Be it for switching between pages or tabs, performing zoom in/out, or scrolling through a page, all these could easily be carried out just by performing the specific gesture on the mouse itself.
So on to all these benefits attached, many users are looking forward to connecting and using their Apple Magic Mouse on their Windows 10/11 PC. If you are also on the same page, then this guide shall help you out. Follow along for the instructions.
How to Connect and Use Apple Magic Mouse in Windows 10/11
- To begin with, download the official Boot Camp Support Software from Apple.
- Once downloaded, extract it to any convenient location on your PC.

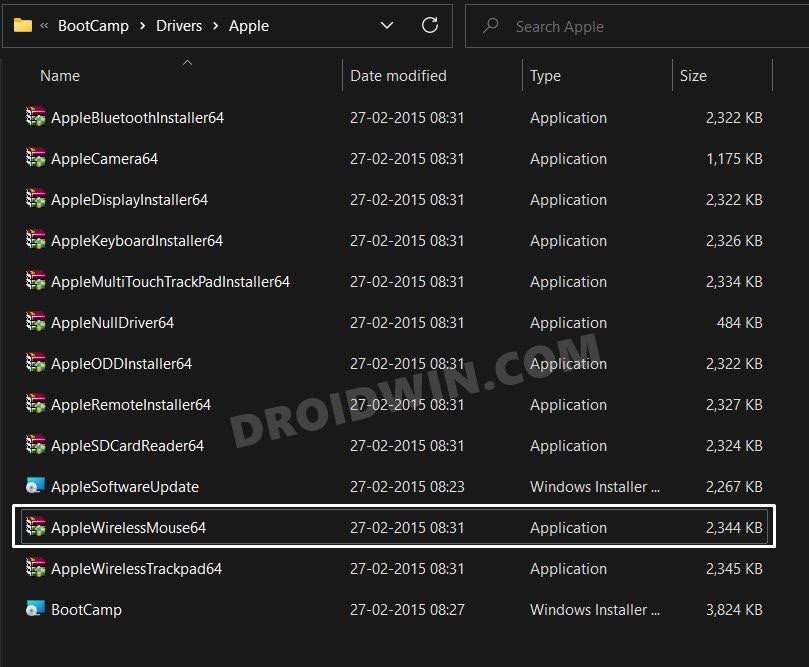
- Then go to the extracted folder > BootCamp > Drivers > Apple.
- Now double-click on the applewirelessmouse64.exe file to launch the setup.

- Then proceed with the on-screen instructions to complete the setup.

- Once done, open the Settings menu via Windows+I shortcut keys.
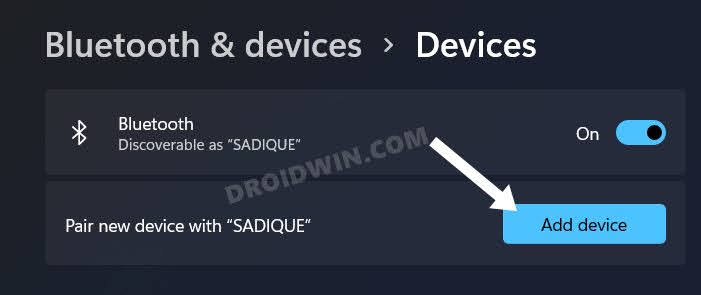
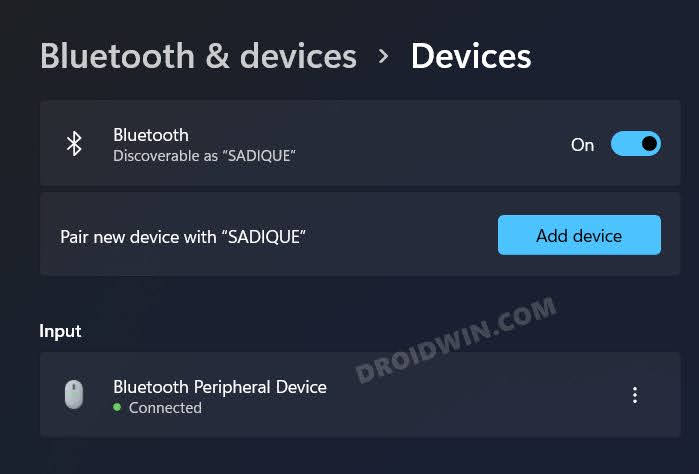
- Then go to Bluetooth and Devices and click on Add Device.

- After that, select Bluetooth from the list.

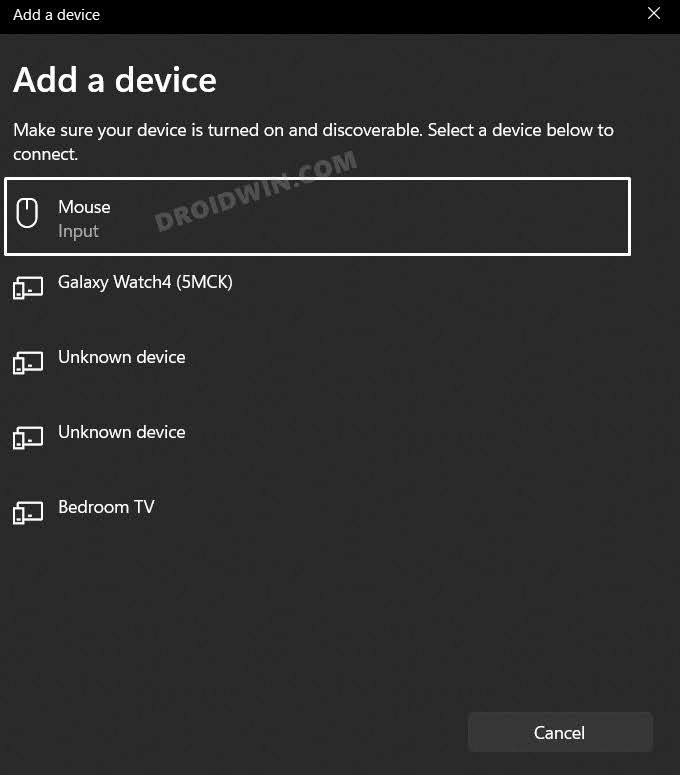
- Now click on Mouse from the list of devices. That’s it.

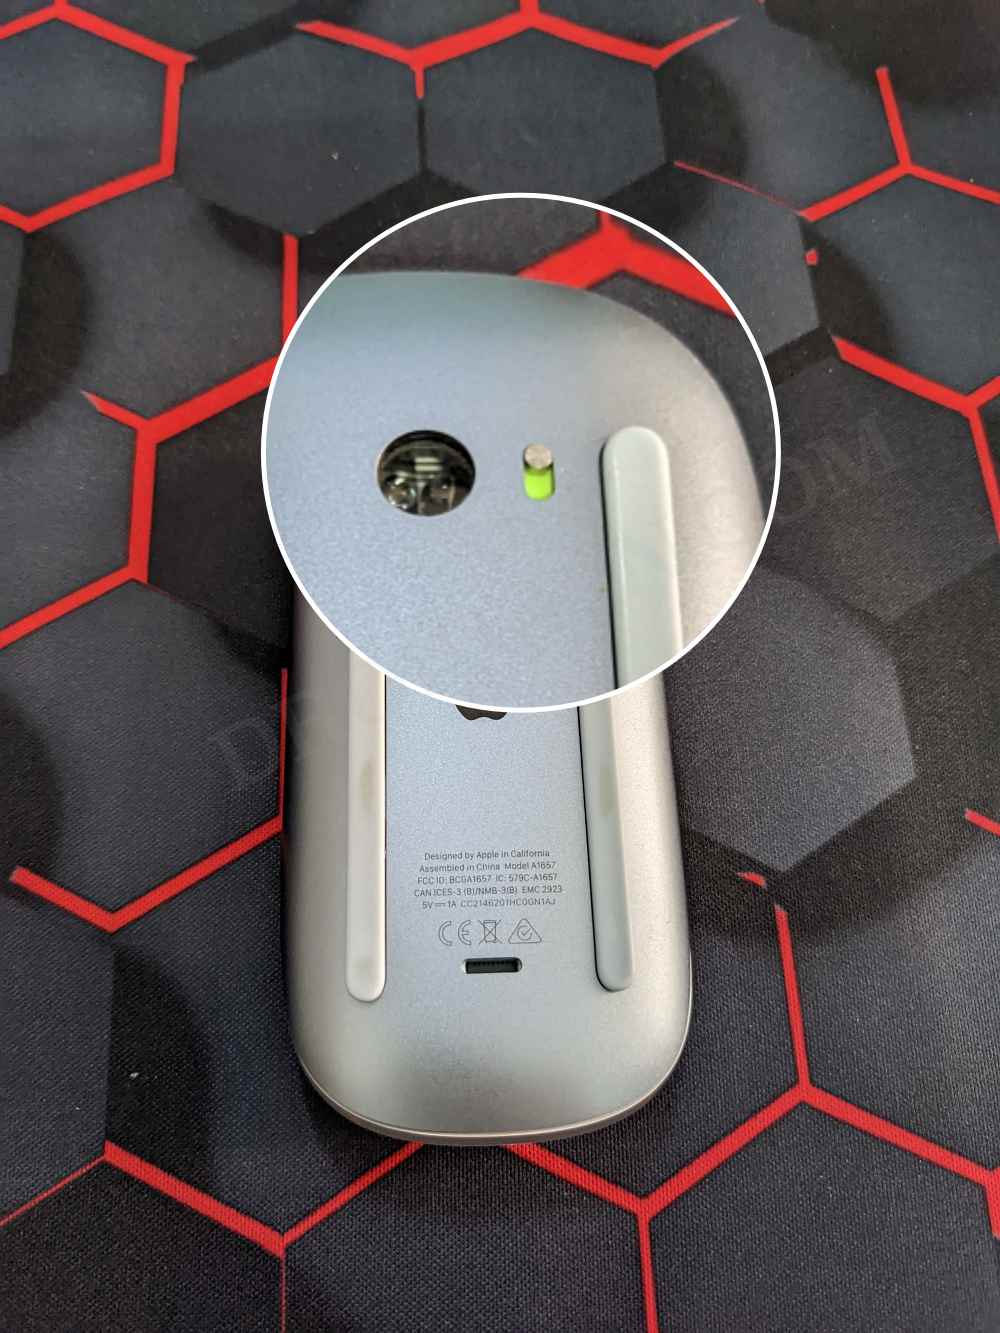
If your mouse doesn't appear in the list, then restart it once

- Your Apple Mouse is now paired and connected with your Windows 10/11 PC.

That’s it. These were the steps to connect and use your Apple Magic Mouse 1/2 on your Windows 10/11 PC. If you have any queries concerning the aforementioned steps, do let us know in the comments. We will get back to you with a solution at the earliest.

