In this guide, we will make you aware of the EDL Test Point for various Android devices. When it comes to custom development, then the very idea of getting our hands on a plethora of mods and tweaks is surely to awaken the tech enthusiasts among us. From flashing custom ROMs to recoveries or gaining administrative privileges by rooting the device via Magisk, well, the possibilities stand endless. However, this is just one side of the story.
Carrying out these tweaks brings in a slew of risks as well. In most cases, your device might end up in a softbrick or bootloop state which could easily be rectified by flashing the Fastboot ROM. However, in some instances, your device might also get hard-bricked. When that happens, then your only course of action should be to flash the unbrick firmware onto your device, for which the first prerequisite is to boot your device to Emergency Download Mode.
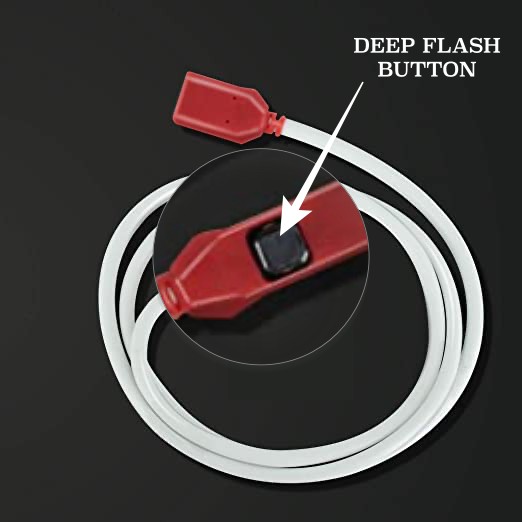
For the unaware, every Qualcomm device comes with this EDL Mode, and allows you to carry out deep-level flashing. As far as booting to this mode goes, in a perfectly working device, there are a plethora of ways through which you could get this job done. But for a bricked device, you just have three methods in hand: using hardware key combination, via an EDL cable [such as the one from Hydra], or by short-testing the two test points. In this guide, we will be focusing on the latter one. Follow along.
Table of Contents
EDL Test Point for Various Android Devices
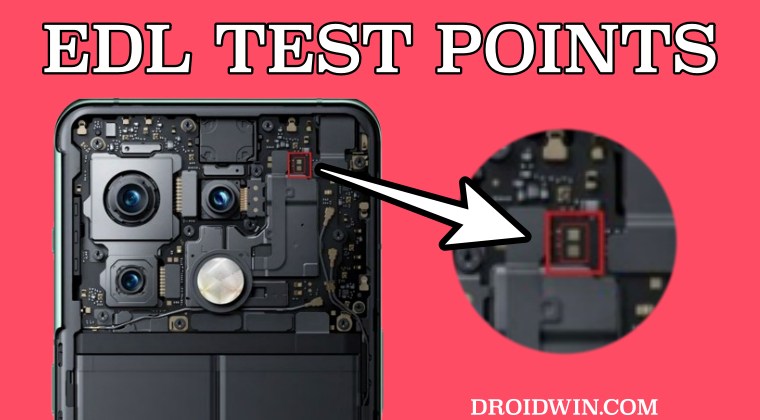
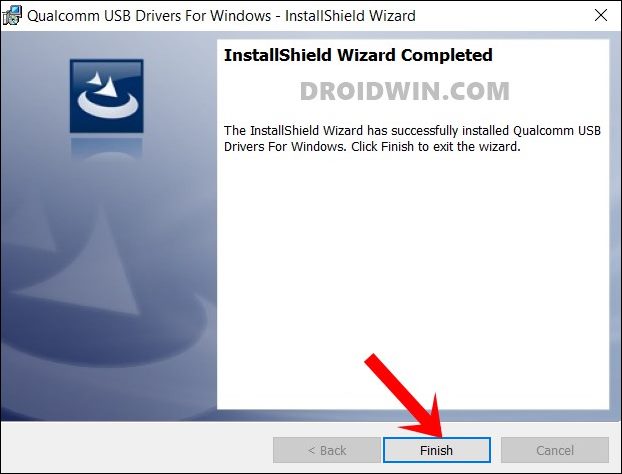
You will need to short the two points together using a wire to get the device into the EDL mode. But before that, make sure you have checkmarked the prerequisites, including installing Qualcomm HS USB QD-Loader 9008 Drivers and Disabling Driver Signature Enforcement on your Windows PC. Moroever, not every USB cable supports EDL Mode, so you might have to shuffle the cables until you find the right one.
Talking about USB, you should use the USB 2.0 port on your PC, instead of the 3.0 [which would be blue in color]. So keeping all these points in mind, let’s get started. Droidwin and its members wouldn’t be held responsible in case of a thermonuclear war, your alarm doesn’t wake you up, or if anything happens to your device and data by performing the below steps.
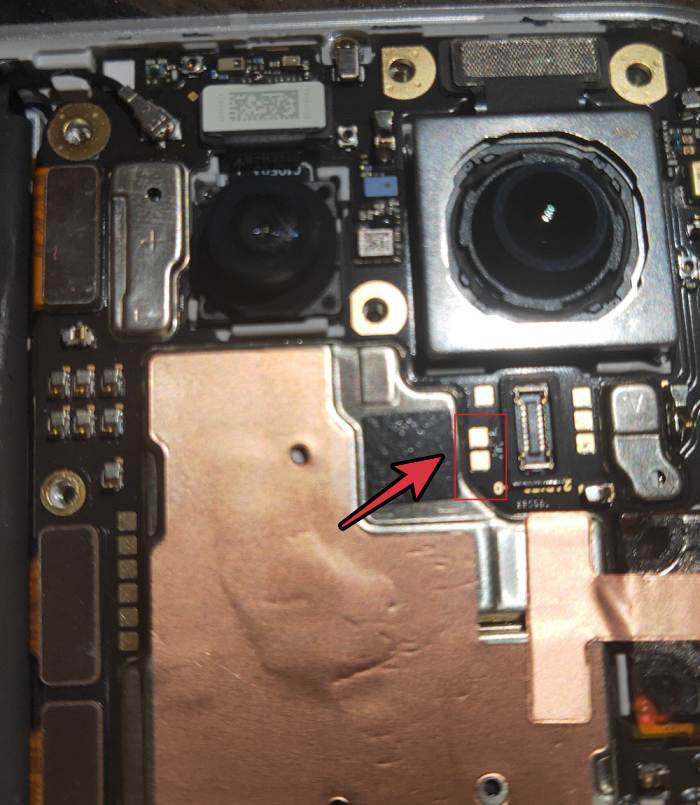
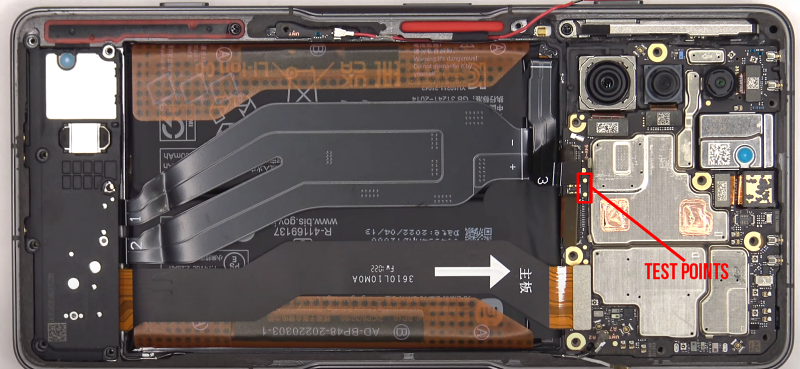
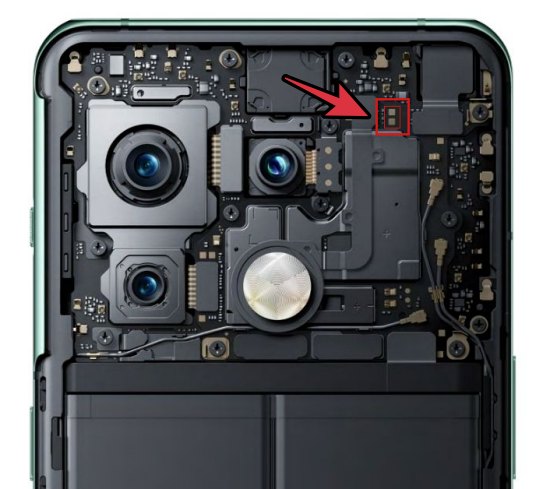
EDL Test Point for Poco F5 / Redmi Note 12 Pro

Credit: XDA Senior Member mvikrant97
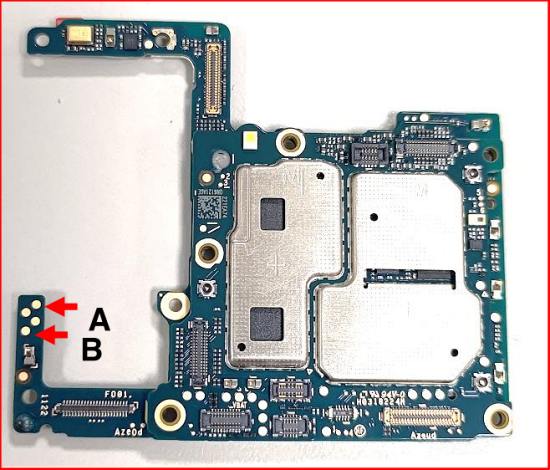
EDL Test Point for Poco F5 Pro / Redmi K60 (China)
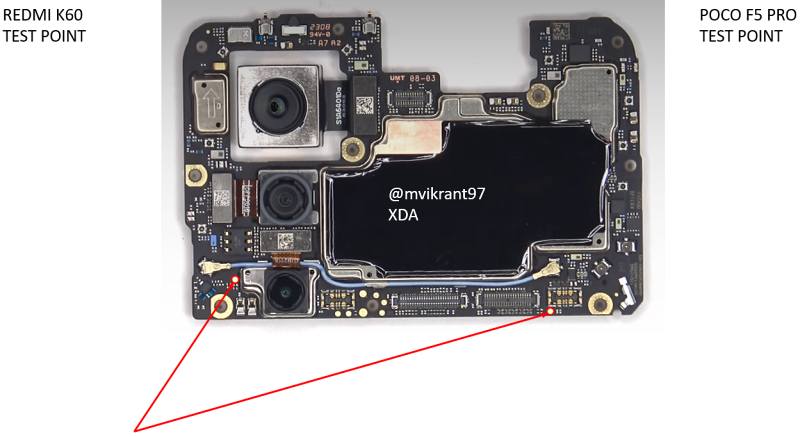
Credit: XDA Senior Member mvikrant97
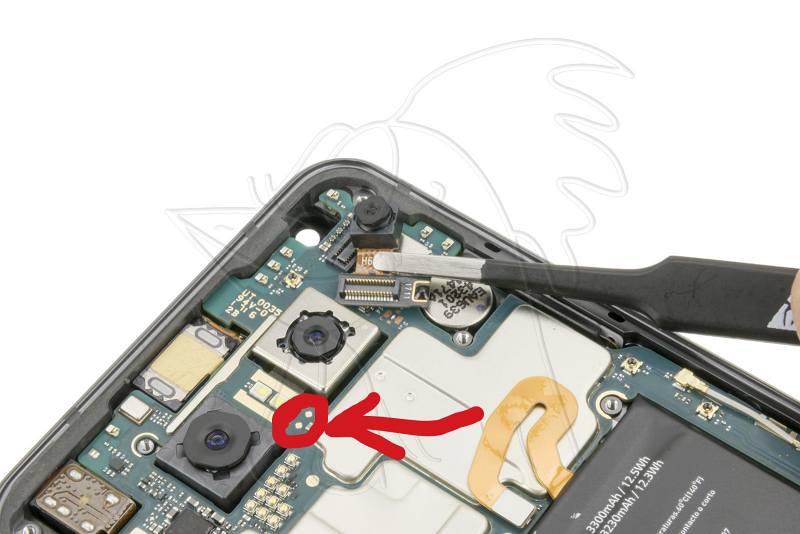
EDL Test Point for Realme GT 2 Pro
Credits: XDA Member henryhan123
EDL Test Point for Poco X3 NFC
Credits: XDA Senior Member Speedo.thc
EDL Test Point for Asus Zenfone 9
EDL Test Point for ZTE Blade Z963VL
Credit: XDA Senior Member xxMoon
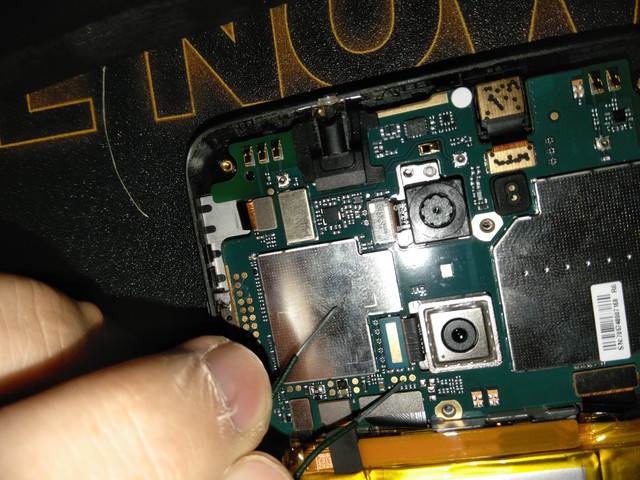
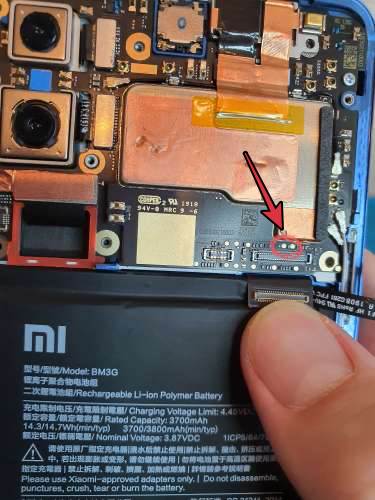
EDL Test Point for Redmi Note 5 Pro
Credit: XDA Member bcdtech
EDL Test Point for Poco F4 GT/Redmi K60 Gaming
Credit: XDA Senior Member xXEphie
EDL Test Point for LG G6
Credit: XDA Senior Member badmaan
EDL Test Point for Poco X3 Pro
Credit: XDA Member AssemJo
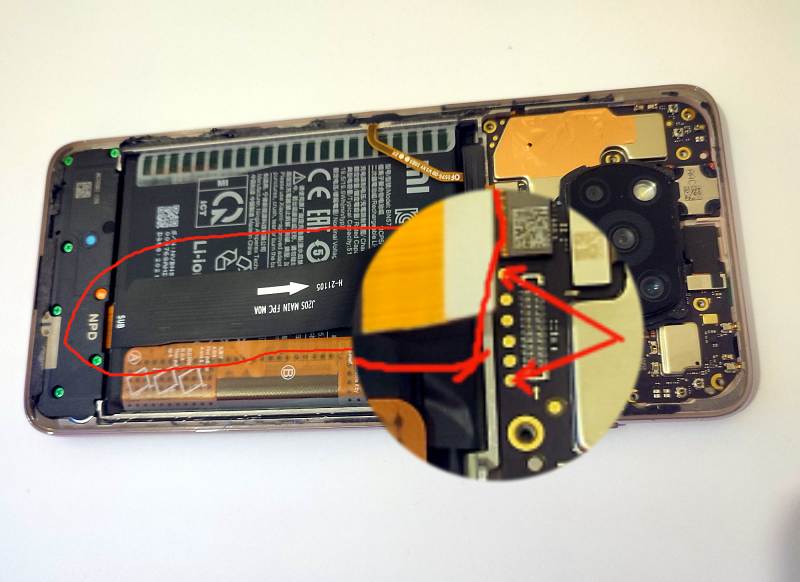
EDL Test Point for Redmi Note 11 Pro 5G
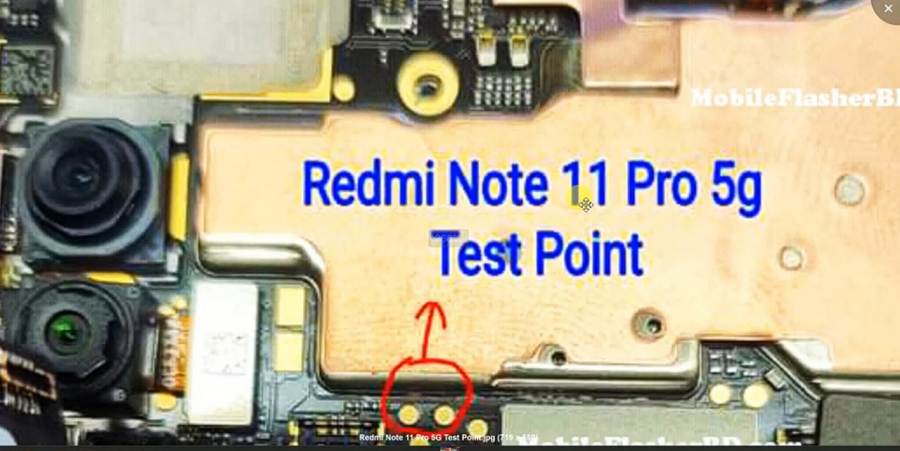
Credit: XDA Senior Member mvikrant97
EDL Test Point for Honor View 10
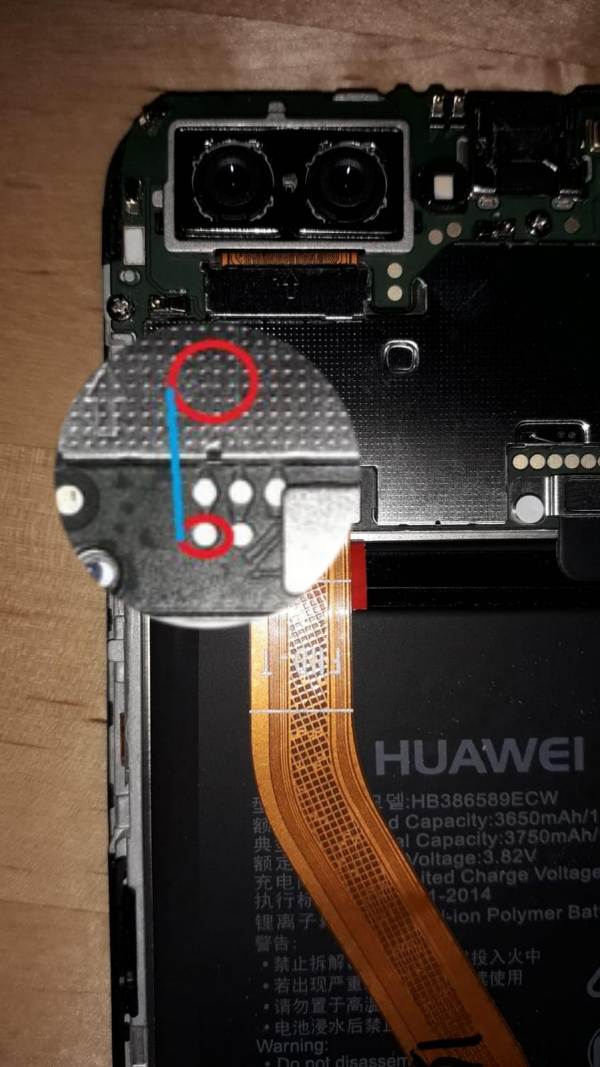
Credit: XDA Senior Member geogsm_1
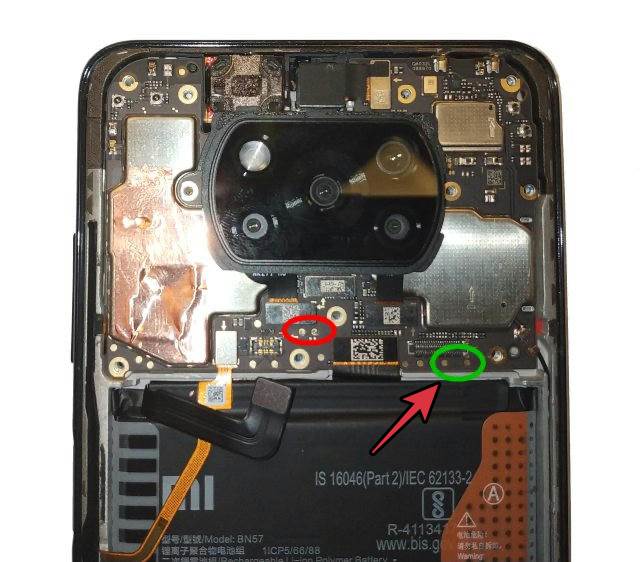
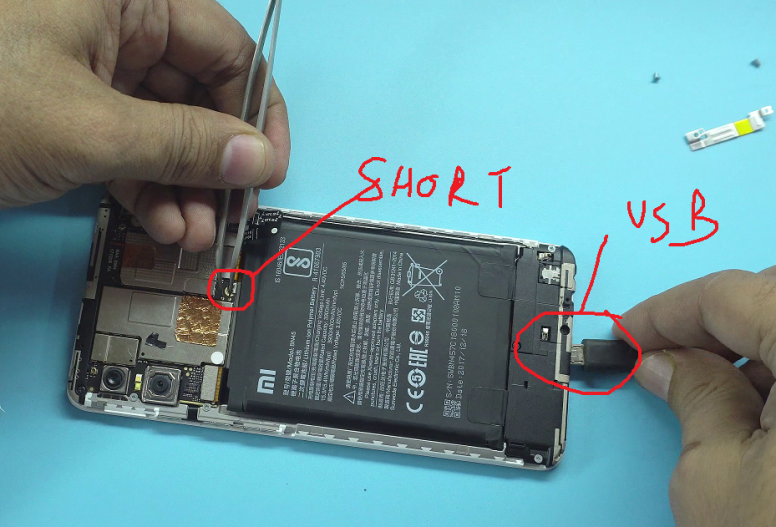
EDL Test Point for Mi 11 Ultra
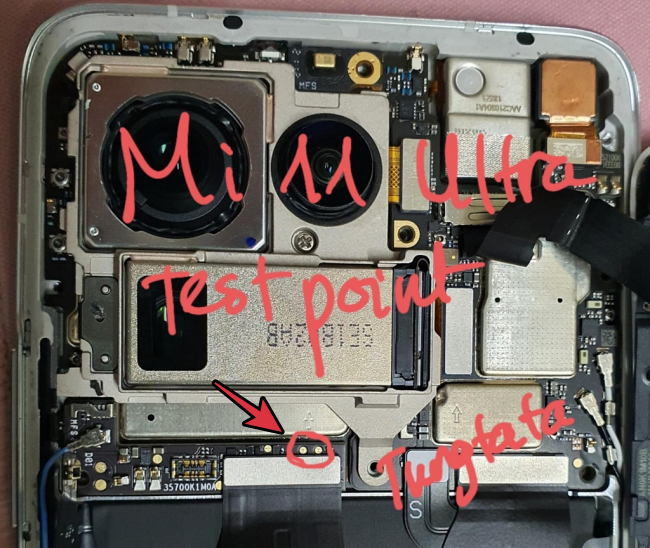
Credit: XDA Member PhoneRepairHUB
EDL Test Point for Moto G 5G Plus
Credit: XDA Senior Member Awilen
EDL Test Point for OnePlus 10 Pro
Credit: XDA Senior Member Metromas
EDL Test Point for Mi Mix 3 5G
Credit: XDA Member wMEL
Steps to Unbrick Your Device via EDL Test Points
- Unplug the USB cable
- Disconnect the battery ribbon and remove the smallest camera [if required].
- Install the Qualcomm HS USB QD Loader 9008 Drivers.

- Now start shorting the 2 pins.
- Keep holding on to the short pins and then plug in the USB cable.
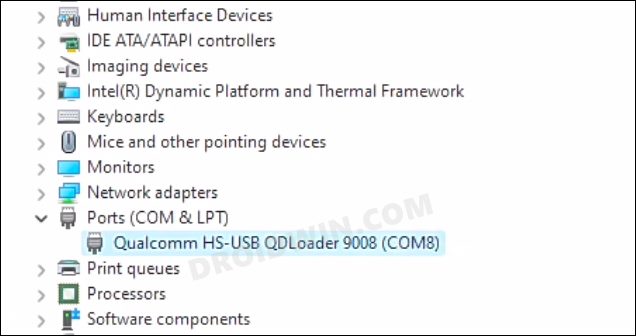
- After 5-10 seconds, you should hear a sound from your windows.
- Likewise, your device manager should show the device as Qualcomm HS USB QD-Loader 9008.
- You may now flash the unbrick rom via the dedicated tool for your device, such as MSM Download Tool for OnePlus.
Different Methods to Access EDL Mode in Bricked Android Devices
Before making you aware of the test points, let’s check out the pros and cons of all the methods to boot your bricked device to EDL Mode.
Via Commands
Pros: It's the easiest of the four methods, however, it also has one of the biggest drawbacks among all [see below], thereby nullifying its advantages.
Cons: Will only work with non-bricked or semi-bricked devices, not when your device is hard-bricked.
Via Hardware Keys
Pros: Easiest of the three and doesn't require much technical know-how.
Cons: Doesn't work under every circumstance and the key combination as well as the point of contact with the PC's USB port is different for different devices.
Via EDL Cable
Pro: Comes with a high success rate and is easy to use.
Cons: Not available in every region, importing takes ages, and obviously requires purchasing so it comes under a paid service.
Via Test Point
Pros: Comes with the highest success rate and will definitely boot your device to the EDL Mode if you short-test the right points.
Cons: Requires a steep learning curve and is the most technical as well as complicated out of the three.
That’s it. These were the EDL Tests Points for various Android devices. If your device is missing from this list,t then do let us know in the comments section below. Moreover, we will be continuously updating this post with new devices, so do keep a tab on the same at regular intervals.