In this guide, we will show you two different methods to disable the Driver Signature Verification on Windows 10/11 PC. Drivers are small software programs that are needed for the proper functioning of their associated hardware. For example, you would need an audio driver, a keyboard driver, a mouse driver, among others.
Windows usually ships with the required drivers installed on your PC. However, it all gives you an option to manually install the driver of your choice. But before you proceed with the installation of the driver, the tech giants will first check if it has been digitally signed by them (aka Microsoft) or not.
If that is not the case, then it would straightaway block the installation of these unsigned drivers. This entire process is carried out via its Driver Signature Verification functionality. While it is indeed quite a useful feature from a security point of view, but in some instances, a user might need to install an unsigned driver as well.
But as you might have realized by now, Windows would straightaway block the installation of these drivers. Fortunately, there does exist a handy way out. You could disable the Driver Signature Verification on your Windows 10/11 PC and install any driver of your choice. Follow along for instructions.
- How to Install macOS on Windows 10 and Run Mac Apps
- How to Uninstall Apps on Windows 10 using Command Prompt
- Run Linux Commands in Windows 10 [without Virtual Machine]
Table of Contents
How to Disable Driver Signature Verification on Windows 10/11

There exist two different methods to carry out this task. We have shared both of them below, you may proceed with the one that meets your requirements. Droidwin and its members wouldn’t be held responsible in case of a thermonuclear war, your alarm doesn’t wake you up, or if anything happens to your PC and data by installing the unsigned/old drivers.
Method 1: Disable Driver Signature Verification via Test Signing Mode
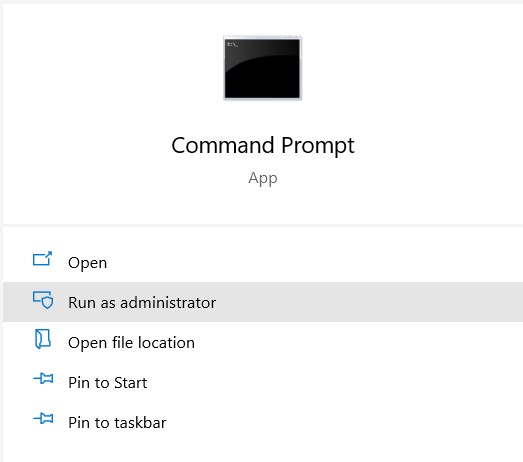
- To begin with, head over to the Start menu and search for CMD.
- Launch the Command Prompt as an administrator.

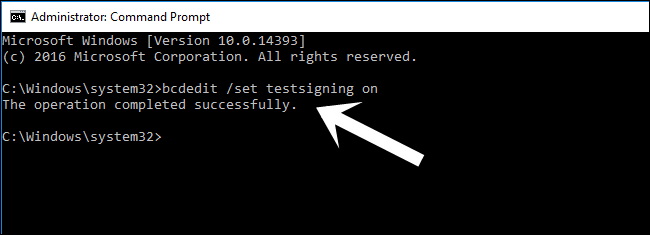
- Now copy-paste the below command in this CMD window:
bcdedit /set testsigning on
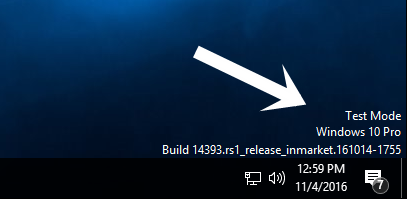
- Once that is done, reboot your PC. When it boots up, you should see the Test Mode written at the bottom right.
- With this, you have successfully disabled Driver Signature Verification on your Windows 10/11 PC. You may now install the desired driver of your choice.
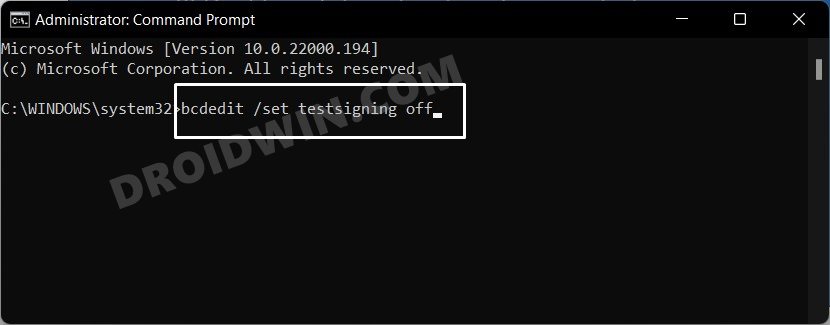
- Moreover, as and when you wish to re-enable Driver Verification, just execute the below command in the CMD window and restart your PC once.
bcdedit /set testsigning off
Method 2: Disable Driver Signature Verification via Advanced Boot Menu
- Bring up the Power menu, keep on pressing the Shift button and click Restart.
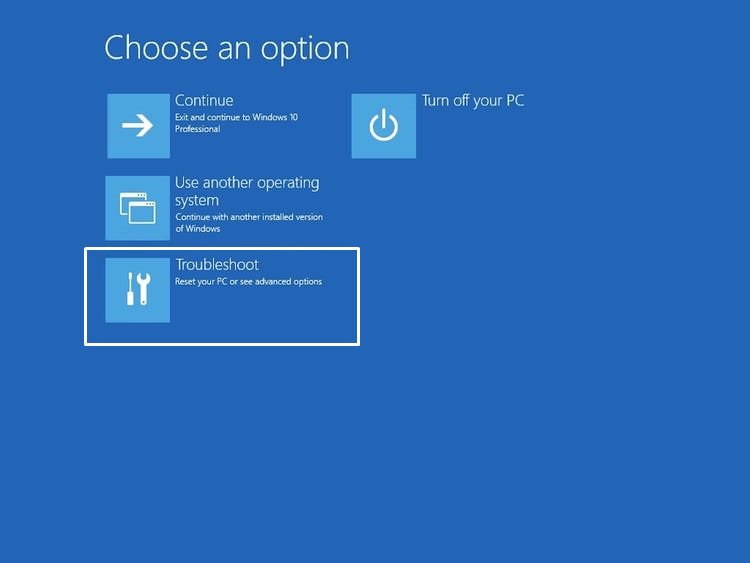
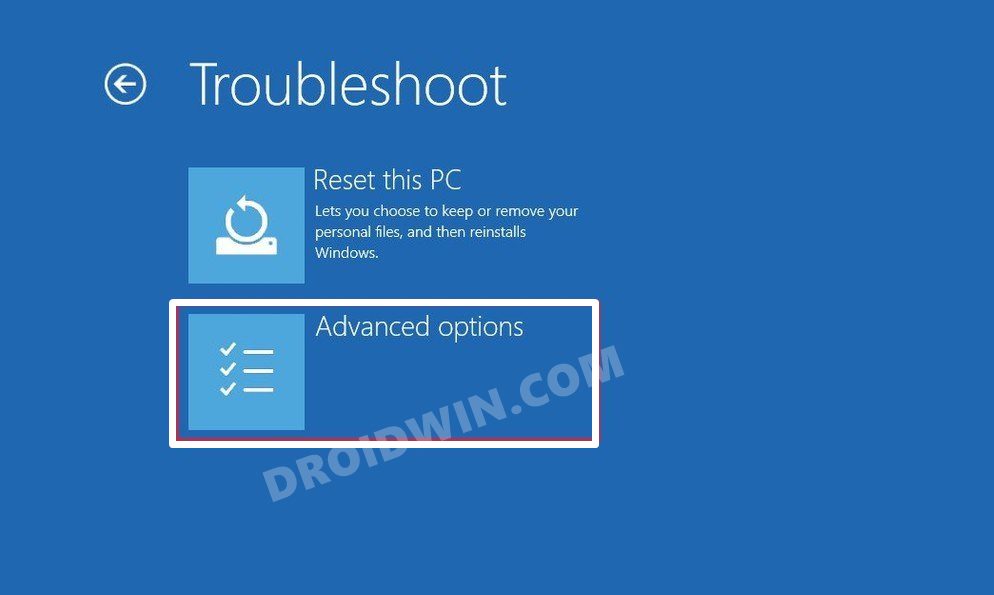
- Your PC will now boot to the Windows Recovery Environment. So click on the Troubleshoot option.
- After that, click on the Advanced options.
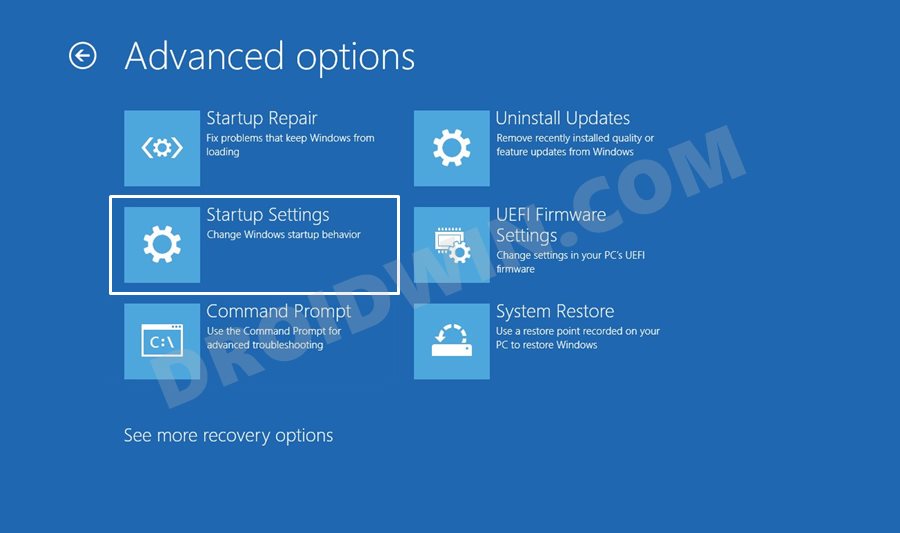
- Then select Startup Settings (after this, on some PC, you might need to click on the Restart button situated at the bottom right).
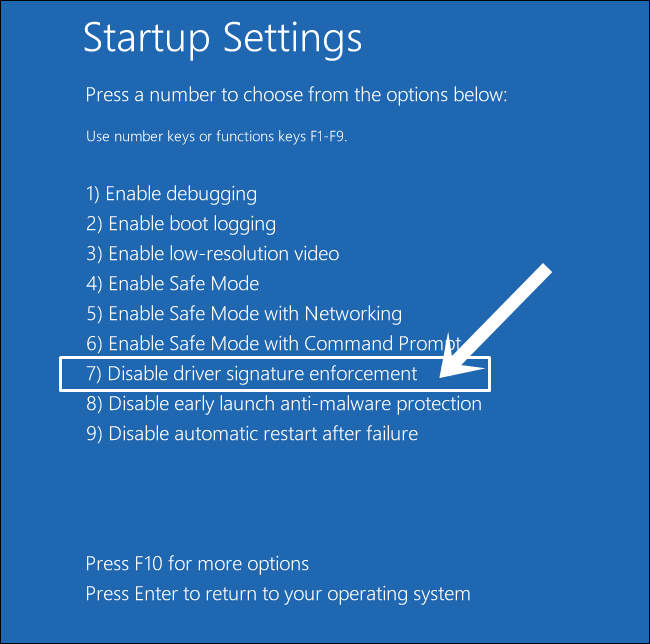
- Now press the 7 or F7 (or Fn+F7 on some PCs) key. Your Windows 10/11 PC will now boot with the Driver Signature Verification disabled.
How to Re-Enable Driver Signature Verification on Windows 10/11
When you are done with the work and you wish to re-enable the Driver Verification, then just restart your PC once. Or launch the Command Prompt as an administrator and execute the below command in the CMD window:
bcdedit /set testsigning off
So with this, we round off the guide on how to disable Driver Signature Verification on your Windows 10/11 PC. We have shared two different methods for the same. If you have any queries concerning the aforementioned steps, do let us know in the comments section below.


Raghul
Rhank you