In this comprehensive tutorial, we will show you how to boot your Android device to the EDL Mode. There are already a plethora of resources across the web, each with its own insights on this topic. However, I felt it to be a little bit over-complicated for the general users. Therefore I will try to keep this guide as simple as possible. Because if your device is bricked, then going through the technicalities of the EDL mode is probably the last thing that you would want to hear about. So with that said, let’s check out the steps to boot your Android device to the EDL Mode.
Android devices, thanks to their open-source nature allows you to carry out a plethora of tweaks and customizations. Then if you step into the custom development scenario, the possibilities expand even further. Once you have unlocked the device’s bootloader, you are now in a position to flash custom ROMs, install a custom recovery like TWRP or install modules. Along the same lines, you could also root your device via Magisk (with or without the use of TWRP).
- How to Fix TWRP 0MB Internal Memory Issue
- How to Update TWRP Recovery on any Android Device
- TWRP: fastboot flash vs fastboot boot: Which command to use
- How to Replace LineageOS Recovery with TWRP
However, all these tweaks come with some associated risks as well. If you end up flashing an old or incorrect custom binary, then your device might go to a boot-loop or get soft-bricked. Well, even that happens, then is quite a handy workaround. Since it is soft-bricked, you could still access the Fastboot or Bootloader Mode on your device.
As a result, you could then flash Stock Firmware via Fastboot Commands and bring your device back to working condition. But sometimes things get a little bit more complicated. Rather than a soft-brick, your device might end up being hard-bricked. As and when that happens, your deivce is as good as a ‘brick’. At the most, if your device has a LED, it will continuously blink red, but that is it.
You wouldn’t be able to access Fastboot, Bootloader, or Recovery Mode on your device. While all these might sound scary, but there is still a way to get back your device. All that is needed is to boot your Android device to EDL Mode and then flash the stock firmware using the designated tools (more on that later). And in this guide, we will help you with just that. Follow along.
- How to fix ADB Device not found [List of Devices Attached is blank]
- Detailed Steps to Fix adb is not recognized Error
- How to Fix Unauthorized Device with ADB Commands [3 methods]
- How to Fix Android Device stuck in Fastboot Mode
Table of Contents
What is EDL Mode | Why is it Needed?
EDL or Emergency DownLoad is a special mode that makes it possible to force flash the stock firmware on your device. This EDL mode is only present on devices that have an underlying Qualcomm chipset. As far as its usefulness is concerned, this comes in handy when your device is hard-bricked. When that happens, you wouldn’t be able to access any partition on your device or flash any file for that matter. In earlier times, the only way out was to take your device to the service center.
However, with the passage of time, some of these tools got leaked and it proved to be a blessing in disguise for us, the tech enthusiasts. So if your device is hard bricked, then you could make use of tools such MSM Download Tool for OnePlus devices, QPST, and QFIL Tools for other Android devices. With Xiaomi, things are a little bit difficult, but we will show you the workarounds for that as well. So with that said, let’s now turn our attention to the different methods that will help you to boot your Android device to the EDL Mode.
How to Boot any Android Device to EDL Mode
There are a total of three methods that will help you to carry out this process. The first one is done via the ADB Commands, the second one via the Fastboot Method while the third one is done using hardware key combinations. Each of these methods has a few caveats as well as added advantages, which we will be mentioning as well. So without further ado, let’s get on with the guide to boot your Android device to the EDL Mode. Just make sure to check-mark all the requirements that we have mentioned in the below prerequisites section.
- Fix Sahara communication failed error in MSM Download Tool
- How to Fix Stuck in Param Preload error MSM Download Tool
- Flash OFP File in Realme Devices using Realme Flash Tool
- Unlock Bootloader on Realme 2 without Unlock Tool or In-Depth Test Tool
Prerequisites
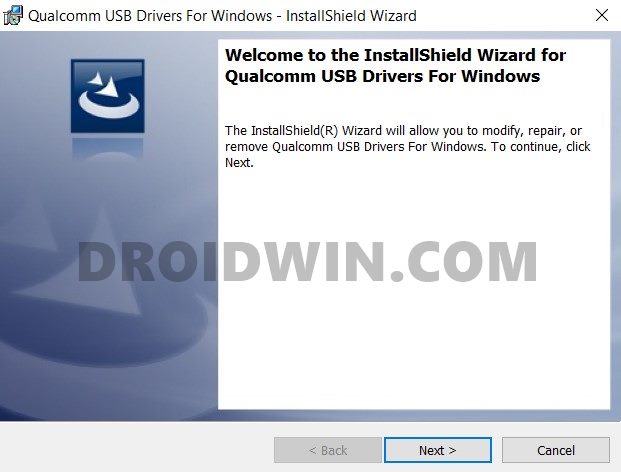
- First and foremost, download and install the Qualcomm USB Drivers on your PC using the guide given here: Qualcomm HS-USB QDLoader 9008 Drivers: Download & Install

- Next up, download and install the Android SDK Platform Tools on your PC. This will provide you with the necessary ADB and Fastboot binaries.
- Now here is an interesting point to keep a note of. If your device is hard-bricked, then chances are it might be already in EDL Mode. If you are seeing just the black screen with no response and cannot force reboot or boot to any mode, then chances are it might be in EDL.
- Likewise, if your device has a Notification LED, then it might be blinking red as well. So if your device is already in EDL mode, then you may directly proceed with the steps to unbrick it. However, we would still recommend you go through the below information to add another page to your knowledge book.
Method 1: Boot Android Device to EDL Mode via ADB Command
This method will only be applied to devices that are in perfect working condition. However since it falls under the topic’s domain, we decided to include it here. So follow the below steps to boot your Android device to EDL Mode via ADB Commands:
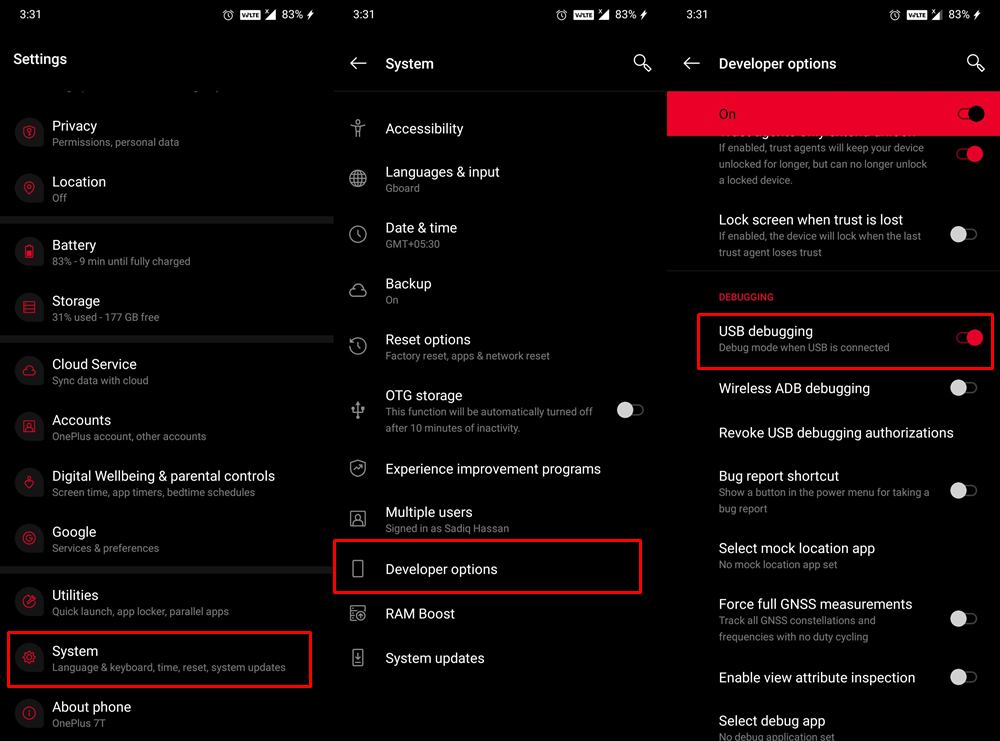
- Enable USB Debugging on your device. This will make your device recognizable by your PC in ADB mode. So head over to Settings > About Phone > Tap on Build Number 7 times > Go back to Settings > System > Advanced > Developer Options > Enable USB Debugging. [Don’t Miss: How to Enable USB Debugging on a Broken Android Device’s Screen].
- Now connect your device to the PC via USB cable.
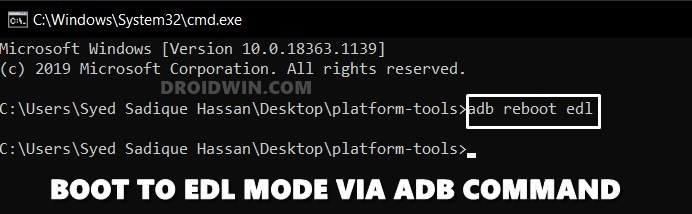
- Then head over to the platform-tools folder, type in CMD in the address bar, and hit Enter. This will launch the Command Prompt.
- Finally, type in the following command in the CMD window to boot your Android device to EDL Mode from ADB Mode:
adb reboot edl
- That’s it. Your device will now be booted to EDL Mode.
Method 2: Boot Android Device to EDL Mode via Fastboot Command
If your device is in a bootloop or has been soft-bricked, then you wouldn’t be able to use the first method. However, even then, chances are you will still be able to access the Fastboot Mode. In that case, you could either flash stock firmware via the fastboot commands. Or if that doesn’t work out, then you could boot your device to EDL from Fastboot Mode and then use the required tool to unbrick.
- With the device booted to Fastboot Mode, connect it to the PC via USB Cable (if not booted to Fastboot, then use the adb reboot bootloader command to do so).
- Then head over to the platform-tools folder, type in CMD in the address bar, and hit Enter. This will launch the Command Prompt.
- Finally, type in the following command in the CMD window to boot your Android device to EDL Mode from Fastboot Mode:
fastboot oem edl
- If that doesn’t work out, then you may try the following command:
fastboot reboot-edl
- Even if this doesn’t work, then you may use the below command:
fastboot reboot edl
- Your device should now be booted to the EDL mode. You may now proceed ahead with the desired task.

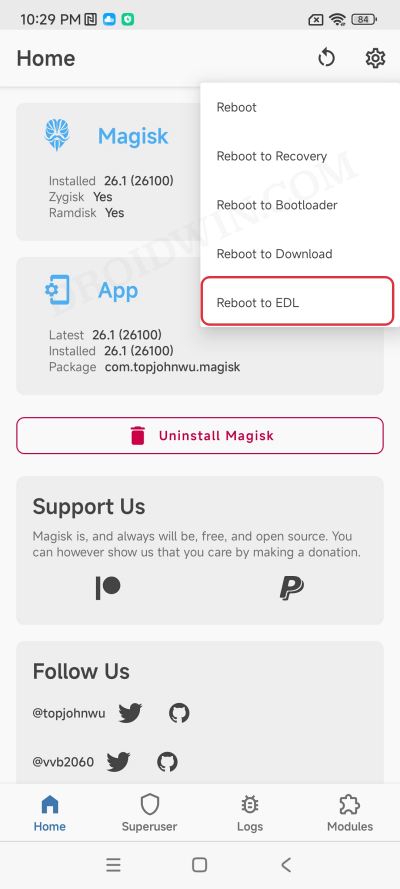
Method 3: Boot Android Device to EDL Mode via Magisk
This is the fastest of all the four methods which don’t even require USB cable, PC, etc. On the flip side, your device needs to be rooted and it should be unbricked. if that’s well and good, then just launch the Magisk app, tap on the Reboot icon situated at the top right, and select Reboot to EDL. Your Android device will now reboot to EDL Mode.
Method 4: Boot Bricked/Unbricked Android to EDL Mode via Hardware Keys
If your device is hard-bricked, then you wouldn’t be able to access the Fastboot Mode, let alone ADB. As a result, both the above methods wouldn’t give out satisfactory results. In this case, this should be your go-to method. The only thing to keep in mind is that different OEMs follow different hardware key combinations to boot their device to EDL Mode. Even then, we have listed out all the possible permutations and combinations that will help you to boot your Android device to EDL Mode. Follow along.
Boot Bricked OnePlus Devices to EDL Mode
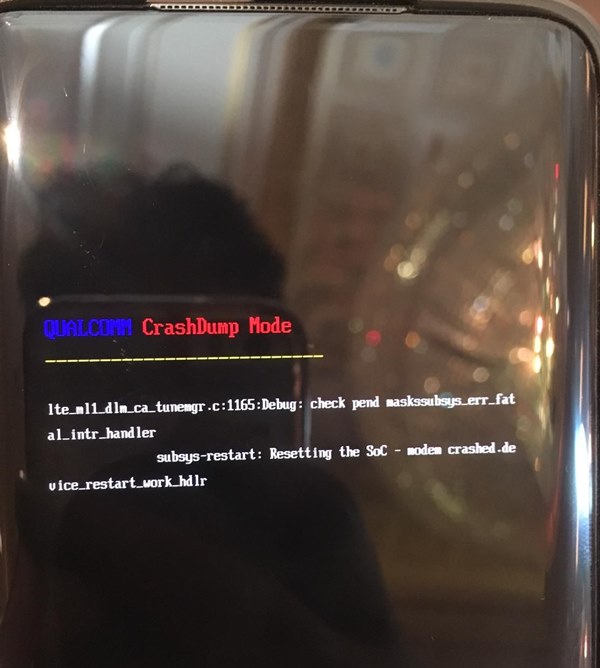
Power off your device. if you cannot do so as of now, then keep it aside and let the battery drain out. However, if your OnePlus device is in a Qualcomm CrashDump Mode, then press and hold the Volume Up and Power buttons together for around 10 seconds. This will exit the CrashDump Mode and power off your device.
- Then plug one end of the USB cable into your PC but don’t plug in the other end to your device.
- Now press and hold the Volume Up and Volume Down buttons together for a few seconds.
- While keeping both these buttons pressed, connect the device to the other end of the USB cable.
- Once booted to EDL, you may then use the MSM Download Tool to flash the decrypted firmware and unbrick your device.
Boot Bricked Realme Devices to EDL Mode
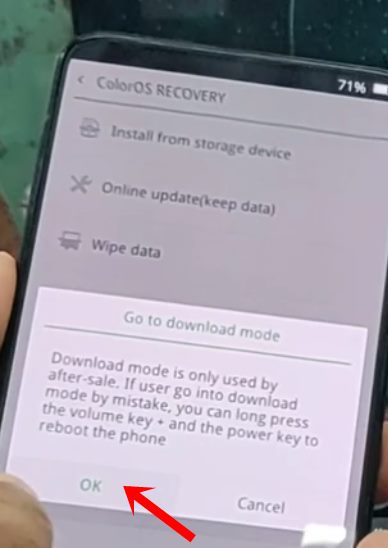
First and foremost, make sure your device is turned off. For most of our readers, that will anyways be the case since the device has been hard bricked. However, if that’s not the case, then we would recommend you to keep your device aside until the battery drains out and your device completely turns off. Once that is done, refer to the instructions given in this guide: How to Boot Realme Devices to EDL Mode (3 Methods) and Unbrick It.
Boot Bricked Xiaomi Devices to EDL Mode
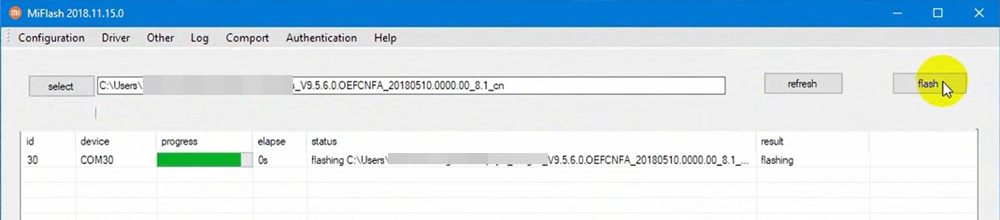
- First off, power off your Xiaomi device.
- Then connect one end of the USB cable to your PC and leave the other end as it is.
- Then press and hold the Power + Volume Down buttons together.
- While keeping both the keys pressed, connect the other end of the USB cable to your device.
- Your device will then boot to the EDL mode and you might notice the blinking of LED light as well.
You might also get the “FAILED (status read failed (Too many links))” error message while booting to EDL. Simply ignore this message as it wouldn’t conflict with the EDL Mode. For further references, the below guides shall help you out:
- Fix Mi Account Authorization | Unbrick Xiaomi | EDL Mode
- How to Bypass Xiaomi Account Verification via Mi Unlock Tool
- Download Patched Firehose file for 600+ Android Devices
- Unbrick Redmi Note 7 | Note 8 | Note 9 Series: The Fix?
Boot Other Hard Bricked Android devices to EDL Mode
- For all the other Android devices, the process is near about the same.
- To begin with, power off your device. If you can’t do so, then you will have to wait until the battery completely drains out.
- Now connect one end of the USB cable to your PC, but don’t attach the other end to the device.
- Press and hold the Volume Up and Volume Down buttons together for a few seconds.
- Now connect the other end of the device to the USB cable.
- Your device will now be recognized as Qualcomm HS-USB QDLoader 9008. You may now flash the device-specific firmware to unbrick it.
That’s it. With this, we conclude the guide on how to boot Android devices to EDL Mode. We have shared three different methods for the same, with a special focus on hard bricked OnePlus, Xiaomi, and Realme devices. If you still have any queries, do let us know in the comments section below. We will get back to you with a solution at the earliest.


John
I have a situation that’s odd. Two T-Mobile H901′ both hard bricked. One is in 9008 emergency download mode, but qfil complains about a Sahara download protocol error with 0 bytes. There is NO useful information posted anywhere on what this error is and how to fix it. One XDA guy actually said send the phone to LG for service. I extracted the necessary qfil files from the actual KDZ I used to upgrade it some time ago. The other H901 isn’t recognize by the qfil 9008 driver BUT usb beeps when plugged in. The Google sdk, LG Mobile usb drivers won’t “see” it either. ADB/Fastboot are useless as is qfil. A board jumper wire reset is probably necessary for EDL mode. I have a TWRP backup of it. Can I simply force write the ‘boot’ and ‘recovery’ partitions from the twrp backup image using qfile to get twrp running as the recovery ??? How do I make a rawwrite and patch file from it. Do I need tgem. Can I just write the boot and recovery partition binary to the eemc using qfil. I REALLY DO wish there was ANY documentation of ANY SORT on it !!!