In this guide, we will show you various methods to fix the ‘DLL file is missing’ error on your Windows 11 computer. Dynamic Link Library commonly known as DLL uses the Dynamic Shared Library concept and allows multiple apps to have access to its data and codes concurrently. These libraries usually have the extensions as DLL, OCX, or DRV, out of which is the DLL format that is most commonly used in the Windows environment. Moroever, such has been the significance of this file that nowadays it is required by every major software and program.
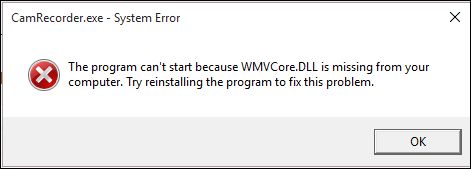
However, there could be a few instances when that app might not be able to find the required DLL file on your PC. When that happens, you will be greeted with the following error message: “The program can’t start because filename.dll is missing from your computer. Try reinstalling the program to fix the problem”. If you are also getting bugged with this error, then fret not. In this tutorial, we will show you various methods to fix the DLL file is missing error on your Windows 11 computer. Follow along,
Table of Contents
Fix DLL File is Missing from your Windows 11 Computer

Do note that there’s no universal fix as such. You will have to try out each of the below-mentioned workarounds and see which one works best in your favor. So with that in mind, let’s get started.
FIX 1: Manually Download DLL File
This is perhaps the most straightforward fix that one could think of. Just download the missing DLL file and place it in its correct directory and the issue stands rectified. So where’s the catch? Well, there’s no official source from where you could download these files. Do a Google search and you will be able to find a plethora of third-party websites that offer free DLL files,
However, it’s up to you to decide which one is in sync with your requirement. [I usually go for dll-files.com, but it’s not a recommendation, you are free to choose any site of your choice]. Moreover, once you have downloaded the file, transfer it to the C:\Windows\System32\ directory and then check if it fixes the missing DLL files issue on your Windows 11 computer.
FIX 2: Use SysWow64 Directory
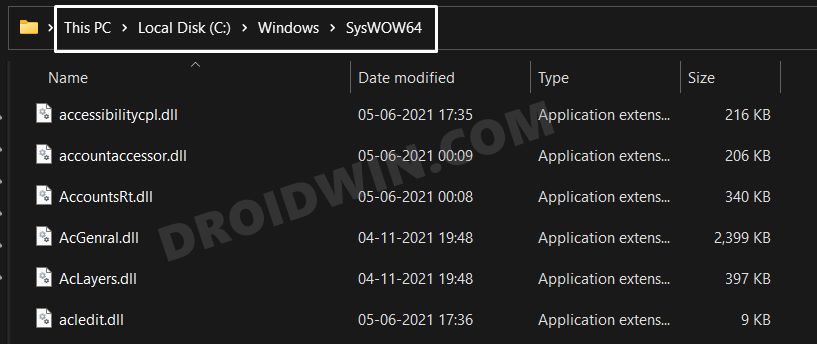
The default DLL location is System32, however, Windows also stores some DLL files in the SysWow64 directory. Therefore, you should consider placing a copy of the desired DLL file into the C:\Windows\SysWOW64\ location as well. Once that is done, restart your PC and check if it fixes the missing DLL files issue on your Windows 11 computer.
FIX 3: Re-Register DLL File
If you have downloaded the DLL file from a third-party site or if the system DLL file’s configuration has got corrupted, then you will have to re-register that DLL file. You could do so either via Run or CMD. We are listing the steps for Run, if you wish to try it out in CMD, then the commands will remain the same, just make sure to launch CMD as an administrator.
- To begin with, use the Windows+R shortcut keys to open the Run dialog box.
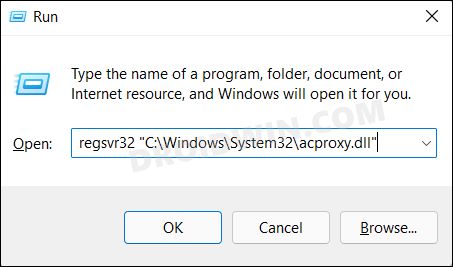
- Now, if the DLL file is present in the System32 folder, then use the below command:
regsvr32 "C:\Windows\System32\acproxy.dll"

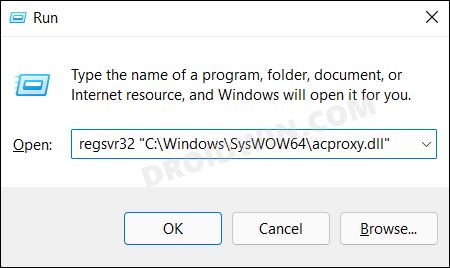
- On the other hand, if the file is situated in SysWow64, then use the following command:
regsvr32 "C:\Windows\SysWOW64\acproxy.dll"

- Check if it fixes the missing DLL files issue on your Windows 11 computer.
FIX 4: Disable Windows Firewall
If you have downloaded the DLL file from a third-party site, then Windows Defender might block that DLL file’s functionality on your PC. However, if you are sure of the file’s trustworthiness, then you could temporarily disable Firewall and then let the file carry out the required task. After that, you may then easily re-enable it. Here’s how:
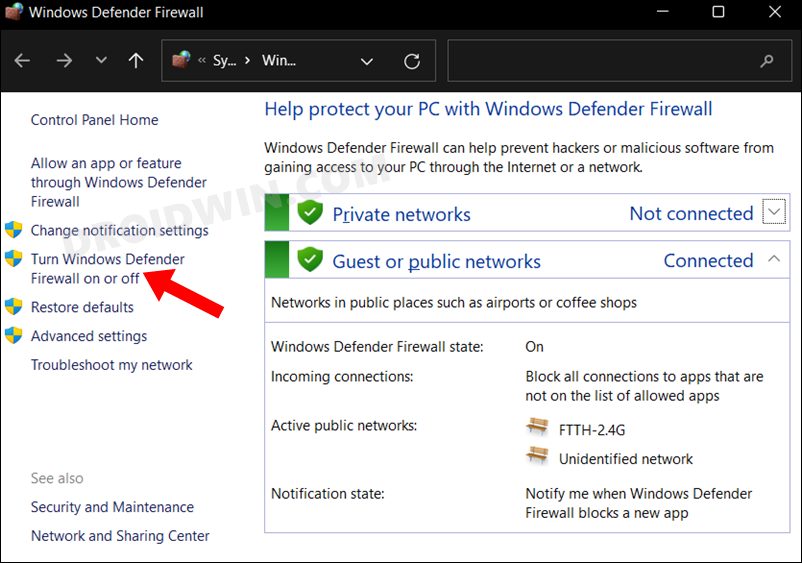
- Head over to the Start Menu, search Windows Defender Firewall, and open it.
- Then click on Turn on or off Windows Defender Firewall from the left-hand side.

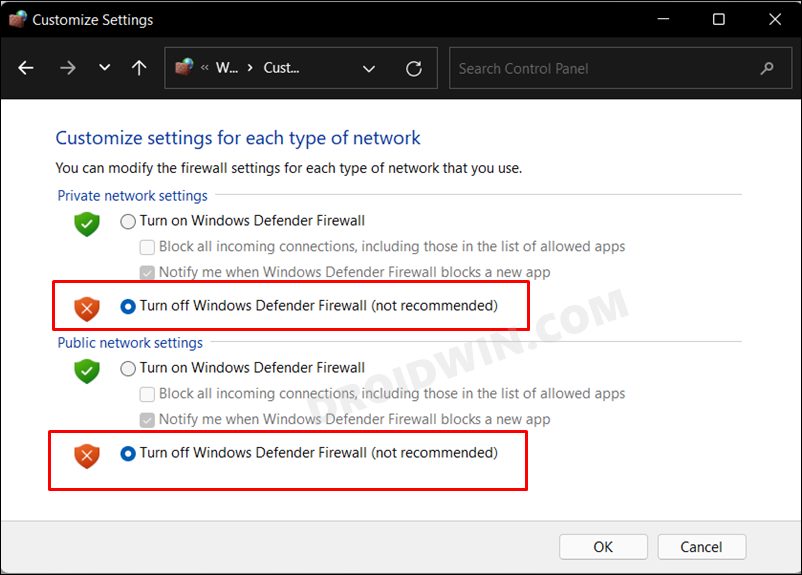
- After that, select Turn off under both the Public and Private networks.

- Check if it fixes the missing DLL files issue on your Windows 11 computer.
FIX 5: Run SFC and DISM Commands
System File Checker and Deployment Image Servicing and Management are two command-line utility tools that scan for the corrupt Windows files and then replace them with their working counterpart. The major difference between the two is whereas the SFC replaces the corrupt files with the working ones from the cached directory on your PC, DISM does so by downloading the working files from the online Microsoft servers. And as of now, we would be making use of both these tools to fix the DLL issue. Follow along.
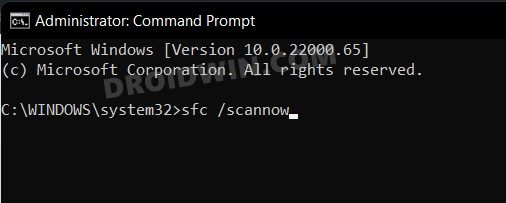
- To begin with, head over to the Start Menu, search Command Prompt, and launch it as an administrator.
- Then copy-paste the below command to open the SFC Tool:
sfc /scannow

- Once the SFC Scanning is complete, it’s time to use the DISM Tool. So copy-paste the below command:
DISM /Online /Cleanup-Image /RestoreHealth

- Once DISM finishes the scanning, it is recommended to reboot your PC.
- Once it boots up, check if the fixes the missing DLL files issue on your Windows 11 computer.
FIX 6: Reinstall Visual C++ Redistributables
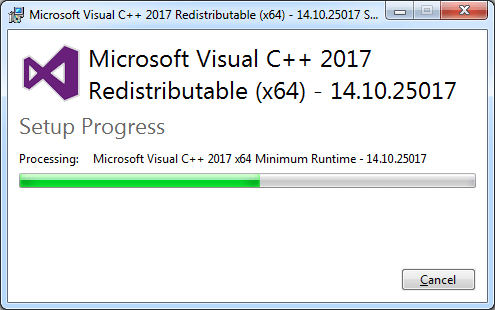
Many games and applications (especially the ones that use the Windows API, DirectX, and . NET) require redistributable Visual C++ runtime library packages to function correctly. Along the same lines, various Dynamic Link Library files are also dependent on these redistributables. So if it gets corrupted or outdated, then its repercussions are bound to be faced by the DLL files. Henceforth, it is recommended to have the latest version of the C++ runtime.
- So download the latest version of Microsoft Visual C++ Runtime from the official site.
- Then launch the setup file and proceed with the on-screen instructions to complete the update process.

- Now check if the fixes the missing DLL files issue on your Windows 11 computer.
FIX 7: Give Permissions to TypeLib Registry
The issue that we are currently dealing with could also arise due to the inability of the DLL to get the required permissions. In this regard, the TypeLib registry file stores information about all the libraries on your PC. Therefore, you should consider giving it the highest level of privileges and let it function in an unrestricted environment. Here’s how it could be done:
- To begin with, launch Registry Editor from the Start Menu.
- Then head over to its address bar and copy-paste the below location:
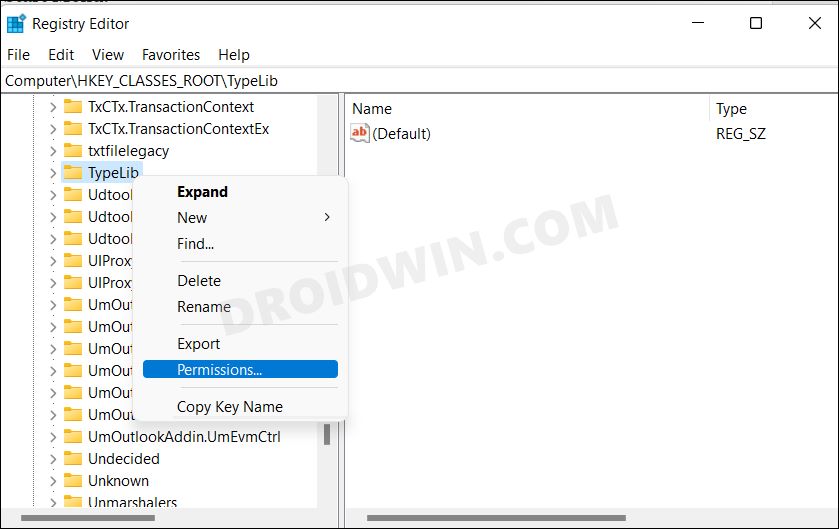
Computer\HKEY_CLASSES_ROOT\TypeLib
- Now right click on the TypeLib folder and select Permissions.

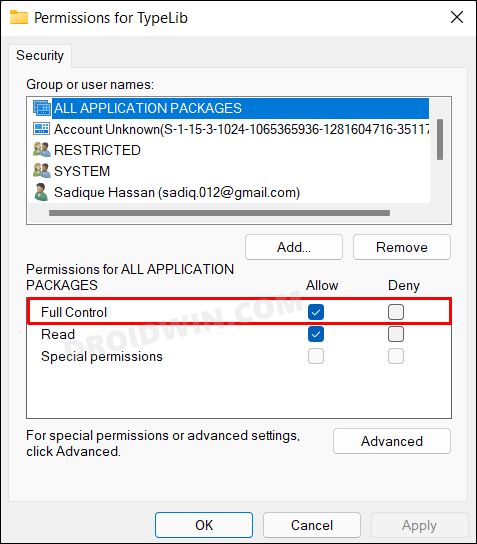
- After that, checkmark Allow next to Full Control and click OK to save it.

- That’s it. This should resolve the missing DLL issue.
With this, we round off the guide on how you could fix the ‘DLL file is missing’ error on your Windows 11 computer. We have listed seven different methods for the same. Do let us know in the comments which one worked out in your favor. Likewise, all your queries are welcomed in the comments section below.
