In this guide, we will show you various methods to fix the Camera Failed warning on your Samsung Galaxy device. The smartphones from the South Korean giants are scaling new heights every other day. Its well-crafted hardware design and impressive OS skin do play a major role in that, however, it’s the sumptuous camera performance that has managed to take all the attention, and rightly so. Well, its latest flagship could even record 8K videos (let that sink in).

However, in spite of all the goodies attached, its camera does go through a few hiccups every now and then. In this regard, the bug that leads to the inability of the camera to launch has been persistent since the earlier days of the S series and surprisingly continues to this date [even the S22 Ultra is currently facing this error]. If you are also currently getting bugged with this error, then fret not. In this guide, we will show you various methods to fix the Camera Failed warning on your Samsung Galaxy device.
Table of Contents
Fix Camera Failed Warning on Samsung Galaxy devices
Do note that there’s no universal fix as such. You will have to try out each of the below-mentioned workarounds and see which one works best in your favor. So with that in mind, let’s get started.
Restart Device
First off, let’s start with the basic workaround of restarting the device. This will refresh the underlying settings and app processes and in most cases, is enough to rectify the issue as well. So long-press the power key and tap on Reboot. Wait for the device to boot up and then check if it fixes the Camera Failed warning on your Samsung Galaxy device.
Clear Camera Cache
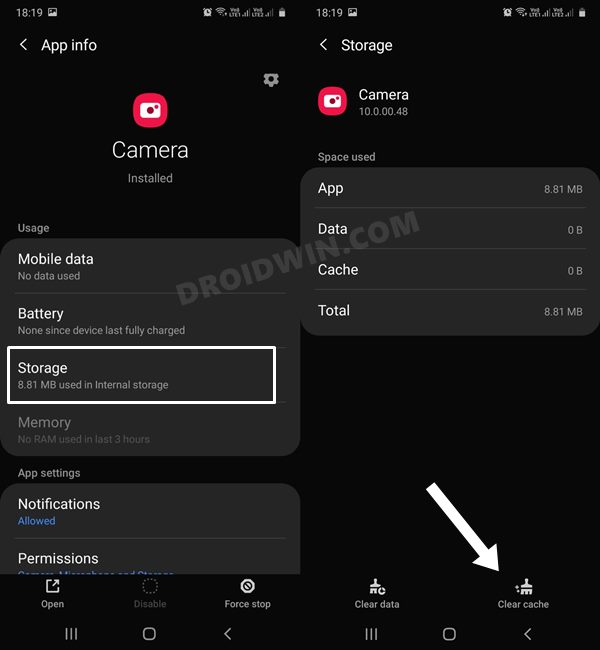
If a lot of temporary data pertaining to the camera gets accrued over the due course of time, then not only would it slow down its performance but could even prevent it from carrying out its normal functioning. Therefore, you should delete these cached data right away, using the instructions given below.
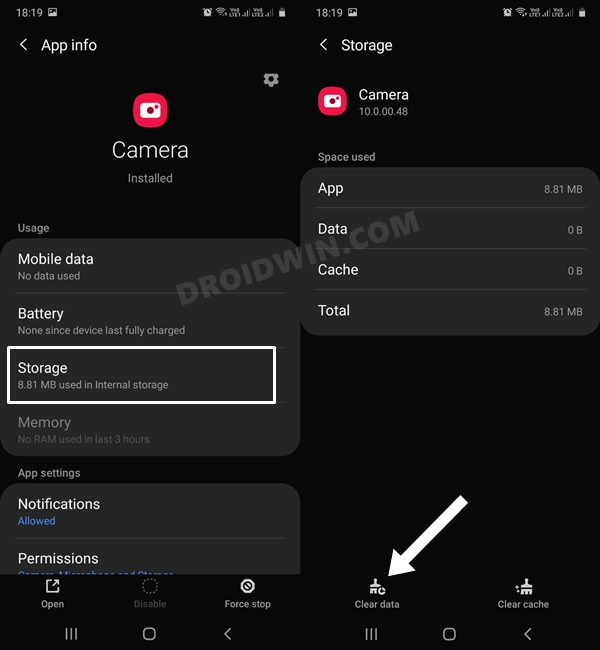
- To begin with, head over to the Settings menu on your device.
- Then go to Apps and select the Camera app from the list.

- After that, go to its Storage section and tap on Clear Cache.
- Verify if it fixes the Camera Failed warning on your Samsung Galaxy device.
Reboot to Safe Mode
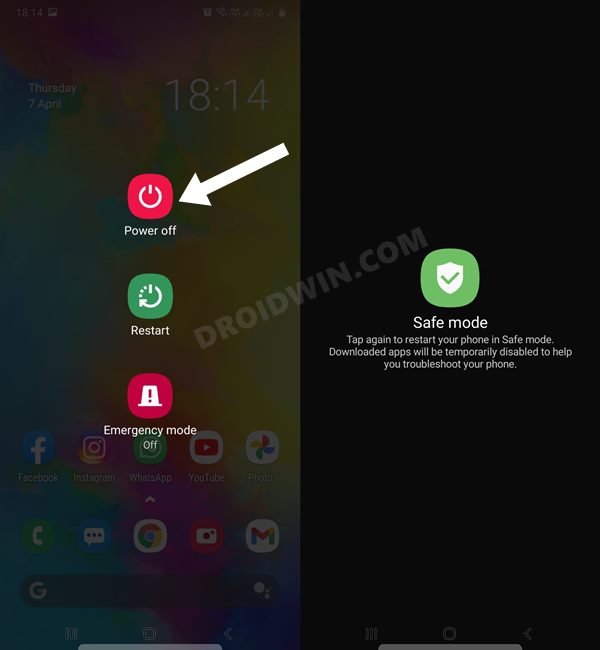
in some instances, a third-party app might conflict with the system app (which in this case is the camera app). To verify if that is the case or not and hence rectify it as well, you will have to boot your device to Safe Mode. Doing so will disable all third-party apps and if does resolve the camera bug, then the culprit was indeed a third-party app that needs to be uninstalled right away. Here’s how all this could be carried out:
Disable Power Saving Mode
If you have put any battery restrictive measures in place, then it would pause the app’s background processes and services. Therefore, you should consider disabling the battery saver mode on your device, using the below-given instructions:
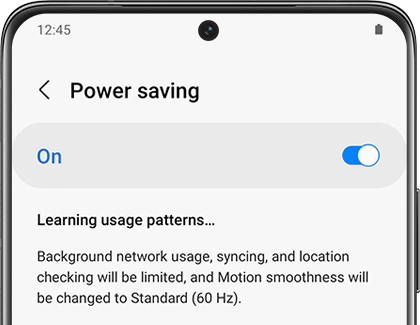
- To begin with, head over to the Settings menu on your device.
- After that, go to Battery and Device Care and disable Power Saving.
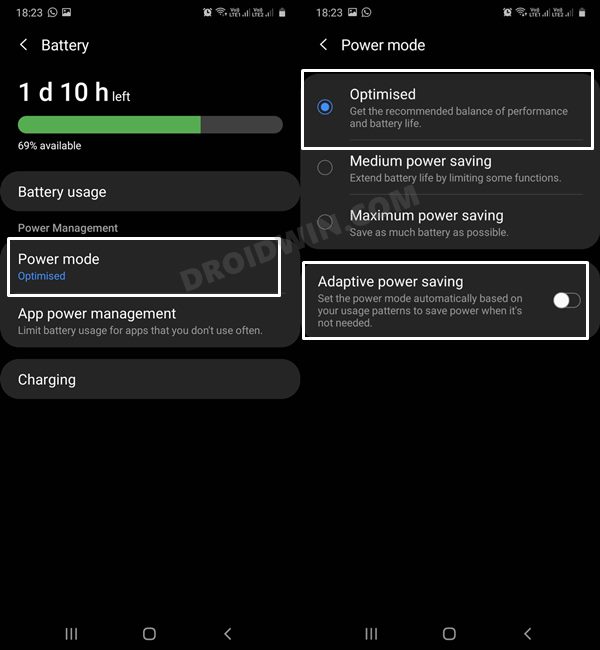
- After that, go back to Settings > Device Care > battery.
- Then head over to Power Mode and select Optimized.
- Likewise, also disable Adaptive Power Saving.
- Check if it fixes the Camera Failed warning on your Samsung Galaxy device.
Disable Battery Optimization For Camera App
You should also make sure that the Camera app is getting unrestricted battery usage. In other words, it shouldn’t be under any of those aggressive battery-saving measures put in place by Samsung.
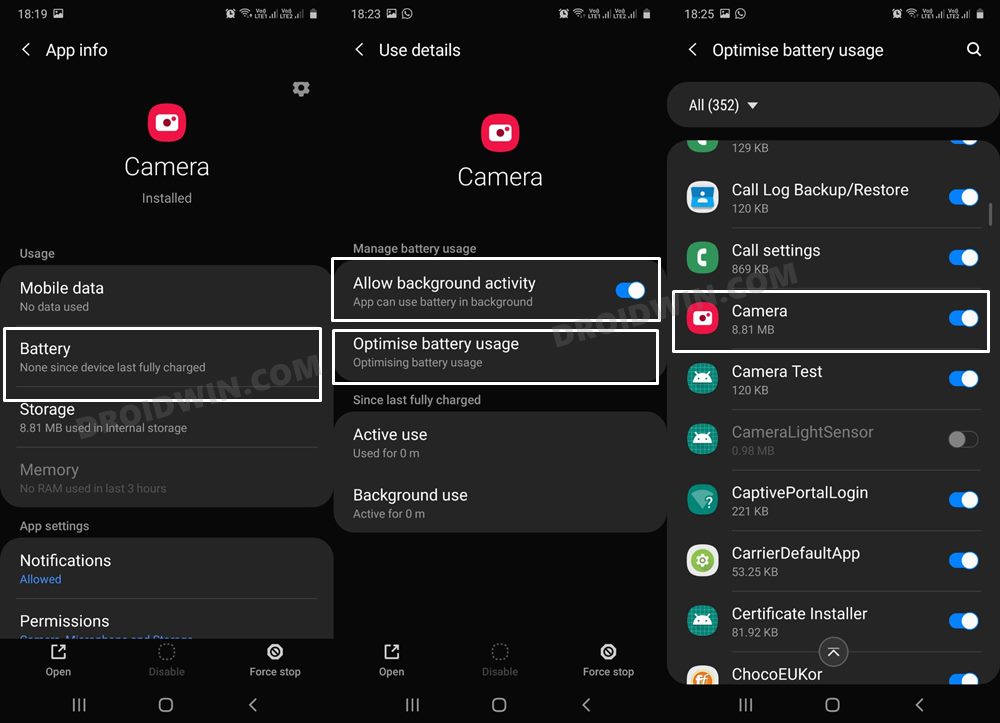
- Head over to the Settings > Apps menu on your device.
- Then select the Camera app and go to its Battery section.
- Enable the toggle next to Allow Background Activity.
- Then go to Optimize Battery Usage and disable the toggle next to Camera.
- Verify if it fixes the Camera Failed warning on your Samsung Galaxy device.
Reset App Preferences
In some cases, creating and implementing rules for an app might have an adverse impact on other apps installed on your device. So you should consider reverting all the app preferences to their default state. Doing so will reset the rules related to disabled and default apps as well as all the restrictions put in place (it will not wipe any app data) and will give you the stock settings to work upon. So let’s put this fix to the test and check out the results.
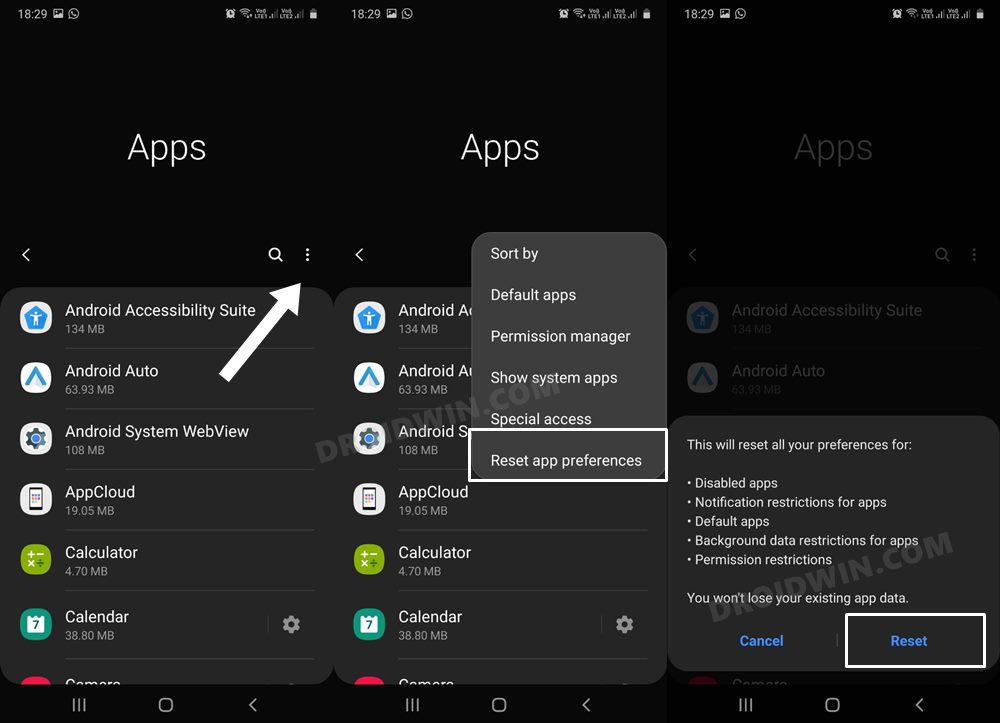
- To begin with, head over to Settings > Apps.
- Then tap on the overflow icon situated at the top right and select Reset App Preferences.
- After that, tap Reset in the confirmation dialog box.
- Check if it fixes the Camera Failed warning on your Samsung Galaxy device.
Delete Camera Data
If the app’s data gets or its configurational settings get corrupted, then your best course of action should be to delete those data and the OS repopulate it from scratch. Here’s how it could be done:
- To begin with, head over to the Settings menu on your device.
- Then go to Apps and select the Camera app from the list.
- After that, go to its Storage section and tap on Clear Data > OK.
- Verify if it fixes the Camera Failed warning on your Samsung Galaxy device.
Wipe Cache Partition
Over the due course of time, tons of temporary data pertaining to various user-installed and system apps as well as from documents and media files might tend to slow down the device and even cause a roadblock or two in the proper functioning of the system apps. Therefore, you should delete all these temporary data by clearing the cache partition on your device. Here’s how:
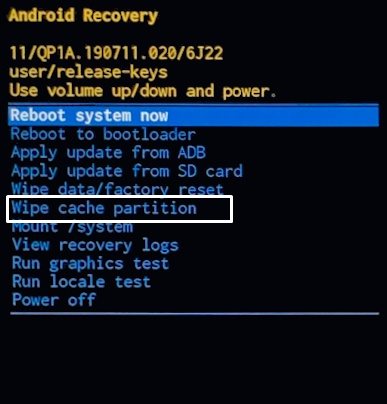
- To begin with, power off your device.
- Then press and hold the Power and Volume Keys for a few seconds.
- Your device will now boot to Recovery Mode (you may now release the pressed keys).
- Now use the Volume keys to highlight the Wipe Cache Partition and hit the Power key to confirm it.
- Then use the Volume keys to highlight YES and hit the Power key to confirm it.
- The cached data on your device will now be wiped. Once done, restart your device.
- Check if it fixes the Camera Failed warning on your Samsung Galaxy device.
Factory Reset
If none of the aforementioned methods spelled out success for you, then your last course of action should be to reset the device to the factory default state, exactly how it came out of the box. However, do note that this process will wipe off all the data from your device, so take a complete device backup beforehand and then proceed with the below steps:
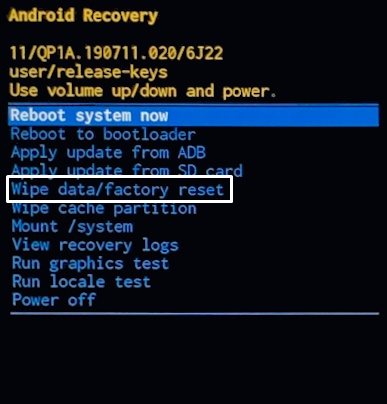
- To begin with, power off your device. Then press and hold the Power and Volume Keys for a few seconds.
- Your device will now boot to Recovery Mode (you may now release the pressed keys).
- Now use the Volume keys to highlight the Wipe Data/Factory Reset and hit the Power key to confirm it.
- Then use the Volume keys to highlight Factory Data Reset and hit the Power key to confirm it.
- Your device will now undergo a reset. Once done, boot it up and then set it up from scratch. The underlying issue would have been rectified.
So with this, we round off the guide on how you could fix the Camera Failed warning on your Samsung Galaxy device. We have listed nine different methods for the same, do let us know which one worked out in your favor. Likewise, all your queries are welcomed in the comments section below.


