In this guide, we will show you various methods to fix the camera not working issue on your Android 12 device. The latest iteration of the OS build has bought in quite a few noteworthy changes. The biggest among them is the massive UI overhaul, thanks to the Material You UI and Wallpaper based theming engine. However, in spite of all the goodies, the OS isn’t free from its fair share of issues.
You might occasionally come across bugs and issues that might cause a great hindrance to the device’s usability. In this regard, one of the most concerning issues is when the device’s camera isn’t functioning along the expected lines. While the camera has always been an integral component of the device, its importance has risen significantly during the recent work-from-home situation.
Well, there couldn’t be anything worse than the camera malfunctioning in the middle of your Zoom or Teams video call meetings. Well, if you are getting bugged with any of these issues on the latest OS build, then this guide shall come in handy. In this tutorial, we will list out various methods to fix the camera not working issue on your Android 12 device. Follow along.
Table of Contents
How to Fix Camera Not Working in Android 12
Do note that there’s no universal fix as such. You will have to try out each of the below-mentioned workarounds and see which one works best in your favor. So keeping that in mind, let’s get started.
FIX 1: Restart Device
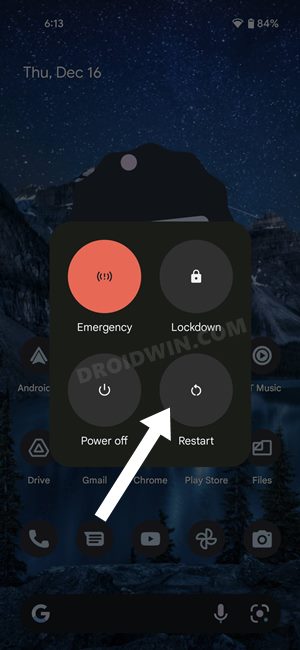
Let’s start off with the most basic troubleshooting tip. In most instances, a simple reboot is all that is needed to rectify the underlying issues. So long-press the Power button and select Restart from the menu that appears. Once your device boots up, check if the camera not working issue on Android 12 has been fixed or not.
FIX 2: Verify Camera Permissions
Next up, verify that the app in question has been granted permission to access your device’s camera. If it hasn’t been given the authority to use your smartphone camera, then this issue is bound to happen. Along the same lines, you should also double-check that the camera system app has been granted the necessary permissions. Here’s how both these tasks could be carried out.
- To begin with, head over to the Settings menu on your device.
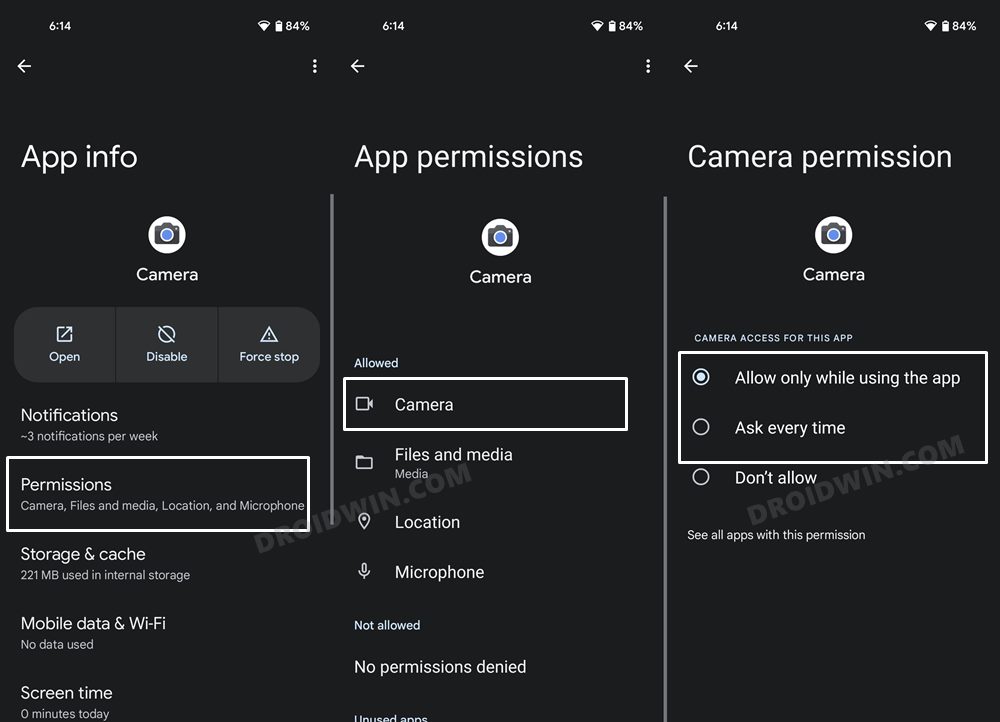
- Then go to Apps > See All Apps and select the desired app from the list.
- After that, go to its Permission section and make sure that the Camera is listed under the Allowed category.

- If it is under Not Allowed, then tap on Camera and select either Ask every time or Allow only while using the app.
- Then go back to See All Apps and this time, go to the Camera system app.
- Now go to its Permission section and make sure that the Camera is under the Allowed section.
- If that is not the case, then select either Ask every time or Allow only while using the app.

If the camera permission is already enabled, then you could also try toggling it off/on. In other words, start by changing the permission from allowed to not allowed and then switch back to allow. This will give it a fresh instance and could fix the camera not working issue on your Android 12 device.
FIX 3: Verify In-App Settings
If the app has been granted the required permission but even then it isn’t able to access the camera, then it could be the case that its camera access might have been disabled from within the app itself.
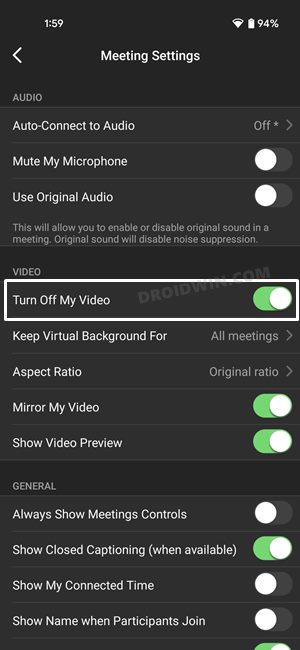
So launch the app, go to its Settings menu and check that the camera/video toggle is enabled. If that is not the case, then enable it right away and then see if it fixes the camera not working issue on your Android 12 device.
FIX 4: Force Stop Camera
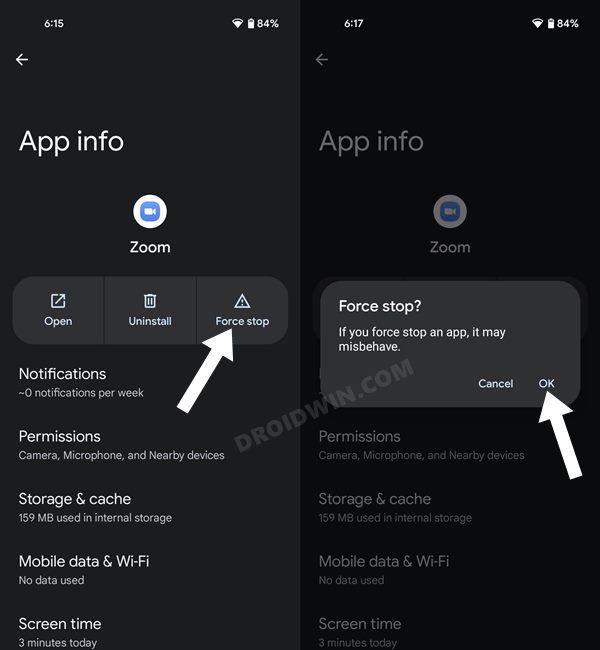
In some instances, an app’s background services might not be functioning along the expected lines. In that case, you should consider force-stopping that app and then letting it start from scratch. And this should be implemented across both the system camera app and the third-party app that is currently facing this issue.
- So go to Settings > Apps > See All Apps and select Camera from the list
- Then tap on Force Stop followed by OK in the confirmation dialog box.
- Likewise, do the same for the third-party app that is unable to use the camera.
- Now check if the camera not working issue on your Android 12 device has been fixed or not.
FIX 5: Disable and Re-Enable App
Disabling and re-enabling the app will let the app’s backend processes start off with a fresh instance from scratch and this, in turn, might rectify the underlying issue as well. So let’s put it to test both for the third-party as well as the system camera app.
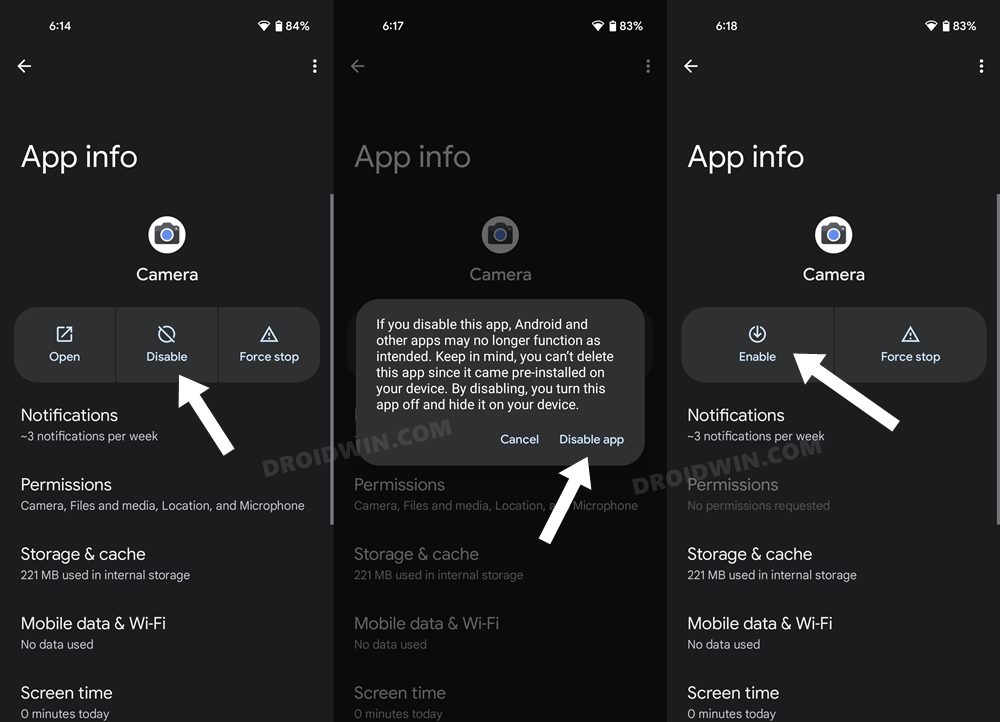
- As before, go to Settings > Apps > See All Apps and select the Camera app from the list.
- After that, tap on Disable App and again on the Disable App in the confirmation dialog box.
- Then wait for a few seconds and tap Enable. The app will now be enabled.
- Now do the same for the third-party app that is currently facing the camera-related issue.
- Once done, check whether it fixes the camera not working issue on your Android 12 device.
FIX 6: Disable Battery Optimizations
If you have implemented any battery restrictive measure to converse battery juice, then consider turning it off for the time being. This is because some apps might not be able to function in this restrictive environment, and more often than not ends up disabling some important app components so as to obey this rule. This might spell trouble for that app and ultimately for the end-users as well. So it’s better to keep this functionality disabled and then check out the results.
- For that, go to Settings > Battery > Battery Saver.
- Then disable the toggle next to Use Battery Saver.
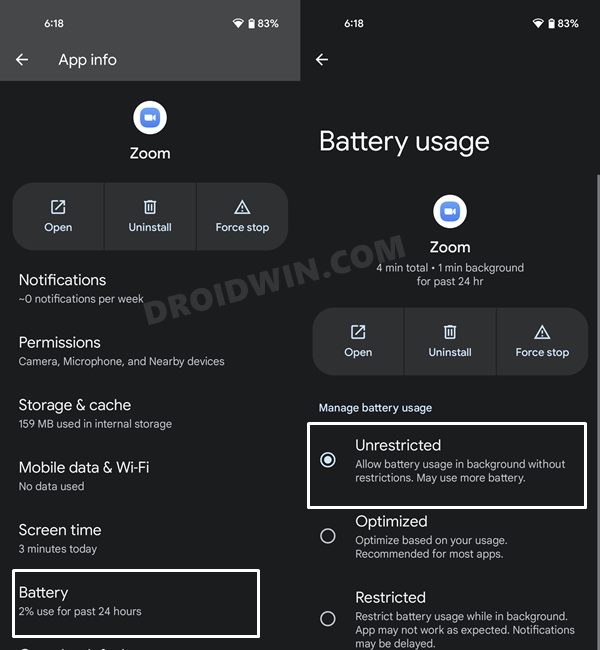
- After that, go to App > See All Apps and select the desired app.
- Then go to its Battery section and select Unrestricted.
- Verify if it is able to fix the camera not working issue on your Android 12 device.
FIX 7: Wipe Camera/App Cache
If a lot of temporary data gets accrued over the due course of time, then not only could it slow down the app, but it could also conflict with its normal functioning. Therefore, your best bet is to delete these cached data at regular intervals, and now should be the perfect time for that.
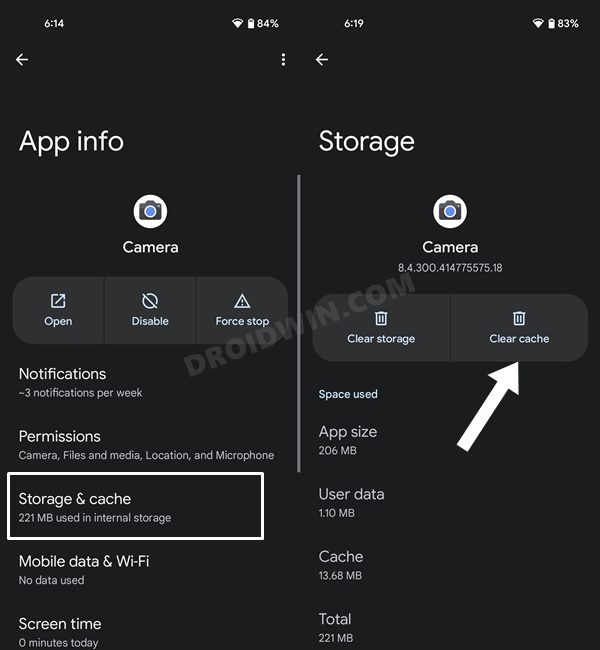
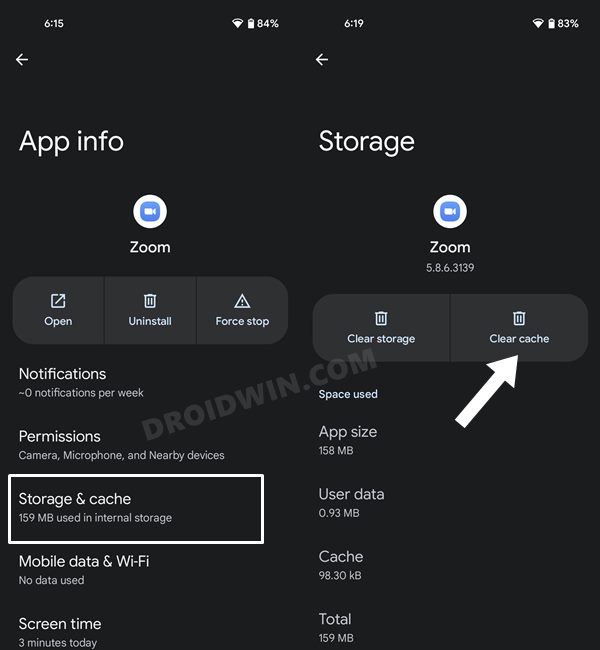
- So head over to Settings > Apps > See All Apps.
- Then select the Camera app from the list.
- Go to its Storage section and tap on Clear Cache.
- Likewise, do the same for the third-party app that is currently facing this issue.
- Now verify if the camera not working issue on your Android 12 device has been fixed or not.
FIX 8: Wipe Camera/App Data
If the stored data or its files get corrupted or outdated, then simply deleting its temporary files wouldn’t do any good. Rather, you will have to delete the entire app data and let it repopulate it from scratch. This needs to be done for both the Camera and the third-party app.
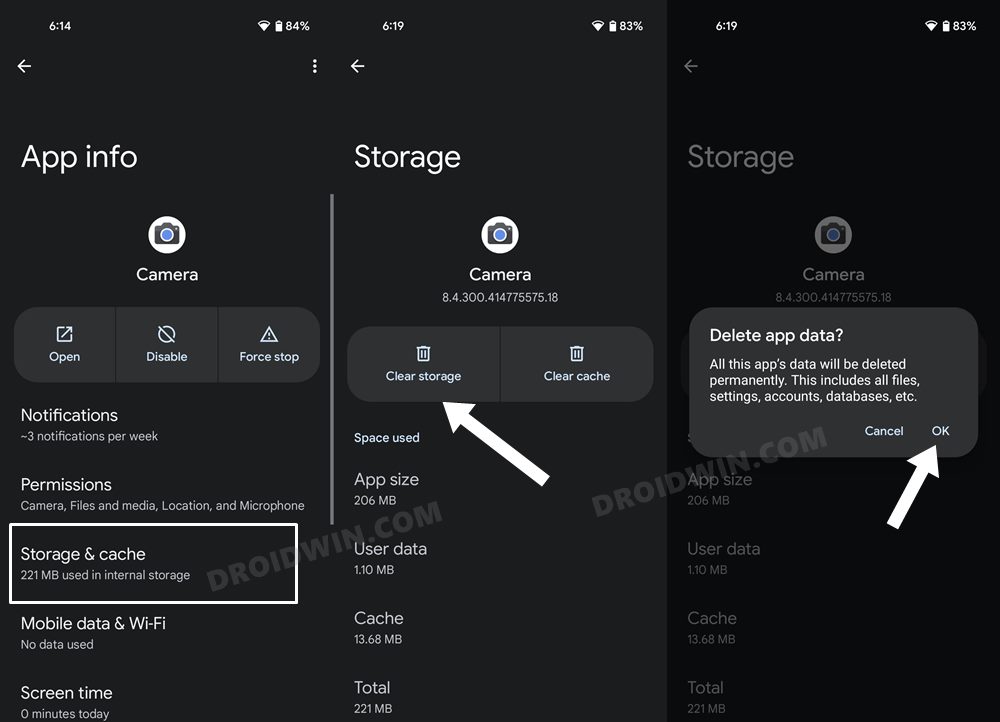
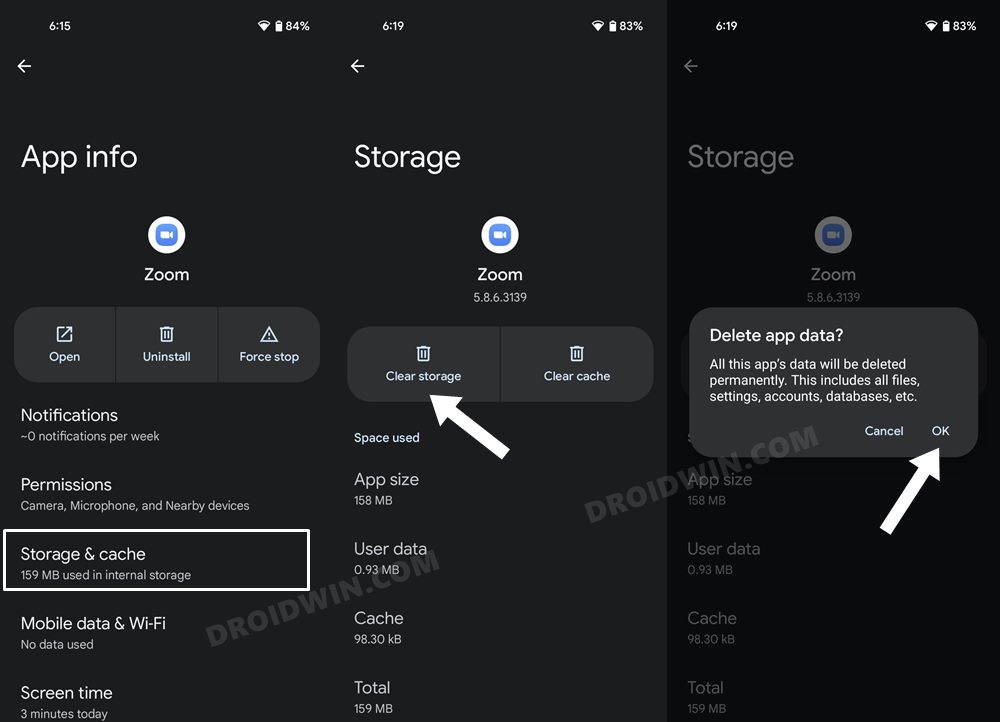
- So head over to Settings > Apps > See All Apps.
- Then select the Camera app from the list.
- Go to its Storage section and tap on Clear Data.
- After that, tap OK in the confirmation dialog box.
- Now do the same for the third-party app as well.
- Once done, check if it fixes the camera not working issue on Android 12.
FIX 9: Uninstall Other Camera Mods
if you have installed a camera mod, such as the popular Google Camera Port (GCam), then sometimes its XML file might conflict with the system camera app. And when that happens, the only way out is to delete that Gcam port from your device. Here’s how it could be done:
- Head over to the Settings menu on your device
- Then go to Apps > See All Apps and select the GCam mod.
- After that, tap Uninstall > OK in the confirmation dialog box.
- Now verify if the camera not working issue on Android 12 has been fixed or not.
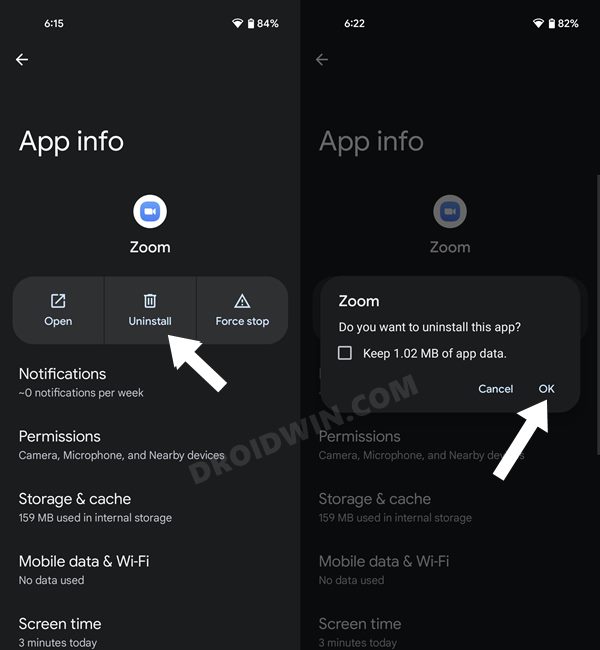
FIX 10: Reinstall the Affected App
If the app’s settings and configuration files have got corrupted, then just deleting the data might not prove to be sufficient. Rather, you will have to uninstall the app that is currently facing an issue and then install its fresh build from scratch. Here’s how:
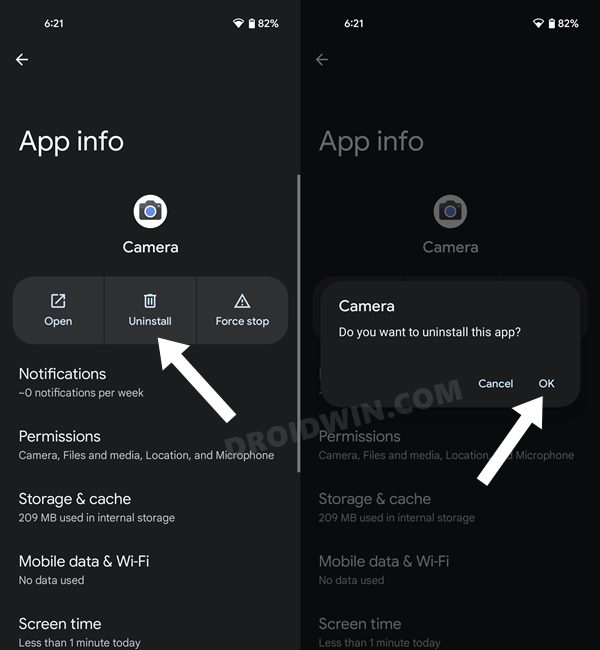
- To begin with, head over to the Settings menu on your device
- Then go to Apps > See All Apps and select the desired app.
- After that, tap Uninstall > OK in the confirmation dialog box.
- Then head over to the Play Store and reinstall that app.
- Now launch the app, set it up and check if it fixes the camera not working issue on Android 12.
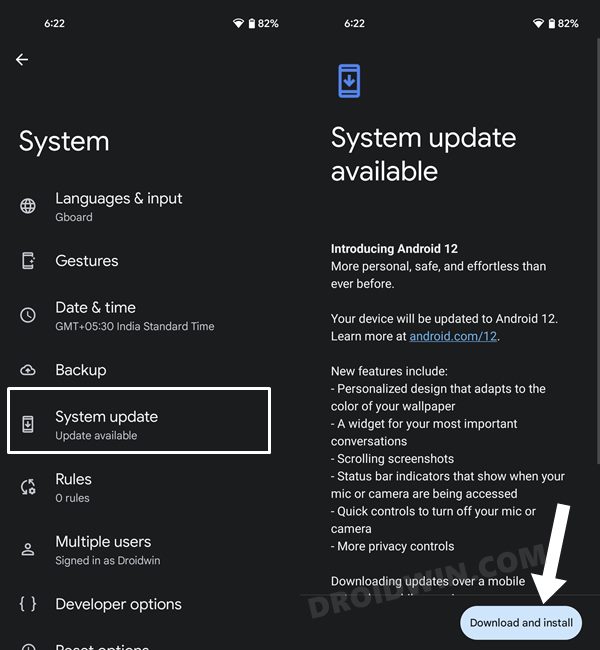
FIX 11: Install System Update
Sometimes the OEM might release a botched OTA update that could spell out trouble for the various apps and services of your device. However, the developers then release a subsequent update that tends to patch this issue. While there is no ETA for this fix, but it generally arrives anywhere between 3-7 days. So, you should check if the OEM has rolled out any updates or not. If it is there, then you should install it without any second thought.
- For that, head over to Settings > System > System Update.
- If there is any pending update, then download and install it right away.
- Once the update has been installed, restart your device.
- Now check if the camera not working issue on Android 12 has been fixed or not.
FIX 12: Boot to Safe Mode
In some instances, a third-party app might conflict with the device’s camera. The best way to verify and hence rectify it is to boot your device to Safe Mode. Doing so will disable all the third-party apps and only the system apps will be running in that mode. And if you are able to use the camera in this mode, then the issue is indeed caused by a third-party app. So you should uninstall each of the recently installed apps, one at a time until the issue is rectified. here’s how:
- Long press the Power button to bring up the Power menu.
- Then long tap on the Restart option and it shall bring up the Safe Mode pop-up.
- Tap OK and your device will be booted to Safe Mode.
- Now access the camera and if it is working well and good, then restart your device back to normal mode.
- Now uninstall the recently installed apps, one at a time, until it fixes the camera not working issue on Android 12.

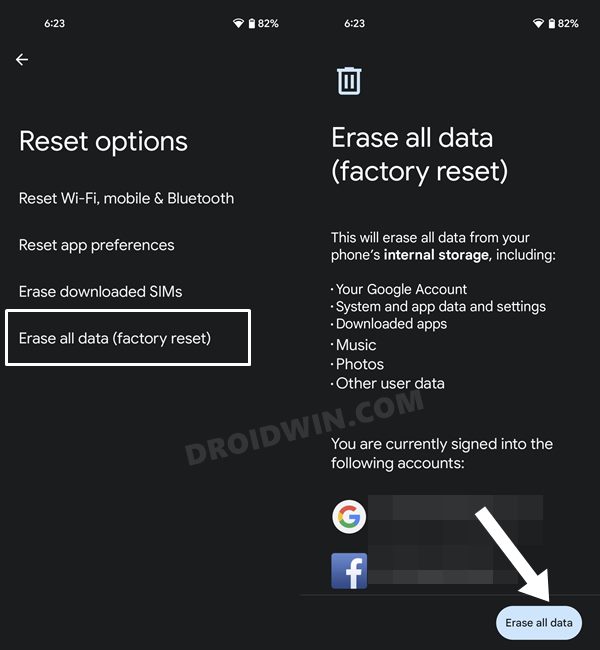
FIX 13: Reset Device
if none of the aforementioned methods managed to spell out success, then your last course of action should be to factory reset your device. This will delete all the apps and data and your device will be just as it was when first unboxed. Since all the settings will be reverted to the factory default state, the underlying issue might be rectified.
- So start off by going to Settings > System > Backup
- Then tap on Backup Now and wait for the process to complete.
- Once done, go to System > Reset Options and select Erase All Data (Factory Reset).
- Finally, tap on the Erase All Data button situated at the bottom right.
- Once the device has been formated, it should take you to the Startup page.
- Sign in with your Google Account and set it up. You should no longer face any camera-related issues now.
So with this, we round off the guide on how you could fix the camera not working issue in Android 12. We have listed thirteen different fixes for the same. Do let us know in the comments section which method spelled out succeed for you. Likewise, all your queries are welcomed in the comments section below.


Hehe
Go to privacy settings. Enable camera access for all apps