In this guide, we will show you the steps to use the Microsoft Intune Company Portal app on a rooted Android device. When it comes to managing corporate apps, data, and resources all under one roof, then it’s the offering from the Redmond giant that many organizations are usually inclined towards. Its Company Portal app provides both the students as well as the employees of an organization to access all those resources in a secure and streamlined manner. Since the app mostly deals with confidential data pertaining to a company, it has put in some restrive measures in place.
One among them is the fact that the app will not function on a rooted device. Since the bootloader on those devices is unlocked and users generally opt for a custom ROM which might be less secure than the stock ecosystem, Microsoft takes no chances whatsoever and blocks the functioning of the app on such devices. But if you wish to bypass this restriction, understanding all the risks involved, then this guide shall help you out. In this tutorial, we will show you the steps to use the Microsoft Intune Company Portal app on your rooted Android device. Follow along.
Table of Contents
Use Microsoft Intune Company Portal in Rooted Android Device

The below instructions are listed under separate sections for ease of understanding. Make sure to follow the same sequence as mentioned. Droidwin and its members wouldn’t be held responsible in case of a thermonuclear war, your alarm doesn’t wake you up, or if anything happens to your device and data by performing the below steps.
METHOD 1: Using Enforce Deny List
In this method, we will be using the Configure Denylist + Enforce Denylist feature of Magisk to hide the root from the Microsoft Intune Portal. Follow along.
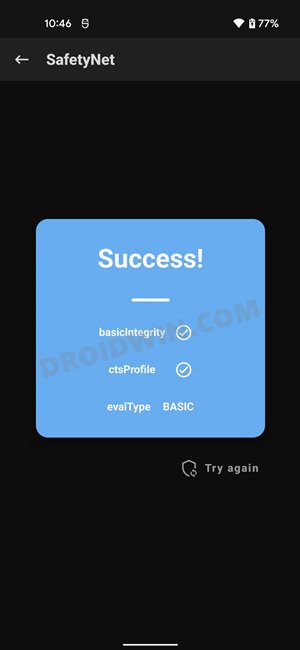
STEP 1: Pass SafetyNet
First and foremost, your device should have passed the SafetyNet Test using the Magisk Hide Props Config module. If that isn’t the case, then do so via the instructions given in this guide- How to Pass SafetyNet on Rooted Android.
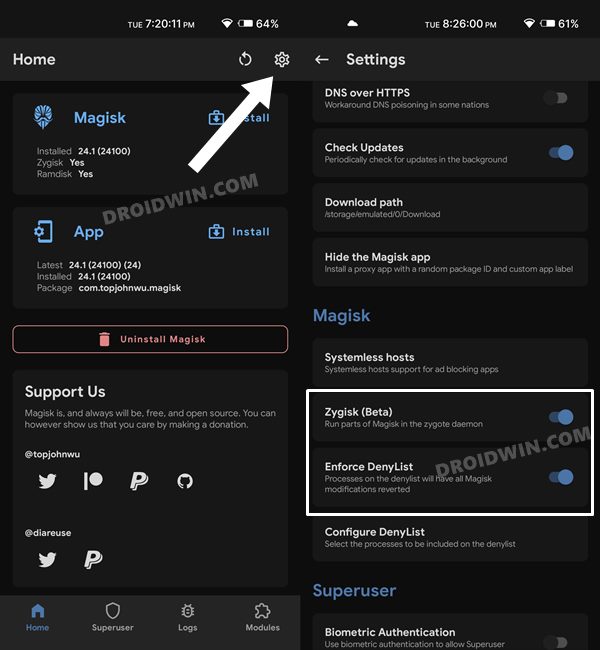
STEP 2: Enable Zygisk and Enforce DenyList
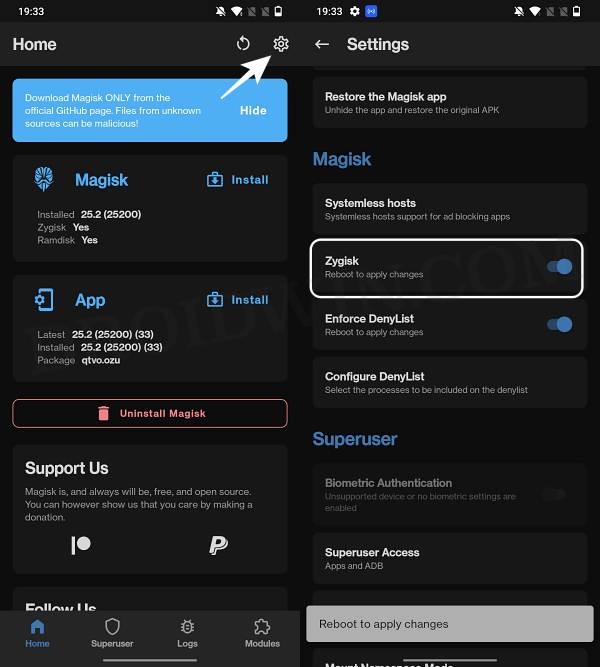
- Launch the Magisk App on your device tap on the Settings icon situated at the top right.
- After that, scroll to the Magisk section and enable the toggle next to Zygisk and Enforce Deny List.

- Now restart the device for the changes to take place. Also, verify that Zygisk status is YES under Magisk.
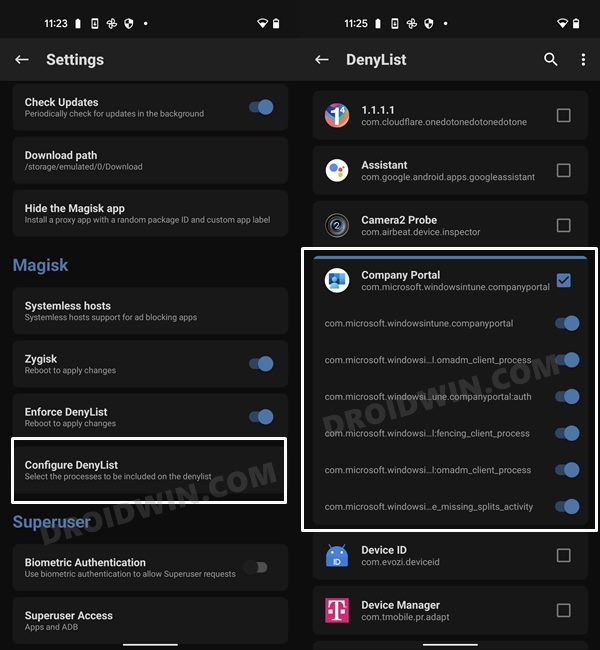
STEP 3: Configure DenyList | Hide Root from Microsoft Intune
- Under the Magisk Settings menu, tap on Configure DenyList.
- Now, tap on Microsoft Intune Company Portal and checkmark all its associated apps.
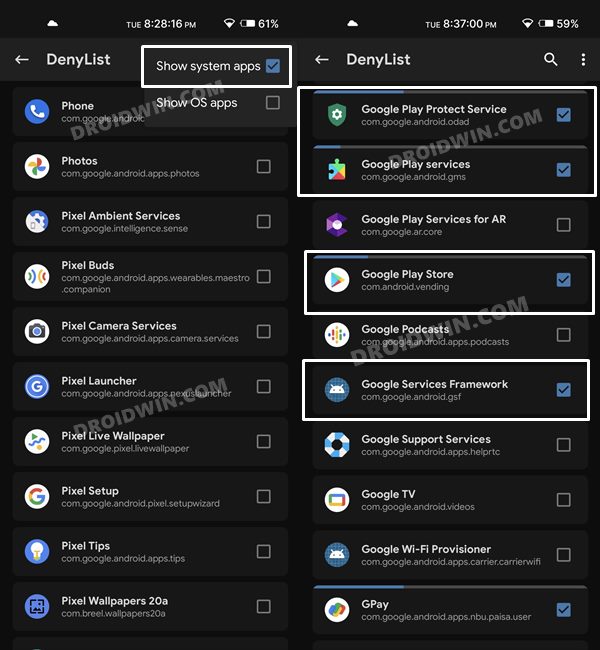
- After that, tap on the overflow icon situated at the top right and select Show System App.
- Now checkmark Google Play Protect Services, Google Play Services, Google Play Store. and Google Service Framework.
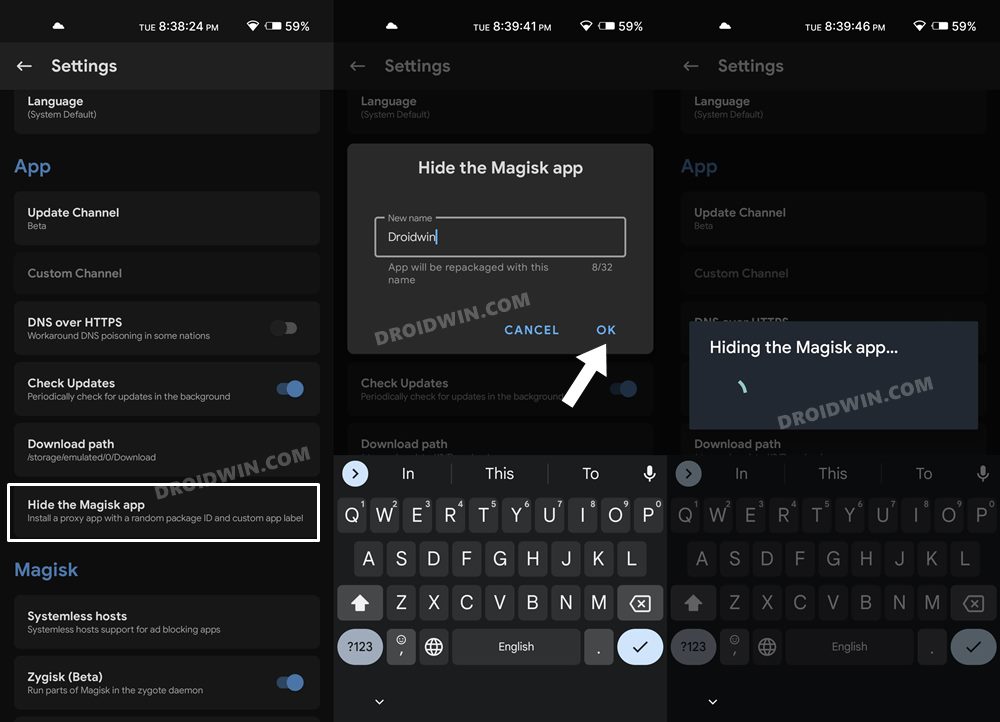
STEP 4: Hide Magisk App
- Go to the Magisk settings menu and tap on Hide the Magisk App.
- Then give it the desired name of your choice and tap OK.
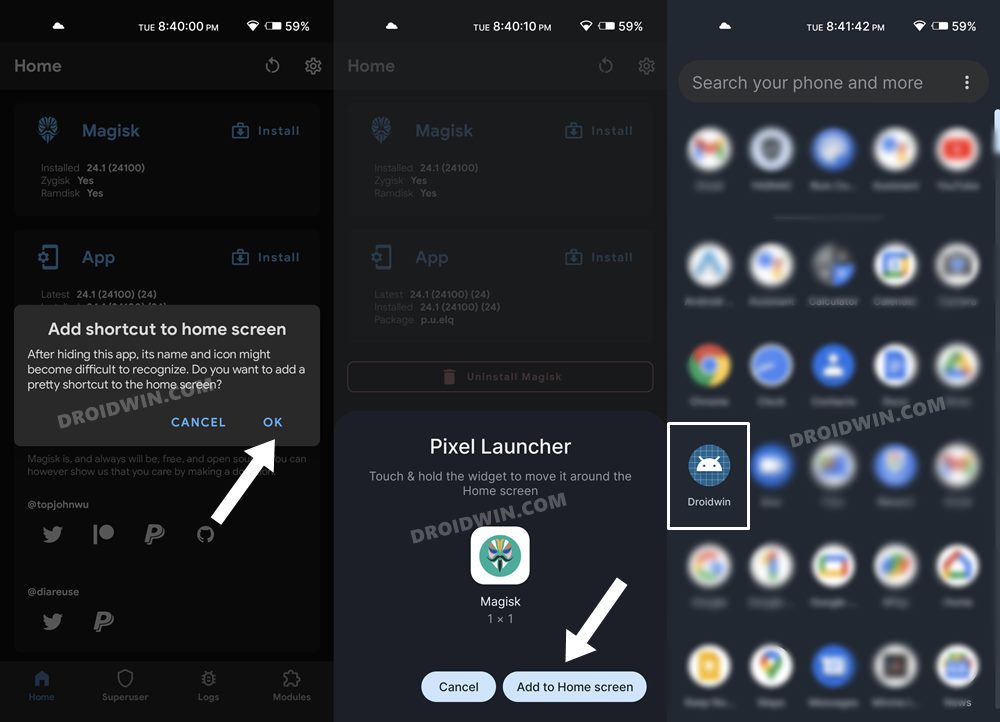
- The hiding process will now begin. Once done, it will ask whether you wish to have the app shortcut on the home screen.
- For ease of convenience, you may select Yes and then tap on the Add to Home Screen button.
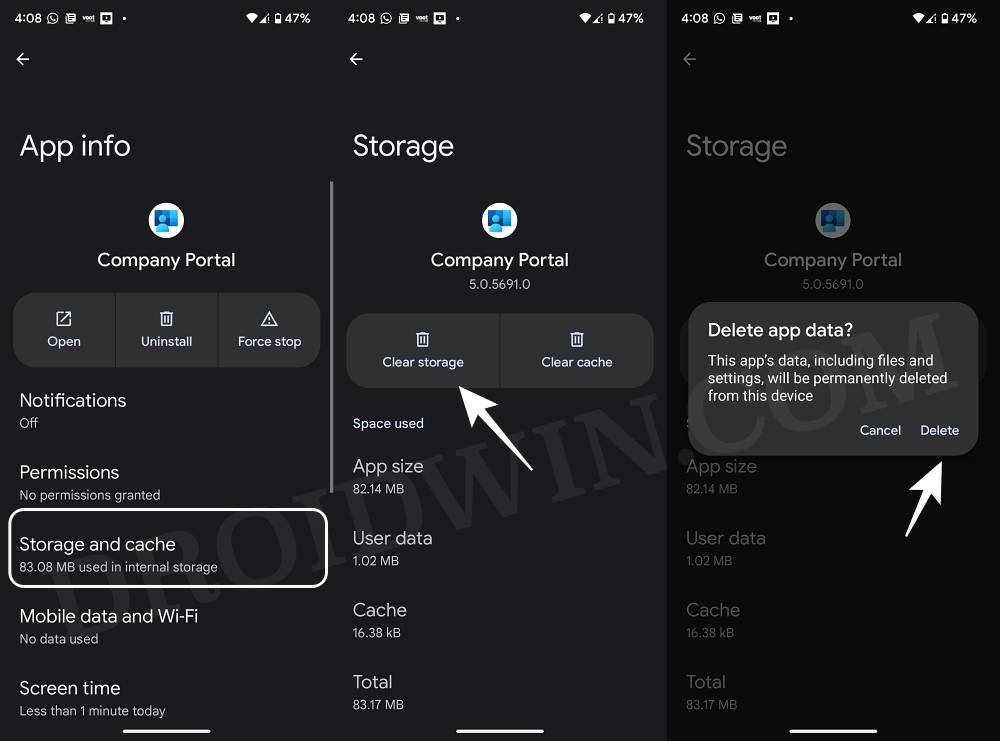
STEP 5: Delete Play Service Play Store, and Intune Data
- Head over to Settings > Apps > See All Apps.
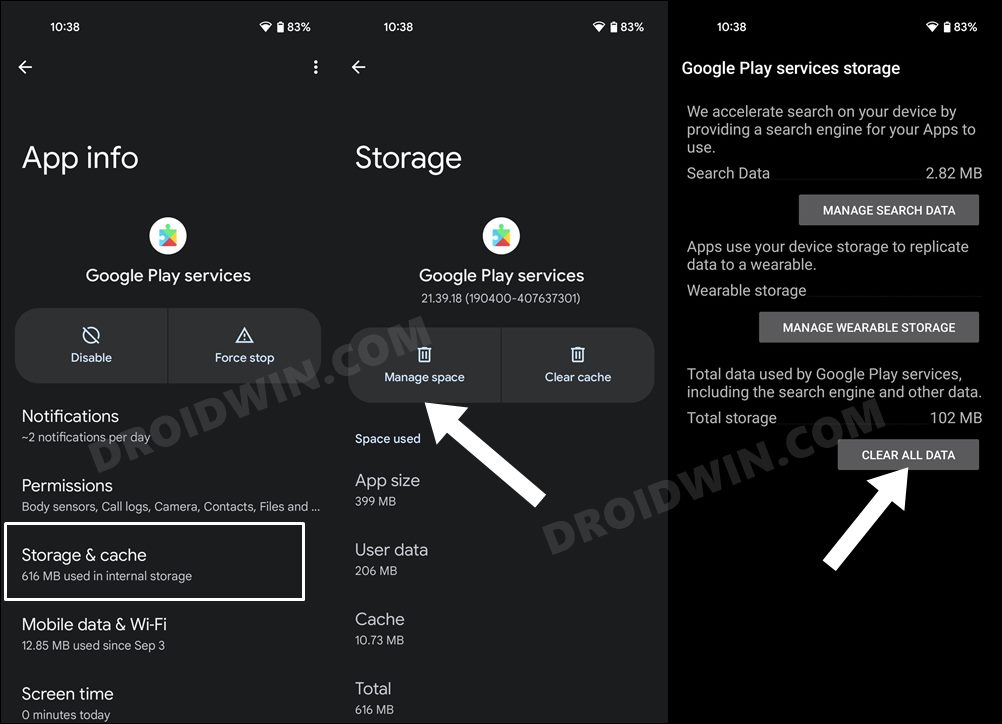
- Then select Google Play Service and go to its Storage and Cache section.
- After that, tap on Manage Space > Clear All Data.
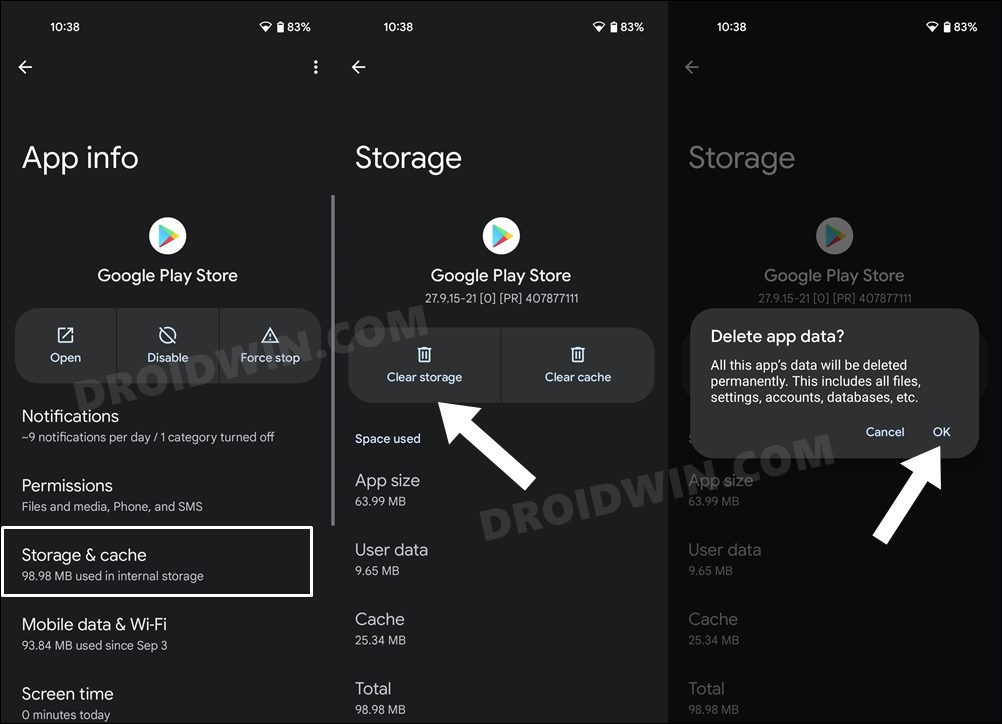
- Once that is done, go back and select Google Play Store.
- Then go to the Storage and Cache section and tap on Clear Storage > OK.
- Finally, delete the data of the Microsoft Intune Portal app as well.
- Once done, restart your device for the changes to take place.
That’s it. These were the steps to use the Microsoft Intune Company Portal app on a rooted Android device using Enforce Denylist feature of Magisk.
METHOD 2: Via Shamiko and LSPosed [NEW]
In this approach, we will be using the Configure Denylist via Shamiko to hide the root from Intune Portal. However, as opposed to the earlier method, we will not enable Enforce Denylist this time around. So with that in mind, let’s get started.
STEP 1: Enable Zygisk
- Launch Magisk and tap on the settings icon situated at the top right
- Then enable the toggle next to Zygisk and restart your device.
- Now launch Magisk and make sure it says Yes next to Zygisk.
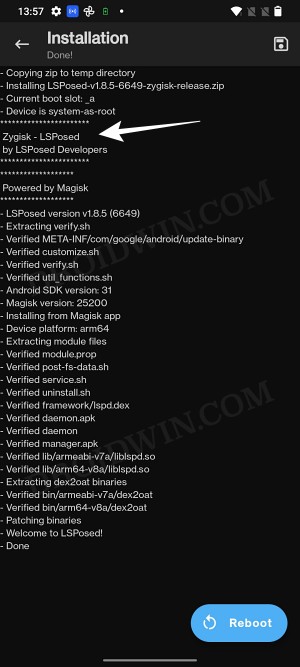
STEP 2: Install LSPosed Zygisk
Next up, install the Zygisk version of Xposed Framework/LSPosed using the instructions given in this guide: How to Install Xposed Framework/LSPosed on Android.
STEP 3: Install Shamiko Module
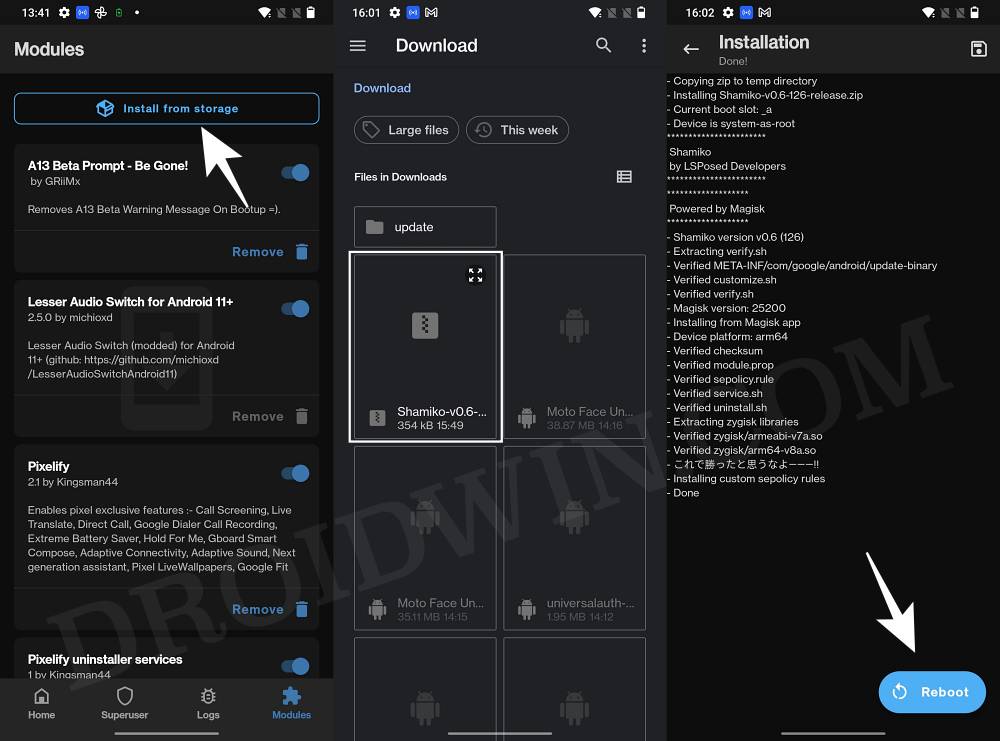
- To begin with, download the Shamiko Module from GitHub.
- Then Magisk, go to its Modules section, and tap on Install from Storage.
- Now select the Shamiko module and it will be flashed. Once done, hit Reboot.
STEP 4: Configure DenyList | Hide Root from Microsoft Intune
- Under the Magisk Settings menu, tap on Configure DenyList.
- Now, tap on Microsoft Intune Company Portal and checkmark all its associated apps.
- After that, tap on the overflow icon situated at the top right and select Show System App.
- Now checkmark Google Play Protect Services, Google Play Services, Google Play Store. and Google Service Framework.
STEP 5: Hide Magisk App
- Go to the Magisk settings menu and tap on Hide the Magisk App.
- Then give it the desired name of your choice and tap OK.
- The hiding process will now begin. Once done, it will ask whether you wish to have the app shortcut on the home screen.
- For ease of convenience, you may select Yes and then tap on the Add to Home Screen button.
STEP 6: Delete Play Service, Play Store, and Intune Data
- Head over to Settings > Apps > See All Apps.
- Then select Google Play Service and go to its Storage and Cache section.
- After that, tap on Manage Space > Clear All Data.
- Once that is done, go back and select Google Play Store.
- Then go to the Storage and Cache section and tap on Clear Storage > OK.
- Finally, delete the data of the Microsoft Intune Portal app as well.
- Once done, restart your device for the changes to take place.
That’s it. You will now be able to use Microsoft Intune Company Portal on your rooted Android device. If you have any queries concerning the aforementioned steps, do let us know in the comments. We will get back to you with a solution at the earliest.


Fernando
It doesn’t work for me. Would you be able to help me please?
James
Thank you for this detailed post. It took a while for me to get the hang of using Magisk. I would have never figured out how to get Intune to work on my own.
Thank you!
Christian
Hello Hassan,
thank you very much for your article. It seems like you have the most recent article for Company Portal and Magisk installed. Unfortunately, Intune Company Portal detects root on my phone since appr. 1 week. Even if I follow your mentioned steps I can’t use the App … it’s loggin in (Email e.g.) and the Portal then immediately deletes my data due to root detection 🙁
Can you confirm it is still working with the latest version of Intune Company Portal on Android devices? I use Canary build and still …. Any further hints for make it working? Thanks.
I’m using a Redmi Note 9 Pro (joyeuse) with latest MIUI (Android 11).
Rohan
It doesn’t work