In this guide, we will show you the steps to fix the screenshot folder missing issue in Windows 11. There are quite a few ways of capturing a screenshot in Windows 11. The first is the native Print Screen key which is followed by the distraction-free Windows+Print Screen mode. Next up, we have the ever-popular Snipping Tool (Windows+Shift+S) that gives you three different modes to take a screengrab.
Rounding it all off is the Xbox Game Bar (Windows+Alt+Print Screen), which is probably the least popular among all the available ones. In this regard, the screenshot captured via Snipping Tool or the Print Screen is saved to the clipboard. You could, then paste it into the desired app (such as MS Paint) and then save the file accordingly.
Likewise, the Xbox Game bar files are stored in the C > Users > UserName > Videos > Captures folder. But if talk about the Windows+Print Screen mode, then those screengrabs get saved to the Screenshot folder. And this is what seems to be the cause of concern for some. According to various users, the screenshot folder is missing from their Windows 11 PC. If you are also getting bugged with this issue, then this guide is here to help you out. Follow along.
How to Fix Screenshot Folder Missing in Windows 11
- Right-click on the Start Menu and select Registry Editor.
- Then copy-paste the below location in its address bar:
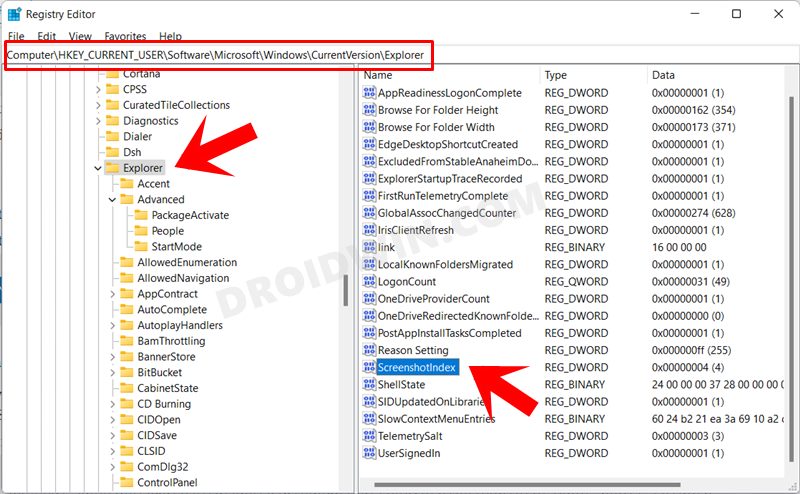
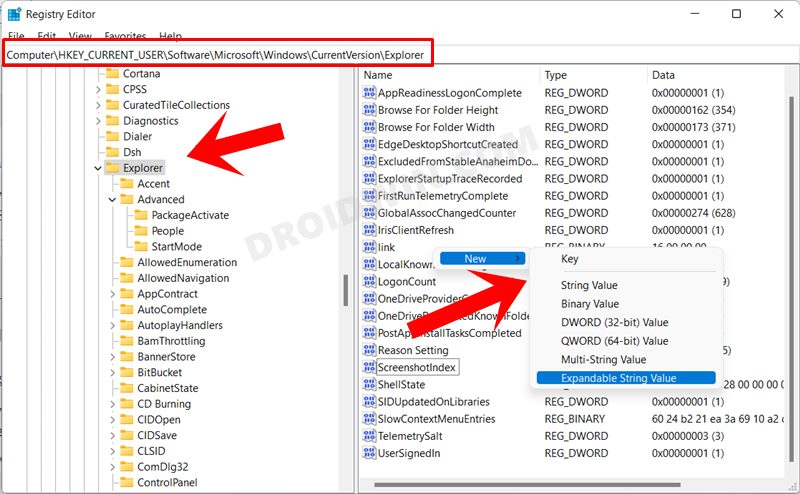
Computer\HKEY_CURRENT_USER\Software\Microsoft\Windows\CurrentVersion\Explorer
- Now refer to the right-hand side menu, you should see the ScreenshotIndex file.

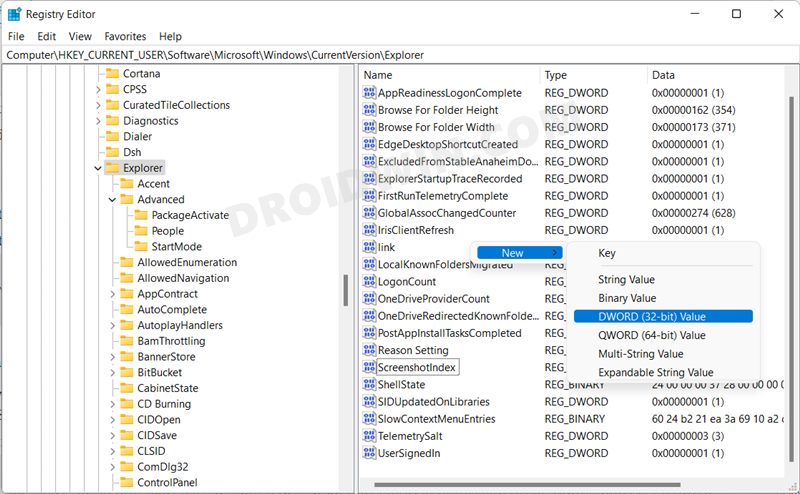
- If it’s not there, then right-click on empty location, select New > DWORD (32-bit) Value, and name it ScreenshotIndex.
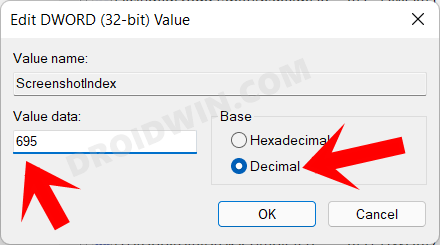
- Now open the ScreenshotIndex file, select Decimal as its Base, and type in 695 in the Value data field.
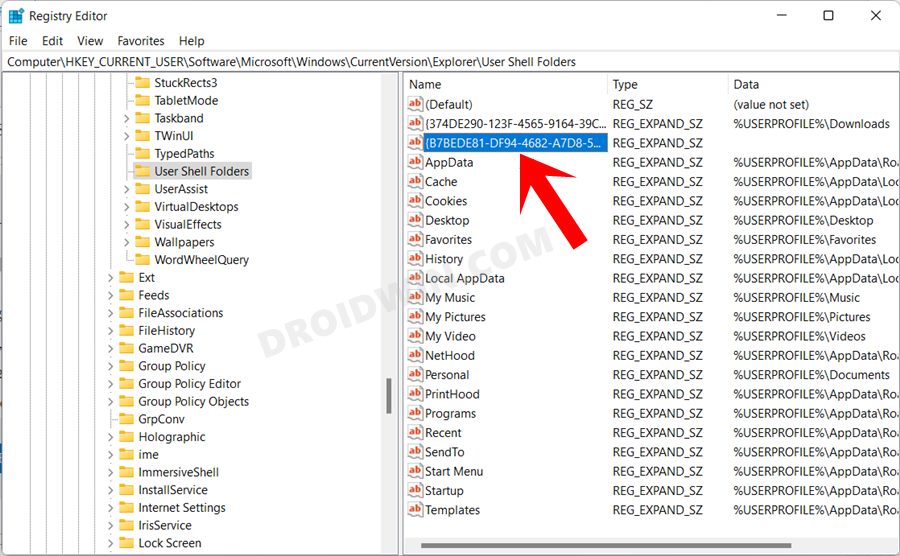
- Once that is done, copy-paste the below location in the Registry Editor’s address bar:
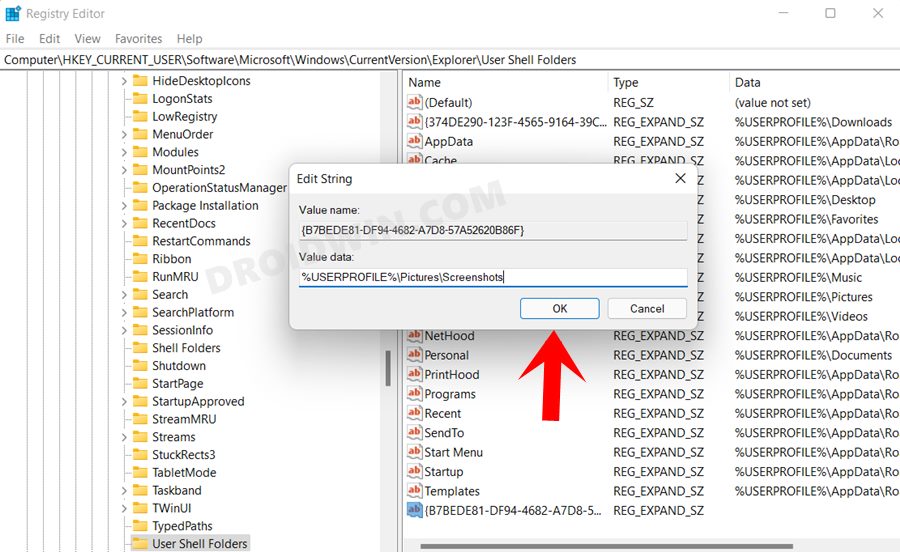
Computer\HKEY_CURRENT_USER\Software\Microsoft\Windows\CurrentVersion\Explorer\User Shell Folders
- Then on the right-hand side, you should see the {B7BEDE81-DF94-4682-A7D8-57A52620B86F} file, double click to open it.
- If it’s not there, then right-click on empty space, select New > Expandable String Value. Then name it {B7BEDE81-DF94-4682-A7D8-57A52620B86F}.
- Now double click to open this file and type in the below location in the Value Data field
%USERPROFILE%\Pictures\Screenshots
- Finally, click OK to save the changes. Then restart your PC once and the issue should be rectified.
So these were the steps to fix the screenshot folder missing issue in Windows 11. If you have any queries concerning the aforementioned steps, do let us know in the comments section below. We will get back to you with a solution at the earliest. Rounding off, here’s another query that I thought worth addressing:
How to Change the Default Screenshot Folder Location in Windows 11
By default, the screenshots are saved in C:\Users\UserName\Pictures\Screenshots. This folder is buried quite deep into the system and it takes ages to reach there. If you also echo this thought, then there’s an easy way out: change the default screenshot location. Here’s how it could be done:
- Create a new folder in the desired location where you wish to save the screenshots from now on.
- Then name that folder Screenshots.
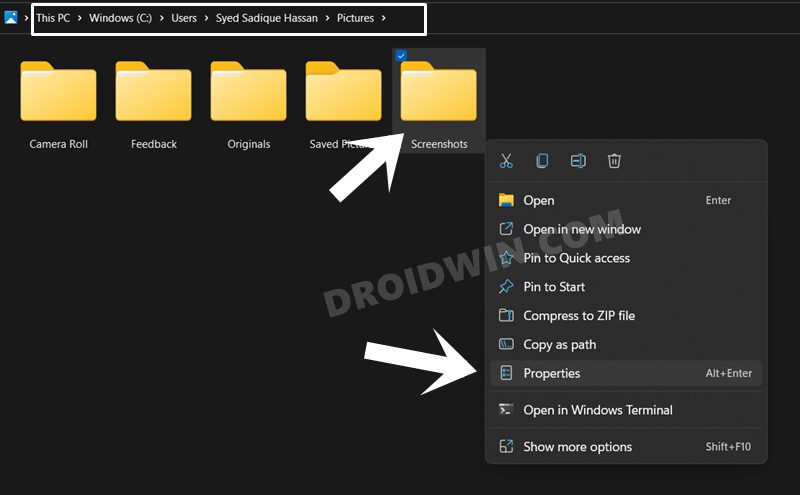
- After that, head over to the default screenshot folder, which is:
C:\Users\UserName\Pictures\Screenshots
- Right-click on that Screenshot folder and select Properties.
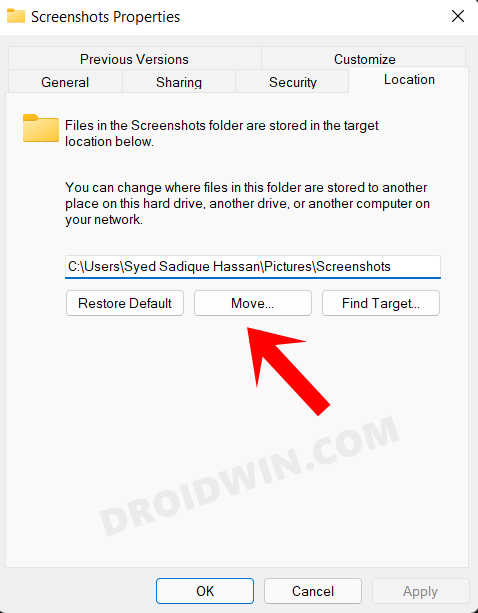
- Now go to the Location tab and click on the Move button.
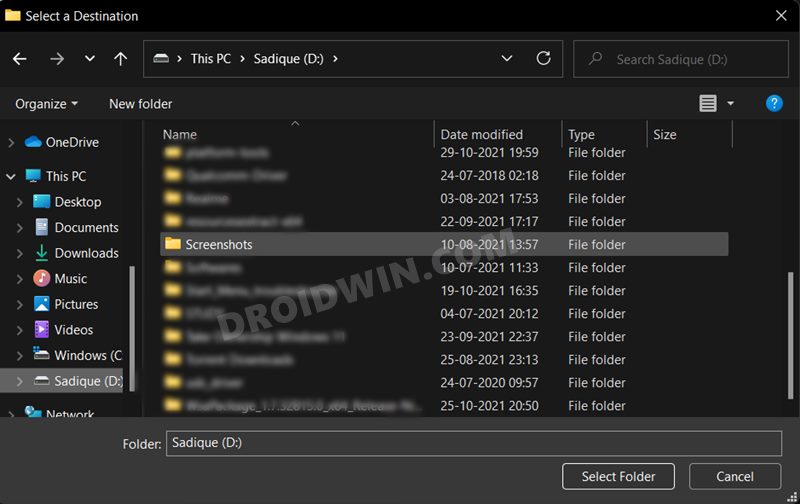
- Navigate to the newly created Screenshot folder, select it, and click on the Select folder button.
- Finally, click OK > YES in the confirmation dialog box.
From now on, all your screenshots taken via the Windows+Print Screen key will be saved over to this new folder. That’s it. So with this, we round off the guide on how you could fix the screenshot folder missing issue and change the default screenshot folder location in Windows 11. All your queries are welcomed in the comments section below.


Ekto
so ive followed all the steps and it hasnt fixed it, i still cant take screnshots, or i can but they dont go anywhere, now im nervous about all the weird things ive done, restarted my PC and a bunch of hollow files popped up and disapeared quickly, now im nervous about all the changes i just done since their is no screenshot folder and thus its litteraly impossible to take screenshots on my windows 11, geuss ill give up on the idea of ever taking a screenshot ever again