In this guide, we will show you the steps to root your Asus ROG Phone 3 via Magisk, without using TWRP Recovery. We have also attached the extracted stock boot.img file from paylaod.bin that you could directly use for rooting purposes. When it comes to entering in the custom development, the first prerequisite is to bypass the sole restriction in the form of the locked bootloader. Once you do so, you may install a custom recovery, flash a custom ROM or gain access to the system partition and attain administrative level privileges.
The latter two are possible by rooting your device via Magisk. This in turn could be carried out via two different methods. The first one involves the direct flashing of the Magisk App (yes, that’s what it is called now, beginning with version 22) via TWRP Recovery. However, not everyone prefers this approach, some out of choice, others out of compulsion. The latter set of users are those whose device doesn’t have an active custom recovery (which by the way is no longer the case with this device).
On the other hand, the former set of users wishes to maintain a safe distance with TWRP due to the complexities involved with its installation (A vs A/B partition, data encryption issues). So if you own Asus’ third iteration of the gaming series device and echo these thoughts as well, then this guide is here to help you out. Given here are the detailed instructions to root your Asus ROG Phone 3 via Magisk, without using TWRP Recovery.
Table of Contents
How to Root Asus ROG Phone 3 via Magisk without TWRP
We are listing the below instructions under separate sections for ease of understanding. Make sure to follow in the exact same sequence as mentioned. Droidwin and its members wouldn’t be held responsible in case of a thermonuclear war, your alarm doesn’t wake you up, or if anything happens to your device and data by performing the below steps.
Install Android SDK

First and foremost, you will have to install the Android SDK Platform Tools on your PC. This is the official ADB and Fastboot binary provided by Google and is the only recommended one. So download it and then extract it to any convenient location on your PC. Doing so will give you the platform-tools folder, which will be used throughout this guide.
Unlock Bootloader on Asus ROG Phone 3
To begin with, you will have to unlock the bootloader on your Asus ROG Phone 3 device. As opposed to the general Fastboot Command for bootloader unlocking, Asus takes a different approach. It releases a device-specific app through which you could carry out the unlocking process with just a single click. But do keep in mind that this process will wipe off all the data from your device. Likewise, it might also make the warranty null and void. So keep these points in mind, take a complete backup, and proceed with the below steps:
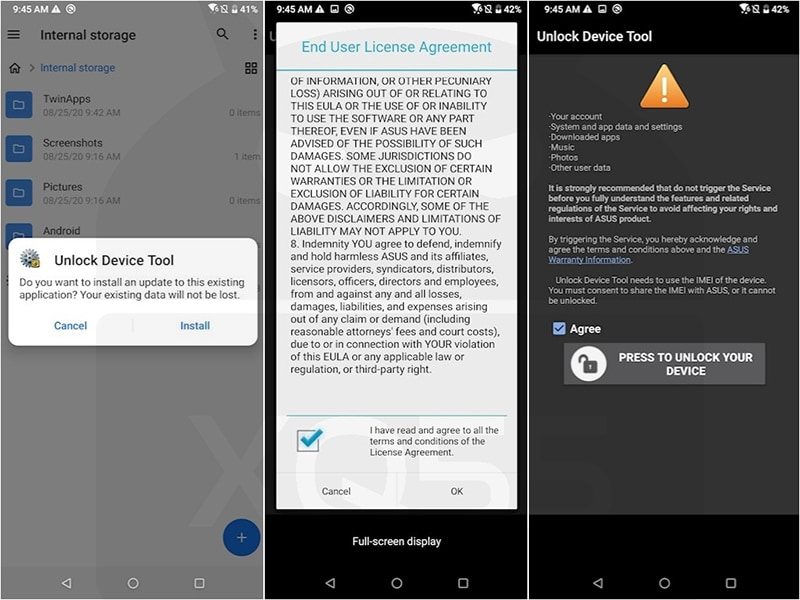
- Download the official Asus ROG Phone 3 Unlock Device App.
- Now install it onto your device and then launch it.
- Agree to the Terms and Conditions
- Finally, hit the Press to Unlock your device button.
That’s it. The bootloader is now unlocked on your Asus ROG Phone 3, you may now proceed with the steps to root it via Magisk without using TWRP Recovery.
The below two steps will now list out the instructions to download the stock firmware and then extract the stock boot.img from the payload.bin file. Currently, I am using Version WW-17.0823.2012.131, hence I have already performed both these steps.
So if you are also running the same firmware version, then you may directly download the extracted stock boot.img file from here and skip the next two steps. Once downloaded, directly move to over to the patching section “Patch Asus ROG Phone 3 Stock Boot.img via Magisk”.
Downoad Asus ROG Phone 3 WW-17.0823.2012.131: Stock Boot.img File
UPDATE 1: Added new stock boot.img at the end of this guide
Download Asus ROG Phone 3 Firmware
Next up, you will have to download the stock firmware for your Asus ROG Phone 3. We will then extract the boot.img file from it, patch it via Magisk, and flash it via Fastbot Commands. Just make sure that you download the same firmware version that is currently installed onto your device. You may download the same from Asus Official Firmware Collection Page. As for this guide, I am using Version WW-17.0823.2012.131, which is the latest one at the time of writing.
Extract Asus ROG Phone 3 Stock Boot.img from Firmware
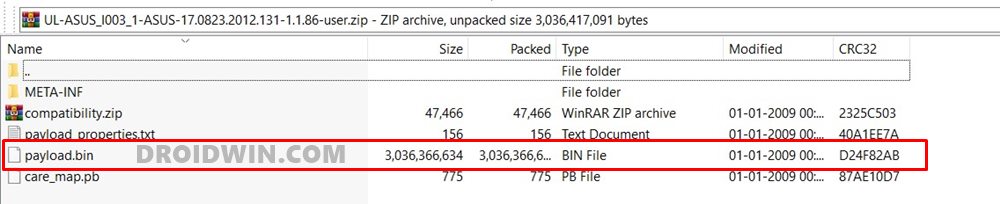
The complete package will be in a ZIP format, which you could easily extract via WinZIP or WinRAR. But this extraction isn’t going to give you any partition file (such as boot.img, recovery.img, system.img, etc). All these firmware files are placed inside the payload.bin file. To extract it, you will need to use Python and an open-source Decrypt tool.
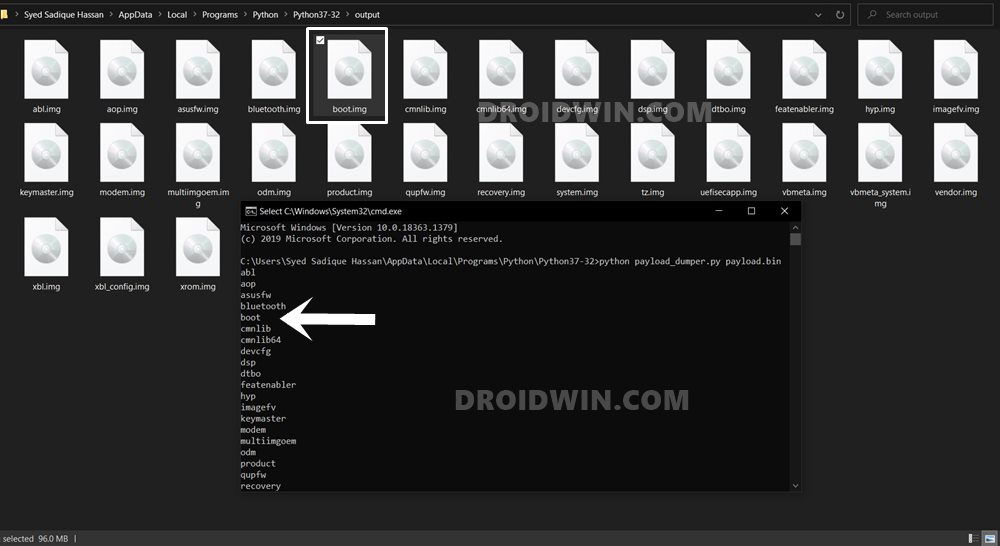
The steps are pretty straightforward and you may refer to this guide to carry out the extraction process: How to Extract payload.bin and get the stock boot image file. Once you have extracted the stock boot.img, it’s time to patch it via Magisk and flash it via Fastboot to root your Asus ROG Phone 3 without TWRP.
Patch Asus ROG Phone 3 Stock Boot.img via Magisk
- To begin with, transfer the extracted stock boot.img file to your device.
- Then install the Magisk app onto your device.
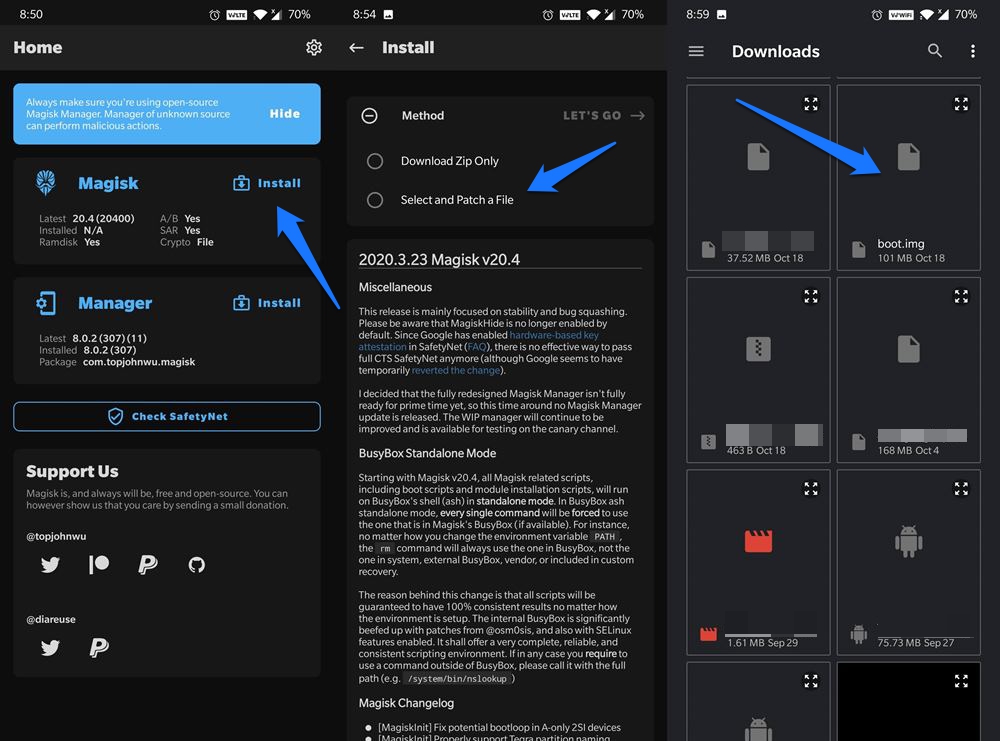
- Launch it and tap on Install next to Magisk.

- Choose Select and Patch a file option,
- Navigate to the extracted boot.img file and select it.
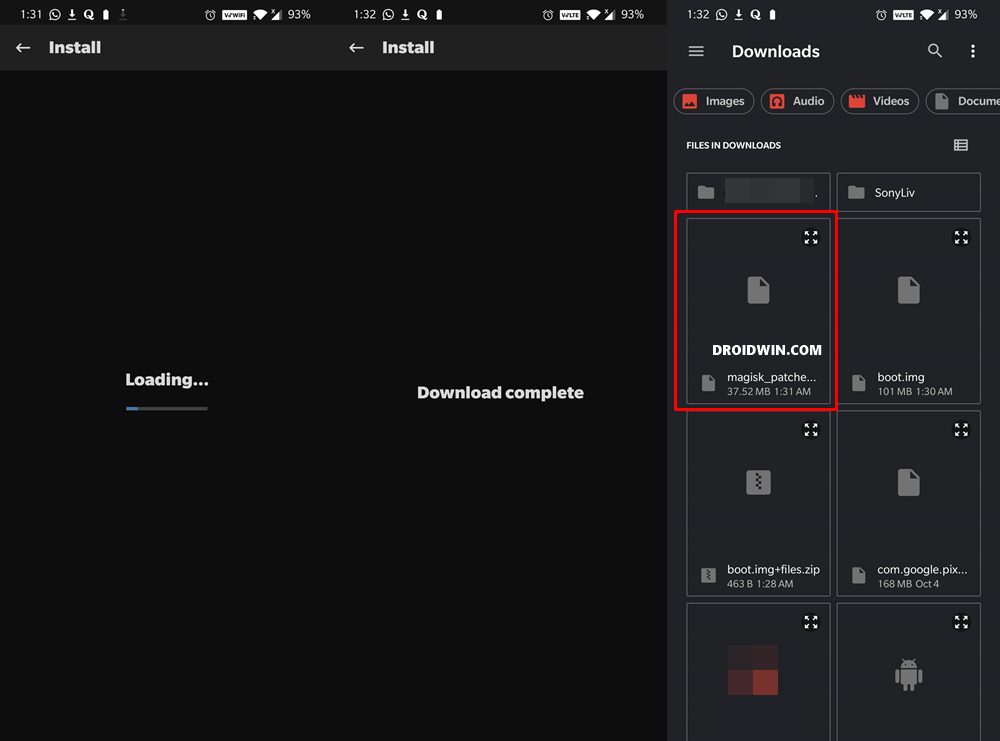
- Magisk will now begin patching this file.
- Once done, you shall get the magisk_patched.img file under the Downloads folder of your device.
Boot Asus ROG Phone 3 to Fastboot Mode
You will now have to boot your Asus ROG Phone 3 to Fastboot Mode so that you could flash the patched boot.img file and hence root your device without TWRP. To do so, power off your device. Then press and hold the Volume Up and Power keys together for a few seconds and your device shall be booted to Fastboot. Or you may also use the below universal Fastboot method:
- Enable USB Debugging on your device and connect it to the PC via USB cable.
- Then head over to the platform-tools folder, type in CMD in the address bar, and hit Enter. This will launch the Command Prompt.
- Type in the following command in the CMD window
adb reboot bootloader
- Your device will now be booted to the Fastboot mode. Let’s now move over to the final section of this guide to root your Asus ROG Phone 3 device via Magisk without TWRP Recovery.

Flash Magisk Patched Boot.img and Root Asus ROG Phone 3
- First off, transfer the patched boot.img file to the platform-tools folder on your PC. Also, make sure that the name of the file is magisk_patched.img, if not, then rename it right away.
- Now with your device booted to Fastboot and connected to PC, type in the below command in the CMD window to flash the patched file:
fastboot flash boot magisk_patched.img
- Once the file has been flashed, you may reboot the device to the OS via the following command:
fastboot reboot
That’s it. These were the steps to root Asus ROG Phone 3 via Magisk without TWRP. Now that you are rooted, you may refer to our guide to Install OTA Updates in Rooted Android Device. Likewise, you could now also Pass Magisk SafetyNet on Rooted Android.
Furthermore, if WideVine L1 has degraded to L3, then refer to this guide to Watch Netflix in HD on Rooted Devices (Get Widevine L1 Support ). Apart from that, if you have any other queries concerning the aforementioned steps, do let us know in the comments. We will get back to you with a solution at the earliest.
Download Asus ROG Phone 3 Stock Boot.img Files
As requested by a user, I am uploading the ROG Phone 3 version WW_17.0823.2102.143 stock boot.img file. You may request yours as well in the comments, and I will try my best to upload it at the earliest. Make sure to give out the complete firmware version/build number as well.
- Download: rog_phone_3_WW_17.0823.2102.143_boot.img


Mirza Sarim Abbas
Ineed .158 boot img can u plz email me on [email protected] . Thanks you
Sadique Hassan
Hi Mirza, could you please let me know the complete firmware version number (and the region as well).
Shawn
Can you please extract the boot.img for the rog phone 3 version 18.0410.2106.138. It’s the ww
Sadique Hassan
Sure, just give me a couple of days
Syed
Hi sir
Kindly provide me boot.img file for
android version 10,built num QKQ.200419.002.WW_Phone-17.0823.2102.143
Sadique Hassan
Uploaded the file WW_Phone-17.0823.2102.143 for ROG Phone 3. The link is in this guide itself.
prince
thanku soo much bro ek baar iske stock recovery ki file upload kr doge ya mail kr dijye mujhe please
Sadique Hassan
Hi Prince, could you let me know the current Build Number/Firmware Version installed onto your device?
prince
thanku soo much bro
Sadique Hassan
Thanks for the appreciation.
Abhishek Sharma
Dear sir
Kindly provide me boot.img file for WW_17.0823.2102.143
android version 10
Sadique Hassan
Added the file in this guide, you may download it now.