In this guide, we will show you the steps to install the EDL Drivers Qualcomm HS-USB QDLoader 9008 on your Windows 11 PC. While carrying out tweaks in the custom development does bring in a slew of goodies, on the flip side, there’s always a risk of things not working out along the expected lines. In such cases, your device could either end up in a softbrick/bootloop state or get hard-bricked.
If it is soft-bricked, then Fastboot Mode is still accessible and hence you could flash the firmware and bring your device back to life. On the other hand, if your device gets hard bricked, then you will have to take the help of Emergency Download Mode and flash the resultant firmware [if your device has a Qualcomm chipset]. For example, flashing the OFP firmware in OnePlus via MSM Download Tool.
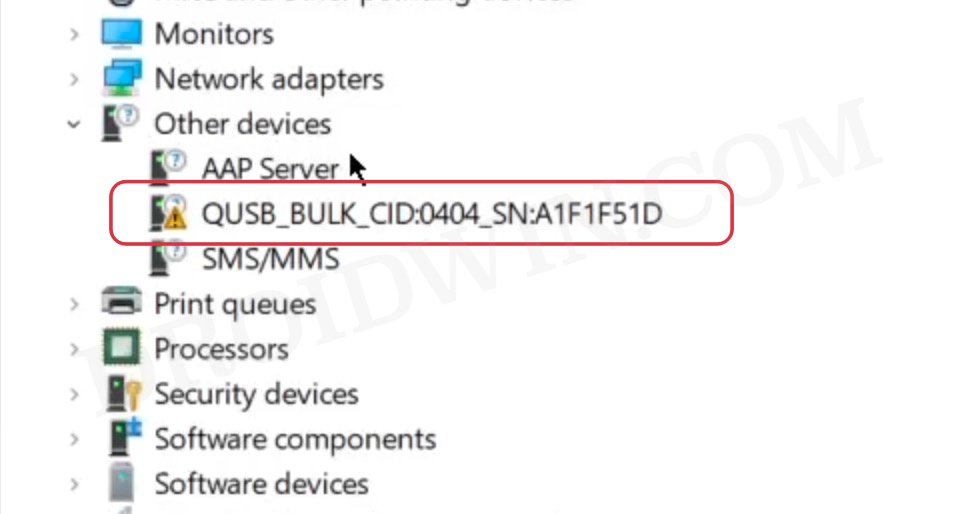
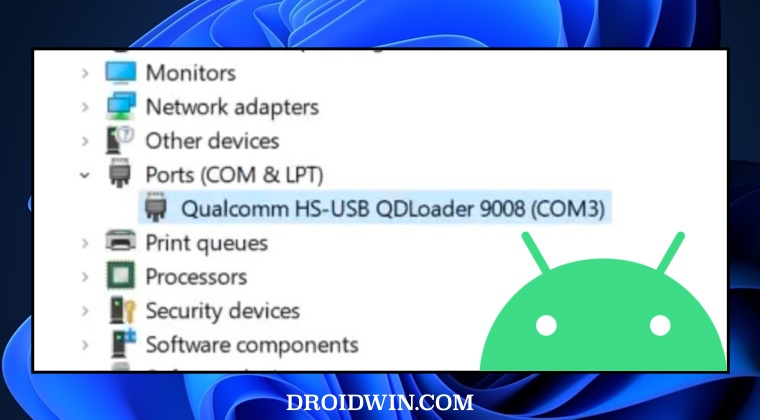
But before you could carry out any of these tasks, your first requirement is to install the EDL Drivers on your Windows 11 PC. If you don’t do so, then the Device Manager will identify the EDL device as QHUSB_BULK instead of Qualcomm HS-USB QDLoader 9008, and hence you wouldn’t be able to carry out the flashing process. So let’s proceed ahead with the driver installation so that your PC is able to identify your device correctly in the EDL Mode.
Table of Contents
How to Install EDL Drivers in Windows 11: Qualcomm HS-USB QDLoader 9008
The below instructions are listed under separate sections for ease of understanding. Make sure to follow the same sequence as mentioned. Droidwin and its members wouldn’t be held responsible in case of a thermonuclear war, your alarm doesn’t wake you up, or if anything happens to your device and data by performing the below steps.
STEP 1: Disable Driver Signature
First off, you will have to disable the Windows Driver Signature Enforcement otherwise Windows will conflict with the driver installation process. So proceed ahead with the below steps to do so right away:
- Press and hold the Shift key and while doing so, click Restart.
- Your device will now reboot to Windows Recovery Environment.
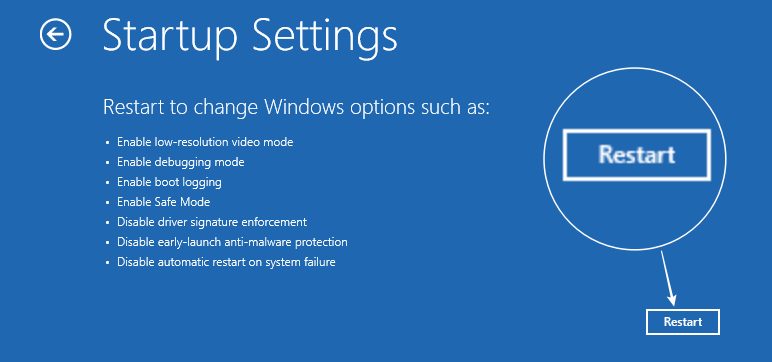
- Now go to Troubleshoot > Advanced Options > Startup Settings.

- Then click on the Restart button situated at the bottom right.
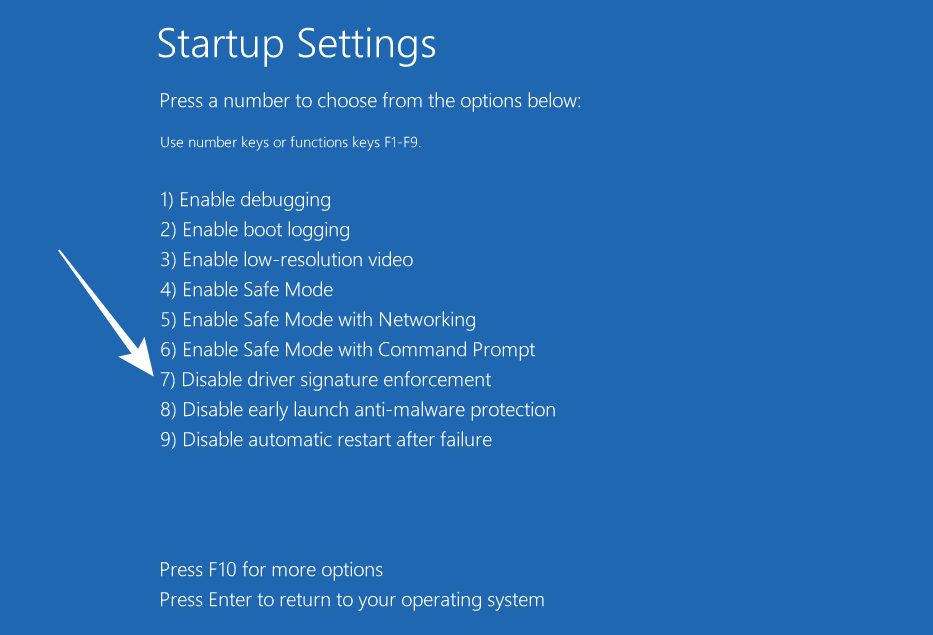
- Now press the 7 or F7 key to select Disable Driver Signature Enforcement.

- Your PC will now restart with the driver signature disabled.
STEP 2: Boot the Device to EDL Mode
Next up, you will have to boot your device to EDL Mode and connect it to your PC via a USB cable. If your device is hard-bricked, then it might already be in this mode [see below]. On the other hand, if your device is stuck in the Fastboot or you could access its OS, then check out our guide on How to Boot any (Bricked/Unbricked) Android Device to EDL Mode. Once done, let’s now verify whether the device is booted to EDL Mode or not.
- Right-click on the Windows icon and select Device Manager.
- Then expand the Ports section and your device will be listed there.
- It will be named something along the lines of QHUSB_BULK.

Do note that as of now your device will be listed as QHUSB_BULK [along with a yellow exclamation mark] instead of Qualcomm HS-USB QDLoader 9008. It’s just because the EDL drivers are not installed on your Windows 11 PC. But for the time being, QHUSB_BULK. is enough to suggest that your PC at least recognizes your device and you could now proceed ahead with the driver installation.
STEP 3: Install EDL Drivers in Windows 11
- Download the EDL Mode Drivers from here [grab the Automatic Drivers file].
- Then double-click on the QDLoader HS-USB Driver.exe file to launch the setup.
- You will be prompted to choose between WWAN-DHCP and ETHERNET-DHCP, select WWAN-DHCP and click Next.
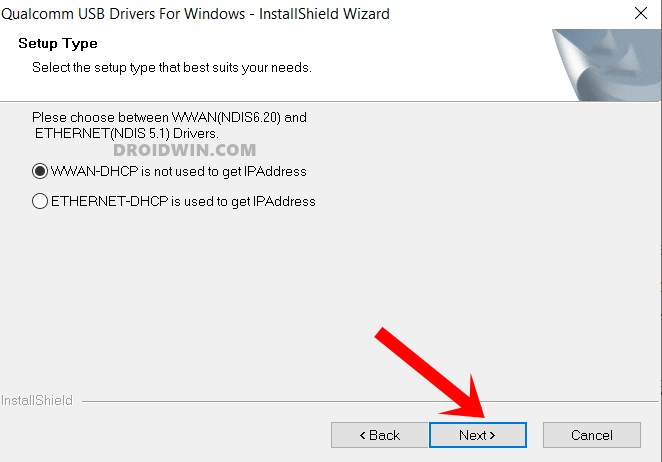
- Then click Next on the Welcome screen that appears. Accept the Terms and Conditions and click Next.
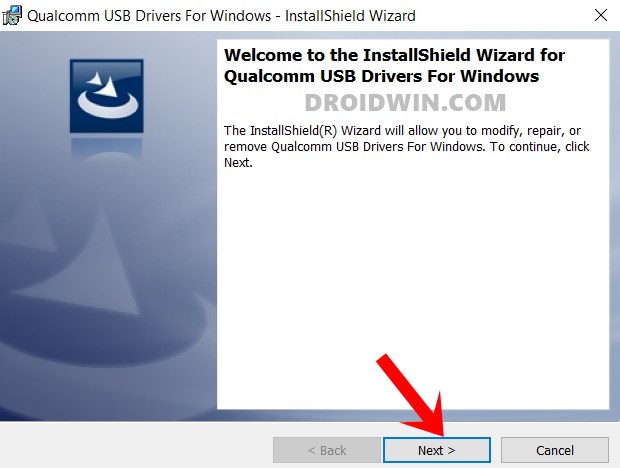
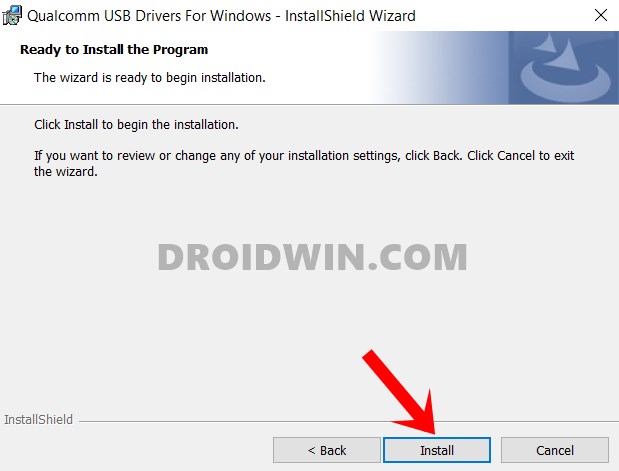
- Finally, hit the Install button and wait for the process to complete.
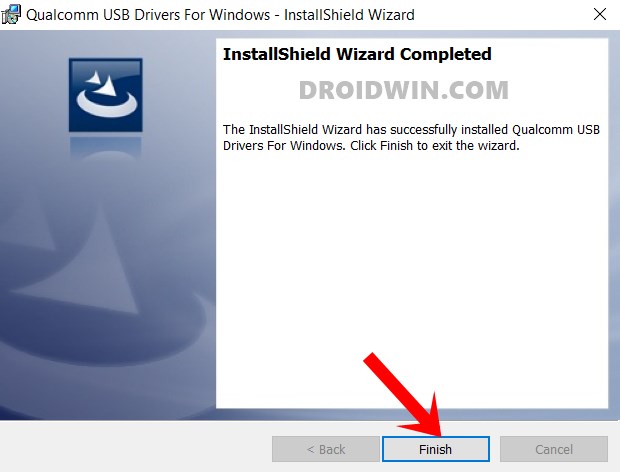
- Once done, hit the Finish button. You will now be prompted to restart your PC, do so as instructed.
STEP 4: Verify EDL Connection
Now that the driver installation is successful, let’s verify the EDL connection. It is recommended that you unplug and then replug your device to the PC via a USB cable. Likewise, re-verify that the device is still booted to EDL Mode.
- Right-click on the Windows icon and select Device Manager.
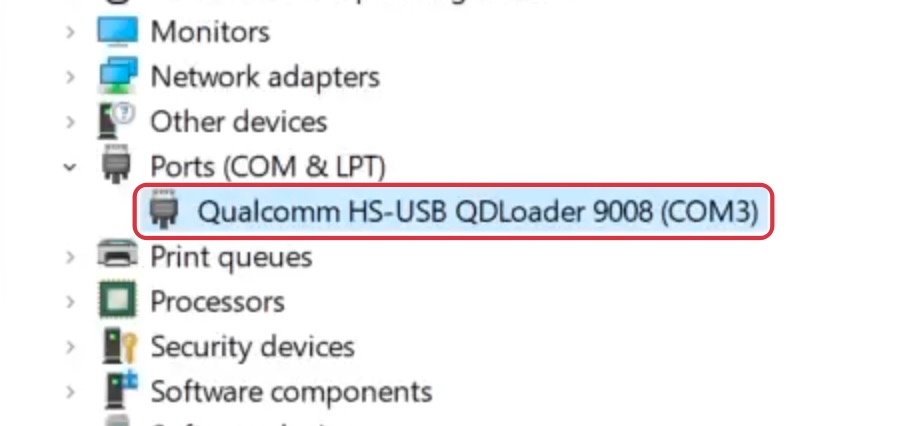
- Then expand the Ports section and your device will be listed there.
- This time your device will be listed as Qualcomm HS-USB QDLoader 9008.

STEP 5: Unbrick your Device!
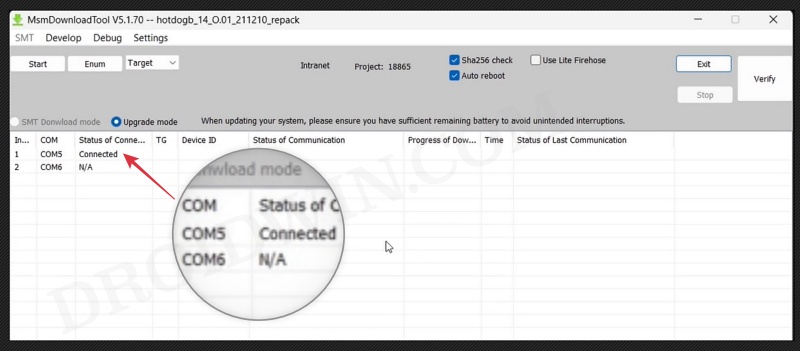
We have now checkmarked all the prerequisites and you could proceed ahead with the unbrick process. If you own a OnePlus device, then you could grab hold of the MSM Download Tool from here and refer to the flashing instructions given in that guide.
That’s it. These were the steps to install the EDL Drivers Qualcomm HS-USB QDLoader 9008 on your Windows 11 PC. If you have any queries concerning the aforementioned steps, do let us know in the comments. We will get back to you with a solution at the earliest.
