In this guide, we will show you a couple of methods to perform a System Restore when your Windows 11 PC cannot boot to the OS. The System Restore is one of the most useful functionalities that Redmond built into the OS. It takes a backup of crucial system and registry files and then saves them as Restore Point. In case your PC isn’t working along the expected lines, then you could easily roll it back ot the earlier working state using these Restore Points.
While you could easily restore these backups directly from the OS, however, there could be a few instances wherein you might not be able to access it. So what could be done in such cases? Well, you could still use the System Restore even if your Windows 11 PC cannot boot to the OS. And in this guide, we will show you a couple of nifty methods through which this could be achieved. So without further ado, let’s get started.
Table of Contents
How to System Restore when Windows 11 PC cannot boot to OS

We have listed two different methods that will help you. get this job done. Go through both of them once and then try out the one that is in sync with your requirements.
Using Windows Recovery Environment
- To begin with, power off your PC. Then, press the power button to turn it back on.
- As soon as the OS starts booting, power it back off. Do so at least a couple of times.
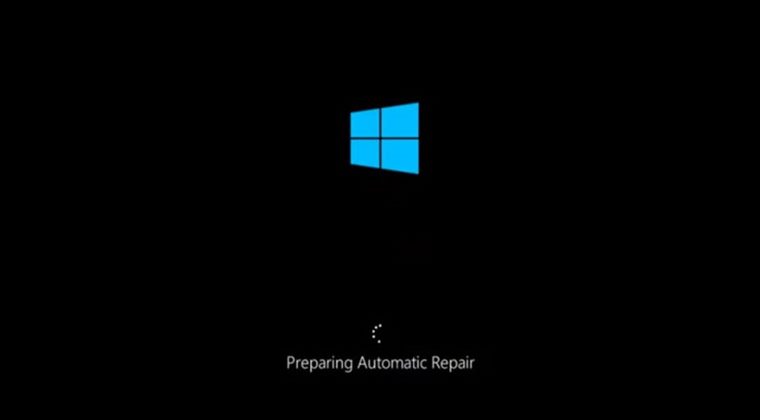
- On the third attempt, you should see the “Preparing Automatic Repair” message.

- You’ll be taken to Automatic Repair. Click on Advanced Options.
- Then click on Troubleshoot > Advanced Options > System Restore.

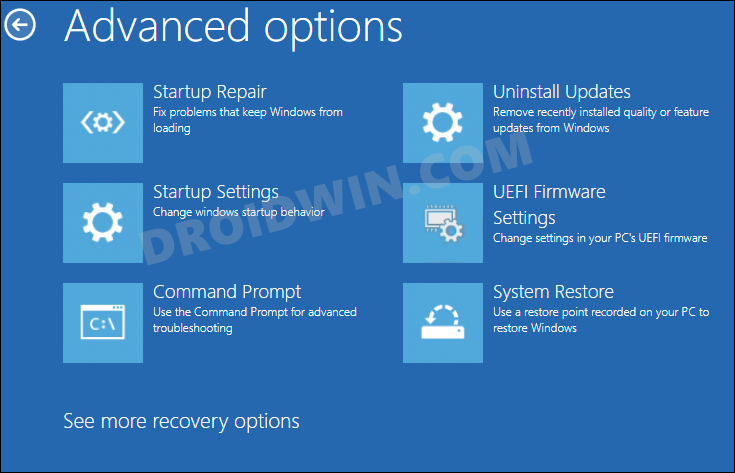
- You’ll now be taken to the System Restore window. Click on Next.
- Now choose the restore point of your choice and click Next > Finish.
- The restore process will now start and could take a while.
- If you get any error, then try using a different restore point [if available]
- Once done, you can now boot your PC to the OS without any issues.
Using Windows 11 Installation Media
- To begin with, create a Windows 11 bootable USB.

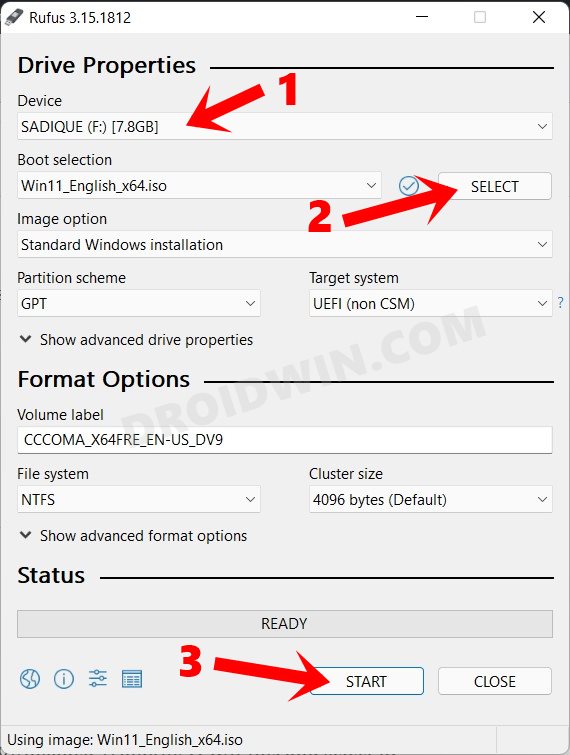
- Then connect the USB device (that has the bootable Windows 11 ISO file) to your PC.
- Now power off your PC. Now turn it back on and press the F8 key before Windows boots to the OS.
- You shall now be taken to the Advanced Boot Menu.
- Click on the ‘Use a Device’ option from the Choose an Option screen.

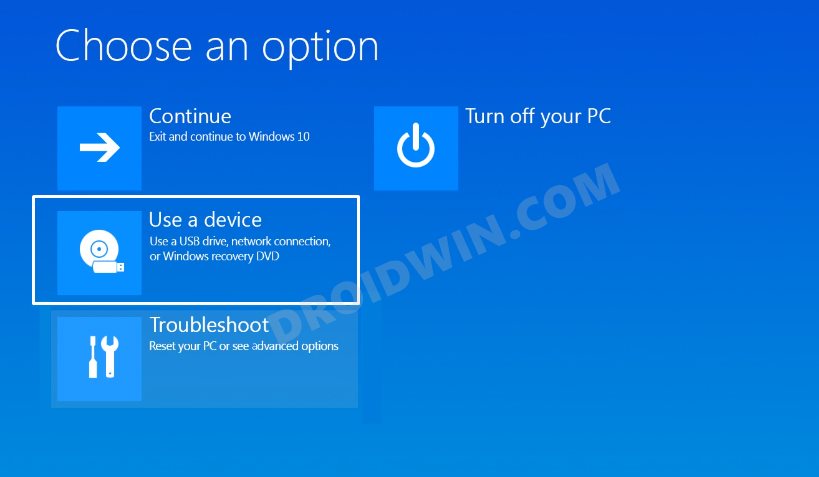
- After that, select your USB device from the list.
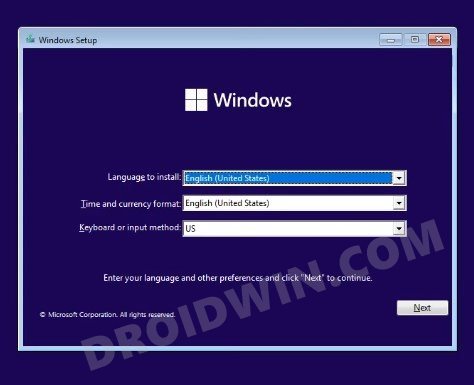
- It shall now launch the Windows 11 setup. Just proceed with the on-screen instructions to install it onto your PC.

System Restore Still Doesn’t Work, What’s Next?
If you are still unable to carry out a system restore, then your only course of action is to reset your PC, which, depending on the option you choose, might erase all the data. So if that’s well and good, then refer to the below steps:
- To begin with, power off your PC. Then, press the power button to turn it back on.
- As soon as the OS starts booting, power it back off. Do so at least a couple of times.
- On the third attempt, you should see the “Preparing Automatic Repair” message.


- You’ll be taken to Automatic Repair. Click on Advanced Options.
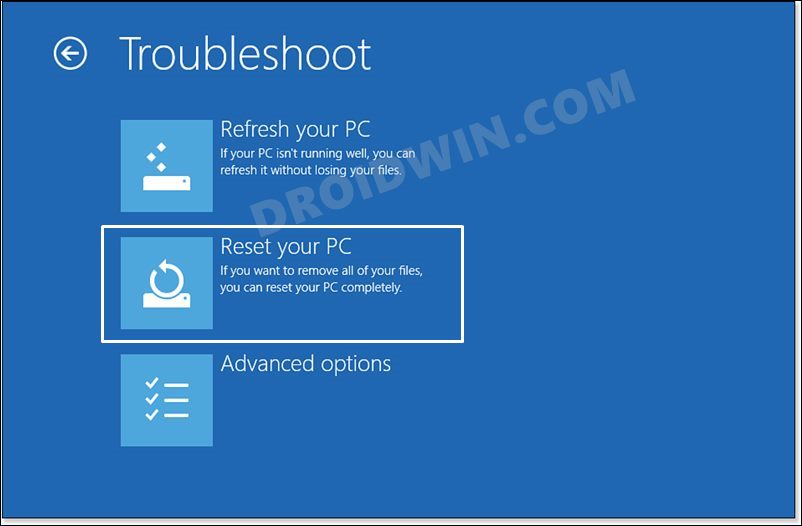
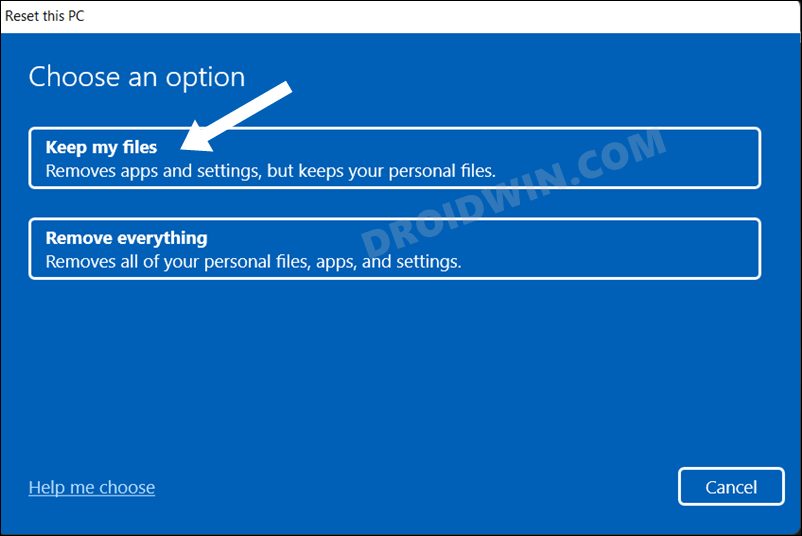
- Then click on Troubleshoot > Reset this PC > Keep my Files.

- You may now choose either of the two: ‘Cloud download’ or ‘Local reinstall’.
- Finally, click on Reset and wait for the process to complete.
- If you get any error, then this time select Remove Everything instead of Keep my Files and retry the process.

- The reset will now initiate and once done, you will be able to access the OS without any issues.
That’s it. These were the various methods to perform a System Restore when your Windows 11 PC cannot boot to the OS. If you have any queries concerning the aforementioned steps, do let us know in the comments. We will get back to you with a solution at the earliest.


