In this guide, we will show you two different methods to save the spotlight or lock screen images on your Windows 11 PC. The latest iteration of the OS build has packed in a plentitude of customization options. Right from the taskbar, to the Settings page or Start Menu, there’s a slew of UI revamps across the OS. Along the same lines, the lock screen has also been further enhanced. Every time you boot up your PC, you will be greeted with a new image.
Each of the images has been curated from different sources and belongs to a varied set of domains. If you like any of these images, then you will further be blessed with images from that category as well. And more often than not, the images come out to be quite impressive, to say the least. So if you wish to save it, your first course of action might be to copy it over to the clipboard via the Print Screen key and then save it using a photo editor app (even Paint will do).
While this is an option, but not the best one out there as the print screen will also capture the date/time and some other details (calendar events or description of the image/author). So what else could you do to get hold of these aesthetically pleasing images in their original quality, free from all distractions? Well, there exist two different methods through which you could save the spotlight or lock screen images on your Windows 11 PC. And in this guide, we will make you aware of both these methods. Follow along.
Manually Save Spotlight/Lock Screen Images in Windows 11
This manual approach is a tad longer as compared with the second (automated) method but the good thing is that it wouldn’t require you to deal with any third-party apps. All that is needed is the File Explorer and a CMD window. So with that in mind, let’s get started.
- To begin with, launch the File Explorer via the Windows+E shortcut keys.
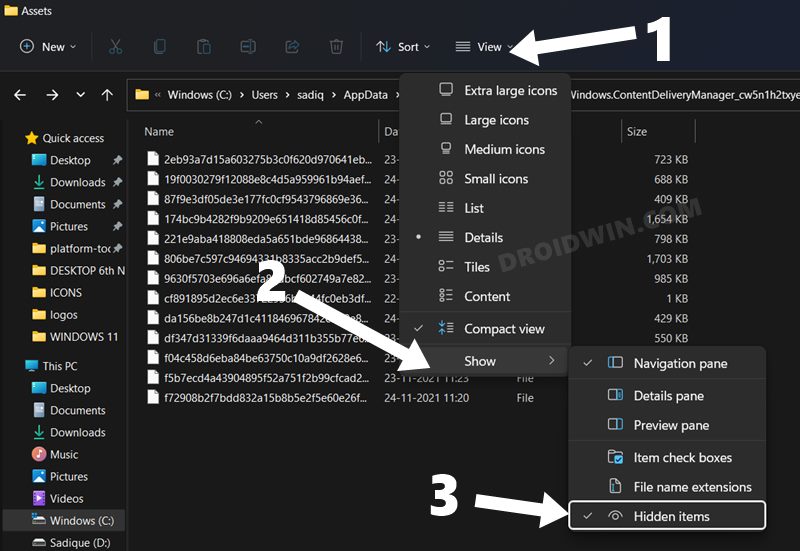
- Then click on the View option situated at the top menu bar, select Show, and enable Hidden Items.

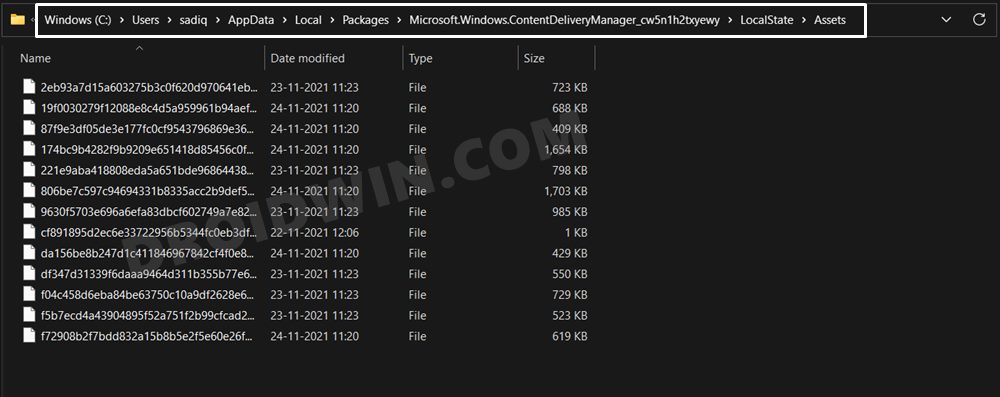
- Once that is done, copy-paste the below location in the address bar:
C:\Users\sadiq\AppData\Local\Packages\Microsoft.Windows.ContentDeliveryManager_cw5n1h2txyewy\LocalState\Assets
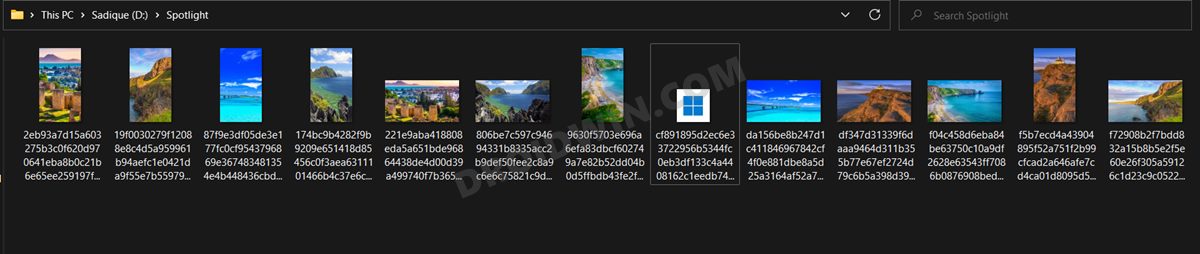
- Now all the files you see are the Spotlights images saved till now. But since they don’t have any extensions, your PC isn’t able to identify them. So let’s assign them the JPG/PNG extension to convert them to an image file.
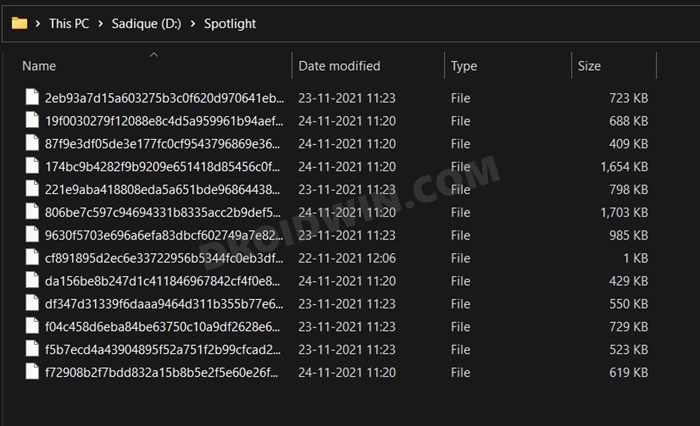
- Before that, it is recommended to copy all the images from that directory and save them at a new location. This is because it’s better to leave the original Spotlight folder in its default state and carry out the tweaks somewhere else.
- So copy and paste these images to some other location. Then use the Ctrl+A to select all the files. We will now be renaming all these files at once via CMD. If you are dealing with only one or two files, then you could also do so manually via the right-click menu.
- After that, head over to the Start Menu and launch Command Prompt as an administrator.
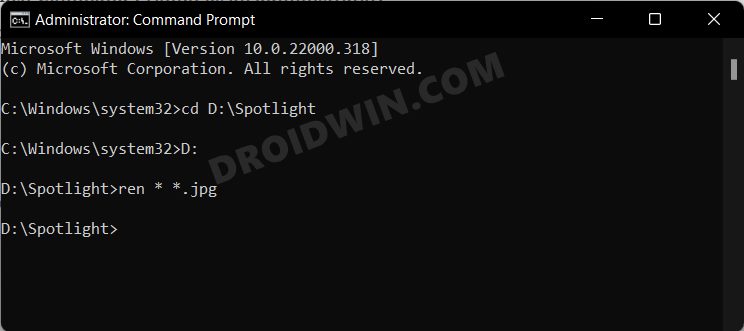
- Then change its directory to the folder where you have pasted those spotlight images using the below command.
cd location
- For example, in my case, the location is D:\Spotlight, so the command will be:
cd D:\Spotlight
- Now just execute the below command to perform a batch rename:
ren * *.jpg
That’s it. All the files will now be converted to the JPG image file and you could use it as per your liking. And with this, we conclude the manual method to save the spotlight or lock screen image on your Windows 11 PC. Let’s now check out the automated one.
Automatically Save Spotlight/Lock Screen Images in Windows 11
If the aforementioned steps were asking for quite a lot of effort, then you could automate this process by taking a helping hand from a third-party app. Here’s what you need to do:
- To begin with, download the Dynamic Theme app from the Microsoft Store.
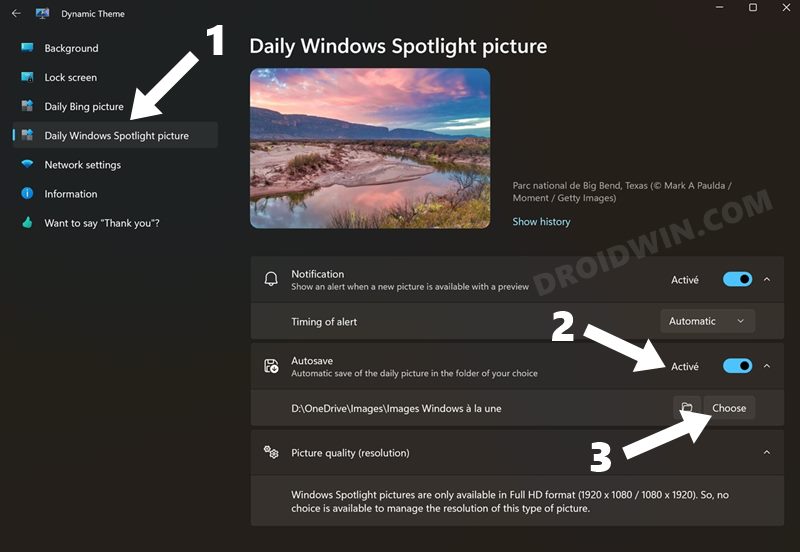
- Then launch it and go to the Daily Windows Spotlight Feature section from the left menu bar.
- After that, enable the toggle next to AutoSave.
- Then click on the Chose button and select the directory where you need to save these spotlight.
- That’s it. From now on, all the spotlight images will be automatically saved to that folder.
With this, we round off the guide on how you could save spotlight/lock screen images on your Windows 11. We have shared two different methods for the same. If you have any queries concerning the aforementioned steps, do let us know in the comments. We will get back to you with a solution at the earliest.


