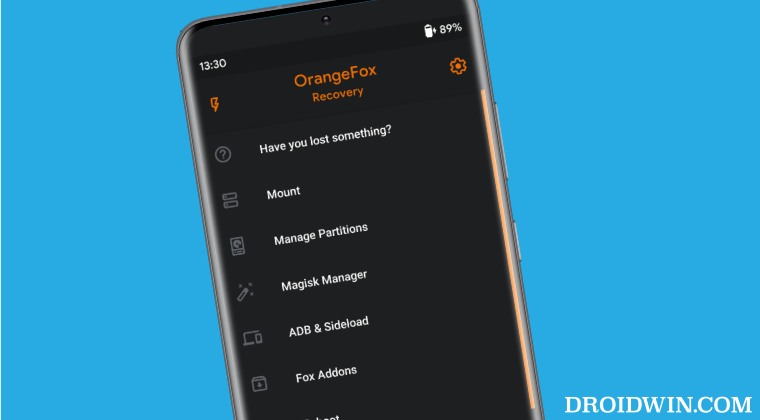
In this guide, we will show you the steps to install the OrangeFox Recovery on Redmi Note 12 4G. While there are quite a few OEMs out there that are active in custom development, however, it’s fair to say that Xiaomi is right there at the top of the pecking order. While many OEMs could brag about the likes of custom ROMs, kernels, rooting, mods, and tweaks, however, hardly anyone could compete when it comes to custom recovery.
As of now, Xiaomi seems to be among the very few players in the market that has active support for custom recoveries like TWRP, ORangeFox, and PitchBlack. As a result, tasks such as flashing ZIPs, taking backup of partitions via Nandroid Backup, mounting them, or deleting their data to make room for another ROM could easily be done in just a few clicks. So let’s take full advantage of the same and install the OrangeFox Recovery onto your Redmi Note 12 4G right away.
Table of Contents
How to Flash OrangeFox Recovery on Redmi Note 12 4G
Before starting, please take a backup of all the data on your device, just to be on the safer side. Droidwin and its members wouldn’t be held responsible in case of a thermonuclear war, your alarm doesn’t wake you up, or if anything happens to your device and data by performing the below steps.
STEP 1: Install Android SDK

First and foremost, you will have to install the Android SDK Platform Tools on your PC. This is the official ADB and Fastboot binary provided by Google and is the only recommended one. So download it and then extract it to any convenient location on your PC. Doing so will give you the platform-tools folder, which will be used throughout this guide.
STEP 2: Enable USB Debugging and OEM Unlocking
Next up, you will also have to enable USB Debugging and OEM Unlocking on your device. The former will make your device recognizable by the PC in ADB mode. This will then allow you to boot your device to Fastboot Mode. On the other hand, OEM Unlocking is required to carry out the bootloader unlocking.
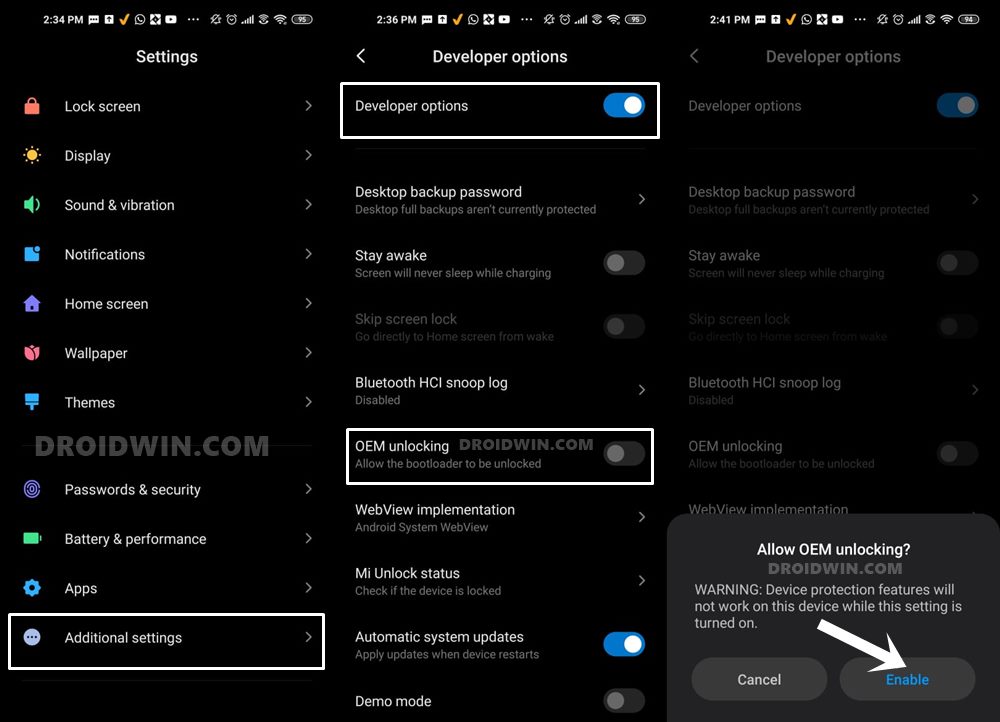
So head over to Settings > About Phone > Tap on MIUI Number 7 times > Go back to Settings > System > Advanced > Developer Options > Enable USB Debugging and OEM Unlocking.
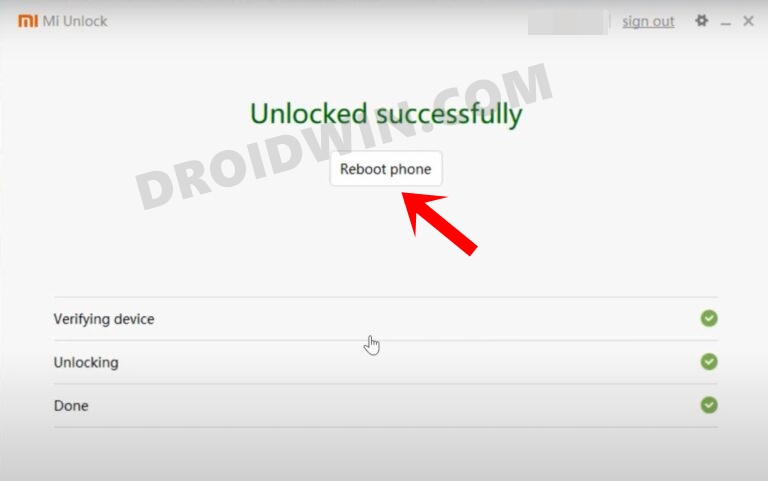
STEP 3: Unlock Bootloader on Redmi Note 12 4G
Next up, you will also have to unlock the device’s bootloader. Do keep in mind that doing so will wipe off all the data from your device and could nullify its warranty as well. So if that’s all well and good, then refer to our guide on How to Unlock Bootloader on any Xiaomi/Poco/Redmi/Mi Device.
STEP 4: Download OrangeFox Recovery for Redmi Note 12 4G
- You may now grab hold of the OrangeFox for your device from the below link.
DOWNLOAD LINK
- Once downloaded, extract it to any convenient location on your PC.
- Now transfer the extracted recovery.img to the platform-tools folder on your PC.
- On the other hand, transfer the recovery.zip to your device.
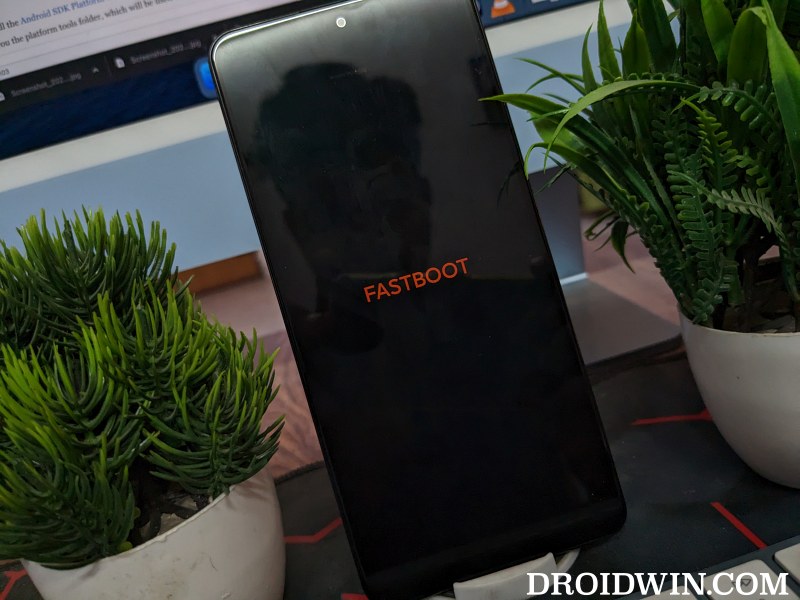
STEP 5: Boot Redmi Note 12 4G to Fastboot Mode
- Now connect your device to the PC via a USB cable. Make sure USB Debugging is enabled.
- Then head over to the platform-tools folder, type in CMD in the address bar, and hit Enter. This will launch the Command Prompt.

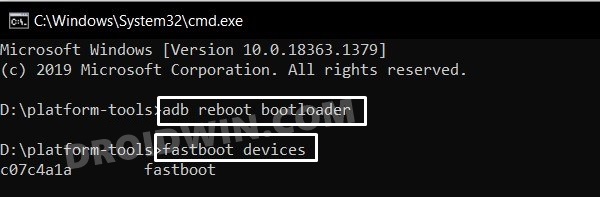
- Type in the following command in the CMD window to boot your device to Fastboot Mode
adb reboot bootloader
- To verify the Fastboot connection, type in the below command and you should get back the device ID.
fastboot devices
- If you are not getting any serial ID, then make sure to install Fastboot Drivers on your PC.

STEP 6: Flash OrangeFox Recovery on Redmi Note 12 4G
- First off, type in the below command to flash OrangeFox Recovery
fastboot flash recovery orangefox.img
- Then, type in the below command to boot your device to OrangeFox Recovery
fastboot reboot recovery
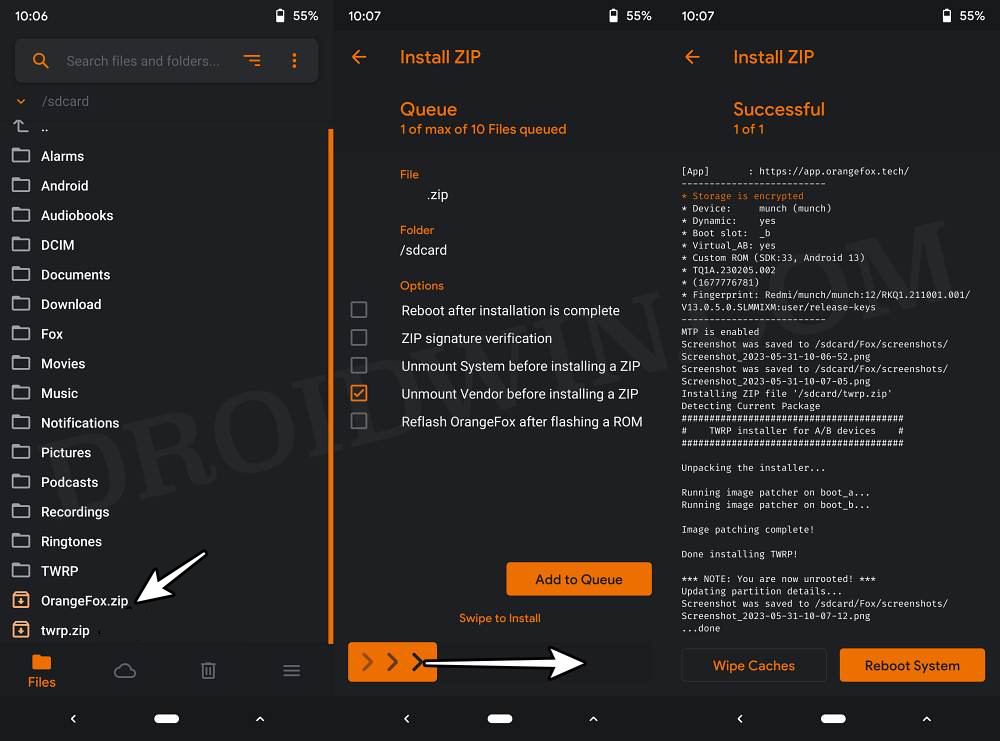
- Now, go to Install, select the OrangeFox ZIP, and perform a right swipe to flash it.
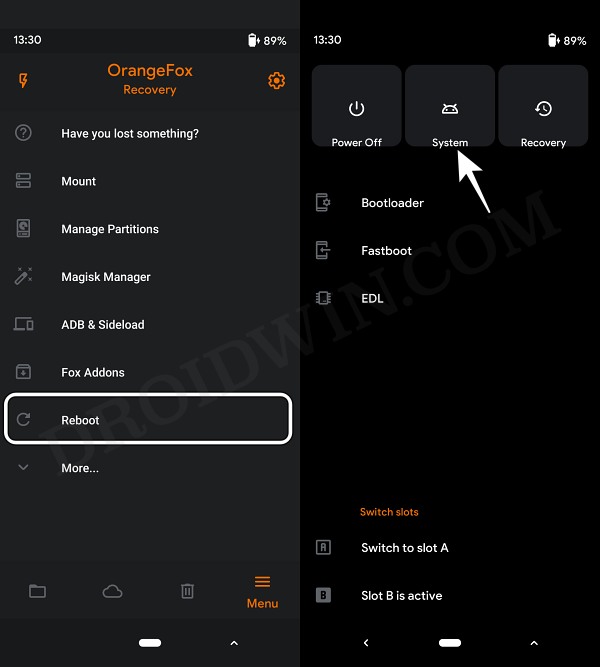
- Once done, go to Reboot and select System to boot your device to the OS.
These were the steps to install the OrangeFox Recovery on your Redmi Note 12 4G. If you have any queries concerning the aforementioned steps, do let us know in the comments. We will get back to you with a solution at the earliest.


