In this guide, we will show you two different methods to export the Group Policy settings from one Windows 11 PC and then import it to another. These groups of settings created using the Microsoft Management Console controls the working environment of the user and the computer accounts. It also tends to provide centralized management and configuration of operating systems, applications, and users’ settings.
Most of these settings are configured and then implemented by the network administrators, and it goes without saying that it is quite an effort-taking task. So if you have a group of PCs on which these policies needs to be implemented, then carrying out this task manually will take ages. To cut down on this time, there exist two nifty methods to export the Group Policy Settings from one Windows 11 PC and then import it to another. So without any further ado, let’s check them out.
Table of Contents
How to Export and Import Group Policy Settings in Windows

If you are carrying out this tweak on your Windows 11 home edition PC, then you will first have to enable the Local Group Policy on your PC. Once that is done, you may then refer to the below two methods and try out the one that is in sync with your requirement.
Method 1: Via File Explorer
- To begin with, bring up the File Explorer via Windows+I shortcut keys.
- Then copy-paste the below location in its address bar and hit Enter:
%systemroot%\System32\GroupPolicy

- Use Ctrl+A to copy all the files and then send them to the USB device.
- Then head over to the destination PC and plug in the USB device.
- Now go to the following location and paste the files there from the USB
%systemroot%\System32\GroupPolicy
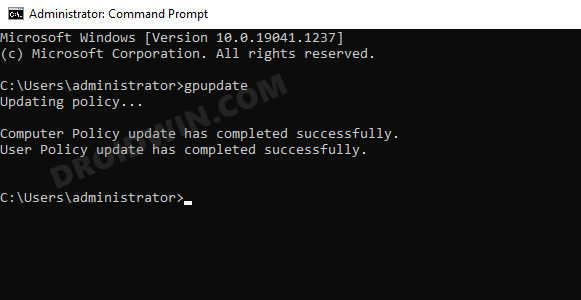
- Once done, head over to the Start menu and launch CMD as an administrator.
- Finally, type in the below command to implement those policies right away:
gpupdate /force

Method 2: Via Microsoft Management Console
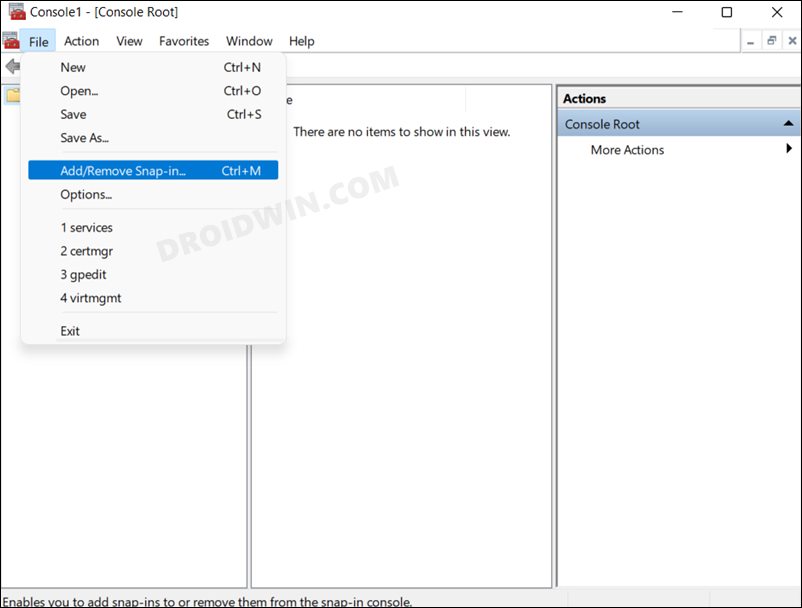
- Bring up the Run dialog box via Windows+R shortcut keys.
- Then type in the below keyword to open the Microsoft Management Console
mmc
- After that, go to File and click on Add/Remove snap-in.
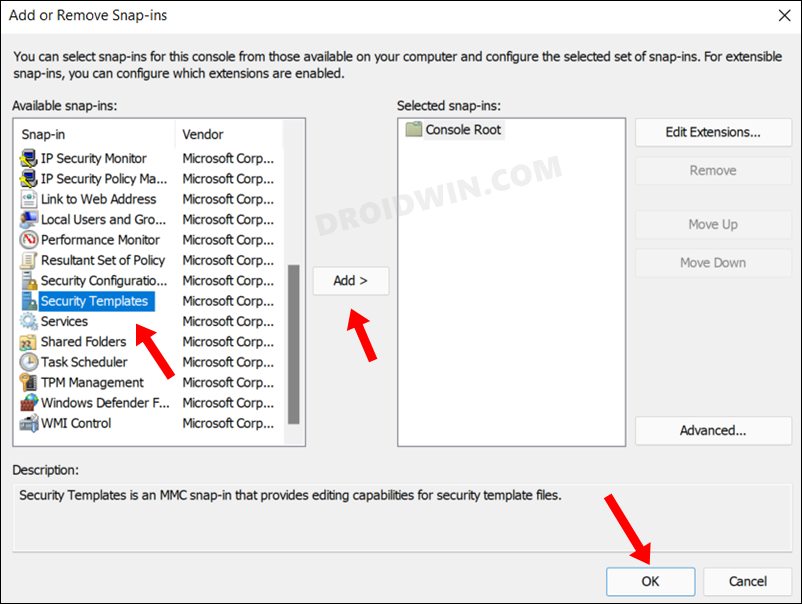
- Then select Security Templates and click the Add button followed by OK.
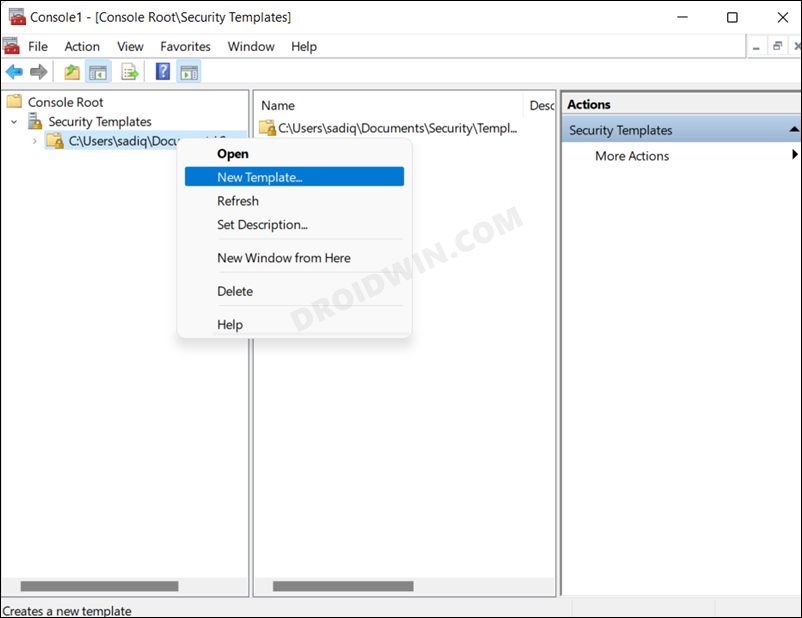
- Now expand the Security Templates from the left-hand side:
- Then right-click on the file present within it and select New Template.
- Give it a name. Then expand it from the left-hand side and configure it as per the requirement.
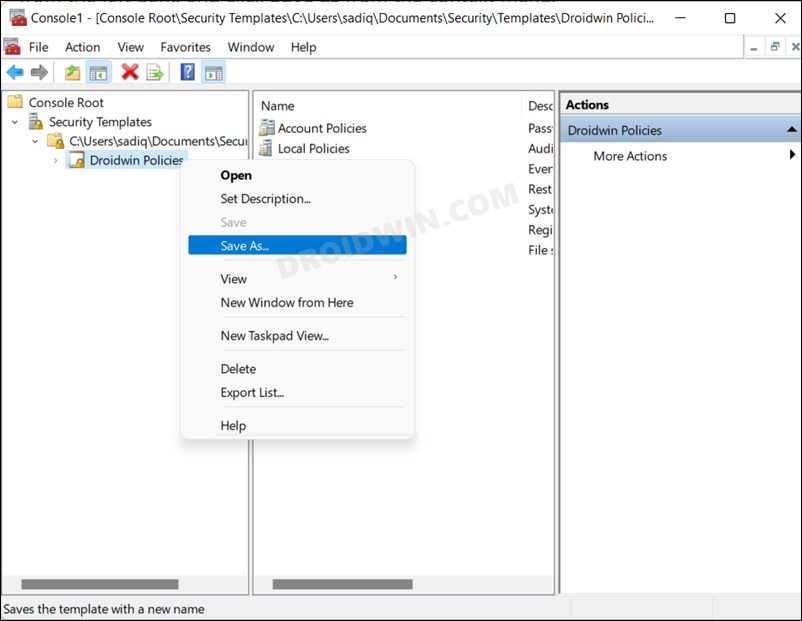
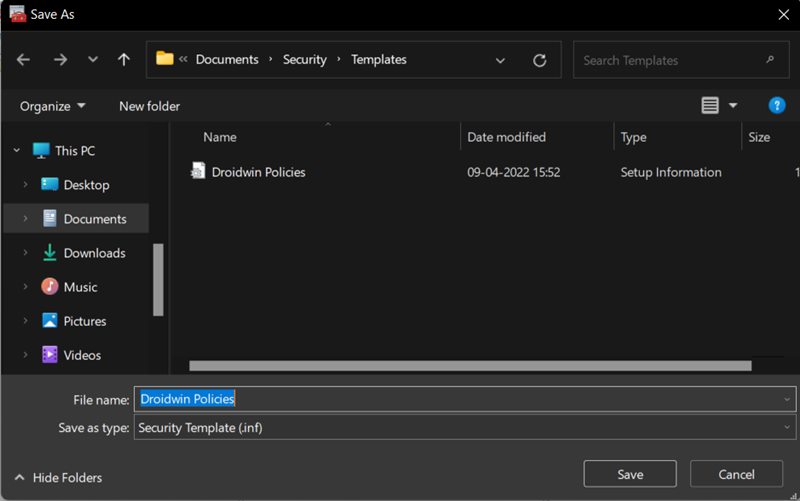
- Once done, right-click on that template and select Save as.
- Then select the location where you need to save it. The policy will then be saved in an INF file.
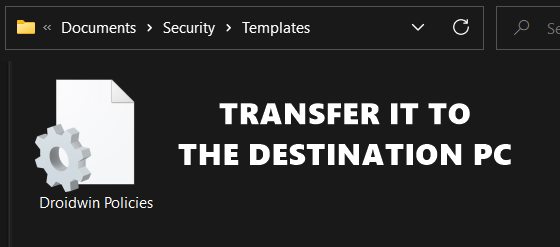
- Transfer this INF file to the destination PC.
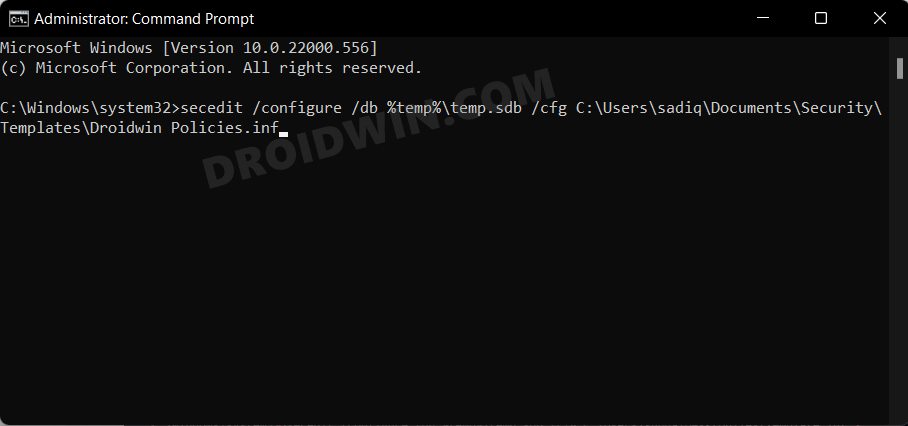
- Then launch CMD as an admin there and execute the below command (replace Path-To-INF-File accordingly):
secedit /configure /db %temp%\temp.sdb /cfg Path-To-INF-File
- Finally, restart your PC and the policies will be implemented.
So with this, we round off the guide on how you could export the Group Policy settings from one Windows 11 PC and then import it to another. If you have any queries concerning the aforementioned steps, do let us know in the comments. We will get back to you with a solution at the earliest.


