In this guide, we will show you the step to enable Screen Recording in the Snipping Tool on your Windows 11 PC. When it comes to taking screenshots, then the built-in app in the OS is more than enough to checkmark most of our prerequisites. However, a native screen recording is something that users had requested for ages, which the Redmond giant has finally paid heed to.
At the time of writing, Microsoft is testing a new version of the Snipping Tool version 11.2211.35.0 which comes with the Screen Recording functionality. However, that update is currently aimed at the Insider preview users who are on the Developer Preview. However, we managed to find a nifty workaround through which you could enable this feature even in the stable Windows version. So without further ado, let’s check out how this could be carried out.
How to Enable Screen Recording in Snipping Tool

As of now, Screen recording is at an early stage so you might come across a few performance issues. Likewise, in this stage, there is no option of switching the audio source, muting the microphone, or changing the camera view. So with that in mind, let’s get started with the steps to enable Screen Recording in the Snipping Tool on Windows 11 PC.
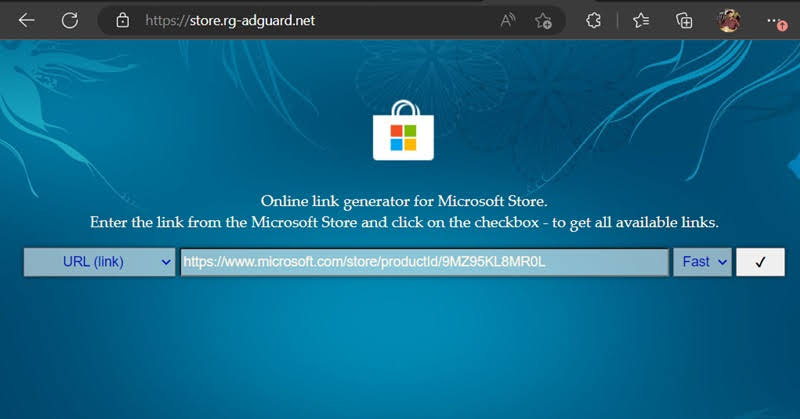
- To begin with, head over to the Online Microsoft Store Link Generator.
- Then type in the below value, select Fast from the drop-down menu, and hit the checkmark icon
https://www.microsoft.com/store/productId/9MZ95KL8MR0L

- Now download the package named
Microsoft.ScreenSketch_2022.2211.35.0_neutral_~_8wekyb3d8bbwe.msixbundle
- Then launch the setup and hit Update. Snipping Tool will now be updated to the latest version.
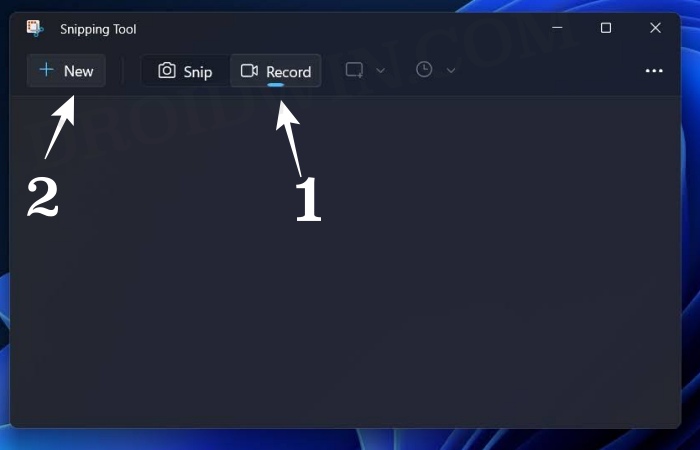
- Launch Snipping Tool from the Start Menu and you should now see the Screen Recording option.
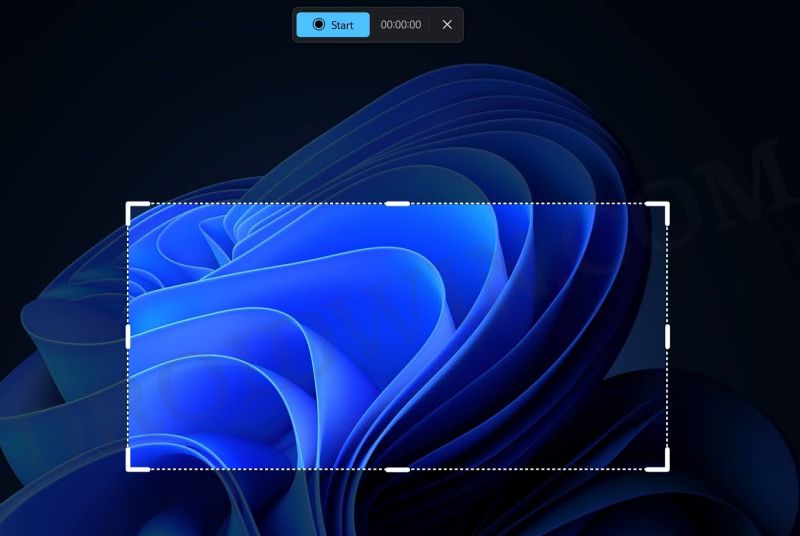
- Select Record and then click on New. Now drag the cursor over to the region that you record and then release it.
- The recording will start after three seconds countdown. Once you are done with it, just hit the red stop icon to stop the recording.
- Finally, hit the Save icon situated at the top right to save this recording at the desired location.


How to Remove Screen Recording from Snipping Tool
If the screen recording feature in its current state doesn’t meet your requirement, then you could easily remove it and go back to the earlier stable version. Here’s how:
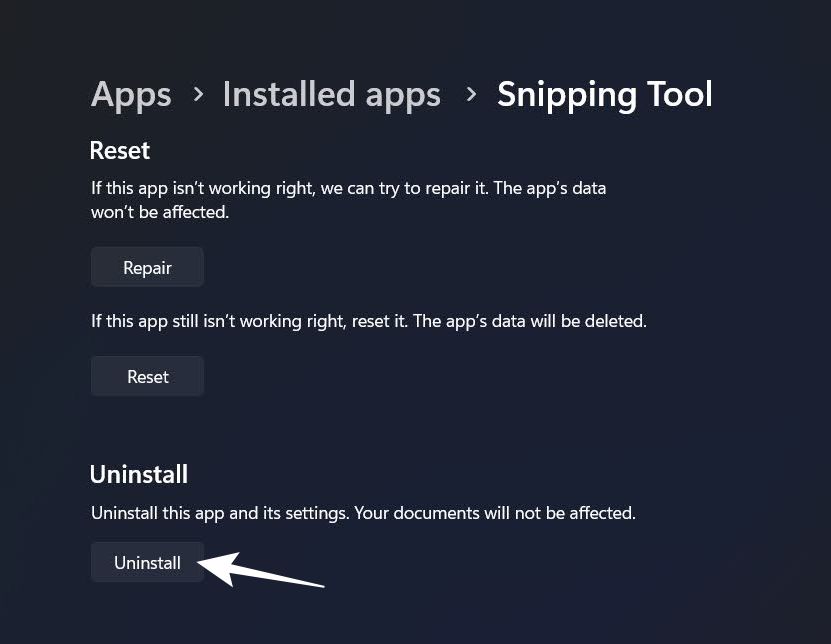
- Launch Settings via Windows+I and go to Apps > Installed Apps
- Then select Sniping Tool and hit Uninstall > Uninstall in the prompt.
- Once done, launch Microsoft Store, search Sniping Tool, and hit get.
- The stable version of the Sniping Tool will now be installed on your PC.
That’s it. These were the steps to enable Screen Recording in the Snipping Tool on your Windows 11 PC. Likewise, we have also shared the steps to revert the chance and remove this feature, if it turns out to be buggy. If you have any other queries concerning the aforementioned steps, do let us know in the comments. We will get back to you with a solution at the earliest.


