In this guide, we will show you the steps to enable the Gboard’s Scan Text functionality. When it comes to keyboard apps, then the offering from the Silicon Valley giant is without a shadow of a doubt the best in this domain. While it already beholds a slew of intriguing features in its arsenal, Google just keeps on blessing it with even more! The latest one to make its entry is Optical Character Recognition which is surely going to be quite a useful addition to this app.
Table of Contents
Benefits of Gboard’s Scan Text Feature
Up until now, we used to rely on the Google Lens app to get this job done. While it’s still quite a handy app for scanning text from images, however, the entire process was quite cumbersome- launching Lens > scanning and copying the text from the image > going over to the desired text field > pasting the text.
But now this process has been drastically cut down, all thanks to the feature being incorporated into the keyboard app itself. You could directly scan the text from the image from the keyboard itself and paste it into the desired field.
Caveats of Gboard’s Scan Text Feature
With that said, it is in its infancy stage and has a couple of shortcomings when compared to the Lens. For instance, as compared to Lens, you cannot directly search the web for the selected text. Moreover, it is way behind the mark when it comes to identifying handwritten notes, something in which Notes has excelled quite brilliantly.
Not to mention the fact that the feature could only scan English [well, at least for now]. With that said, these caveats will surely be ironed out in the subsequent releases, but if you wish to give it a try right away, then here’s how you could enable and use the Gboard’s Scan Text functionality.
How to Use Gboard’s Scan Text Feature

- Download and install the latest beta version of the Gboard app.
- Then go to the text field and bring up Gboard.
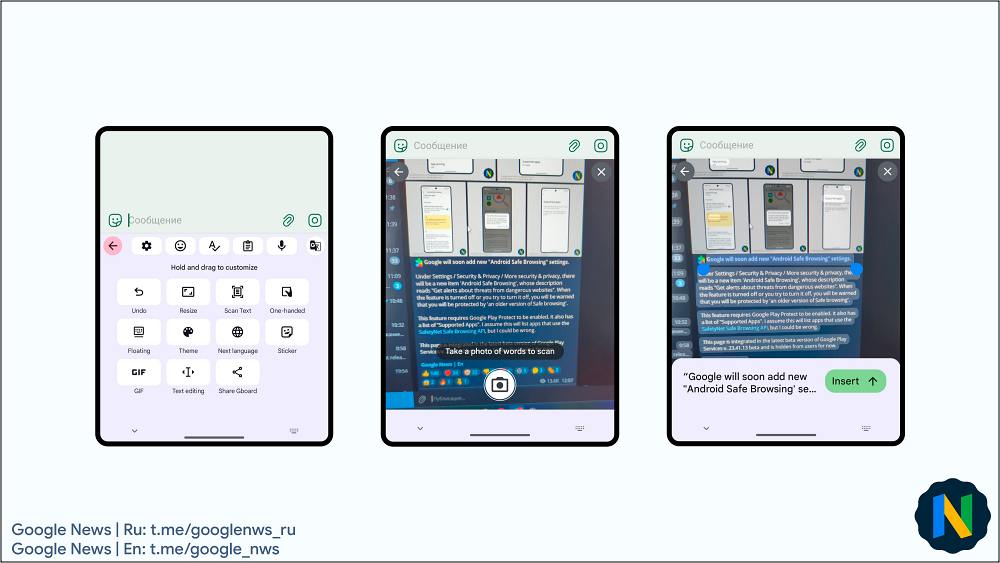
- Now tap on the menu icon and select Scan Text.
- You’ll get the camera permission prompt, select the required option.

Credits: Nail_Sadykov on X - It will replace the keyboard with the camera viewfinder.
- Now take a photo of the words to scan.
- Then select the desired text from the image.
- Finally, hit Insert and the text will be inserted in the text field.
That’s it. These were the steps to enable the Gboard’s Scan Text functionality. If you have any queries concerning the aforementioned steps, do let us know in the comments. We will get back to you with a solution at the earliest.


