In this guide, we will show you the steps to disable Copilot in Windows 11. There’s a thin line drawn between the use case scenario of artificial intelligence being useful and intrusiveness in nature. When it begins to lean towards the latter half, then things get quite challenging and the faster you bid adieu to it the better will it be.
However, from the developer’s perspective, they would want you to get completely immersed in this AI experience. In this regard, the likes of Google and Microsoft have already done quite a lot. If we talk about the Redmond giant, then they have even baked its AI tool into the OS itself. Dubbed Copilot, it is a rebranded version of Bing Chat and has been integrated into numerous Microsoft 365 apps.
As if the fact that Bing was the worst search engine wasn’t enough, this forceful integration only makes the matter worse. And the icing on the cake? It has even started showing ads in the form of suggestions! All in all, it seems Microsoft itself is doing its best to let users maintain a safe distance from its AI Tool. So without any further ado, let’s grant them their wish and disable Copilot on our Windows 11 PC right away!
How to Disable Copilot in Windows 11

- Bring up Run via Windows+R, type in regedit, and hit Enter. This will launch Registry Editor.
- Then copy-paste the below location in the address bar and hit Enter:
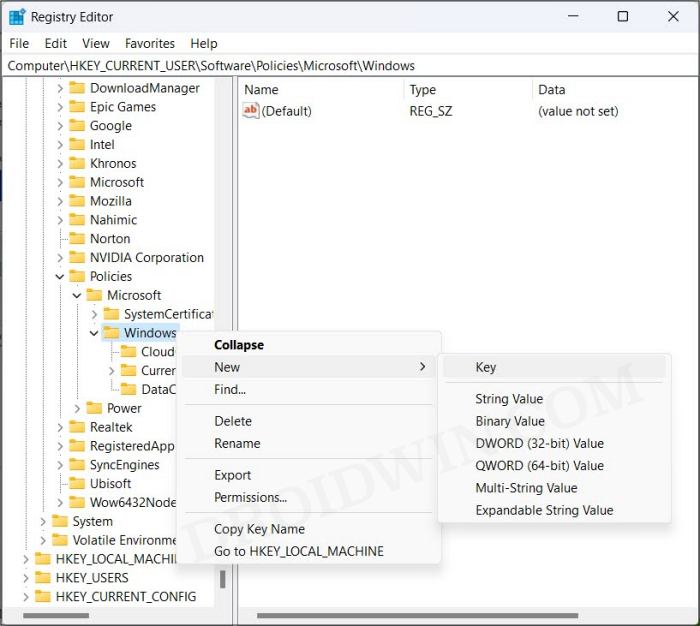
HKEY_CURRENT_USER\Software\Policies\Microsoft\Windows
- Now right-click the Windows key and select New > Key. Name it WindowsCopilot.

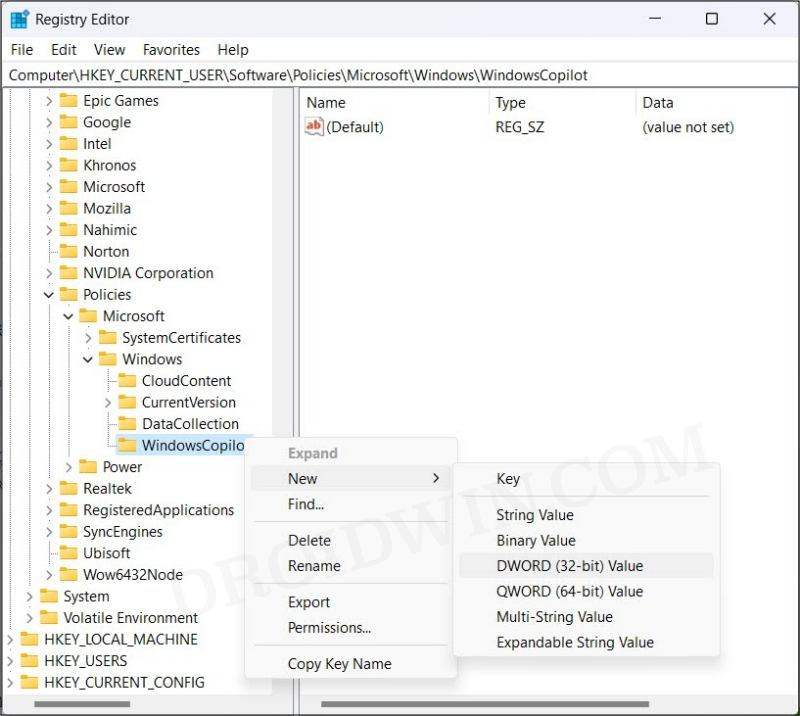
- Then right-click on WindowsCopilot and select New > DWORD (32-bit) Value.
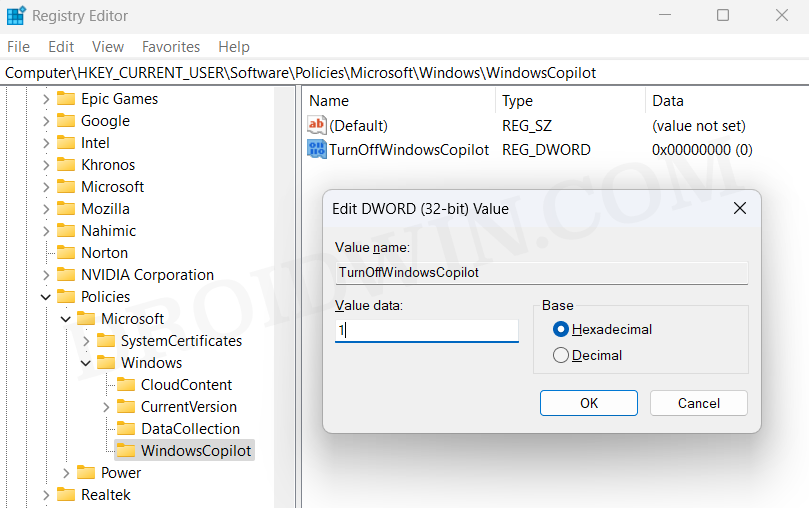
- Name it TurnOffWindowsCopilot. Then open it, set its Value Data to 1, and hit OK.
- Finally, sign out of your Microsoft account and then sign back in to apply the changes.
These were the steps to disable Copilot in Windows 11. If you have any queries concerning the aforementioned steps, do let us know in the comments. We will get back to you with a solution at the earliest. [Featured Image: Microsoft Blog]


