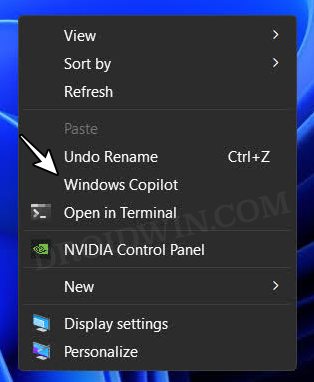
In this guide, we will show you the steps to add Copilot to the Windows 11 context menu. This artificial intelligence assistant from the Redmond giant is integrated into numerous Microsoft 365 apps and it beholds a slew of noteworthy functionalities, including the ability to code, write, generate images, answer questions, etc.
Also known as Bing Chat, this AI assistant is being extensively used by numerous Windows users ever since it was announced. If you are also among them, then your best bet will be to add the option to launch Copilot directly from the Windows 11 context menu so that you can easily access it in just a few clicks. So without any further ado, let’s show you how this could be carried out.
How to Add Copilot to Windows 11 Context Menu
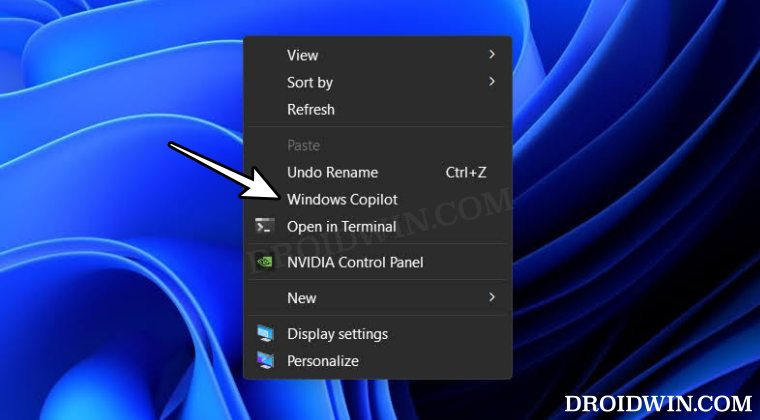
- Bring up Run via Windows+R, type in regedit.exe, and hit Enter. This will launch Registry Editor.
- Then copy-paste the below location in the address bar and hit Enter:
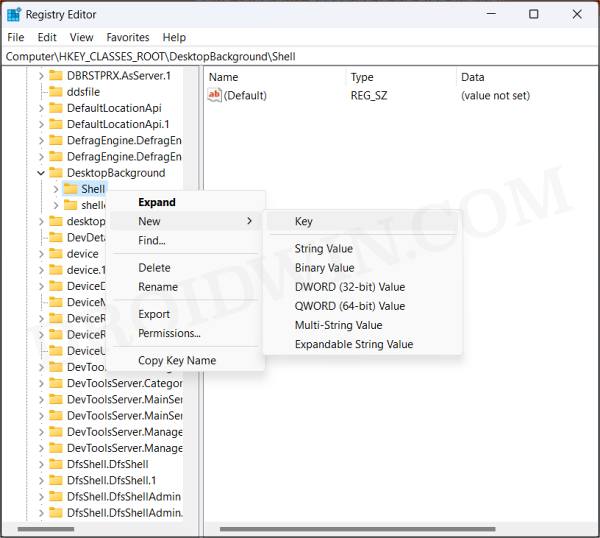
COMPUTER\HKEY_CLASSES_ROOT\DesktopBackground\Shell

- Right-click the shell key on the left and select New > Key.
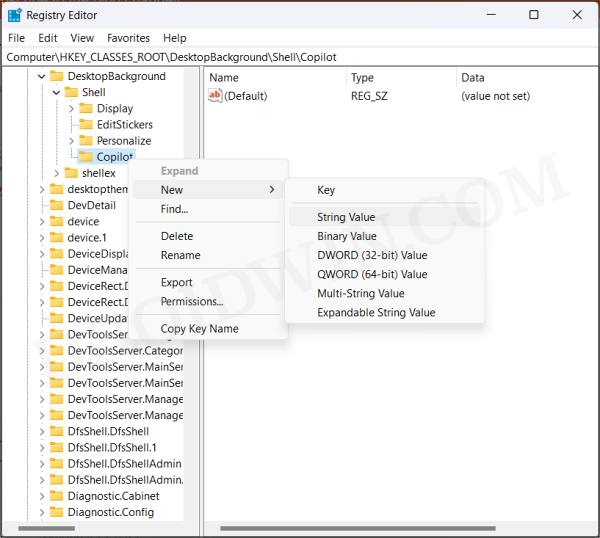
- Name it Copilot. Now right-click on this Copilot key and select New > String value.

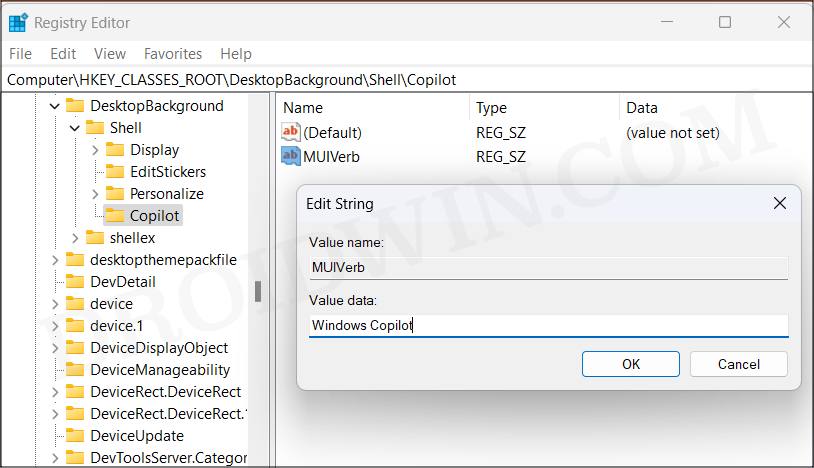
- Name it MUIVerb and double-click to open it.
- Type in Windows Copilot in its Value Data and hit OK to save it.

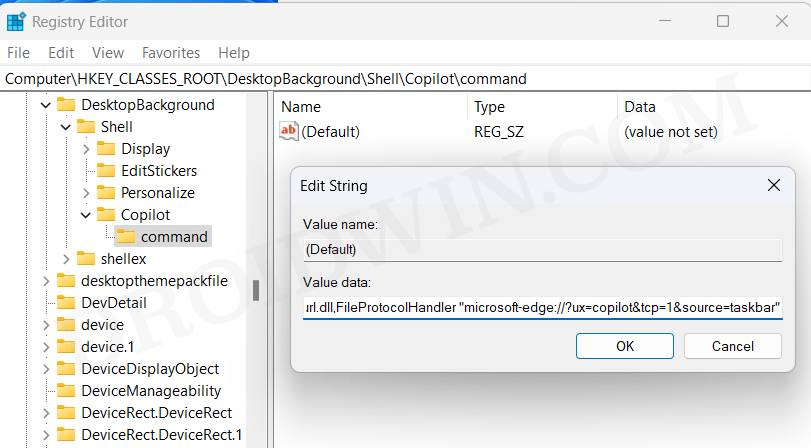
- Again, right-click the Copilot key and select New > Key. Name it command.
- Then go to its right-hand side, open the Default key, and assign it the below value:
rundll32.exe url.dll,FileProtocolHandler "microsoft-edge://?ux=copilot&tcp=1&source=taskbar"

- That’s it. Now right-click the desktop and select Show More Options > Windows Copilot.

So these were the steps to add Copilot to the Windows 11 context menu. If you have any queries concerning the aforementioned steps, do let us know in the comments. We will get back to you with a solution at the earliest.
