In this guide, we will show you various methods to fix the high ping issue on your Windows 11 PC. Ping is a network utility tool that lets you know how long it takes for a packet of data to travel from your computer to a server and then back. You could also use it to measure if a particular IP Address is active or not by using the ping command followed by the IP Address or URL.
It is measured in milliseconds (ms) and the lower it is, the less lag you are likely to face. This is because low ping will ultimately end up taking less time in fetching data from the servers and bringing it back to your device. On the other hand, in case of high ping, the time taken for a round trip will be significantly higher and hence your device will receive data packets after an extended time frame.
In the case of online multiplayer games where each second matters, this short delay could spell trouble for the end-users. So is there any way out? Well, there do exist quite a few methods through which you fix the high ping issue on your Windows 11 PC. And in this guide, we will make you aware of just that. Follow along,
Table of Contents
How to Fix High Ping Issues in Windows 11

It is recommended that you try out each of the below-mentioned workarounds and then see which one spells out success for you. So with that in mind, let’s get started.
FIX 1: Try Network Tweaks
It goes without saying that one of the biggest culprits of high pings results from the slower network connection speed. Therefore, to resolve it, you could try a couple of network-related tweaks, namely-
- First off, try switching from the wireless mode [WiFi] to wired [ethernet].
- However, if a wired connection isn’t possible, then make sure to be on the 5Ghz [802.11 a/c] wireless spectrum as opposed to 2.4Ghz [802.11 b/g/n].
FIX 2: Minimize Background Network Processes
There could be a few processes running in the background that is taking up a substantial amount of the network. Out of them, some of them might not be even needed as of now. So you could disable those services which would end up freeing some network bandwidth that could be sued by the game/app that actually needs it.
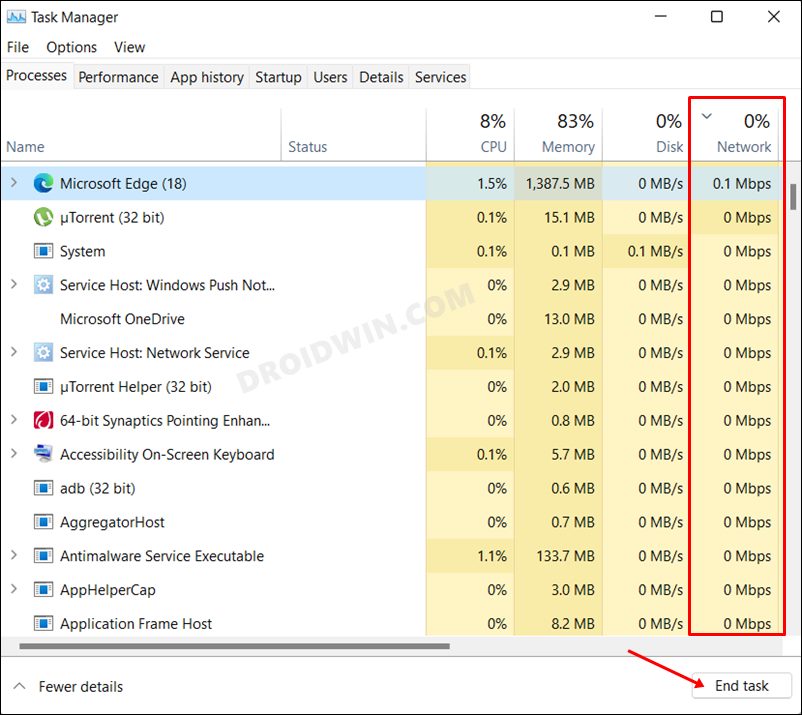
- Bring up the Task Manager via Ctrl Shift Esc shortcut keys.
- Then scroll to the Background Process section.
- Now refer to the process that is consuming a significant amount of network resources.

- If it isn’t important as of now, then select it and hit End Task. Do so for all such processes.
- Once done, check if it fixes the high ping issue on your Windows 11 PC.
FIX 3: Enable IPv6
As of now, you might be using the fourth version of Internet Protocol [IPv4]. However, the IPv6 is the newer protocol and it utilizes a 128-bit IP address, as opposed to 32-bit for its counterpart. This automatically translates to a slew of additional goodies, all of which when combined could spell out a lower ping for your setup. Therefore you should consider switching from IPv4 to IPv6, using the instructions given below-
- Bring up the Run dialog box via Windows R shortcut keys.
- Then type in the below command and hit Enter to open Network Connection
ncpa.cpl
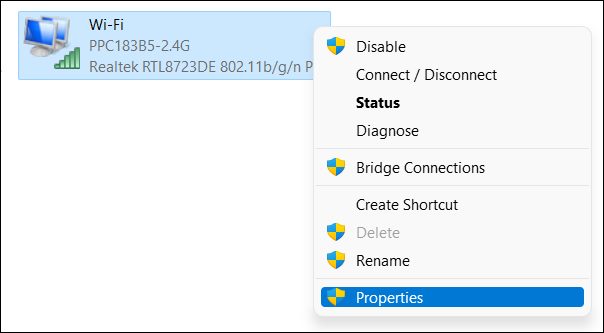
- Now right-click on your network and select Properties.
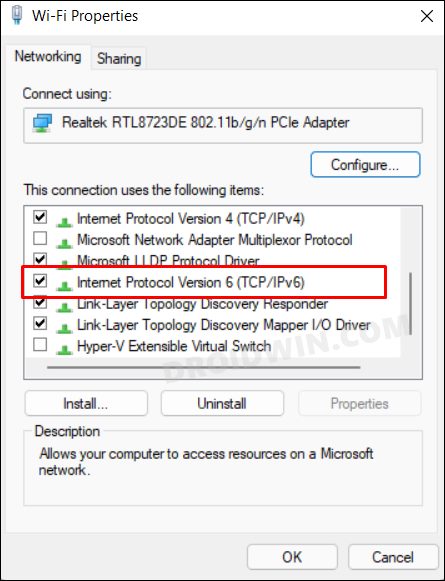
- After that, checkmark IPv6 [TCP/IPv6] and hit OK.
- Check if it fixes the high ping issue on your Windows 11 PC.
FIX 4: Change DNS Address
Your Internet Service Provider would have automatically assigned a Domain Name Server to your system. However, that isn’t the only available DNS, you could also choose from third-party DNS such as the ones from Google and Cloudflare. Apart from providing a more secure data exchange platform, they are also more efficient in getting the job done. So let’s opt for either of these two DNS and then verify if it spells out success in lowering the ping.
- Bring up the Run dialog box via Windows R shortcut keys.
- Then type in the below command and hit Enter to open Network Connection
ncpa.cpl
- Now right-click on your network and select Properties.
- Double-click on Internet Protocol Version 4 OR 6 [depending on your current settings] to open its Properties.
- After that, select Use the following DNS Server Address and input the desired DNS Server Address values (refer to the below section for the DNS values).
- Once you have entered the desired DNS server address, click OK.
- Now check if it fixes the high ping issue on your Windows 11 PC.
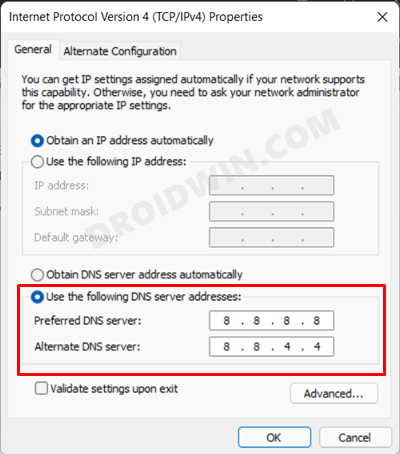
IPv4 Google
Primary- 8.8.8.8
Alternate- 8.8.4.4

IPv6 Google
Primary- 2001:4860:4860::888
Alternate- 2001:4860:4860::8844

IPv4 Cloudflare
Primary- 1.1.1.1
Alternate- 1.0.0.1

IPv6 Cloudflare
Primary- 2606:4700:4700::1111
Alternate- 2606:4700:4700::1001
FIX 5: Add Game to Firewall Whitelist
In some instances, the Windows Firewall might raise a false positive and ends up blocking or reducing the geniune data exchanges taking place between your PC and the concerned app. So to mitigate this false alarm and avoid that from happening in the near future as well, you could add the game to the Firewall’s whitelist. Here’s how-
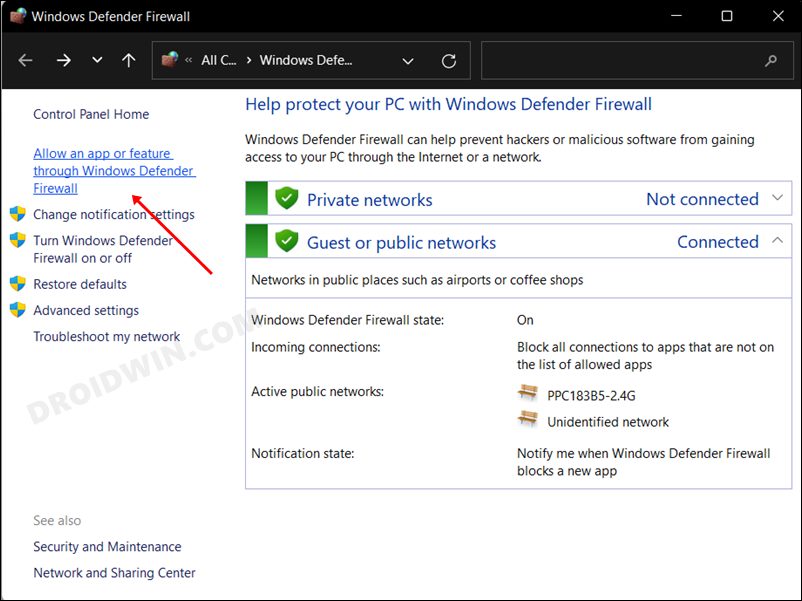
- Launch Windows Defender Firewall from the Start Menu.
- Then click on Allow an app or feature through Windows Defender Firewall.
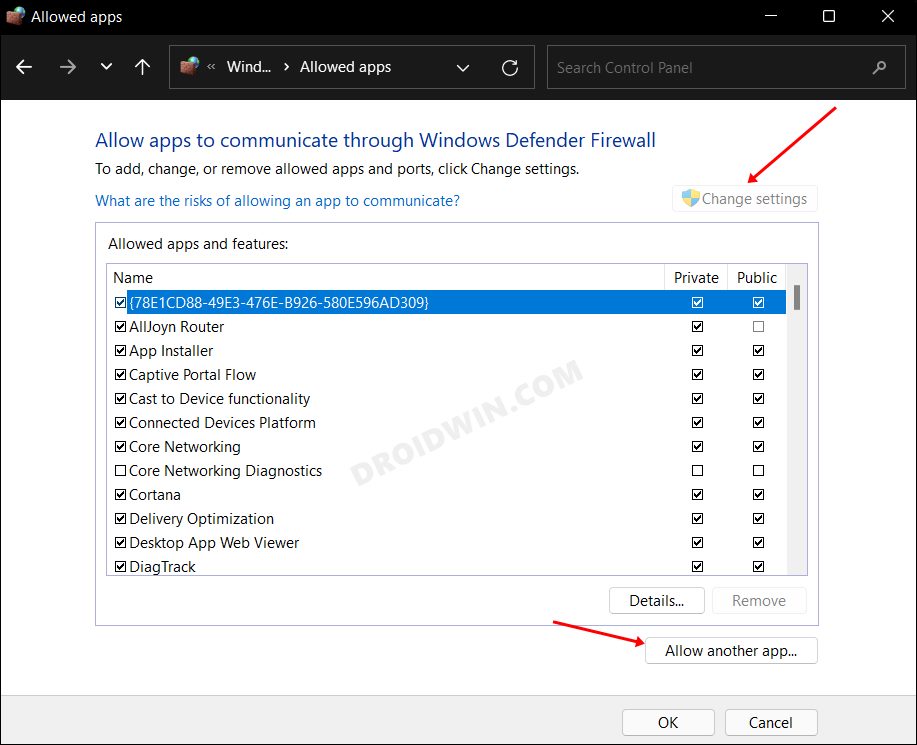
- After that, click on Change Settings followed by Allow another app.
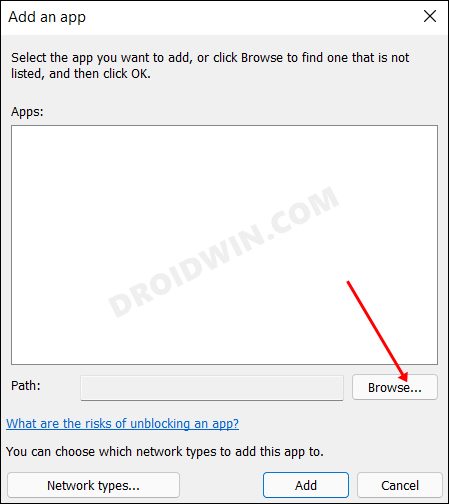
- Now browse to the game’s EXE file and select it. Then click Add to save it.
- Check if it fixes the high ping issue on your Windows 11 PC.
FIX 6: Disable All Battery Saver Modes
If you have put any battery restrictive measures in place, then it might create a few roadblocks in the data exchange process. Therefore, you should consider disabling all such measures, including the ones that we have listed below.
- First off, click on the battery icon present on the taskbar and disable Battery Saver.
- If the battery is low, then consider charging it, which will automatically disable the battery saver mode.
- Once that is done, launch Device Manager from the Start Menu.
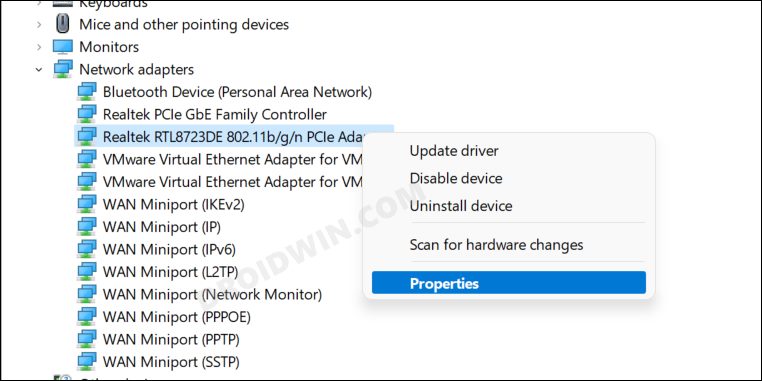
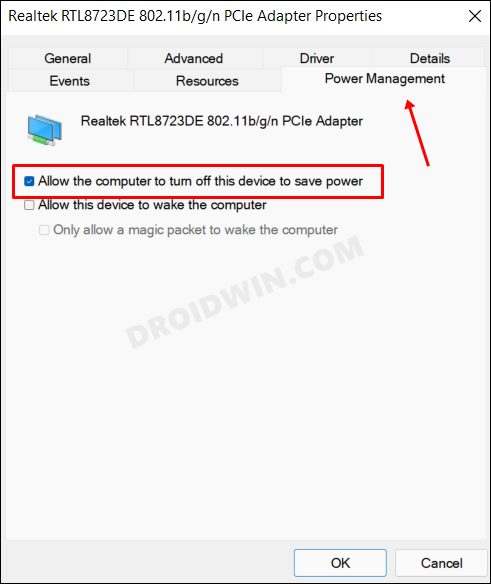
- Then expand the Network Adapters section, right-click on your adapter, and select Properties.
- Now go to the Power Management tab and uncheck Allow the computer to turn off this device to save power.
- Check if it fixes the high ping issue on your Windows 11 PC.
FIX 7: Using Registry Editor
A slightly technical fix, it involves tweaking the NetworkThrottlingIndex registry value such that the OS uses the recommended threshold level for Network Throttling. Likewise, a few tweaks will also have to be made to the TCPackFrequency and the TCPNoDelay registries. But before trying it out using the below-given instructions, make sure to take a backup of the registry.
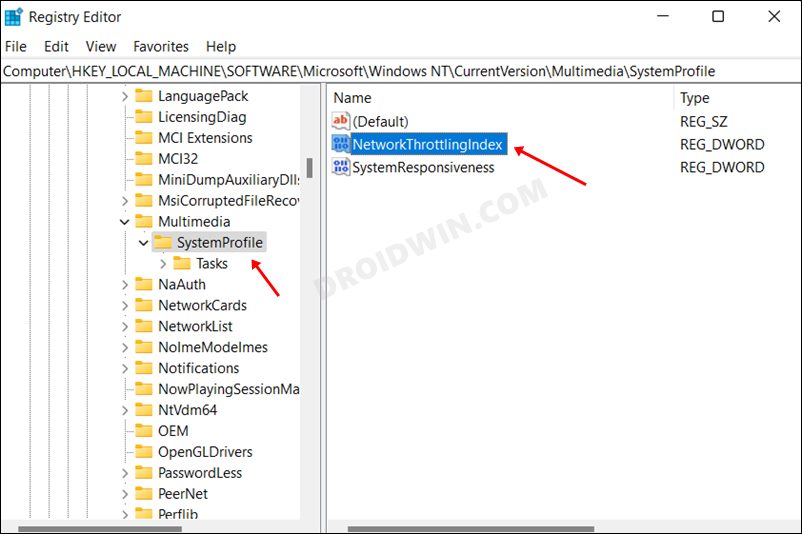
- Launch Registry Editor from the Start Menu and head over to the below location
Computer\HKEY_LOCAL_MACHINE\SOFTWARE\Microsoft\Windows NT\CurrentVersion\Multimedia\SystemProfile
- Then open the NetworkThrottlingIndex file from the right-hand side.
- Change its Value Data to FFFFFFFF and hit OK to save it.
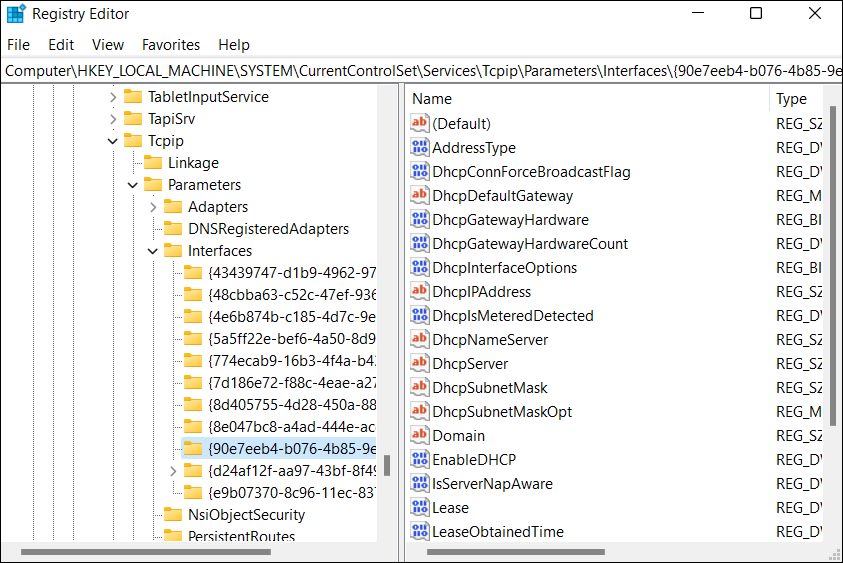
- After that, go to the below location
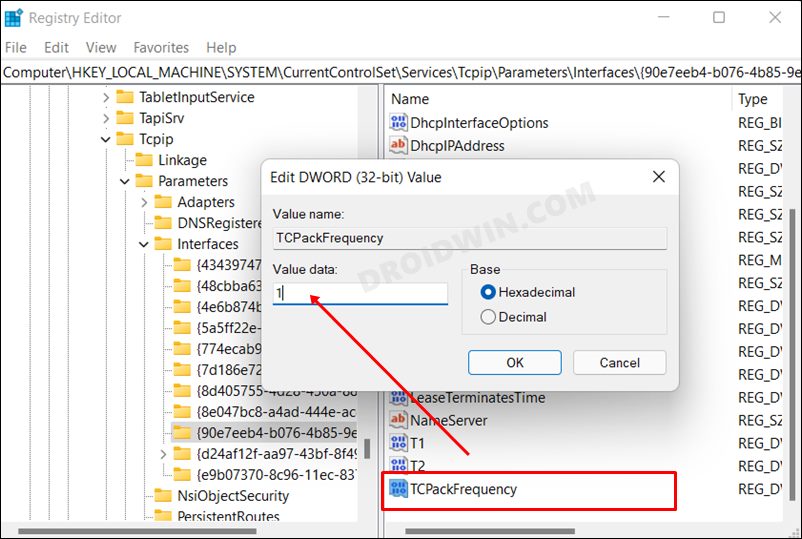
Computer\HKEY_LOCAL_MACHINE\SYSTEM\CurrentControlSet\Services\Tcpip\Parameters\Interfaces
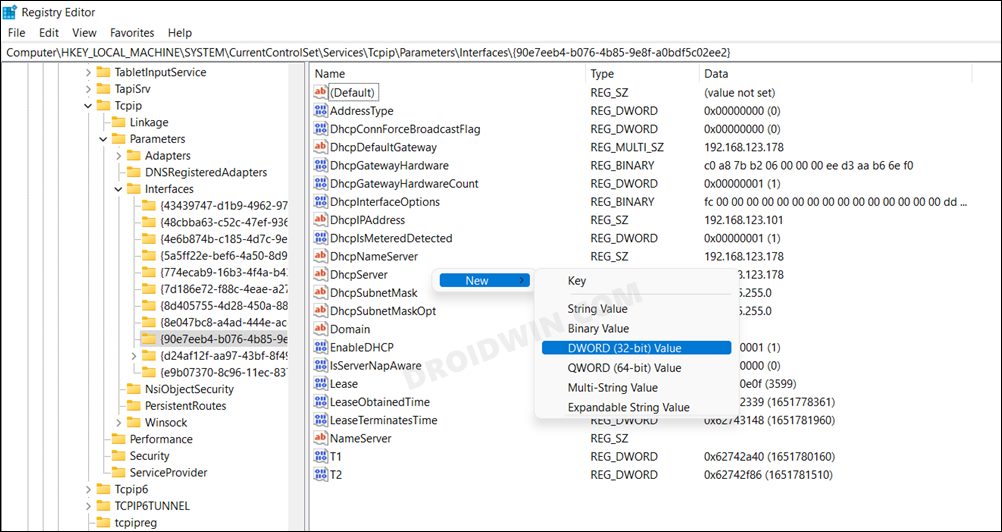
- You will now see many files, each named in alphanumeric style. Select one file at a time and then check which one has the maximum number of files within it.
- Then select that file, go to the right-hand side, right-click in an empty location, and select New > DWORD 32-bit Value.
- Name it TCPackFrequency.Then double click to open it and type in 1 in its Value Data field.
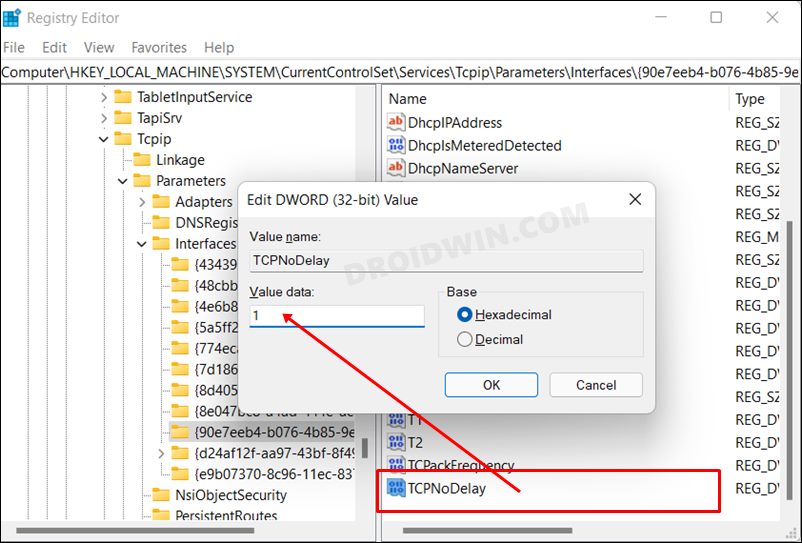
- Again follow the same procedure and create another DWORD 32-bit Value.
- Name it TCPNoDelay and double click to open it. Assign 1 as its Value Data.
- Once done, go to the following location-
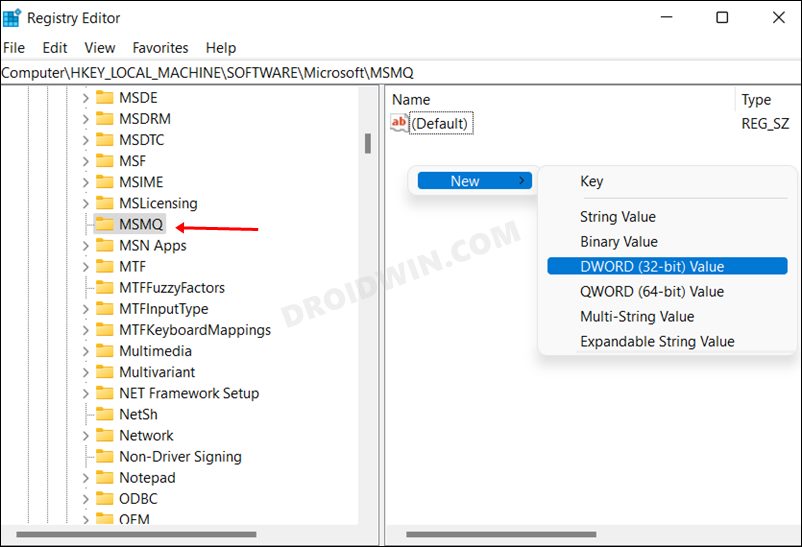
Computer\HKEY_LOCAL_MACHINE\SOFTWARE\Microsoft\MSMQ
- Now go to its right-hand side and create a new DWORD (32-bit) Value file.
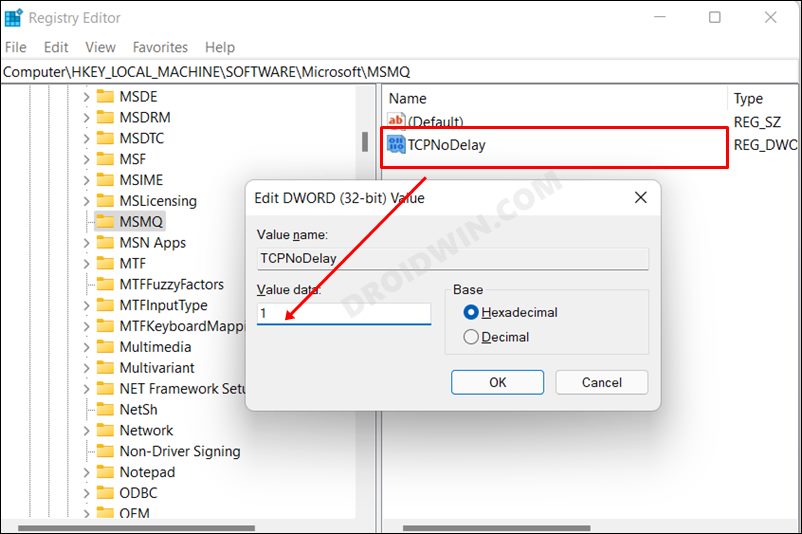
- Name it TCPNoDelay and double click to open it. Then change its Value Data to 1.
- Finally, restart your PC and check if it fixes the high ping issues.

FIX 8: Reset Network
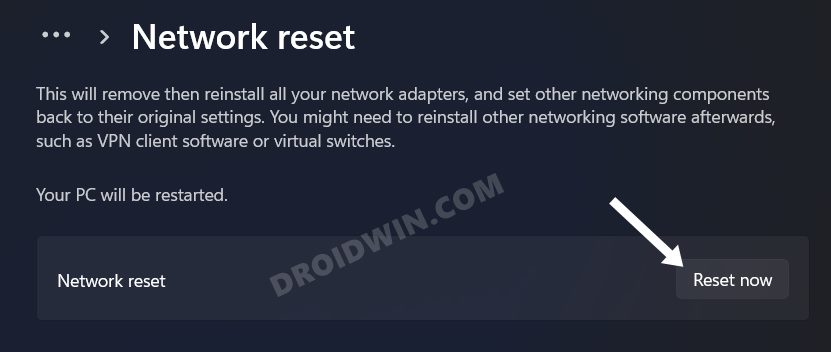
If none of the aforementioned methods worked out in your favor, then your last course of action should be to reset the network settings on your PC. This will refresh the underlying network configuration and the OS will set them up from scratch after the reset is complete. However, do note that this process will also remove all the saved networks from your PC, so make sure to save them beforehand or sync them with your account.
- Bring up the Settings menu via Windows I shortcut keys.
- Then go to Network and Internet > Advanced Network Settings.
- After that, go to Network Reset and click on Reset Now.
- Once done, reconnect to your WiFi and the issue might be resolved now.
That’s it. These were the eight different methods to fix the high ping issue on your Windows 11 PC. Do let us know which one spelled out success for you. If you have any queries concerning the aforementioned steps, do let us know in the comments. We will get back to you with a solution at the earliest.


