In this guide, we will show you various methods to backup and restore the registry on your Windows 11 PC. In the early days of Windows, the Registry Editor was a place where only the tech enthusiasts dares to roam around freely. However, with the passage of time, it has become an important place of visit even for the general users. With each new update to Windows, there is an addition of new functionality which may or may not be in sync with the user’s requirement.
In some instances, these changes could easily be reversed just by making a few tweaks to the string, key, or DWord file corresponding to that component. Likewise, if an app isn’t performing along the expected lines, then more often a few tweaks to the registry file is enough to rectify the underlying issue. However, this is just one side of the coin.
Dealing with these registry entries could sometimes spell out trouble for that app or even for the entire OS in some instances. Therefore, it is always recommended to take a backup of the registry editor before trying out any modifications. Then in case anything goes wrong, you could easily restore the backed-up registry file and bring things back to normal. So on that note, let’s check out the various methods to backup and restore the registry in Windows 11.
Table of Contents
How to Backup Registry in Windows 11

There exist two different methods to back up the registry- either backup just the specific registry to which you are about to make some changes or backup all the registry of the system. The second method is usually the recommended approach but would take some extra time and storage space in comparison with the first one. Anyways, we have listed both these methods below, you may refer to the one that is in sync with your requirement.
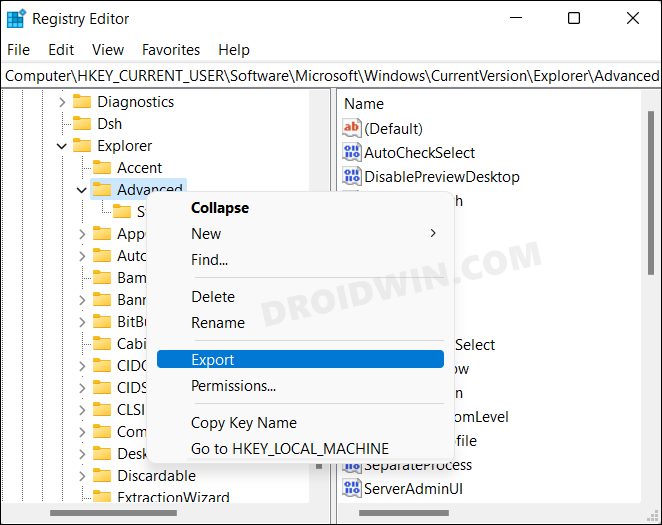
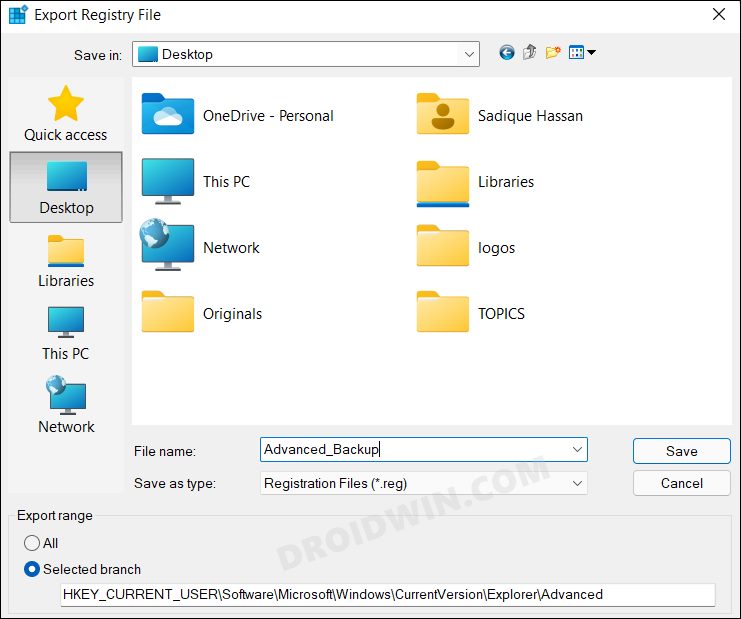
Backup a Specific Registry
- Head over to the Start Menu, search Registry Editor, and open it.
- Then go to the desired registry file, right-click on it and select Export.

- Now select the location where you wish to save it and hit the Save button.
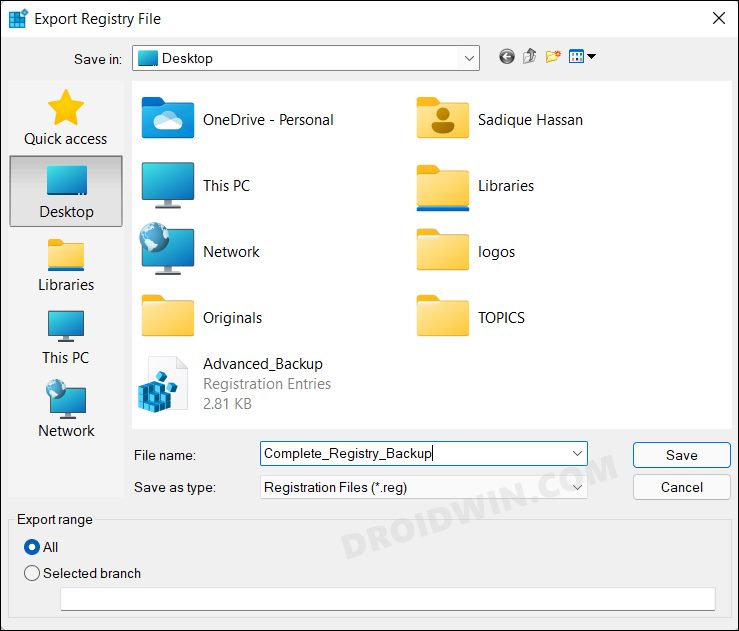
Backup Entire Registry
When it comes to backing up the entire registry, there are two different methods to opt for. You could either do so from the Registry Editor or via the System Restore. If you opt for the latter, then it will also backup the system files and settings, apart from the Registry files. So it obviously takes a little bit more time and also some additional storage space but is usually a much safer approach in comparison with backing up just the registry. With that said, we have listed both these methods below, you may try ou the one according to the need.
Via Registry Editor
- Head over to the Start Menu, search Registry Editor, and open it.
- Then scroll to the top, right-click on Computer, and select Export.
- Now select the location where you wish to save it and hit the Save button.

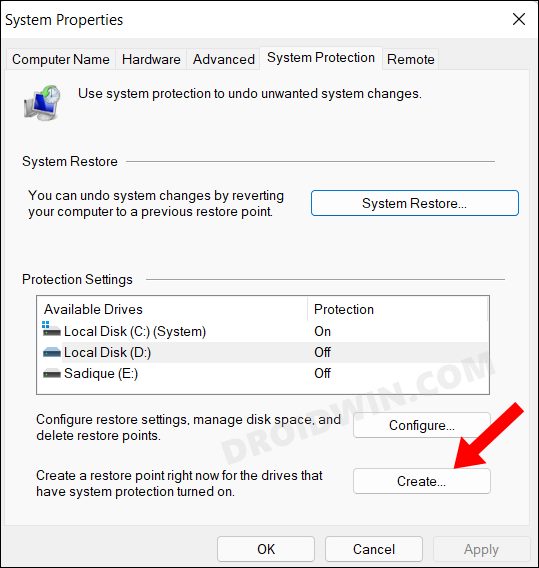
Via System Restore
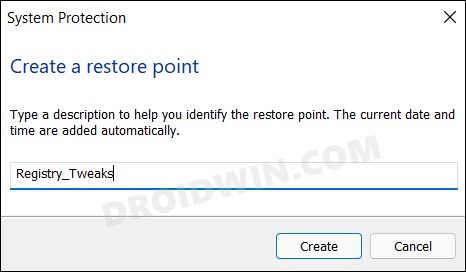
- Search Create a Restore Point from the Start Menu and open it.
- After that, click on the Create button.
- Then give it a name and hit Save.
- The backup process will now begin and could take a few minutes.
How to Enable Automatic Registry Backup
The above process requires you to manually create registry backup as and when needed. However, you could also automate this process and let the system carry out this task on your behalf. The OS will automatically create registry backup at regular intervals, without any manual intervention from your end. So if you are interested in trying, then take a “manual backup” [just for the first time] and then get started with the steps-
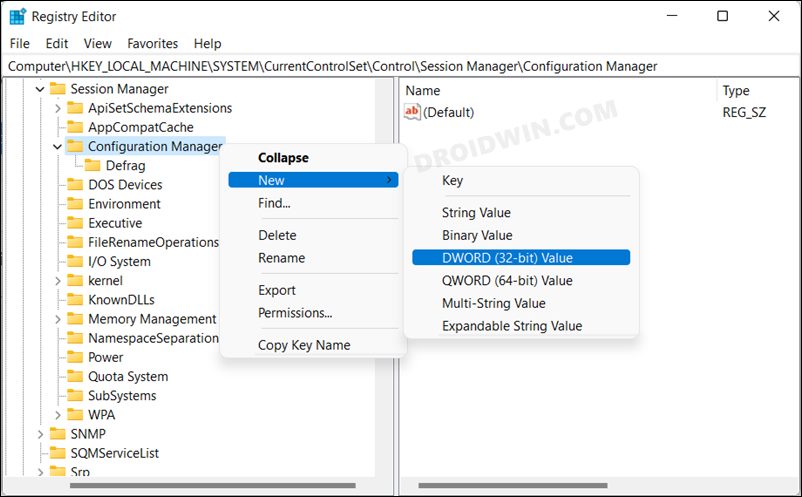
- Open Registry Editor from the Start Menu and head over to the below location
HKEY_LOCAL_MACHINE\SYSTEM\CurrentControlSet\Control\Session Manager\Configuration Manager
- Then right-click on Configuration Manager and select New > DWORD (32-bit) Value.
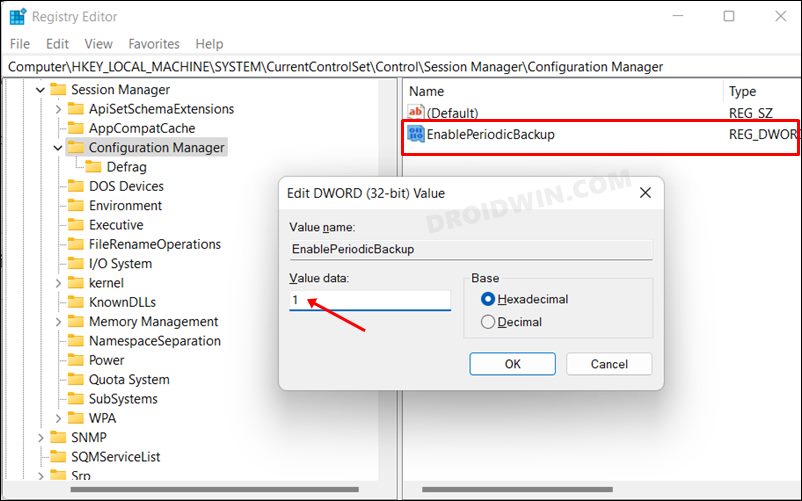
- Name it EnablePeriodicBackup and double click to open it. Then assign 1 in its Value Data field.
- That’s it. Windows will now automatically create periodic backups in the following directory
Windows\System32\config\RegBack
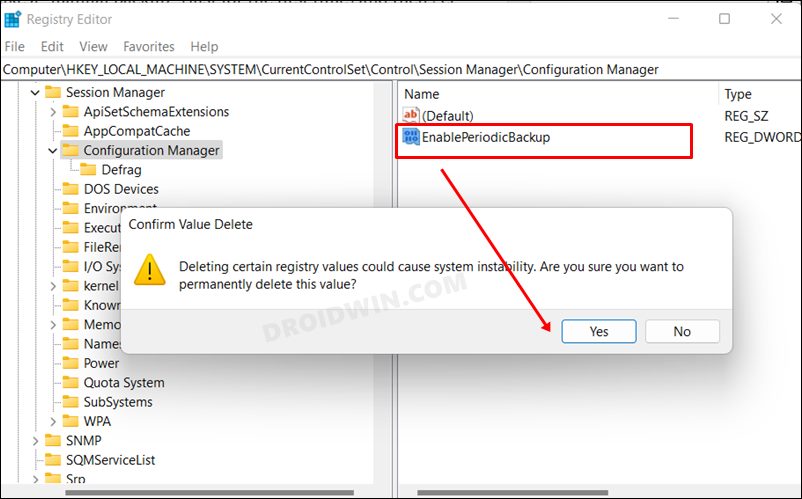
- If at any point in time, you wish to disable the automatic backup, then just delete the EnablePeriodicBackup file.
How to Restore Registry in Windows 11
There exist two different methods to restore the registry- via Registry Editor and using System Restore. You should select the method that you initially used to back up the registry in the first place.
Via Registry
You could either restore the registry from the Registry Editor or via the backed up-registry file. We have listed both these methods below, refer to the one that you find easier to deal with.
Via Registry Editor
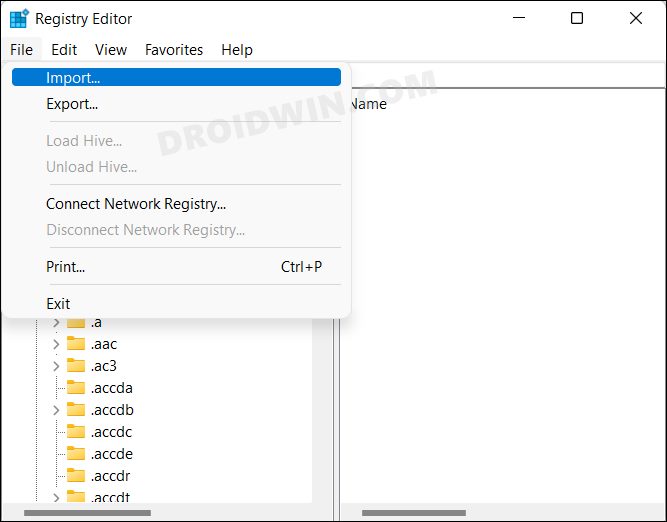
- Head over to the Start Menu, search Registry Editor, and open it.
- Then go to the File tab and click Import from the drop-down menu.
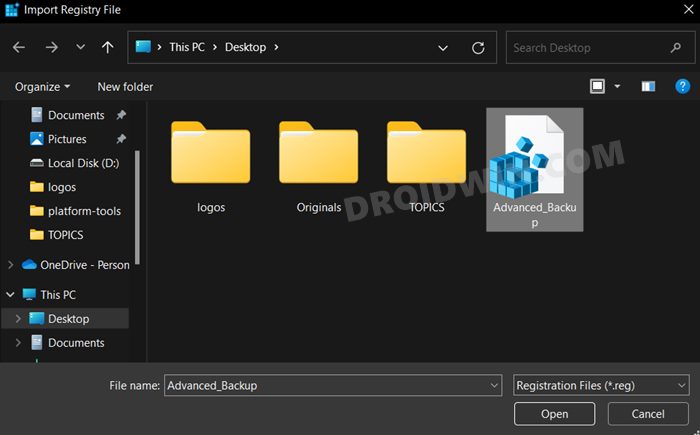
- Now select the backed-up registry file and click Open.
- The selected registry file will now be restored.
Via Registry File
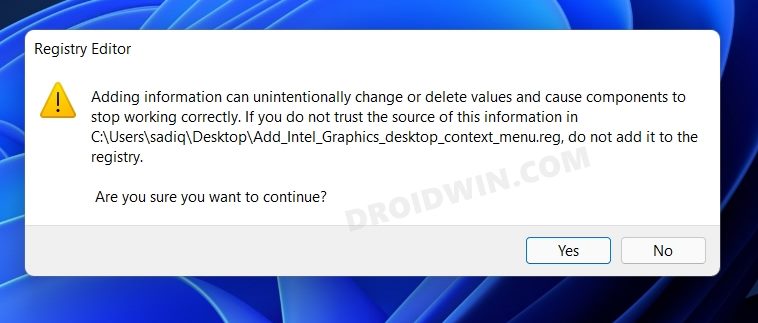
- Double click on the backup-up registry file.
- Then click YES in the confirmation dialog box.
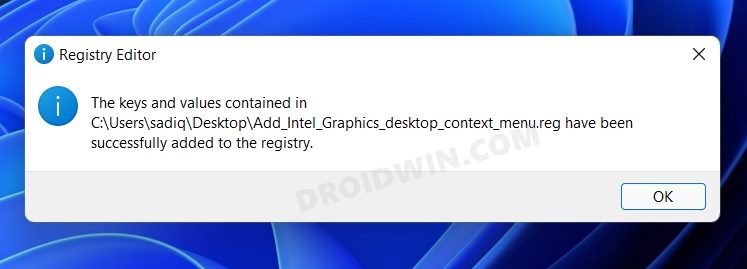
- The restore process will now start.
- Once done, you will be notified of the same, click OK.
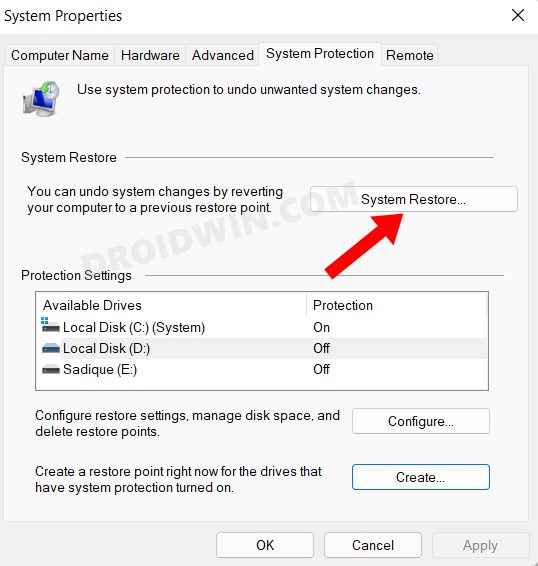
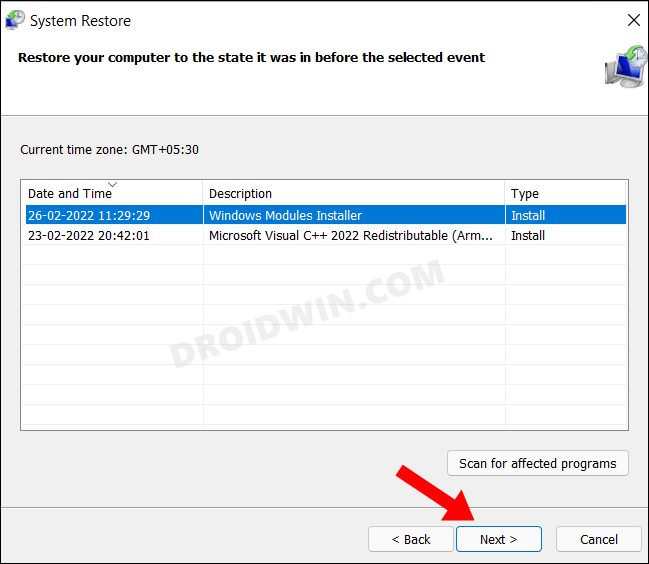
Via System Restore
- Search Create a Restore Point from the Start Menu and open it.
- Then click on the System Restore button.
- After that, select the required system restore and click Next.
- The restoration process will now begin and could take a few minutes.
So with this, we round off the guide on how you could backup and restore the registry on your Windows 11 PC. If you have any queries concerning the aforementioned steps, do let us know in the comments. We will get back to you with a solution at the earliest.


